Physical SIMs may be easier to install and remove from a device, but they aren’t the only type of SIMs we need to deal with these days. Electronic SIMs, or eSIMs, are an alternative to physical SIMs that promise to be better than their counterparts.
They are immune to physical theft and misuse. And users can easily store up to 8 eSIMs on their device, making it easy to switch between plans at any time. It’s one of the reasons Apple has removed the tray for a physical SIM card from the iPhone 14 lineup in the US entirely.
But for all their benefits, the nuisance that comes with installing or removing them overshadows everything else, especially if you don’t consider yourself tech-savvy. However, most of this rep is ill-earned. eSIMs have become easier to install over the years, with scores of options available. And removing one? It’s even easier.
What Does Removing the eSIM Do?
There are several scenarios where might want to remove the eSIM from your device. Whether you’ve transferred the eSIM number to another iPhone or you’re selling your current phone, removing an eSIM from the device becomes necessary in these cases. If you’ve also changed numbers and no longer plan to use the current number, you’ll want to remove the eSIM to make space for other plans.
But you must note that removing the eSIM from the iPhone only removes the SIM from the device. It does not cancel your cellular plan or subscription. If that’s your goal, you’ll need to contact your carrier for that.
If you’re resetting your iPhone and erasing all content and settings because you plan to sell it, trade it, or give it away, you can remove the eSIM while resetting the iPhone instead of performing the steps beforehand.
Note: Removing the eSIM while resetting the device is a choice. If you’re resetting the device because of some other reason, perhaps as a troubleshooting step, you can choose to keep the eSIM on the device.
Remove eSIM from Settings
You can follow the steps below to remove an eSIM from any iPhone that supports eSIM – from iPhone XR, XS, XS Max, and above.
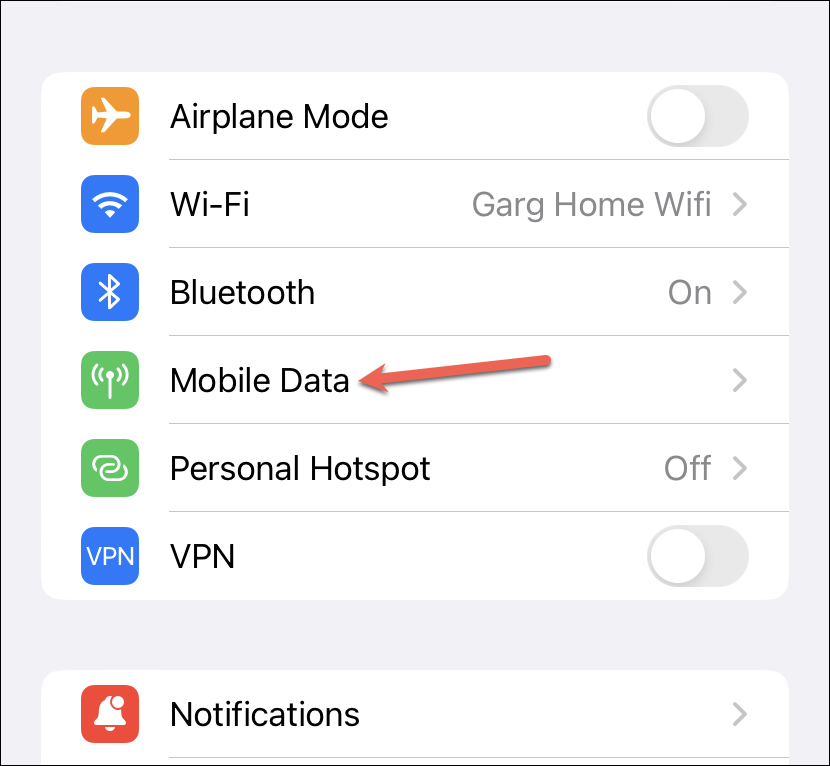
Open the Settings app on your iPhone. Then, tap the option for ‘Cellular’ or ‘Mobile Data’. The option you see will depend on your region.

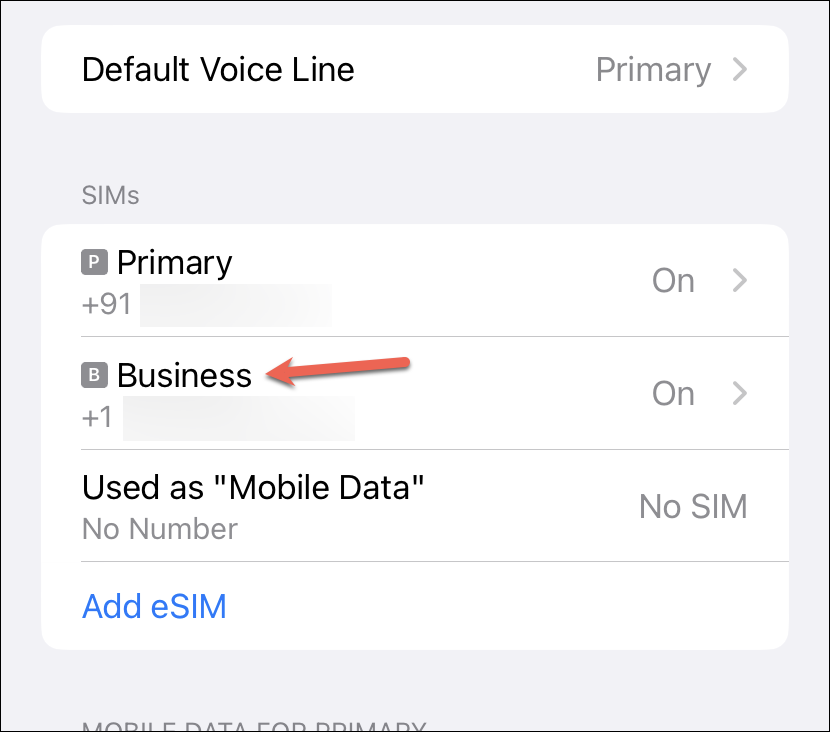
Then, tap the eSIM plan you want to remove from your phone.

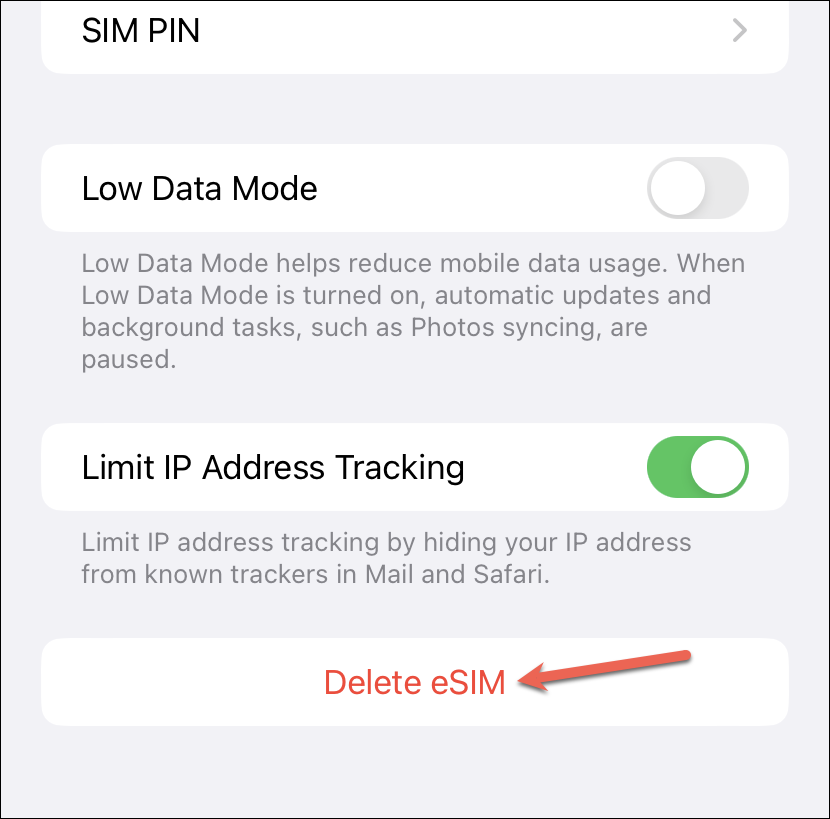
Scroll down in the eSIM details and tap the ‘Delete eSIM’ or ‘Remove Cellular Plan’ option.

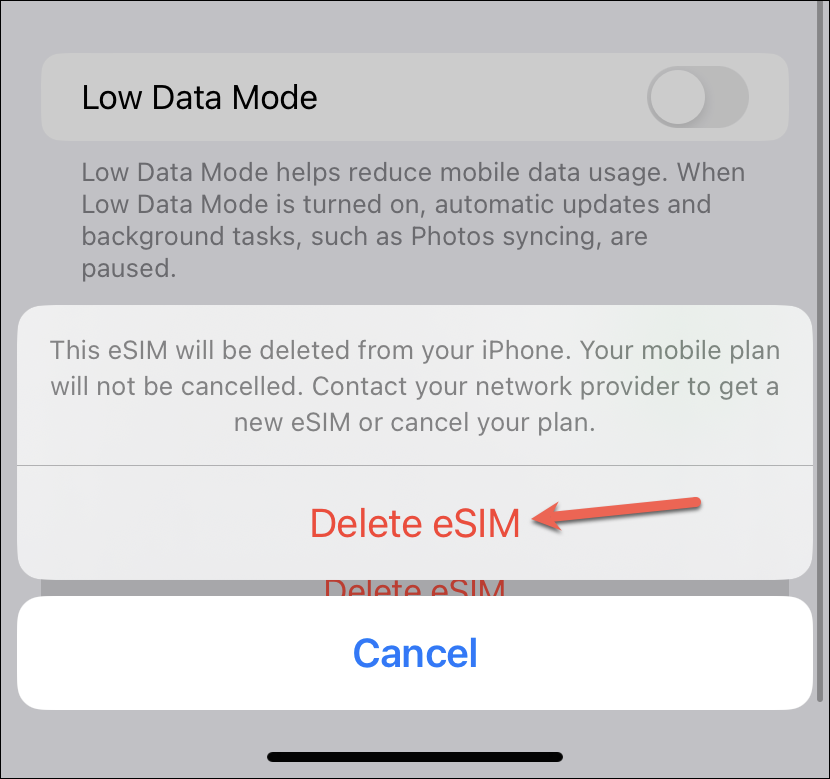
A confirmation prompt will appear. Tap ‘Delete eSIM’ from the pop-up to confirm.

Removing an eSIM from your iPhone is easy. But if you wanted to transfer the number to another iPhone, make sure you’ve set up the eSIM plan on the new iPhone by following these steps before removing the eSIM from the current iPhone.

