Experimenting with different styles in Google Docs can sometimes lead to a document that's cluttered or inconsistent. While there's no single button to reset all settings to default, you can individually reset various aspects of your document to restore it to a clean state.
Resetting Formatting to Default Settings
Adjusting formatting can significantly alter the appearance of your document. If you need to revert these changes, there are two primary methods: using the Clear formatting option or the Paste without formatting feature.
Using 'Clear formatting' to Revert Text Styles
This method is ideal when you want to reset the formatting of existing text in your document without removing hyperlinks. However, be aware that the cleared text may not match the formatting of the surrounding content, so you might need to adjust it manually.
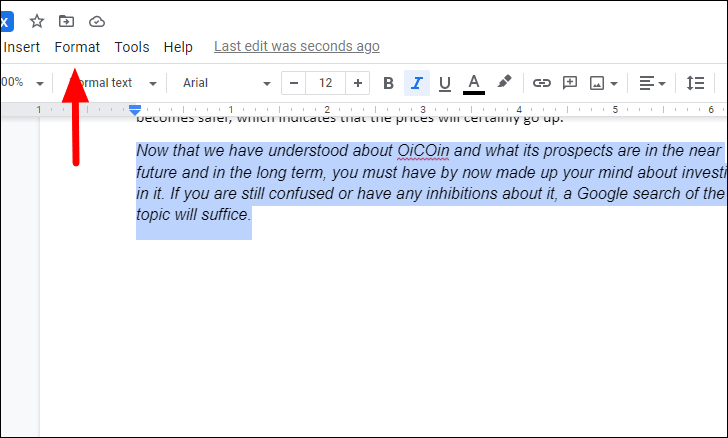
Step 1: Highlight the text you want to reset to default formatting. Then, click on the Format menu at the top of the screen.
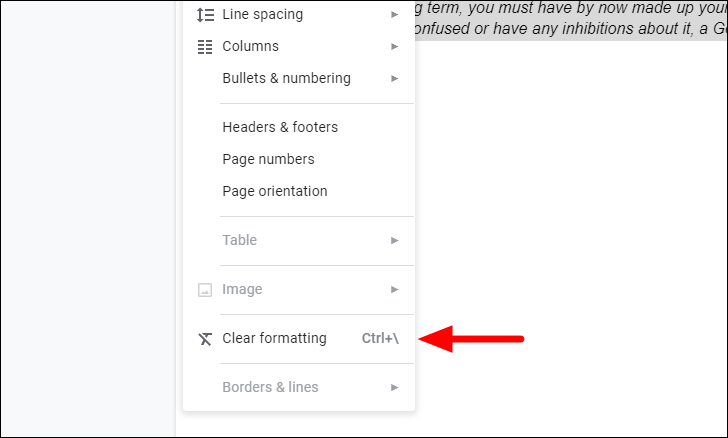
Step 2: In the dropdown menu, select Clear formatting to remove all custom formatting from the highlighted text.
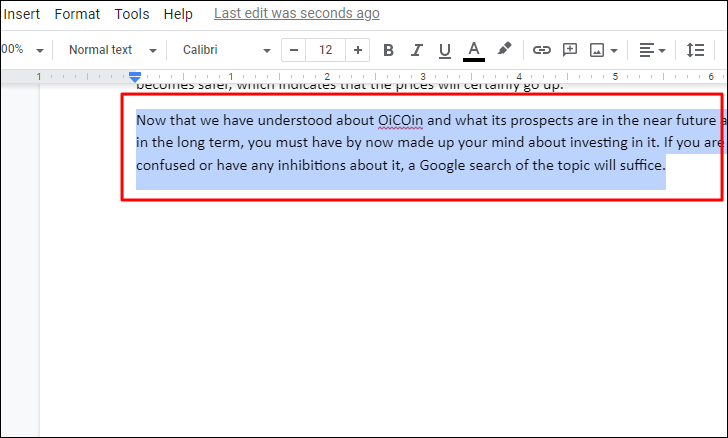
The selected text will now revert to the document's default style.
For a quicker method, you can use the keyboard shortcut Ctrl + \\ to clear formatting from highlighted text.
Using 'Paste without formatting' to Insert Text
If you're copying text from another source and want it to match your document's default style, you can use the paste without formatting option. This method strips away all original formatting, including hyperlinks and images, resulting in plain text that matches your current document's style.
Step 1: Copy the text you want to insert into your document. Place your cursor where you want the text to appear.
Step 2: Right-click and select Paste without formatting from the context menu.
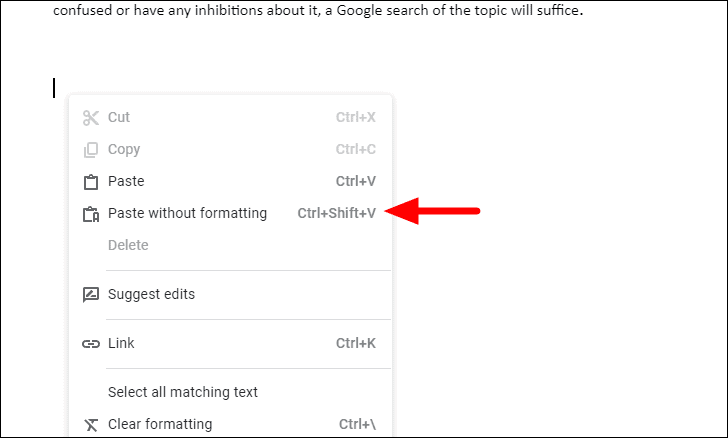
Alternatively, you can press Ctrl + Shift + V to paste text without formatting.
Resetting Margins to Default Settings
Margins determine the blank space around the edges of your document, affecting how text and images are positioned on the page. The default margin size in Google Docs is 1 inch (2.54 cm) on all sides.
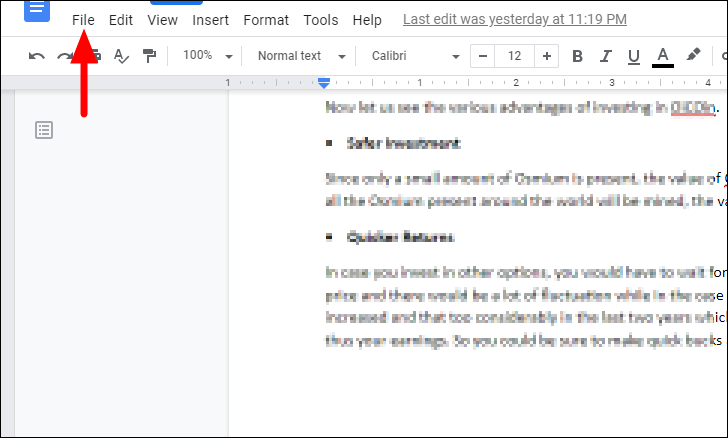
Step 1: Click on the File menu in the top-left corner of the screen.
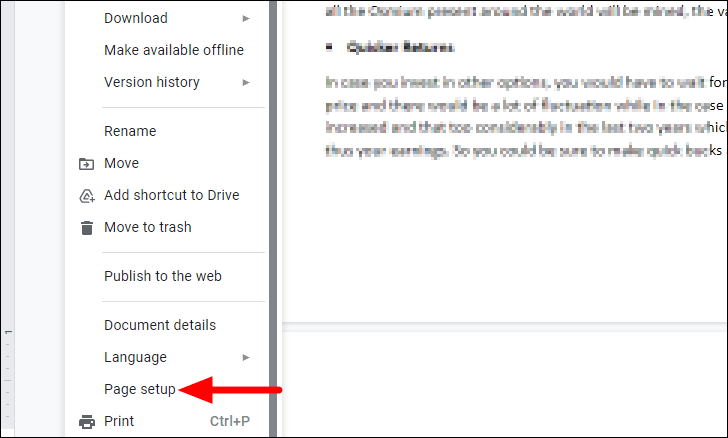
Step 2: Select Page setup from the dropdown menu.
Step 3: In the Page setup window, you'll see margin settings on the right. Set each margin (Top, Bottom, Left, Right) to 1 inch if they aren't already. Ensure that Apply to is set to Whole document.
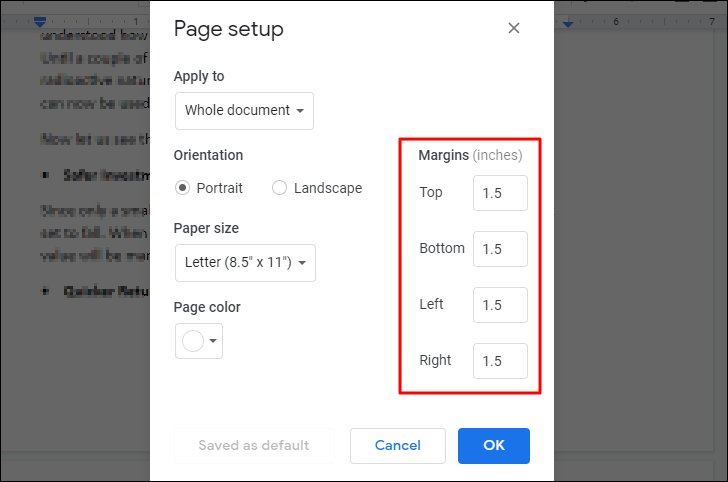
Step 4: Click OK to apply the changes.
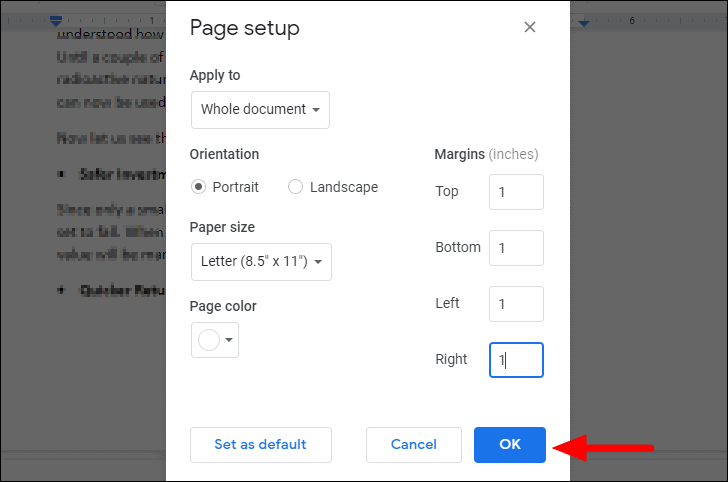
Your document will now have the default margins restored.
Related: How to Edit, Adjust and Change Margins in Google Docs
Resetting Paragraph Styles to Default
Paragraph styles control the appearance of headings and text throughout your document. Resetting them can help ensure consistency, especially if styles have been modified.
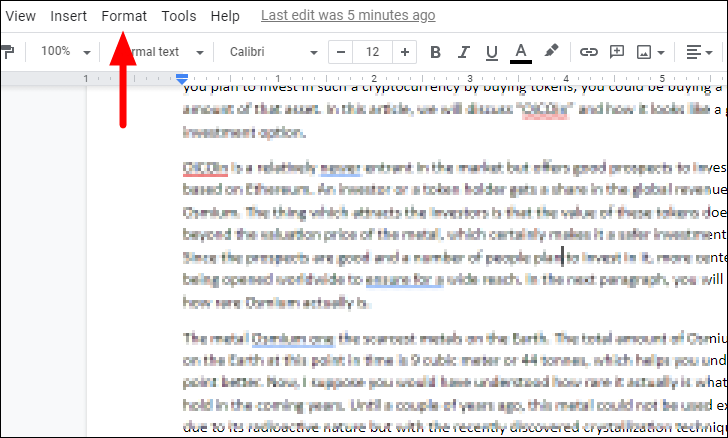
Step 1: Click on the Format menu at the top of the screen.
Step 2: Hover over Paragraph styles, then select Options from the submenu. Choose Reset styles from the list.
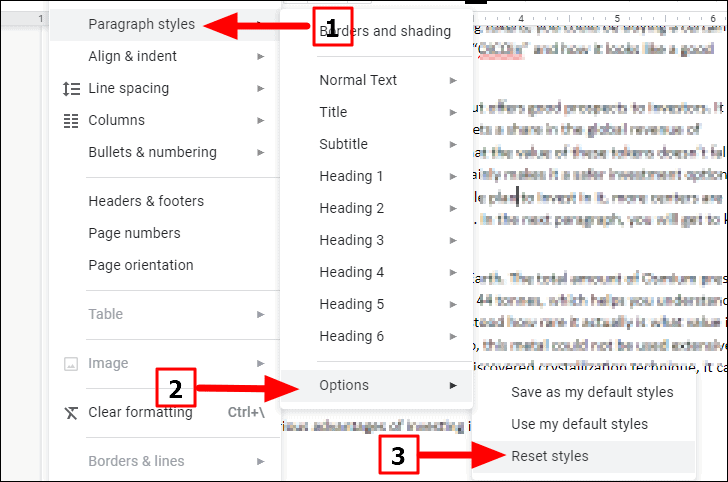
This action will reset all paragraph styles to their default settings. Review your document afterward to ensure everything appears as expected.
Resetting Header and Footer Margins
Headers and footers allow you to add consistent information at the top and bottom of each page, such as page numbers or document titles. The default margin for headers and footers is 0.5 inches.
Step 1: Go to the Format menu at the top of the screen.
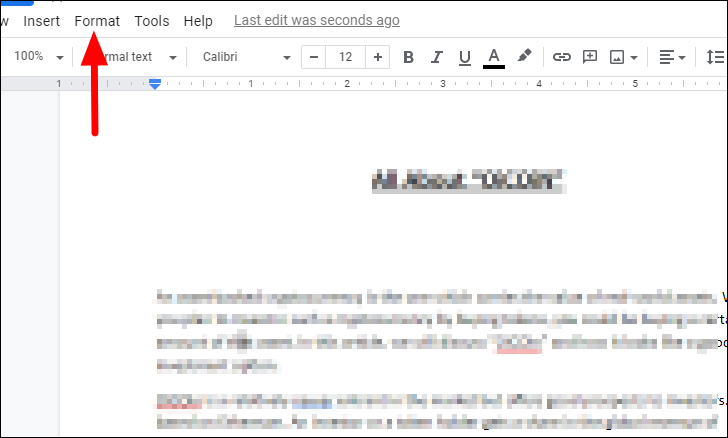
Step 2: Select Headers & footers from the dropdown menu.
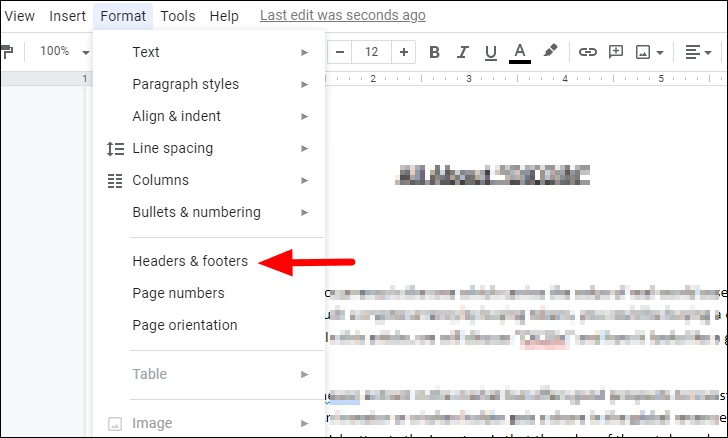
Step 3: In the dialog box, set both the header and footer margins to 0.5 inches. Click Apply to save the changes.
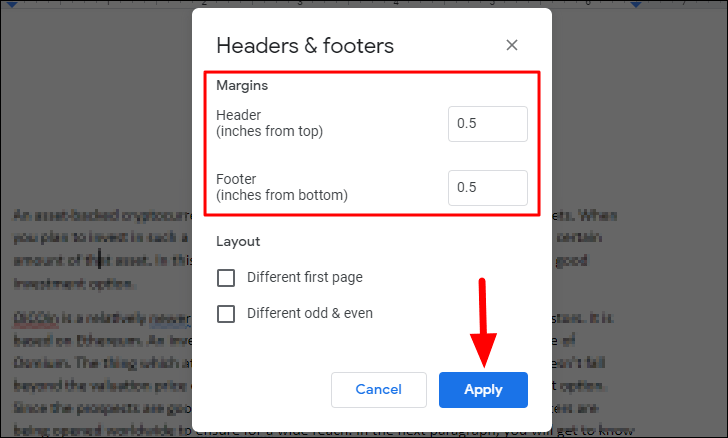
Your header and footer margins will now be set to the default distances from the page edges.
Resetting Personal Dictionary
Over time, you might add words to your Google Docs personal dictionary that are typos or no longer relevant. While there's no option to clear all entries at once, you can remove unwanted words individually.
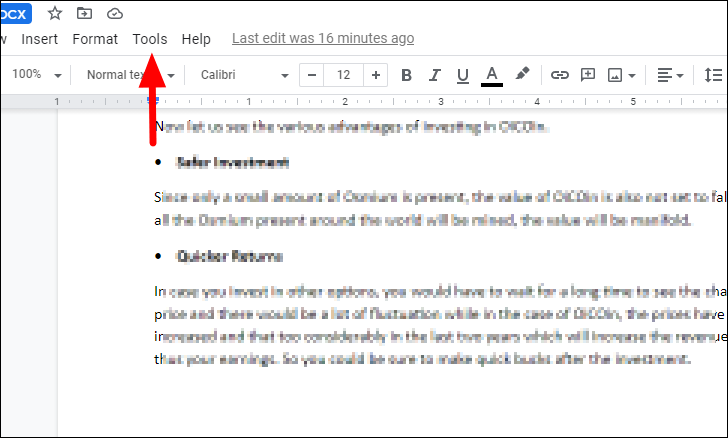
Step 1: Click on the Tools menu in the top navigation bar.
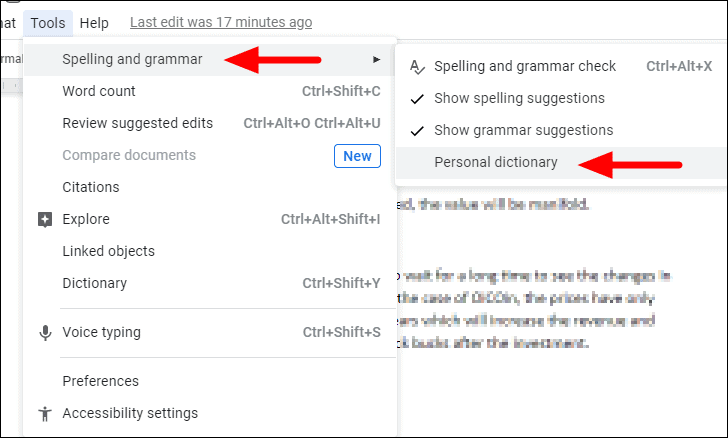
Step 2: Select Spelling and grammar, then click on Personal dictionary in the submenu.
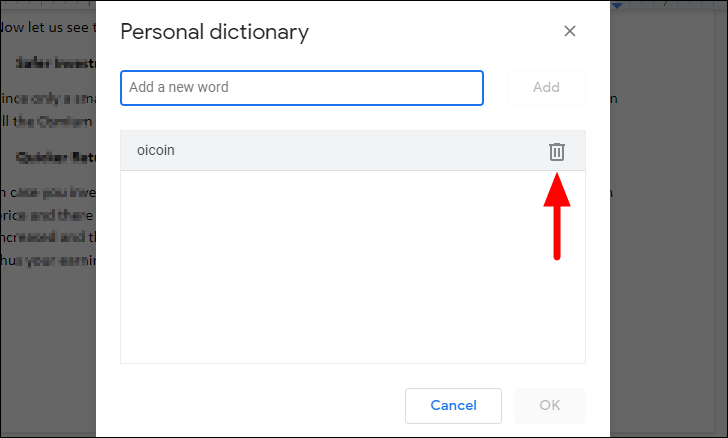
Step 3: In the Personal dictionary window, you'll see a list of words you've added. Hover over a word and click the trash bin icon to delete it.
Step 4: After removing the desired words, click OK to save your changes.
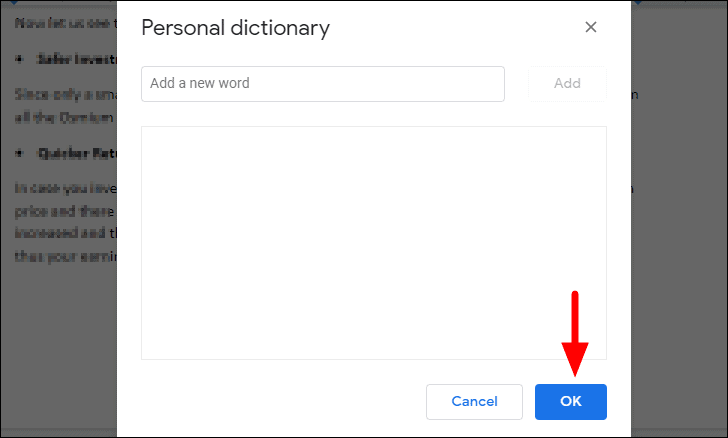
Your personal dictionary will now be updated, and Google Docs will flag the removed words as misspellings if they appear in your document.
Resetting Printer Settings in Your Browser
If your printed documents aren't coming out as expected, browser printer settings might have been altered. Resetting your browser settings can resolve printing issues, but note that this will also reset other preferences, such as your homepage and disabled extensions (excluding bookmarks, history, and saved passwords).
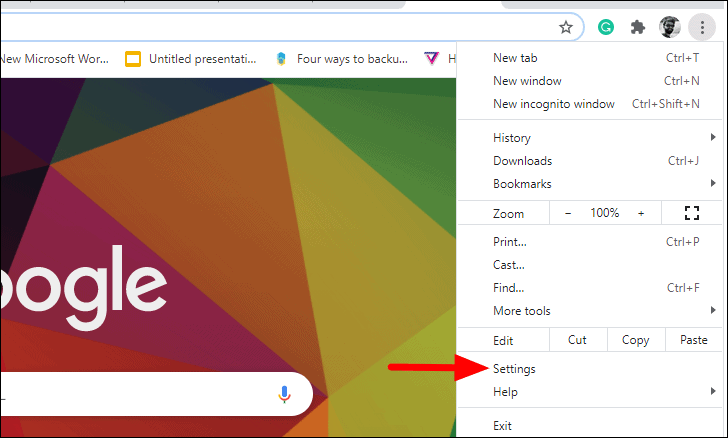
Step 1: In your browser (e.g., Google Chrome), click on the three-dot menu icon in the top-right corner and select Settings.
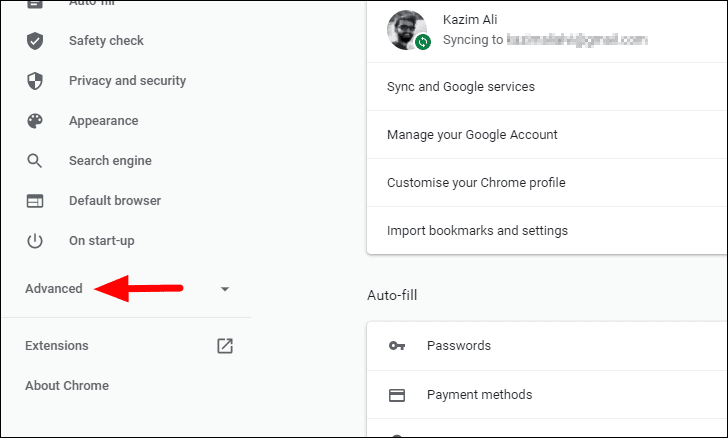
Step 2: Scroll down and click on Advanced to expand more options.
Step 3: Click on Reset and clean up at the bottom of the settings list.
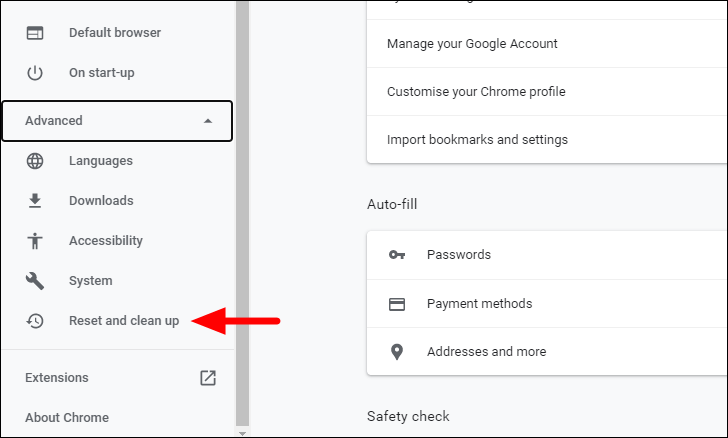
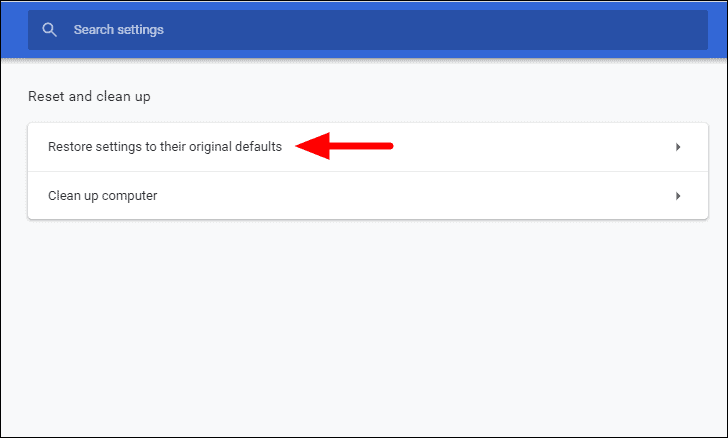
Step 4: Select Restore settings to their original defaults.
Step 5: In the confirmation dialog, click Reset settings to proceed.
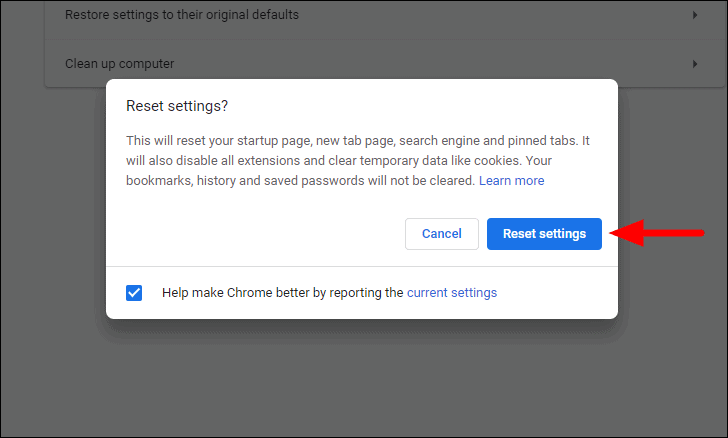
After resetting, your browser's printer settings will return to default, which should resolve most printing issues in Google Docs.
By individually resetting these settings, you can restore your Google Docs to a clean slate, making your document editing smoother and more efficient.

