If you want your Windows 11 PC to automatically shutdown at a fixed time, there are several ways by which you can do so. The OS comes with several tools and utilities that let you schedule and automate tasks without having to rely on third-party programs. And using these tools is incredibly easy, so you do not require much technical skill and knowledge. Depending on your preferences, you can use any of the six methods mentioned here to accomplish this.
Method 1: With Task Scheduler
Windows has a built-in Task Scheduler that you can use to make your computer perform specific tasks at a certain time. By assigning a shutdown task to the utility, you can have your PC shut down automatically at a set time.
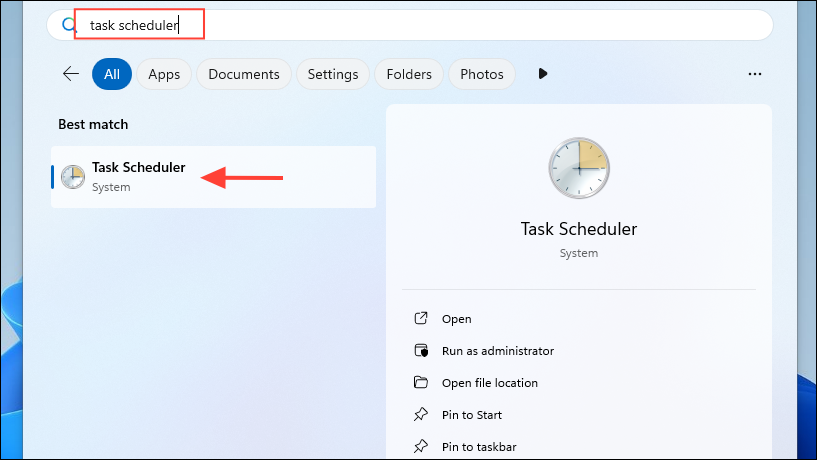
- Open the Start menu, type
task schedulerand click on the utility when it appears in the search results.
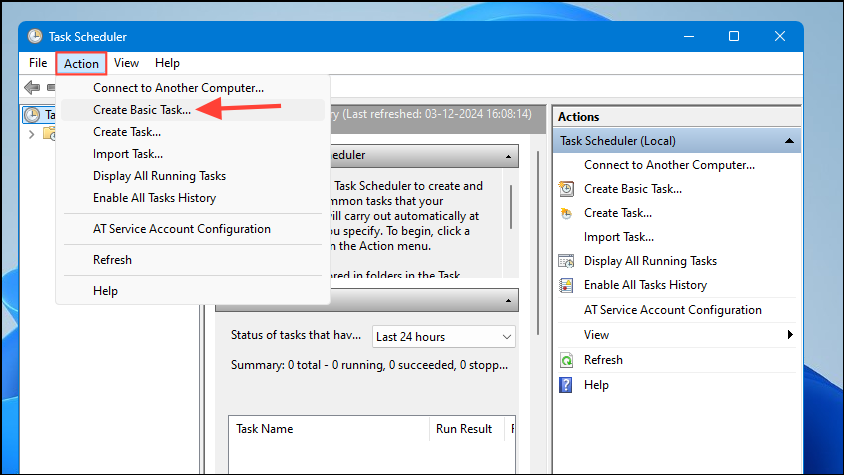
- When the Task Scheduler launches, click on the 'Action' menu in the menu bar at the top and select 'Create basic task'.
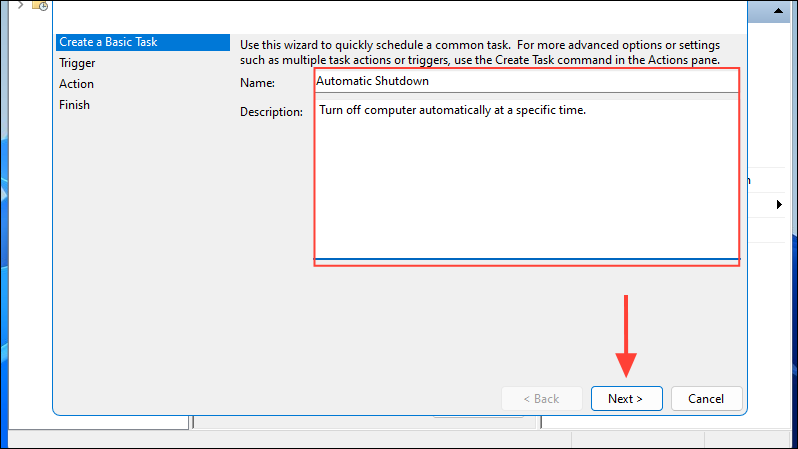
- Provide a name and a description for the task in the dialog box that appears and click on the 'Next' button.
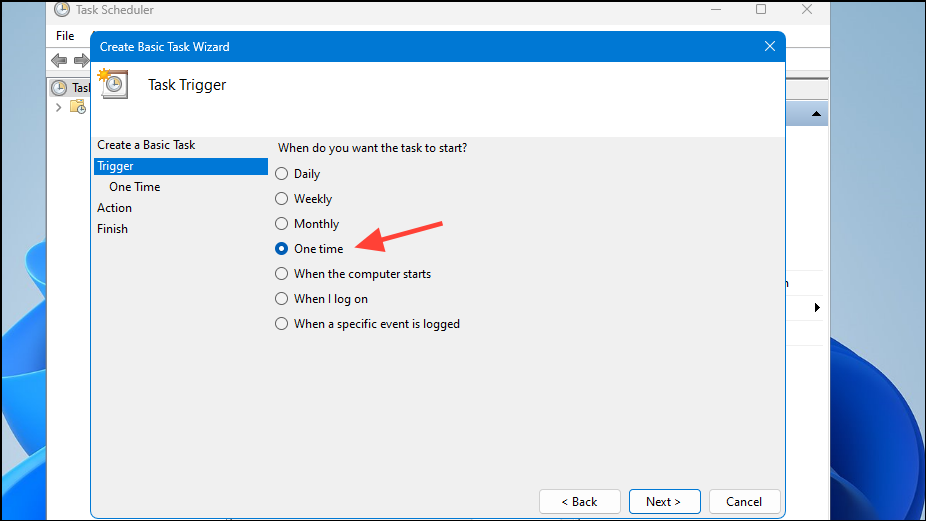
- Now you need to choose how frequently your PC will perform that task. If you only want it shut down automatically once, click on 'One Time' in the list of options. You can select another option depending on your preferences.
- Select the date and time when you want your computer to perform that task, i.e., shut down automatically. Then click on the 'Next' button.
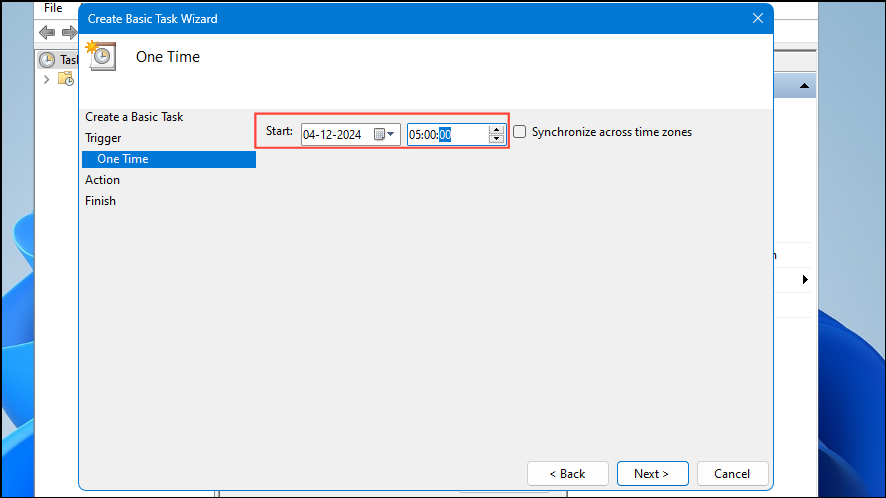
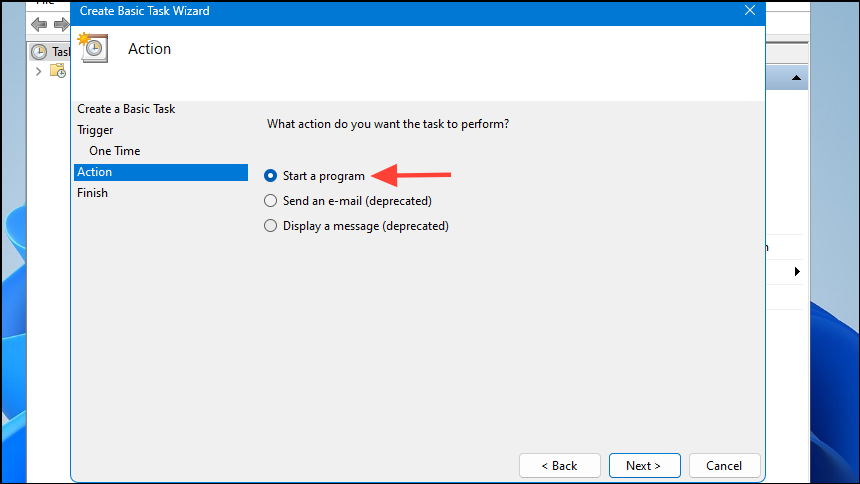
- Then select what you want the utility to do by clicking on the 'Start a program' option.
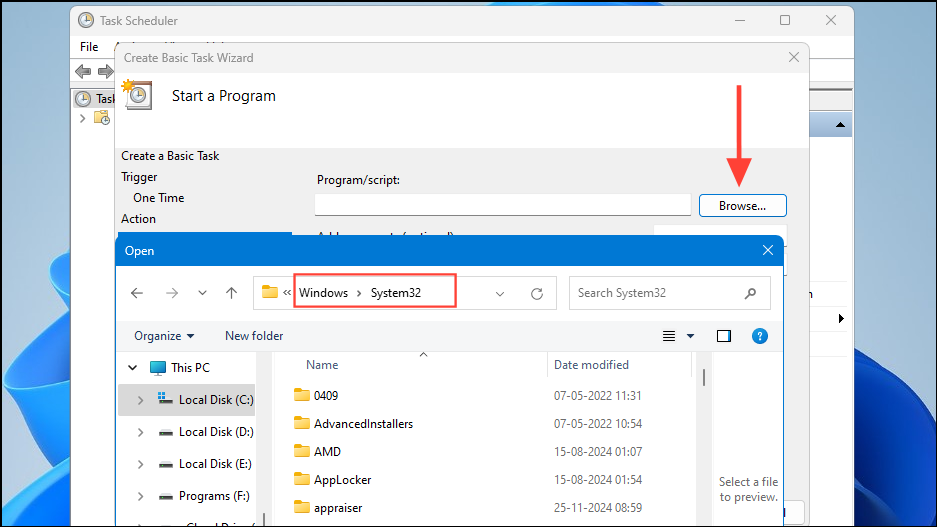
- Click on the 'Browse' button on the next page and navigate to the following path:
C:\Windows\System32\.
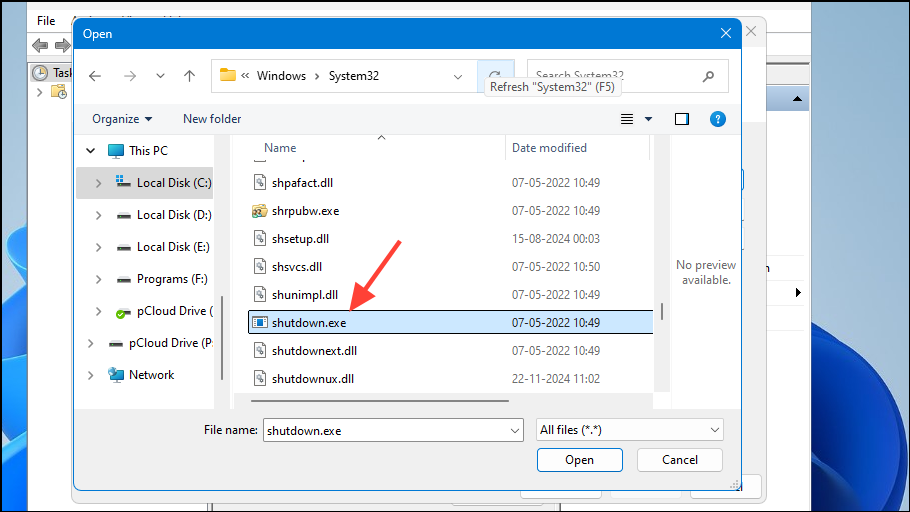
- Select the 'shutdown.exe' file in the folder by clicking on it.
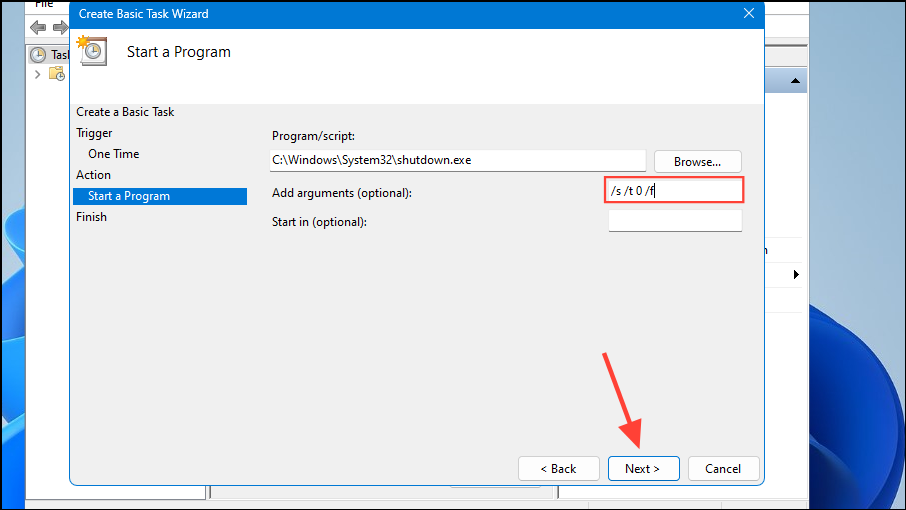
- After selecting the shutdown file, click on the 'Add arguments' field, and enter the following arguments:
/s /t 0 /f. The 's' stands for the shutdown file that will turn off your computer, while the 't' and '0' denote the time when it has to shut down, which is immediately, in this case. You can change it to any other time you want your computer to turn off. Finally, the 'f' forces your PC to turn off even if other apps are preventing it. Click on the 'Next' button when done.
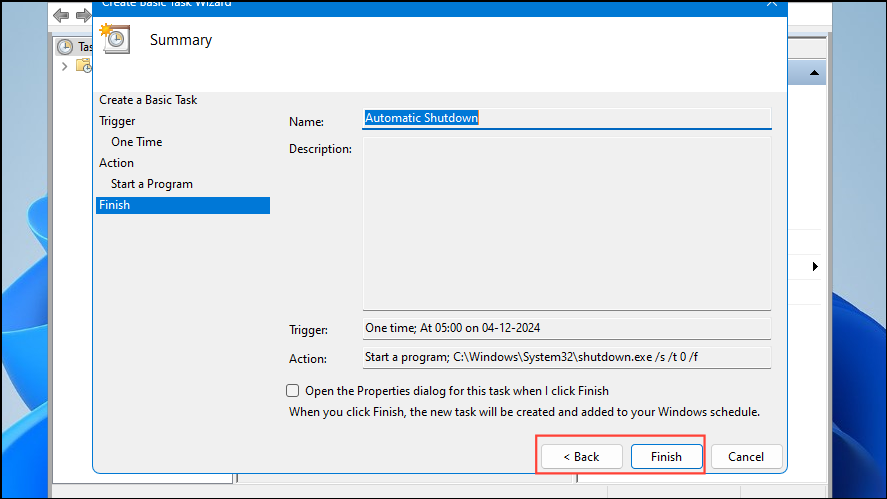
- Now, you can review the details and check whether everything is alright. Click on the 'Back' button if you want to change something or click on the 'Finish' button to complete the process.
Method 2: With Command Prompt
You can also use the command prompt to schedule automatic shutdown for your Windows 11 PC.
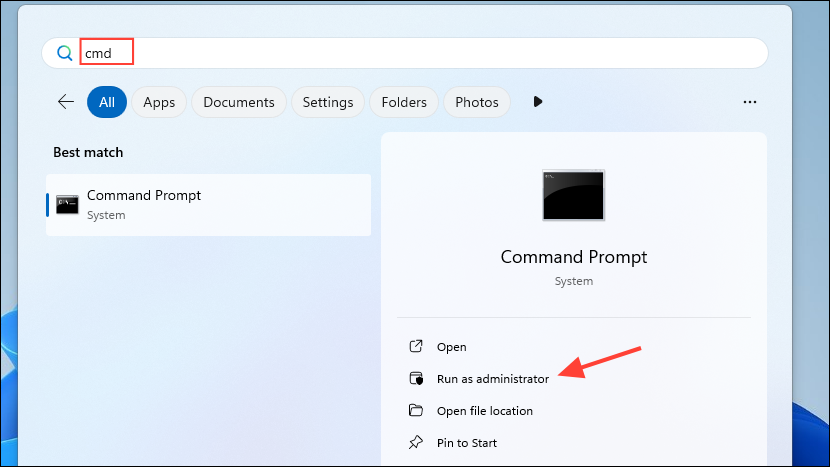
- Open the Start menu, type
cmdand click on 'Run as administrator' on the right.
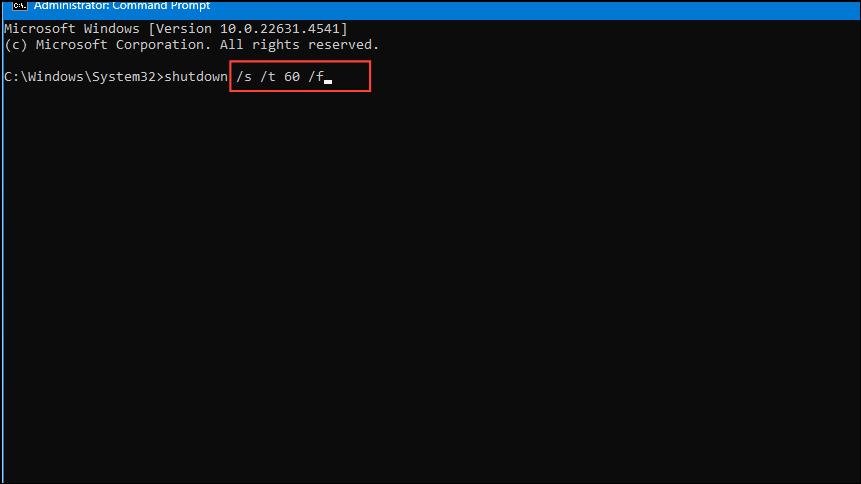
- Once the Command Prompt window opens, type the following command replacing 'seconds' with the time when you want your PC to shutdown:
shutdown /s /t seconds /f, such as 60. You can convert minutes to seconds by multiplying them by 60 and convert hours to seconds by multiplying by 3600.
- You can cancel the automatic shutdown using the following command:
shutdown /a.
Method 3: With PowerShell
Powershell also lets you automatically shut down your computer using Windows PowerShell.
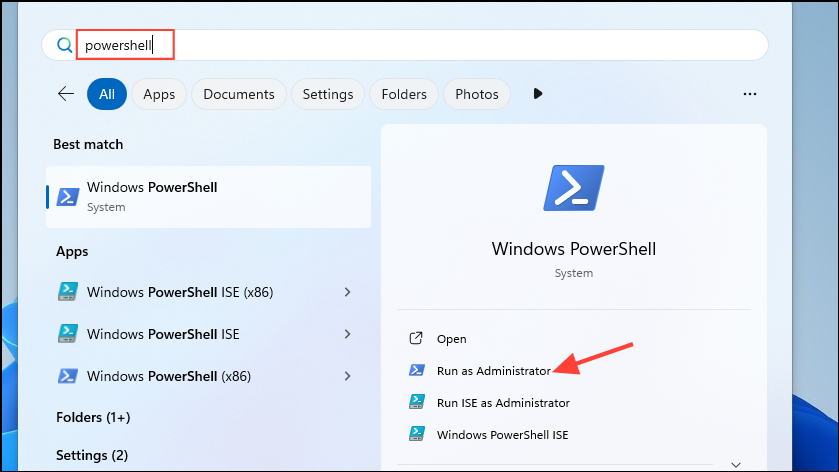
- Open the Start menu, type
powershelland click on 'Run as administrator'.
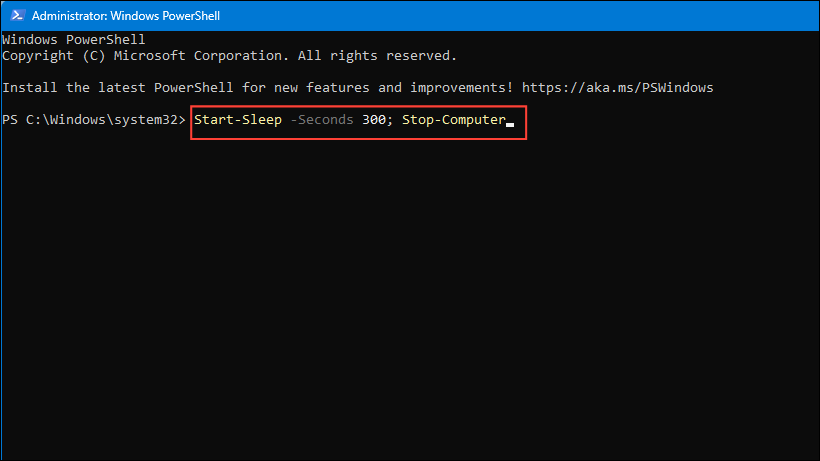
- When the PowerShell window appears, type
Start-Sleep -Seconds seconds; Stop-Computerreplacing seconds with the shutdown time. For instance, if you want to shut down your computer in five minutes, typeStart-Sleep -Seconds 300; Stop-Computer.
- If you want to cancel the scheduled shutdown, type
shutdown /a.
Method 4: From the Run Dialog box
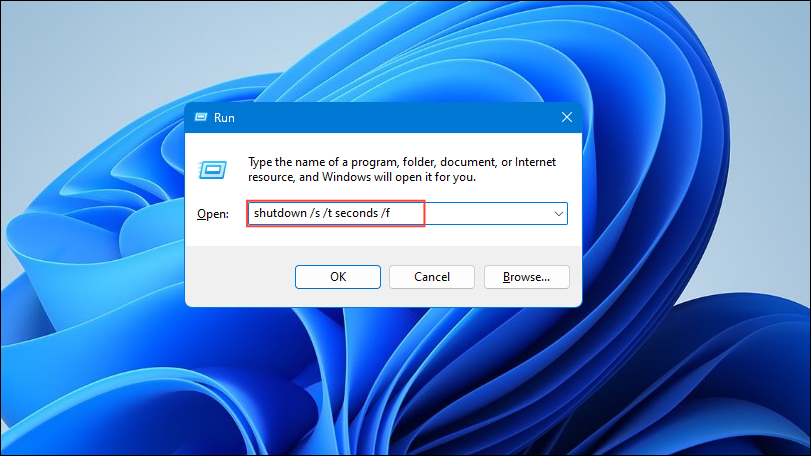
- Use the
Win + Rshortcut to open the Run dialog box and typeshutdown /s /t seconds /finside it when it appears.
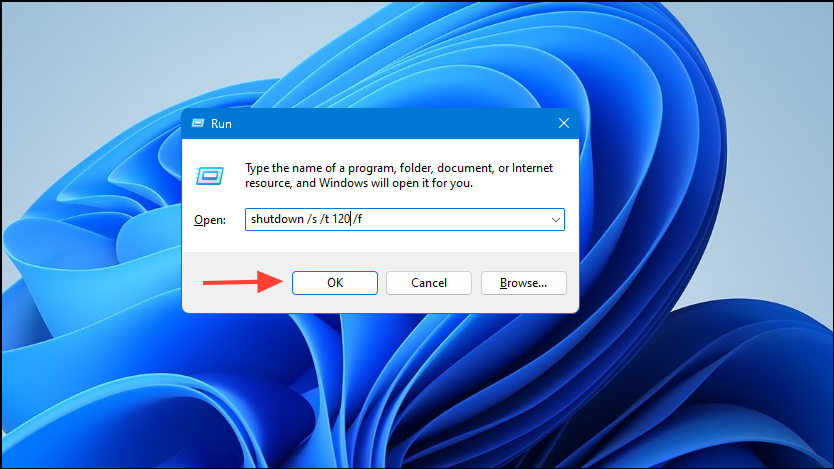
- Replace 'seconds' with the shutdown time, such as '120' and press Enter or click on the 'OK' button.
- You can cancel the scheduled shutdown using the
shutdown /acommand.
Method 5: With the Task Manager
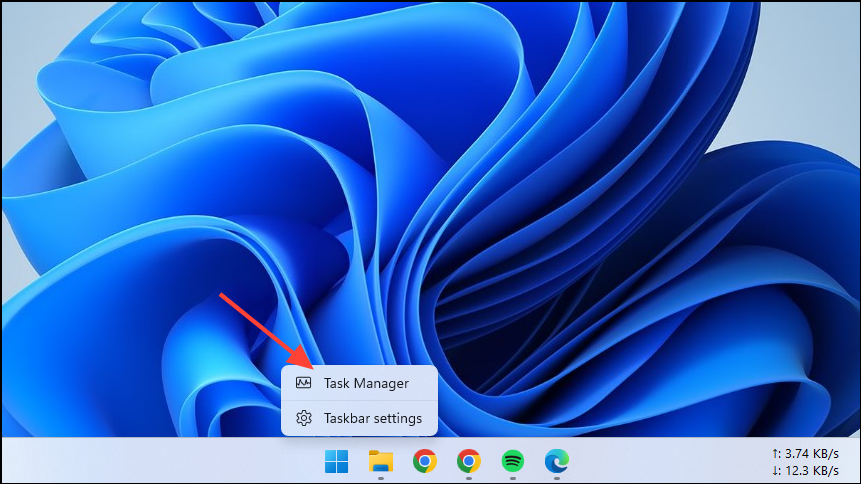
- Right-click on the taskbar and select 'Task Manager' from the menu. Alternatively, use the
Ctrl + Shift + Escshortcut to launch the Task Manager.
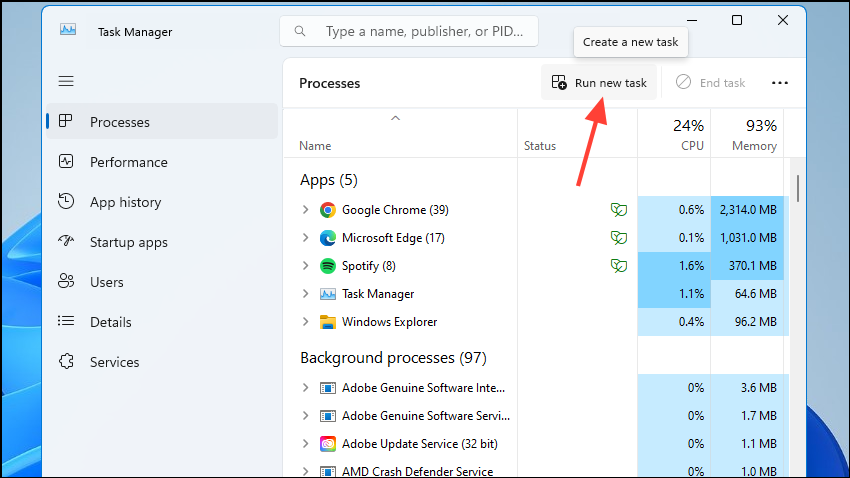
- When the Task Manager opens, click on 'Run new task' at the top.
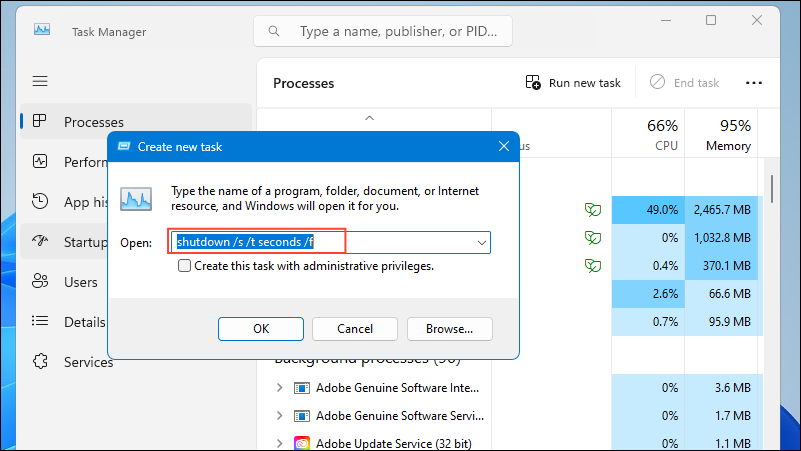
- Type the following in the text field, replacing seconds with the time until shutdown, like
shutdown /s /t 60 /f. To cancel the shutdown, typeshutdown /a.
Method 6: Using a desktop shortcut
- Right-click on an empty space on your Windows 11 desktop, go to 'New' and select 'Shortcut'.
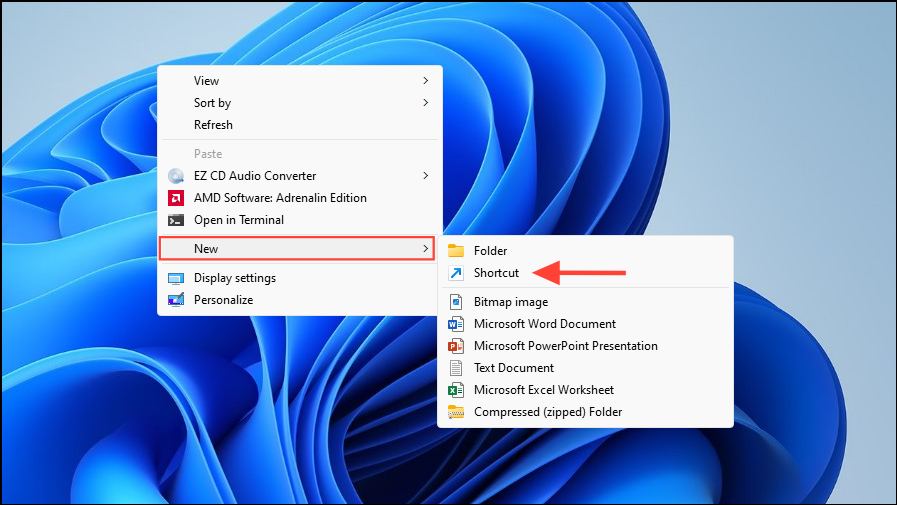
- Type the following command in the 'Type the location of the item' field, replacing 'seconds' with the time until shutdown:
shutdown /s /t seconds /f. Then click on the 'Next' button.
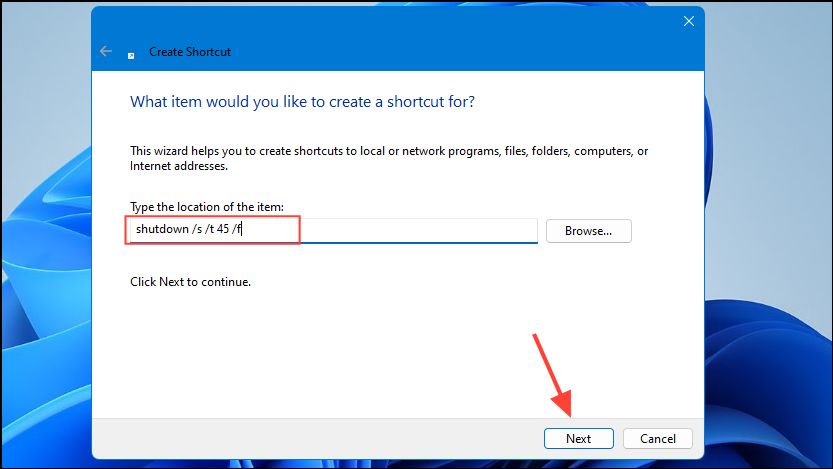
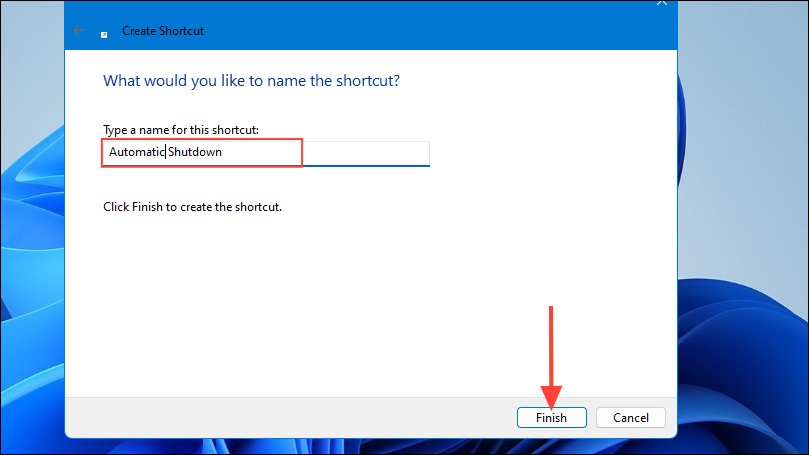
- On the next page, provide a name for the shortcut and click on the 'Finish' button. Now you can simply double-click on the shortcut to turn off your computer automatically.
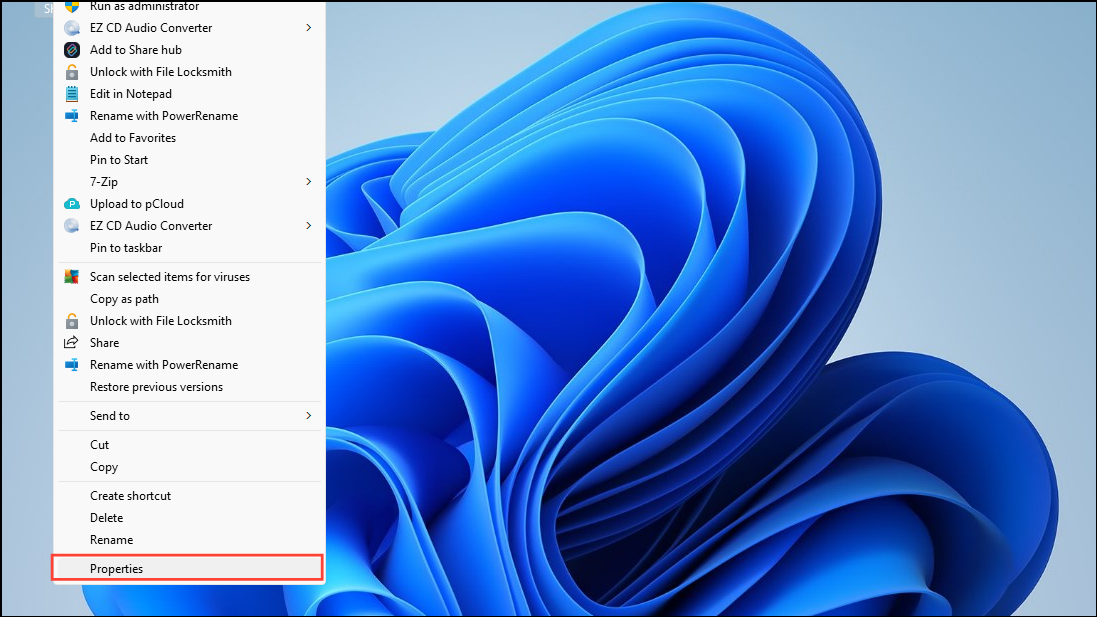
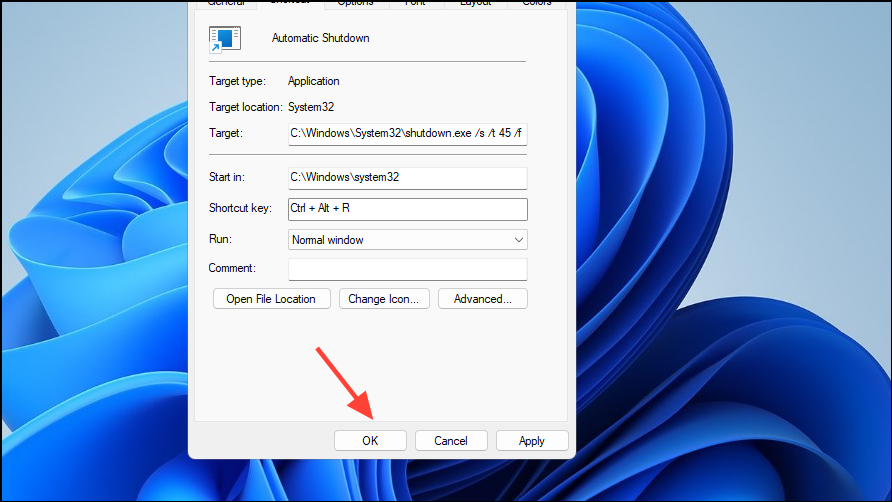
- You can also add a keyboard shortcut to activate this desktop shortcut easily. Right-click on the shortcut and click on 'Properties'.
- In the Properties dialog box, switch to the 'Shortcut' tab at the top and enter the key combination you want to use in the 'Shortcut key' field.
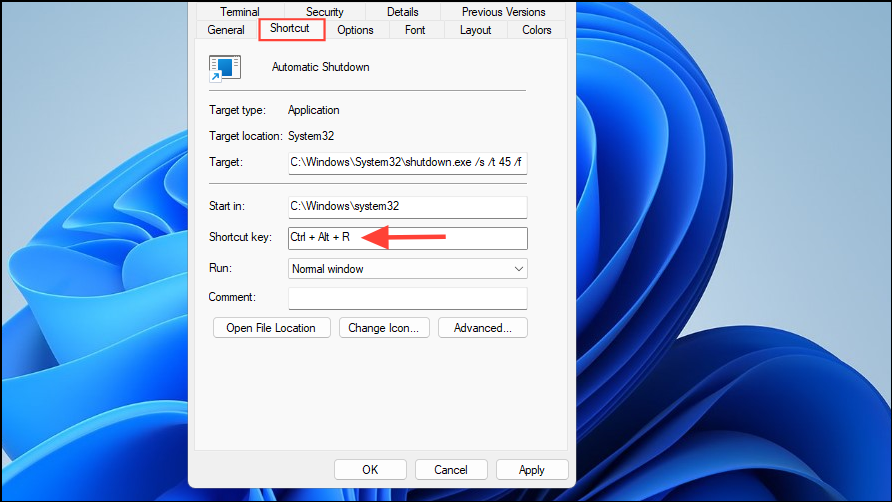
- Click on the 'Apply' button and then 'OK' to close the dialog box. Now, you can press the shortcut keys to shut down your PC automatically.
Things to know
- You can delete the Shutdown task in the Task Scheduler at any time by right-clicking on it and selecting 'Delete'.
- The command prompt method works even if you don't run Command Prompt as an administrator, but commands like those that force other applications to close may not work.
- You can change the combination keys you have set for the desktop shortcut at any time by right-clicking on the shortcut and clicking on 'Properties'. Similarly, you can delete the shortcut when you want to turn off your computer manually.

