Gmail is one of the most popular email services presently. Although during the initial years, it competed with other similar platforms, but as time progressed, Gmail emerged as the favorite amongst users.
The popularity of Gmail can be attributed to the multitude of features it has to offer and the straightforward interface. One such feature is to schedule an email, which is by far the most helpful to many users. With this feature, you can schedule an email for a set date and time. You can have up to 100 scheduled emails at a given time.
This feature is helpful to both students and professionals alike. For instance, you have to send a mail at 3 AM, but you also have to sleep by 1 AM. This is where the scheduling feature comes to the rescue. Furthermore, you can schedule a mail for months later which is another lucrative option.
Scheduling an Email on Gmail
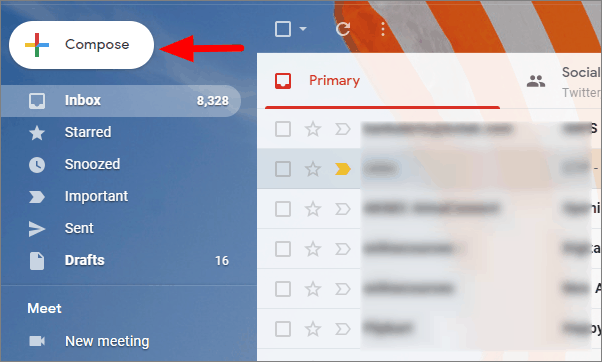
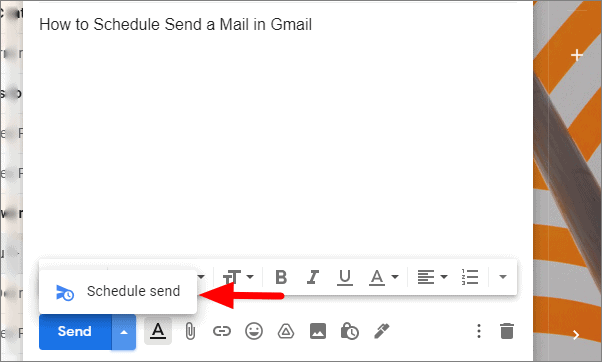
To schedule an email, open Gmail and then click on ‘Compose’ near the top-left corner.
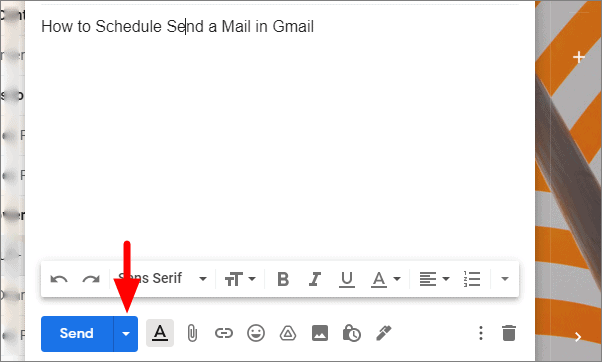
Now, enter the recipient’s email id and the content of the email. After you have written the email, click on the ‘Downward-facing Triangle’ right next to the Send option.
Select ‘Schedule send’ from the menu.
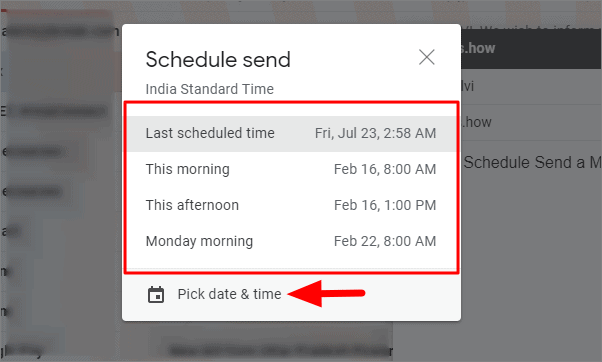
The schedule box will open. You can now select from date and time from the list of options or set a custom one by clicking on ‘Pick date & time’.
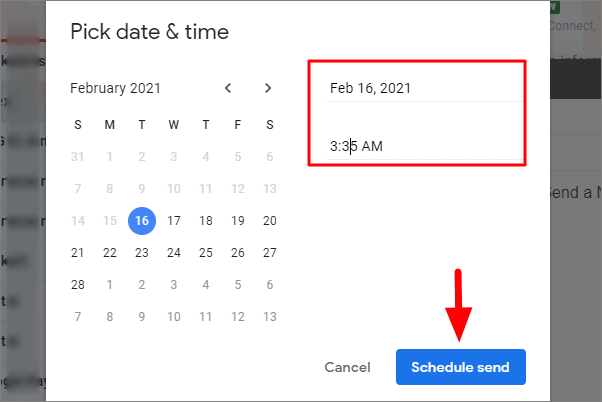
If you click on ‘Pick date & time’, another box will open where you can set a custom date and time to schedule an email. You can change the date both from the calendar and on the right. To change the time, click on the current time, clear it and enter the time of your preference. After you have set a custom date and time, click on ‘Schedule send’ at the bottom.
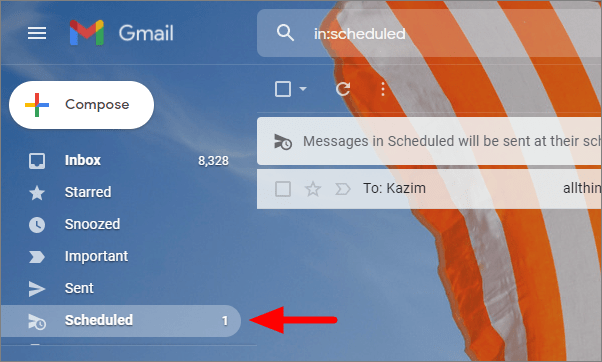
To view the email you just scheduled, click on ‘Scheduled’ on the left and the email will be available here.
Now that you know how to schedule an email on Gmail, use it to avoid a last-minute rush and panic while sending an email.