Have you ever wanted to be in a group photo but ended up being the one taking the picture? Or maybe you’ve tried to capture a selfie from a distance but couldn’t reach the shutter button? If so, you’ll be pleased to know that your iPhone’s built-in camera timer is a feature designed to solve these very problems. Let’s dive into how you can utilize this handy tool to improve your photography game.
Setting a Timer on iPhone Camera
The Timer function in iPhone camera allows you to set a countdown before the photo is taken, giving you ample time to pose, adjust your surroundings, or simply enjoy the moment before the shutter clicks.
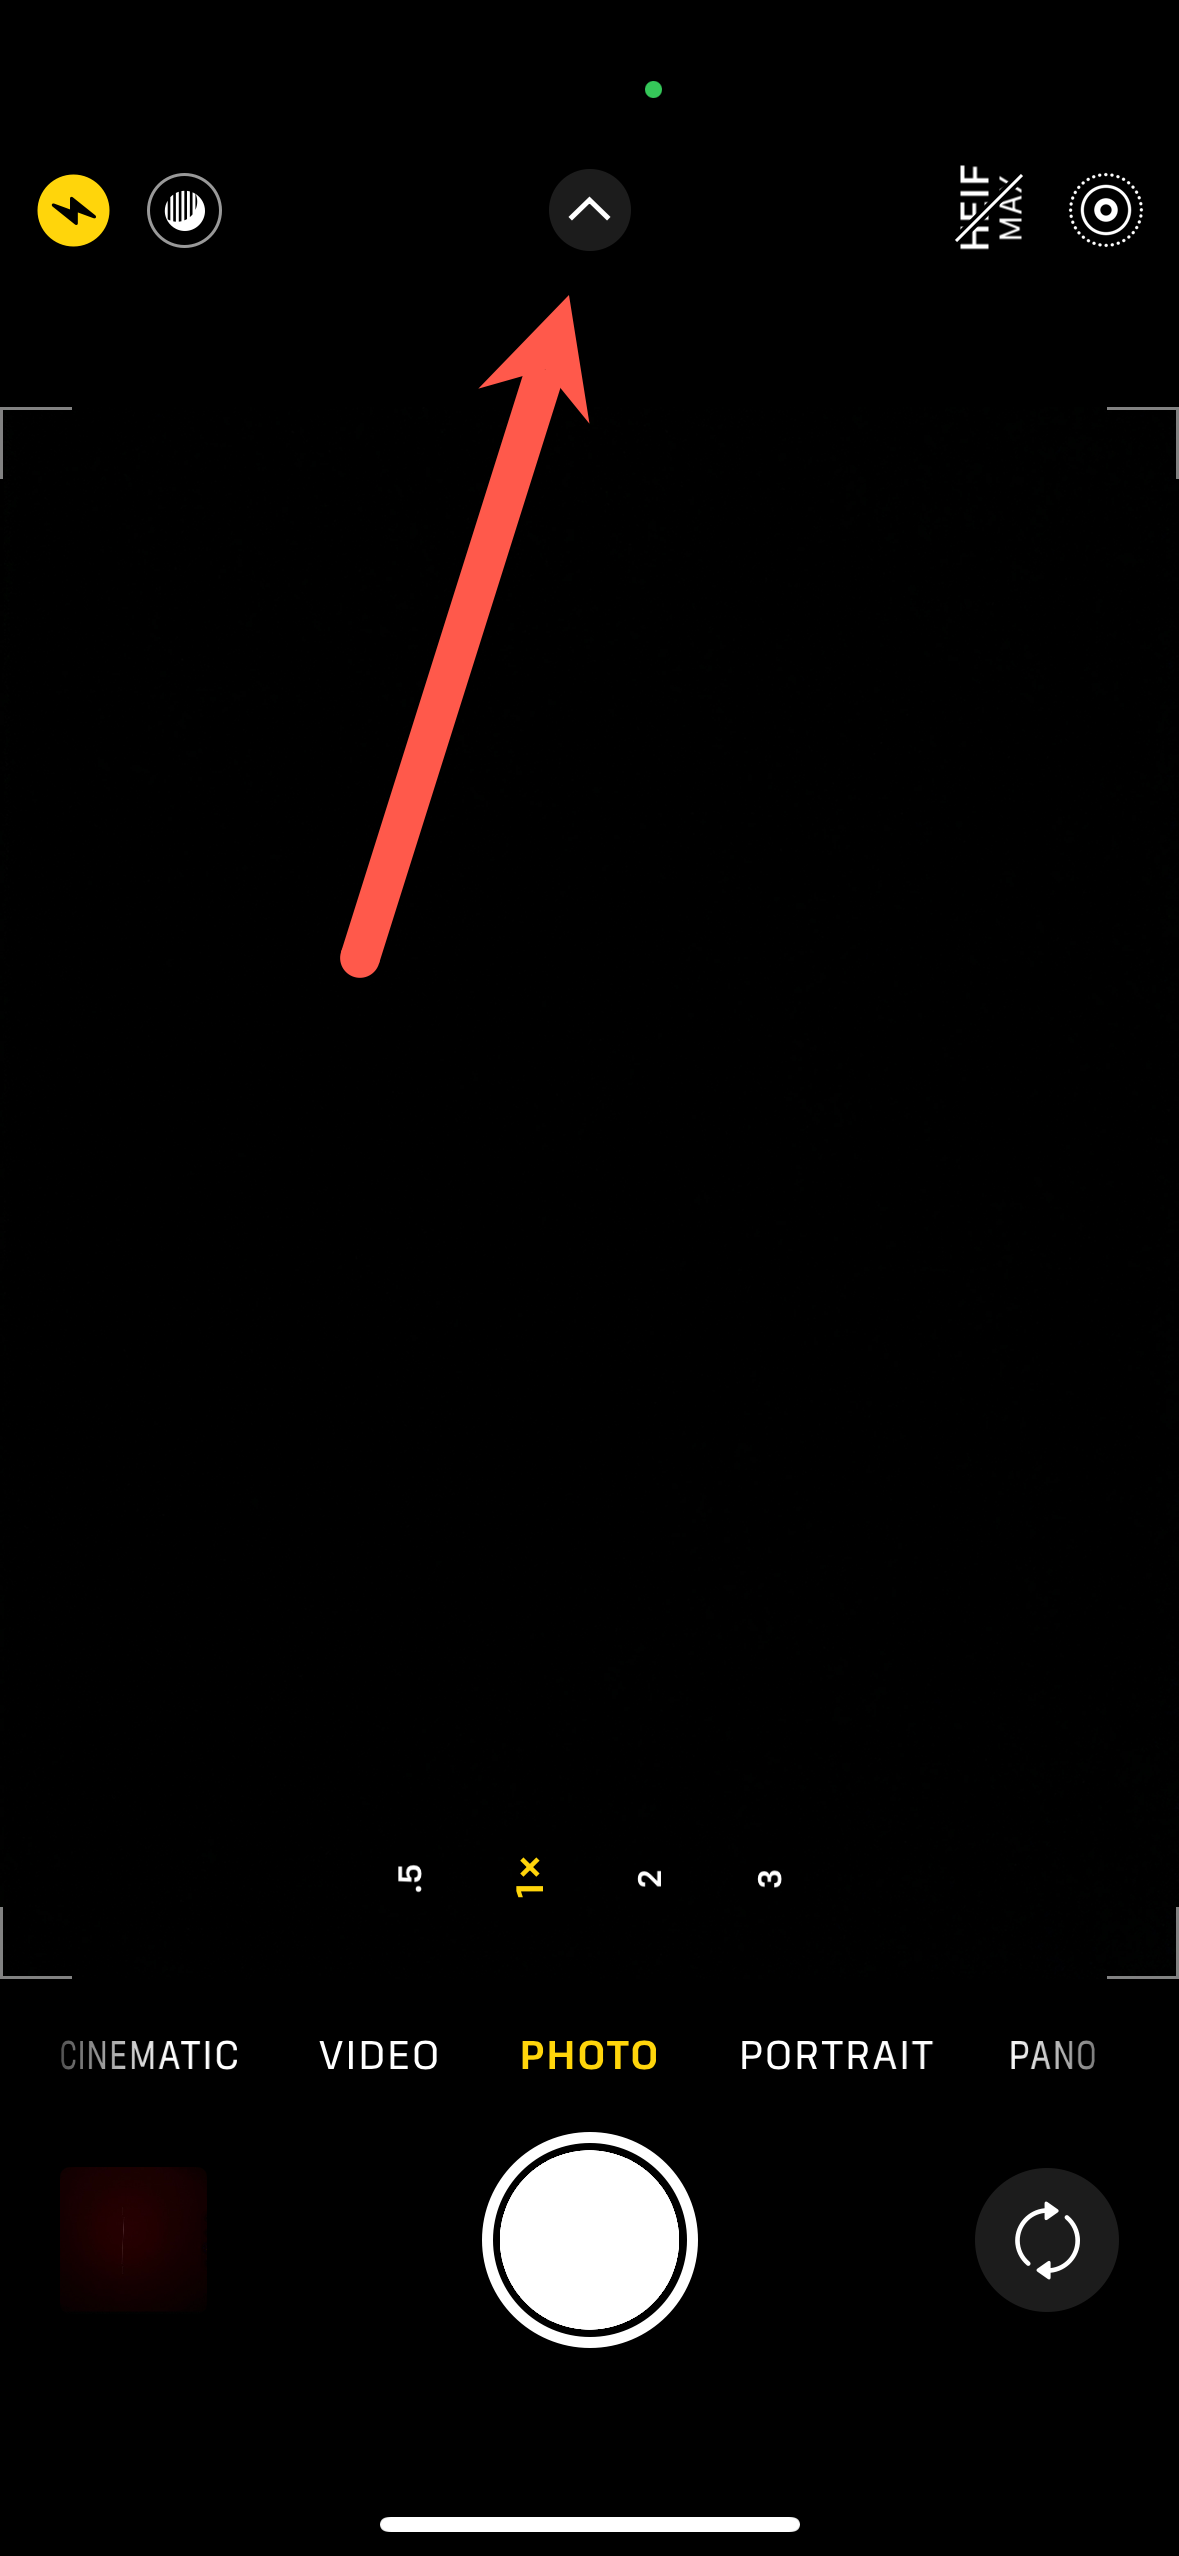
- Open the Camera App. Unlock your iPhone and launch the Camera app. You can find the Camera app on your home screen or by swiping left on the lock screen.
- Position Your iPhone. Set up your shot by positioning your iPhone where you want to capture the photo. You can prop it up with a phone stand or lean it against a stable object.
- Access the Timer Settings. On the camera interface, tap the upward-facing arrow at the top of the screen to reveal additional settings. Drag the icons to the left and look for the ‘Timer’ icon, which typically resembles a clock.
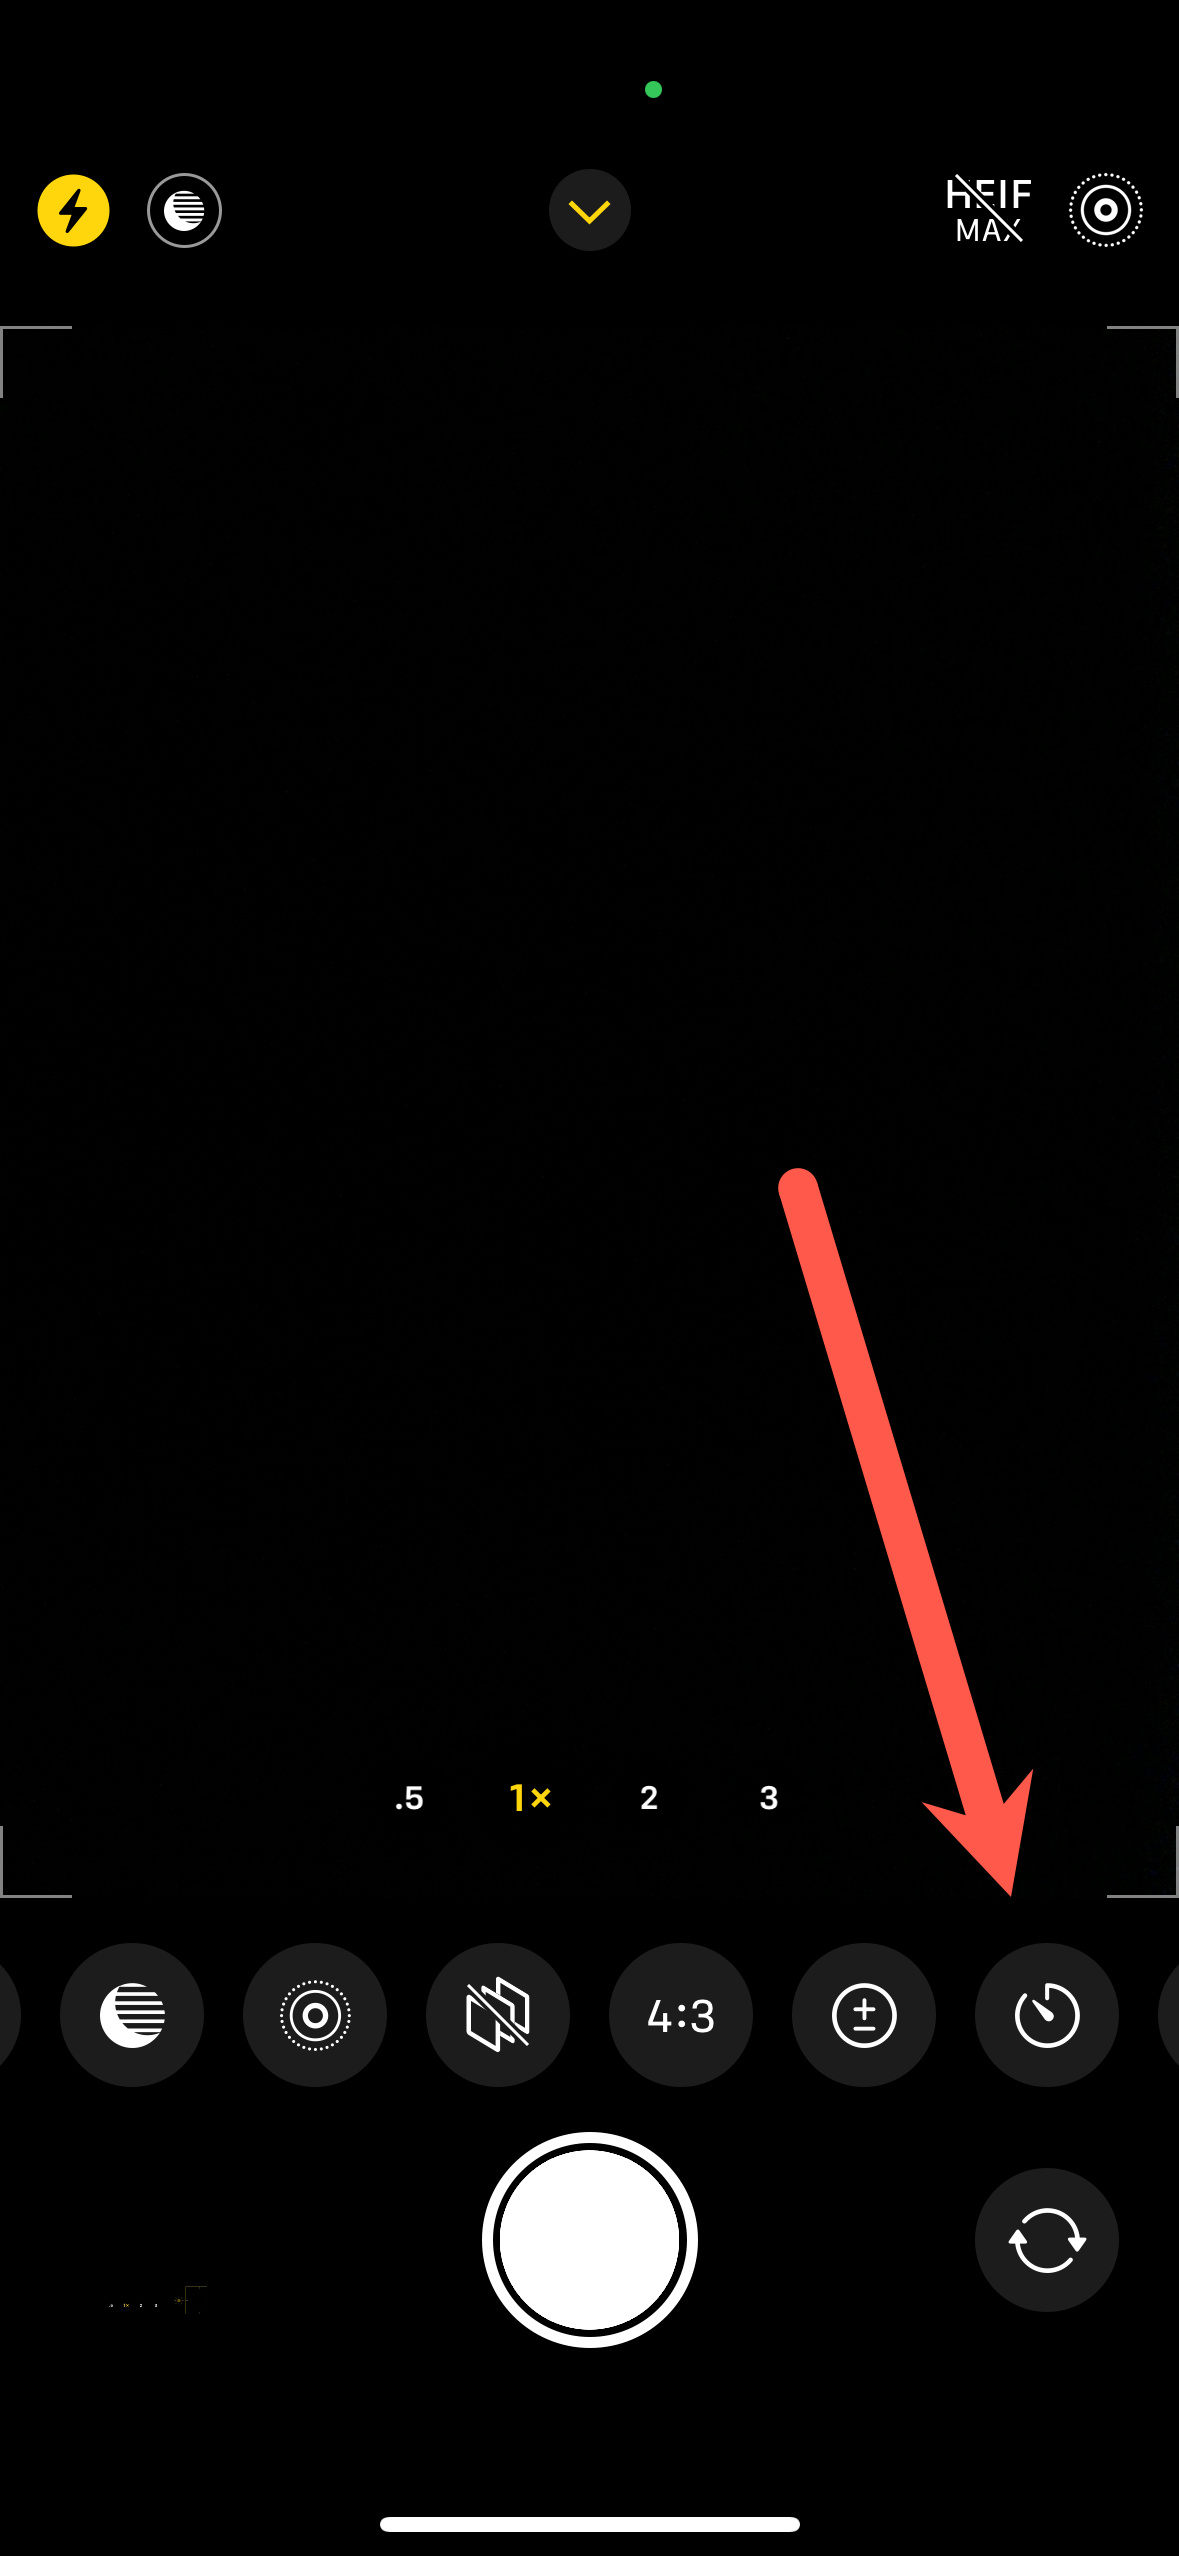
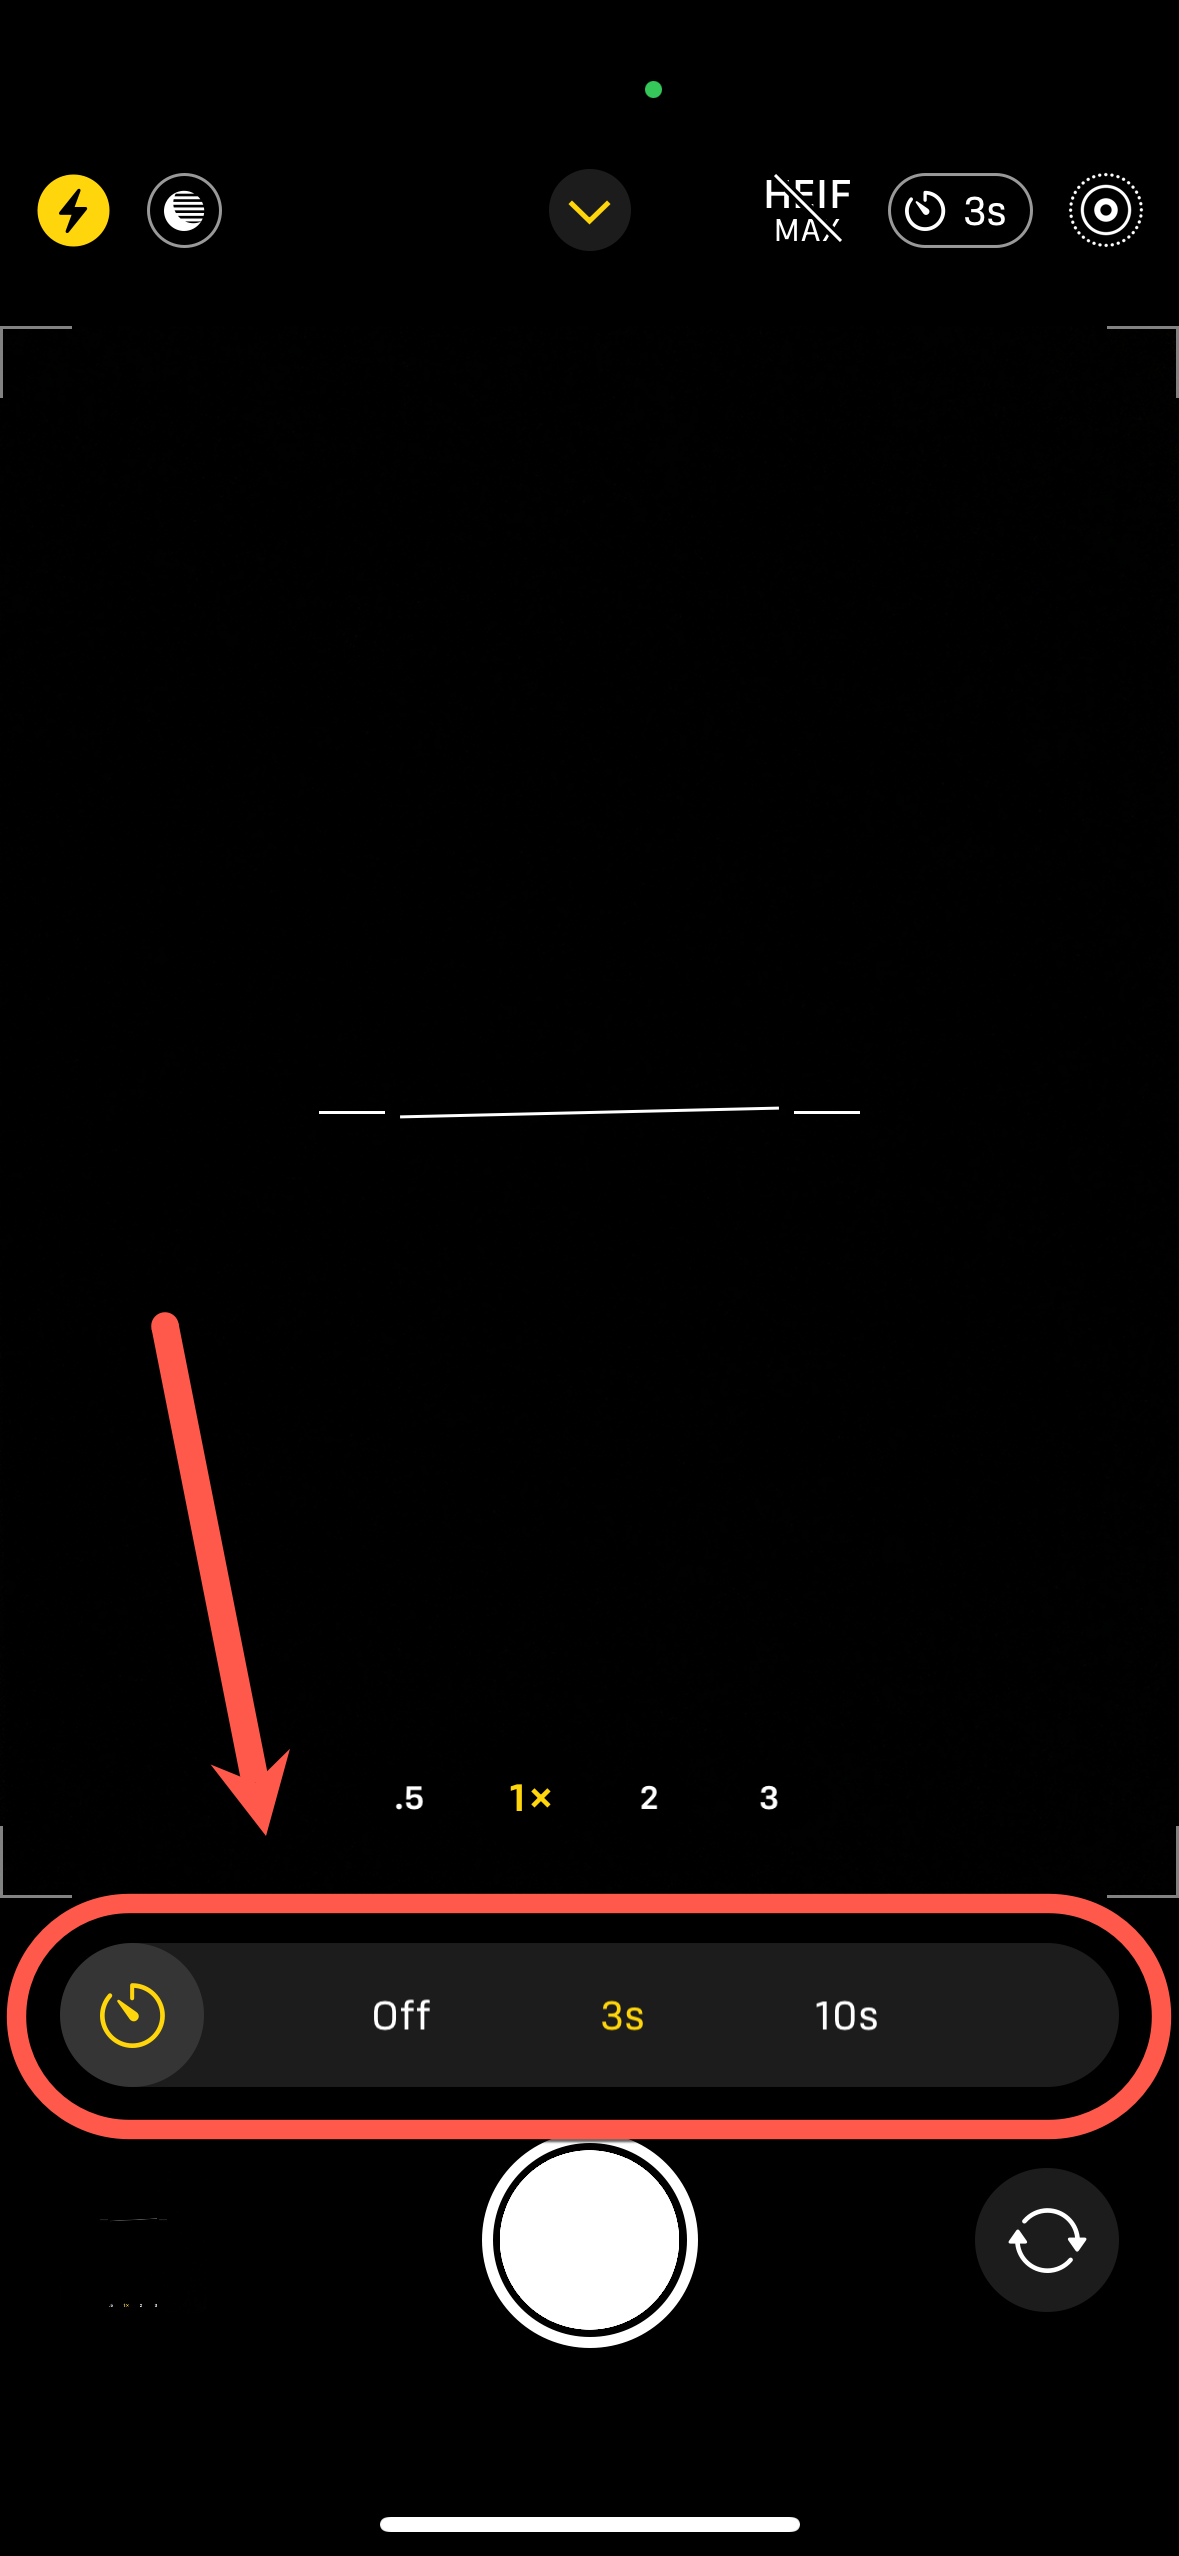
- Choose Your Timer. Select the timer icon, and you’ll be presented with two options: a 3-second or a 10-second timer. Choose the duration that gives you enough time to get ready for the shot. The timer icon will turn yellow when you set a timer. Once active, the timer icon will turn yellow.
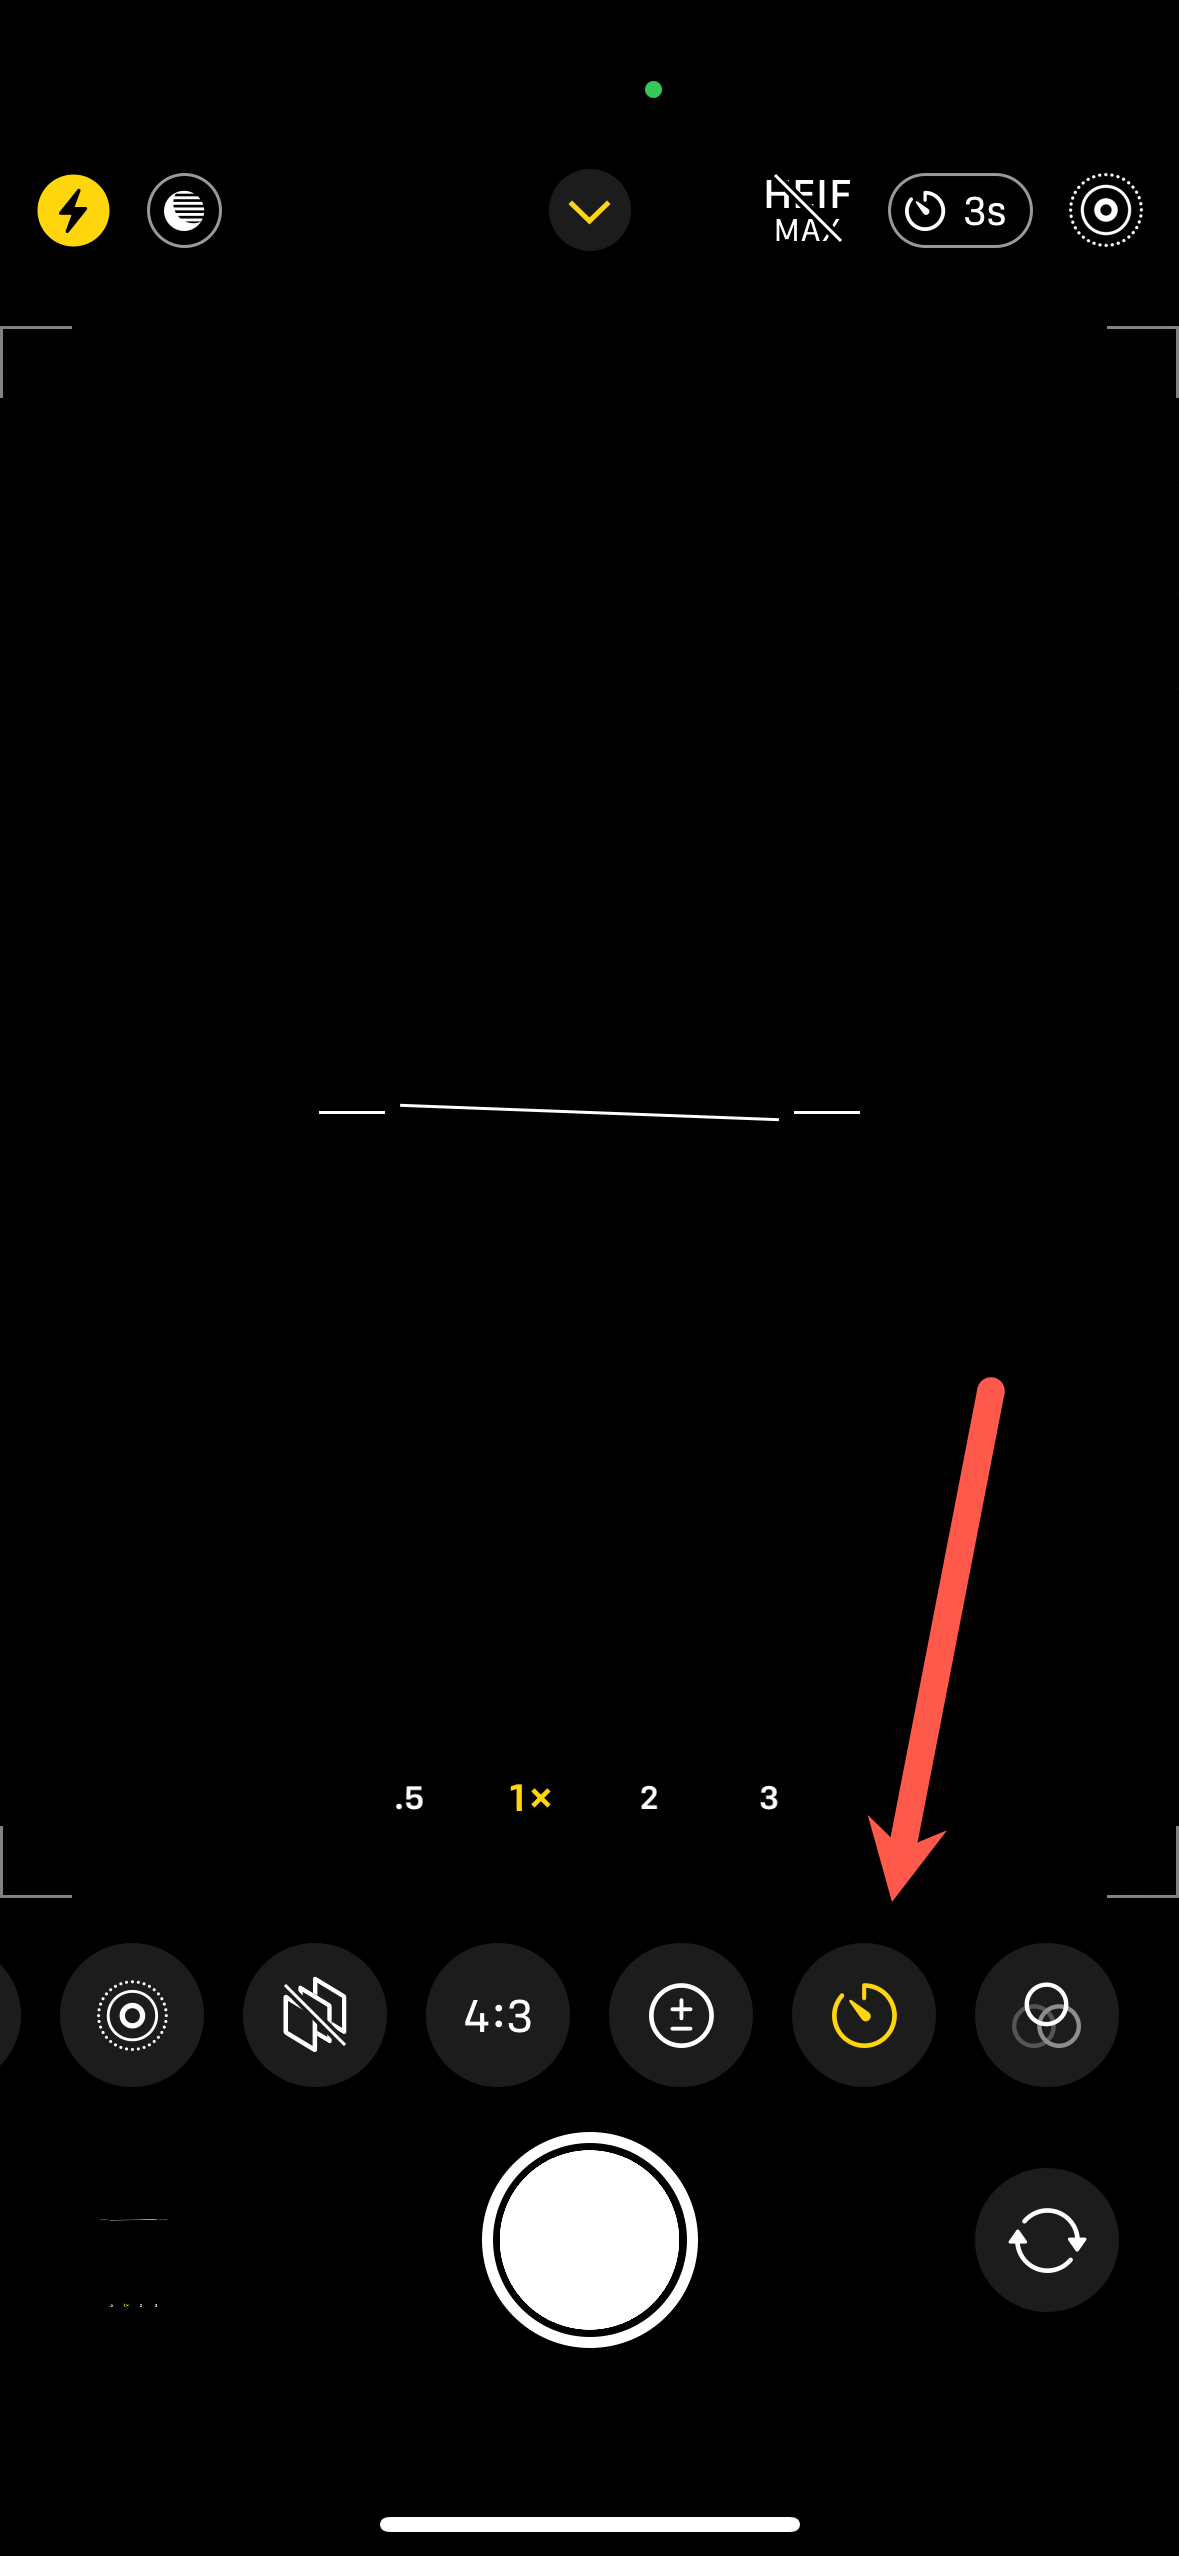
- Take Your Position. Tap the shutter button to start the timer countdown. If you’ve chosen a 3-second timer, you’ll need to quickly move into position. The 10-second timer gives you more time to prepare.
- Capture and Review. Once the countdown ends, your iPhone will capture your photo. If you keep Live Photos disabled, the timer function will take a series of 10 burst photos, allowing you to select the best one from the bunch. You can review these by tapping on the thumbnail in the lower-left corner of the camera app.
Tips for Using the iPhone Camera Timer Effectively
- Use a Tripod: For stability and to get the best angle, consider using a tripod or a flat surface to hold your iPhone in place.
- Mind the Lighting: Ensure the lighting is favorable for your shot. If it’s too bright behind you, move to a position where the light source is in front of you or to the side to avoid shadows and glare.
- Experiment with Live Photos: Live Photos capture 1.5 seconds before and after you take a picture, giving you more options to choose the perfect shot.
- Turn Off Burst Mode: If you prefer not to use Burst Mode, ensure Live Photos is turned on, which disables Burst Mode during timer shots.
Frequently Asked Questions
Q: Can I use the timer for both the front and rear cameras?
A: Yes, the timer function works with both the front (selfie) and rear (main) cameras on your iPhone.
Q: How do I stop the timer once it starts?
A: You can tap the stop button that appears after you start the timer if you need to cancel the countdown.
Q: What happens to the burst photos taken with the timer?
A: Your iPhone saves all the burst photos, and you can review them, keep your favorites, and discard the rest.
Q: Will my iPhone remember the timer setting for next time?
A: The camera app does not remember the timer setting by default. You will need to set it each time you want to use the timer feature.
Q: Can I extend the timer beyond 10 seconds?
A: No, the built-in timer only offers 3-second or 10-second options. For a longer duration, you might consider using a third-party camera app with customizable timers.
Conclusion
The timer function on the iPhone camera is a simple yet powerful tool that can greatly enhance your photo-taking experience. Whether you’re capturing group shots, selfies, or just want to be hands-free, the timer gives you the flexibility to snap photos at just the right moment. Give it a try, and you’ll see just how valuable this feature can be in helping you capture those perfect shots.
Remember, photography is about creativity and fun, so don’t be afraid to experiment with different settings to find what works best for you. Happy shooting!


