
A Virtual Private Network (VPN) encrypts your internet connection, keeping your online activities private and secure from prying eyes. Windows 11 includes a built-in VPN client that allows you to securely connect to remote networks without needing additional software. Follow this guide to set up a secure VPN connection on your Windows 11 device.
Method 1: Configure VPN via Windows 11 Settings
This method uses the built-in VPN client provided by Windows 11. You'll need the VPN server details from your VPN provider or network administrator before proceeding.
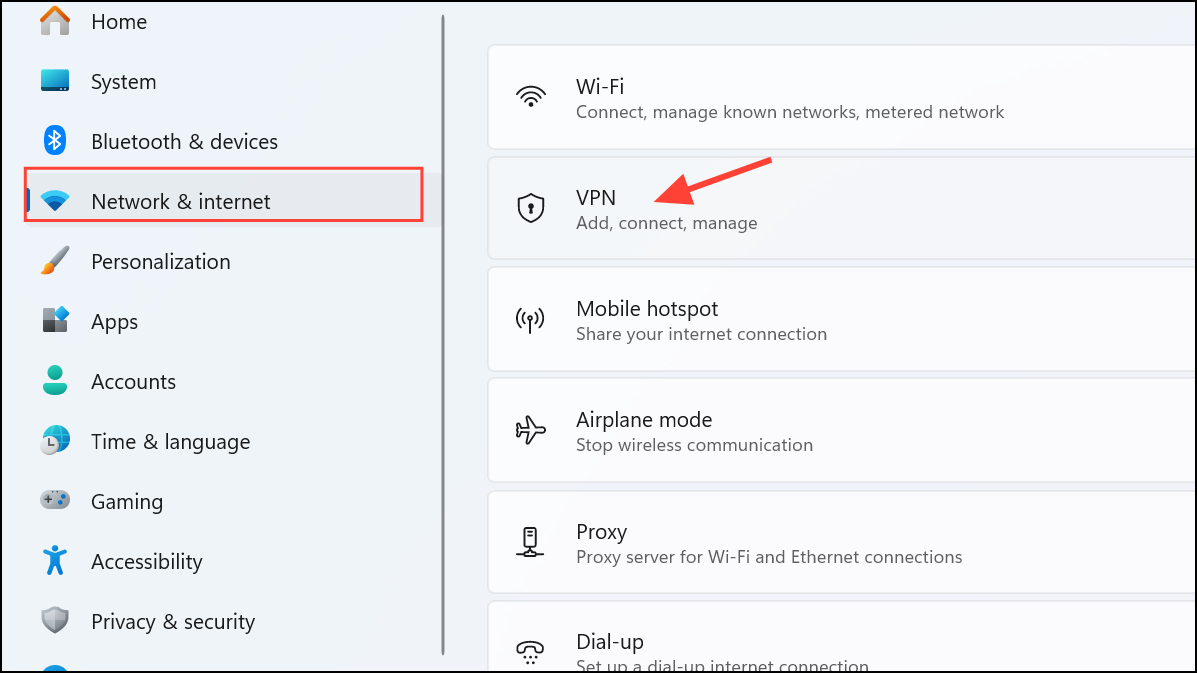
Step 1: Open the Windows 11 Settings app by pressing Windows key + I. In the left pane, select "Network & internet," then click on "VPN" in the right pane.
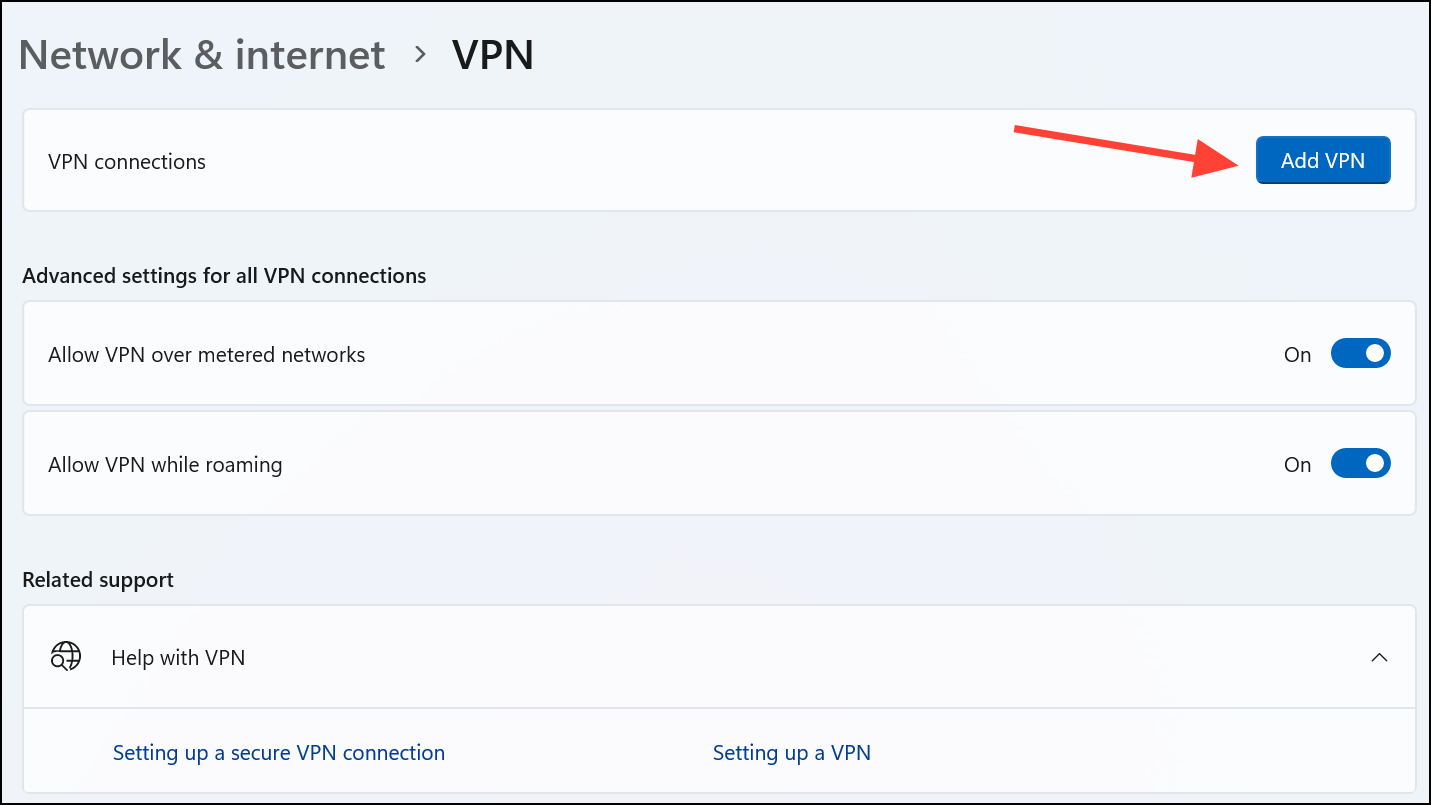
Step 2: Click on "Add VPN" to create a new VPN connection. A new window will appear, prompting you to enter VPN details.
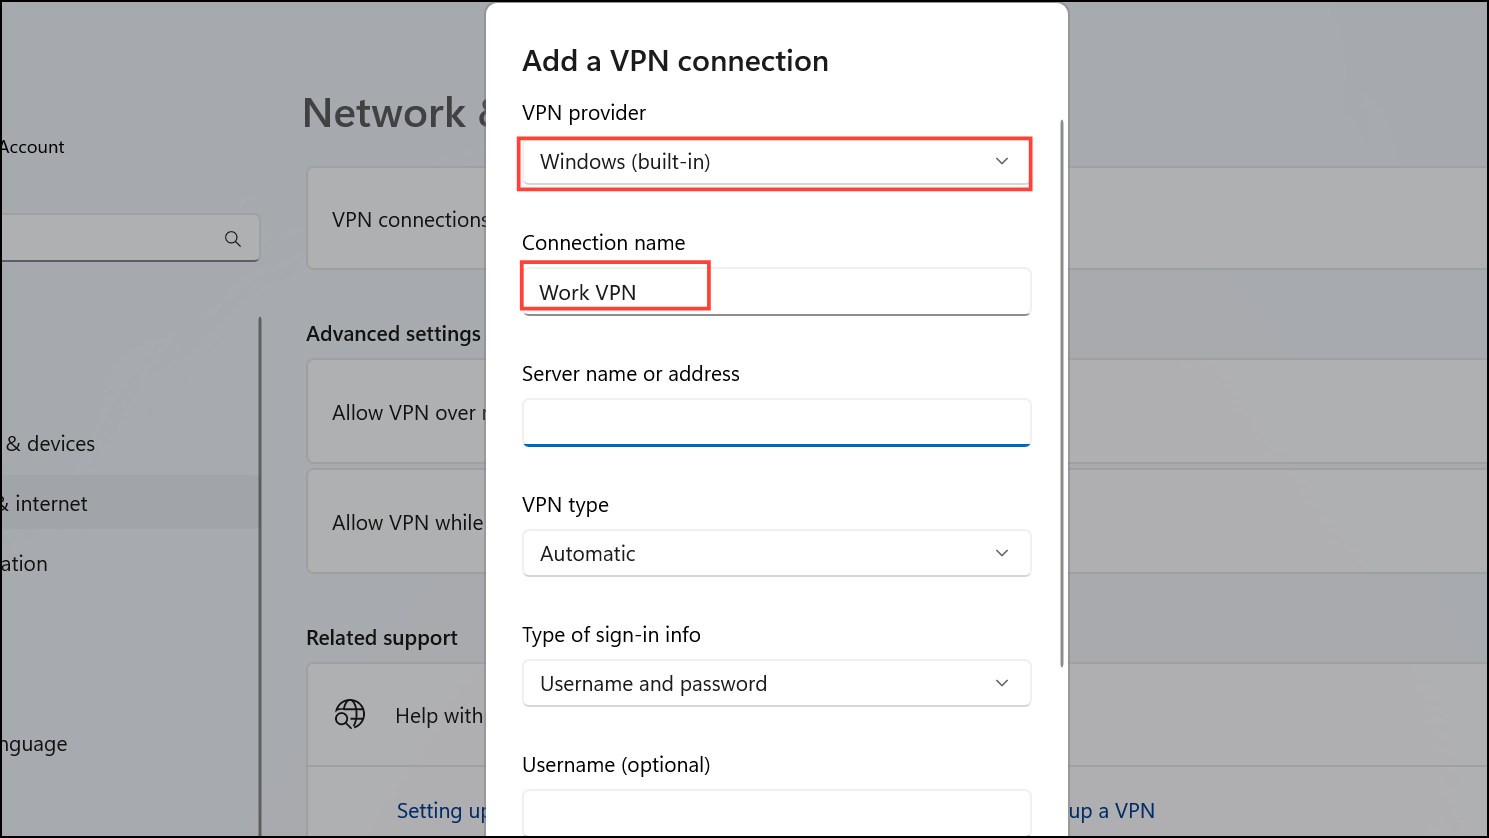
Step 3: In the "VPN provider" dropdown, select "Windows (built-in)." Under "Connection name," enter a recognizable name for your VPN connection (e.g., "Work VPN"). Enter the VPN server's address provided by your VPN service or network administrator in the "Server name or address" field.
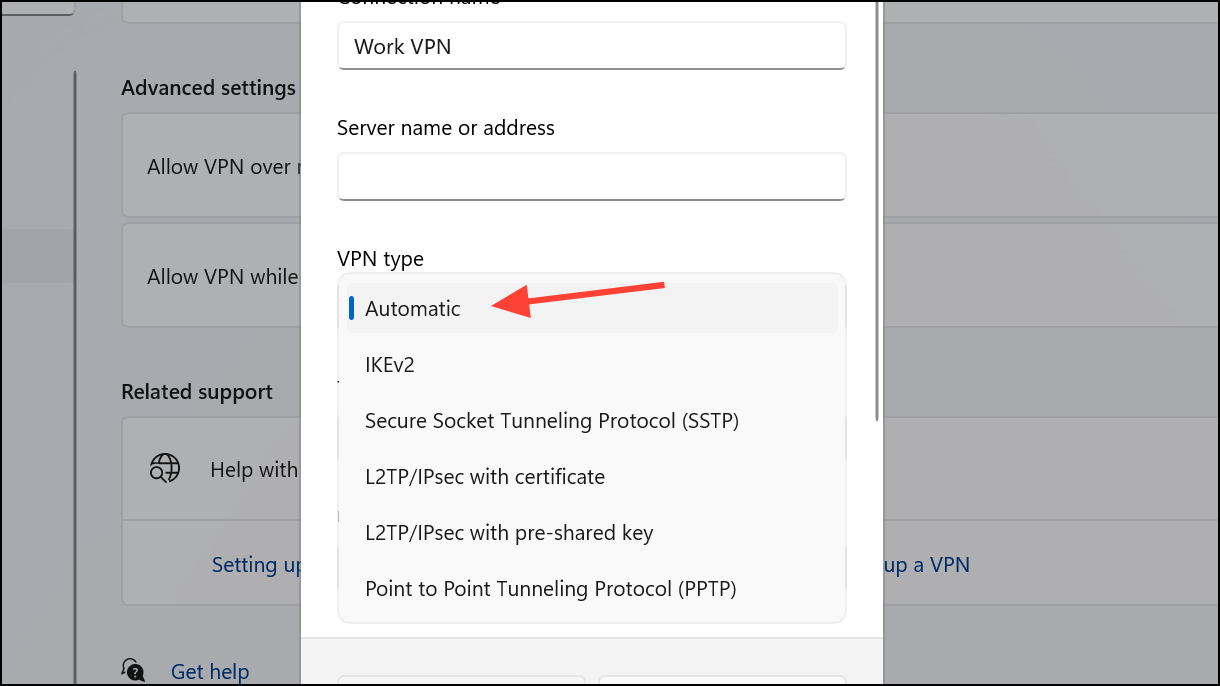
Step 4: Under the "VPN type" dropdown, select "Automatic" to let Windows choose the best protocol. If your VPN provider or administrator specifies a protocol, select the appropriate one (e.g., IKEv2, SSTP, L2TP/IPsec).
Step 5: Under "Type of sign-in info," select "Username and password." Enter your VPN username and password in the appropriate fields. Click "Save" to store your VPN profile.
Step 6: To connect, simply return to the VPN settings page, select your VPN connection, and click "Connect." Windows will establish the secure VPN connection, and you'll see a connected status indicator.
Method 2: Set Up VPN via Control Panel
If you prefer using the traditional Control Panel interface, follow these steps:
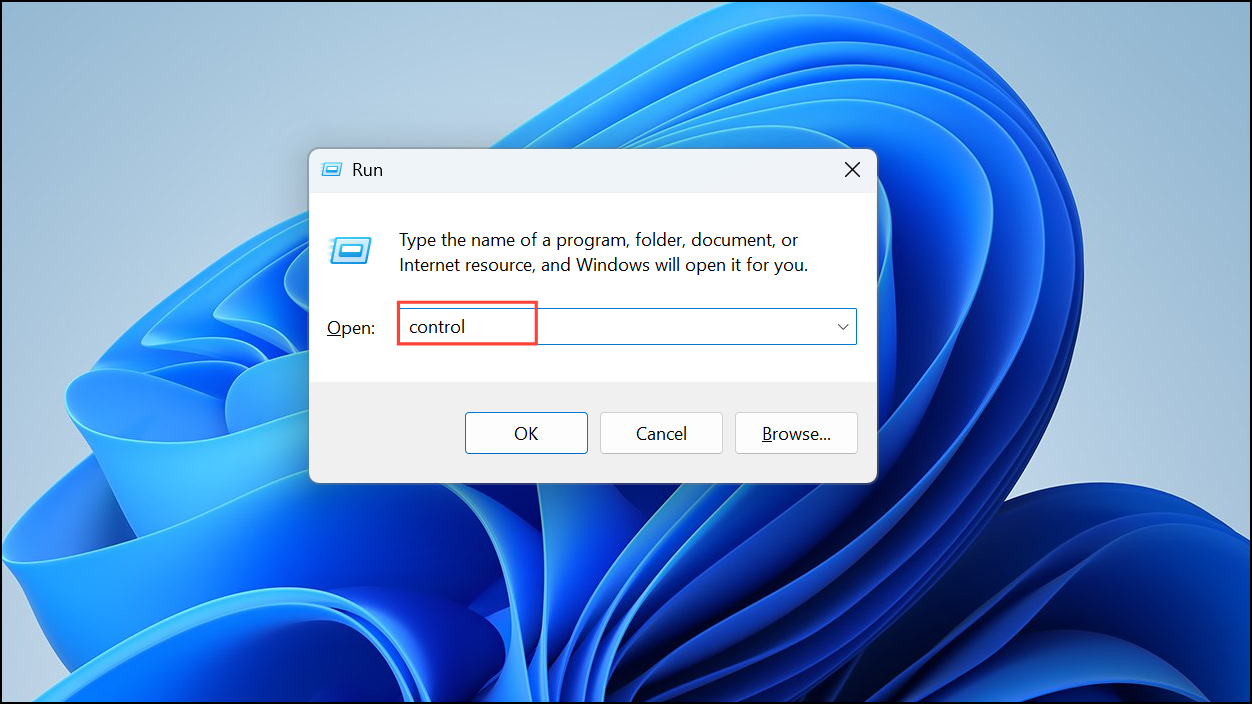
Step 1: Press Windows key + R, type control, and press Enter to open the Control Panel.
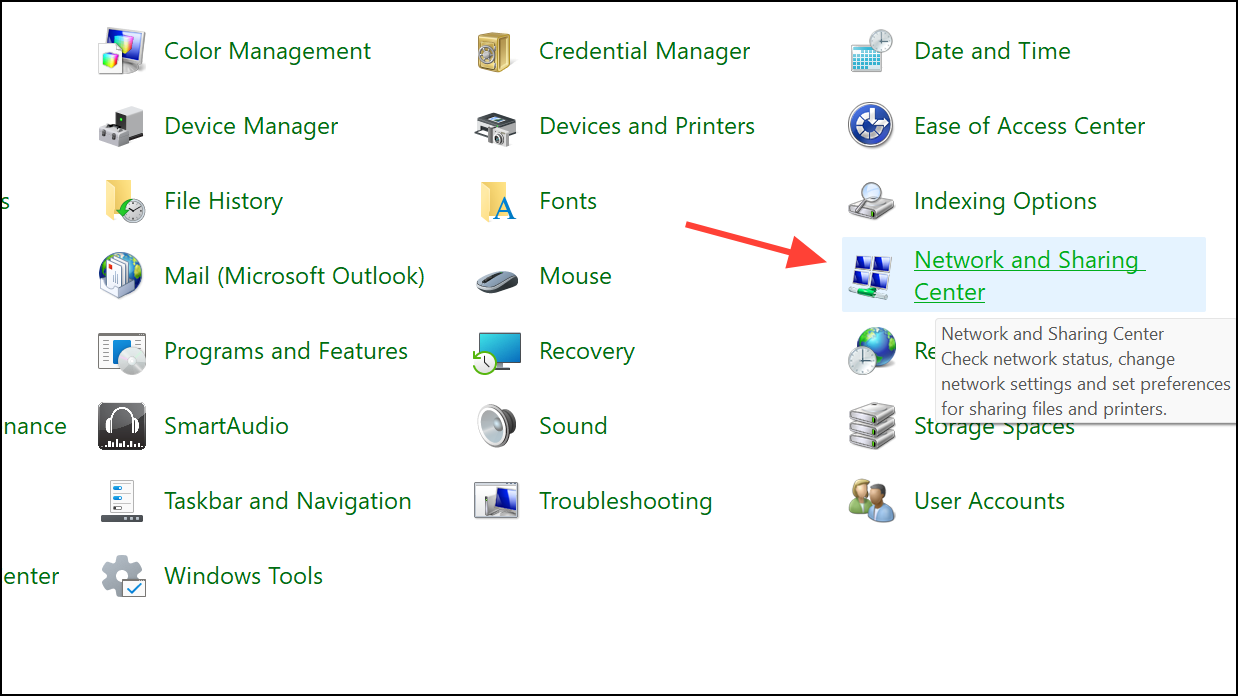
Step 2: Select "Network and Internet," then click on "Network and Sharing Center."
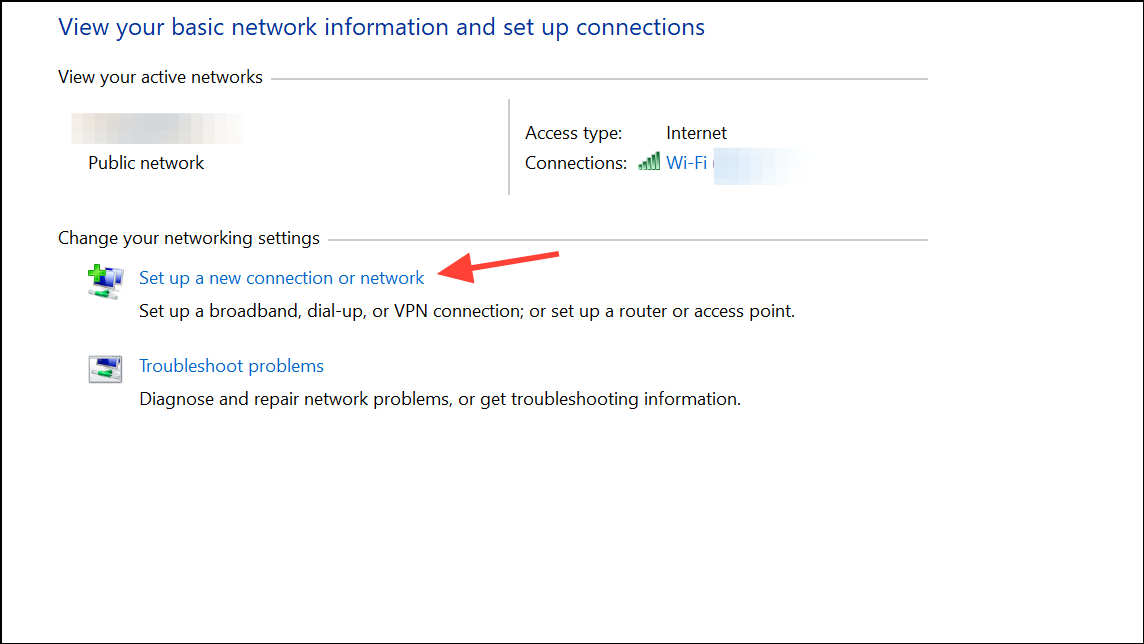
Step 3: Click on "Set up a new connection or network," then select "Connect to a workplace" and click "Next."
Step 4: Choose "Use my Internet connection (VPN)." Enter the VPN server address provided by your VPN service. You can also assign a name to this connection for easy identification. Click "Create."
Step 5: To connect, click the network icon in your system tray, select the VPN connection you just created, and click "Connect." Enter your VPN username and password if prompted.
Common Issues and Troubleshooting Tips
If you're experiencing issues with your VPN connection, try these common troubleshooting steps:
- Ensure your internet connection is stable.
- Double-check your VPN credentials (username and password).
- Try connecting to a different VPN server location if available.
- Restart your computer and router to clear temporary network issues.
- Update your VPN client software or check Windows updates.
- Temporarily disable your firewall or antivirus software to see if they're blocking the VPN.
Advanced VPN Settings to Consider
Windows 11 provides advanced options to optimize your VPN connection:
- Kill Switch: Some third-party VPN providers include a "kill switch" feature that disconnects your internet if the VPN drops, preventing data leaks. Consider enabling this feature if available.
- Split Tunneling: This allows you to route specific applications through the VPN while others access the internet normally. This can improve performance for certain apps.
- DNS Leak Protection: Ensure your VPN provider offers DNS leak protection to prevent your ISP from tracking your browsing activity.
Setting up a secure VPN connection in Windows 11 protects your online privacy and secures your data, especially when using public Wi-Fi or accessing sensitive information remotely. Always choose a reputable VPN provider and regularly update your VPN client and Windows software to maintain optimal security.