
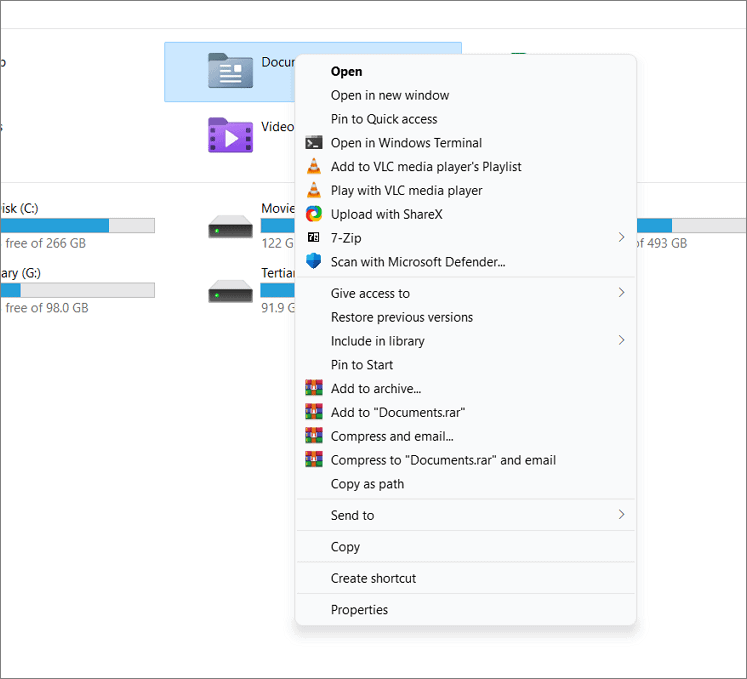
Windows 11 introduces a fresh user interface with a simplified right-click context menu in File Explorer. While this minimalist approach is designed for clarity and ease of use, some users prefer the detailed classic context menu from previous versions of Windows. If you’d like to restore the classic context menu in Windows 11, here are several methods to achieve that.
Enabling the Classic Context Menu via Command Prompt
One way to bring back the classic context menu is by modifying the Windows Registry through the Command Prompt. This method doesn’t require additional software and can be done with a few simple steps.
Cmd or Command Prompt in the search bar, and select Run as Administrator from the options.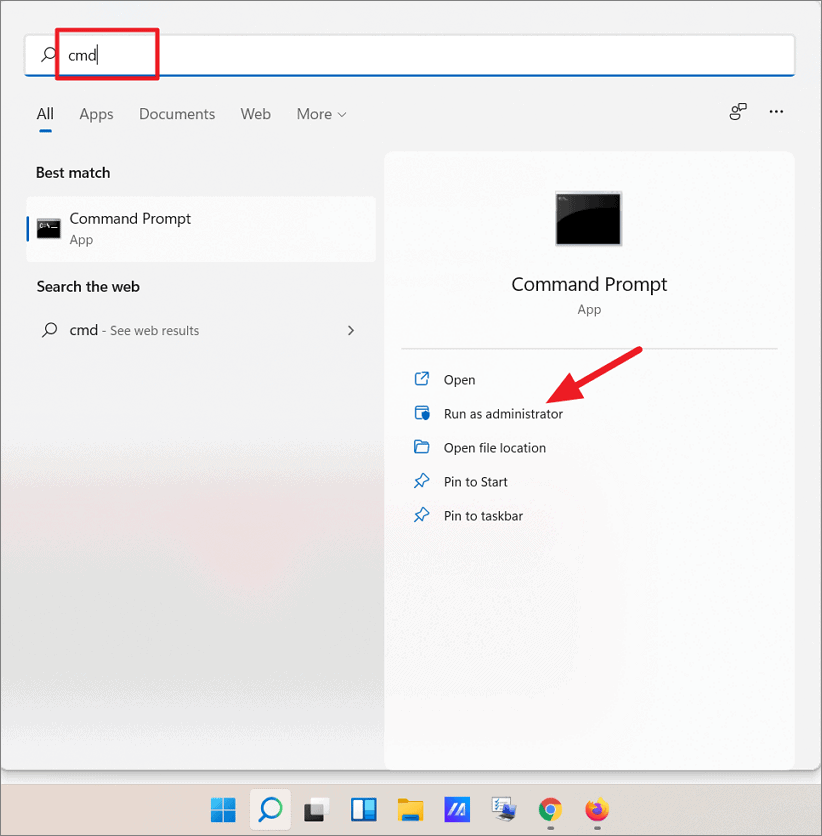
reg add HKCU\Software\Classes\CLSID\{86ca1aa0-34aa-4e8b-a509-50c905bae2a2}\InprocServer32 /ve /d "" /f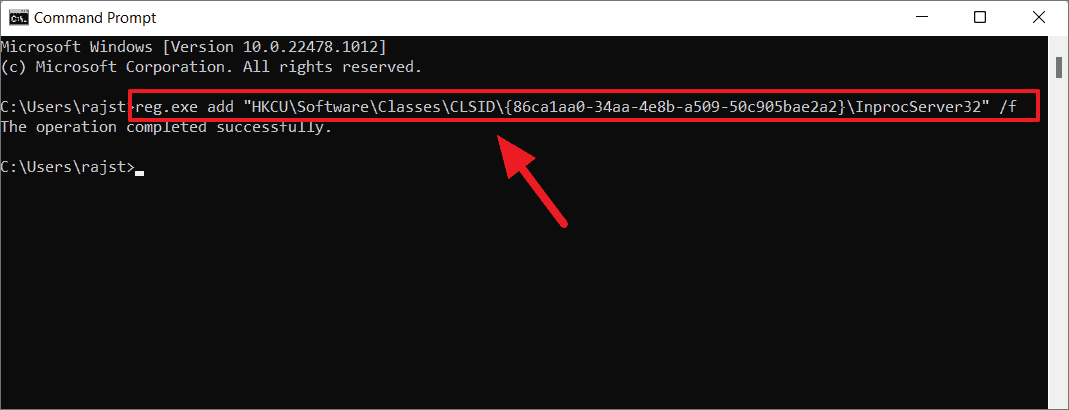
Reverting to the New Windows 11 Context Menu
If you decide to switch back to the default context menu of Windows 11, you can remove the registry changes you made earlier.
Cmd or Command Prompt, and select Run as Administrator.reg delete "HKCU\Software\Classes\CLSID\{86ca1aa0-34aa-4e8b-a509-50c905bae2a2}" /f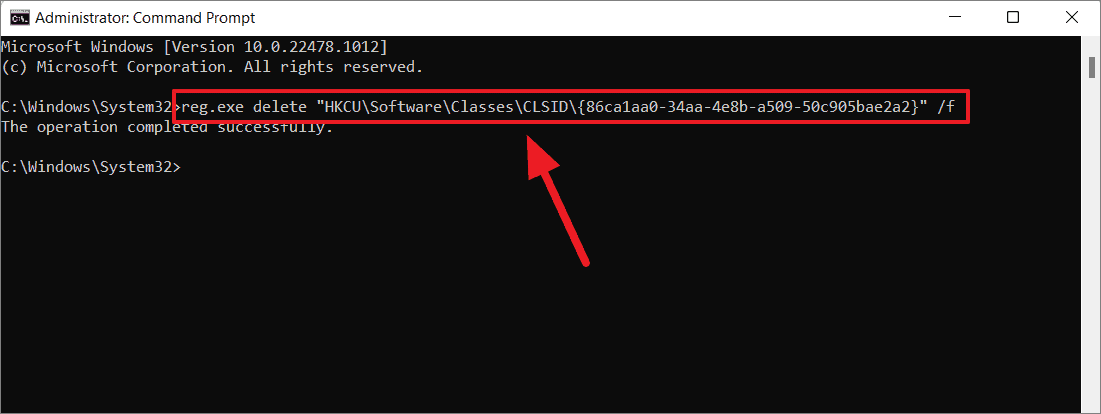
Using a Third-Party Application
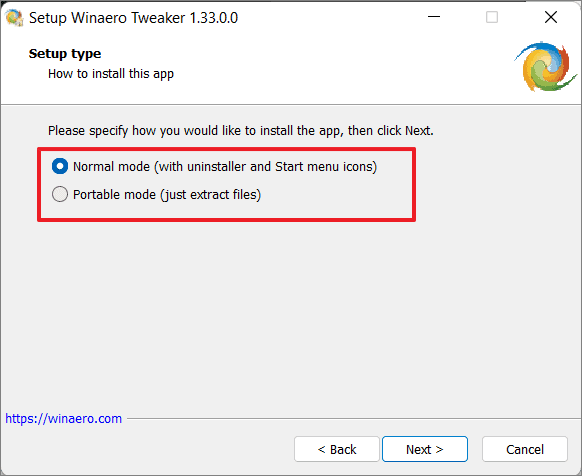
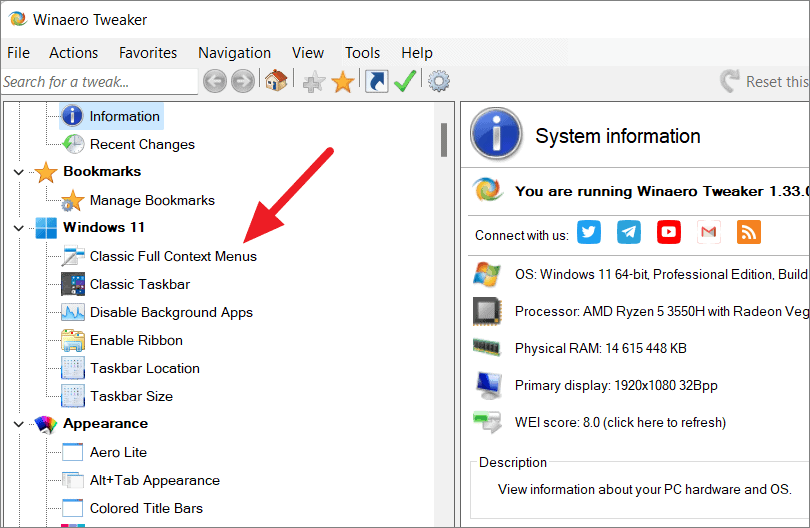
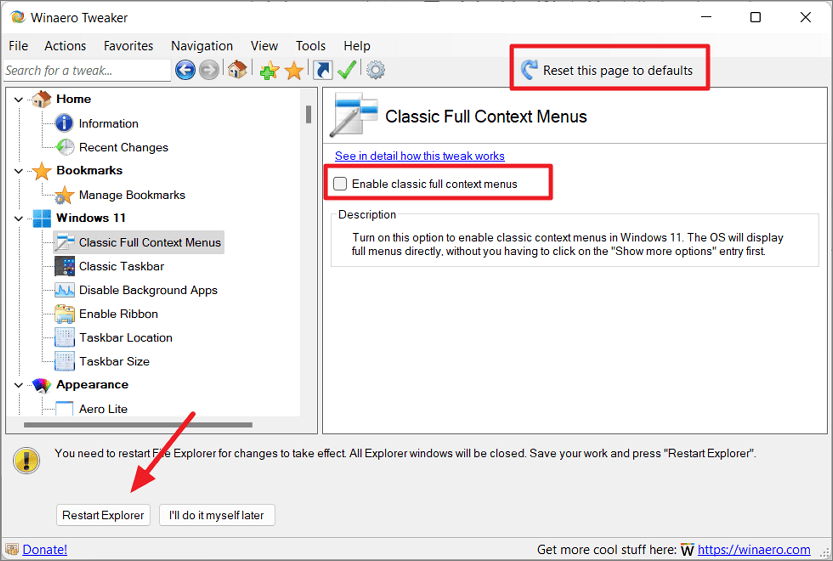
Another method to regain the classic context menu is by using a third-party tool called Winaero Tweaker. This free utility allows you to customize various hidden settings in Windows.

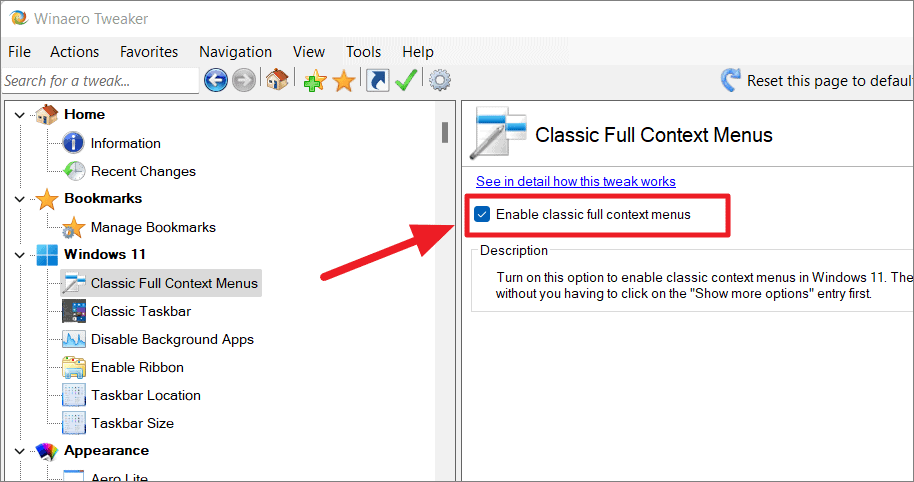
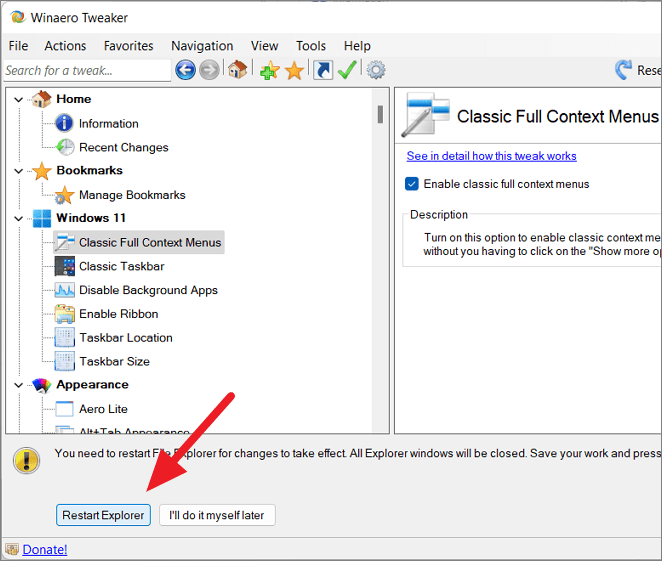
Reverting to the Default Context Menu: If you wish to return to the default Windows 11 context menu, simply uncheck the Enable classic full context menus option in Winaero Tweaker or click the Reset this page to defaults button at the top. Then, click Restart Explorer to apply the changes.
Adjusting the right-click context menu in Windows 11 allows you to customize your user experience to your liking. Whether you prefer the classic style or the new simplified version, these methods make it easy to switch between them.


