
Automatic Wi-Fi connections in Windows 11 can cause your PC to join networks you don’t intend to use, which may lead to privacy concerns, security risks, or simply network confusion. Windows 11 typically remembers networks you’ve connected to and, by default, tries to reconnect to them when they’re in range. Disabling this behavior for specific networks or all saved networks gives you greater control and reduces the risk of connecting to insecure or unwanted Wi-Fi hotspots.
Disable Auto-Connect for a Specific Wi-Fi Network
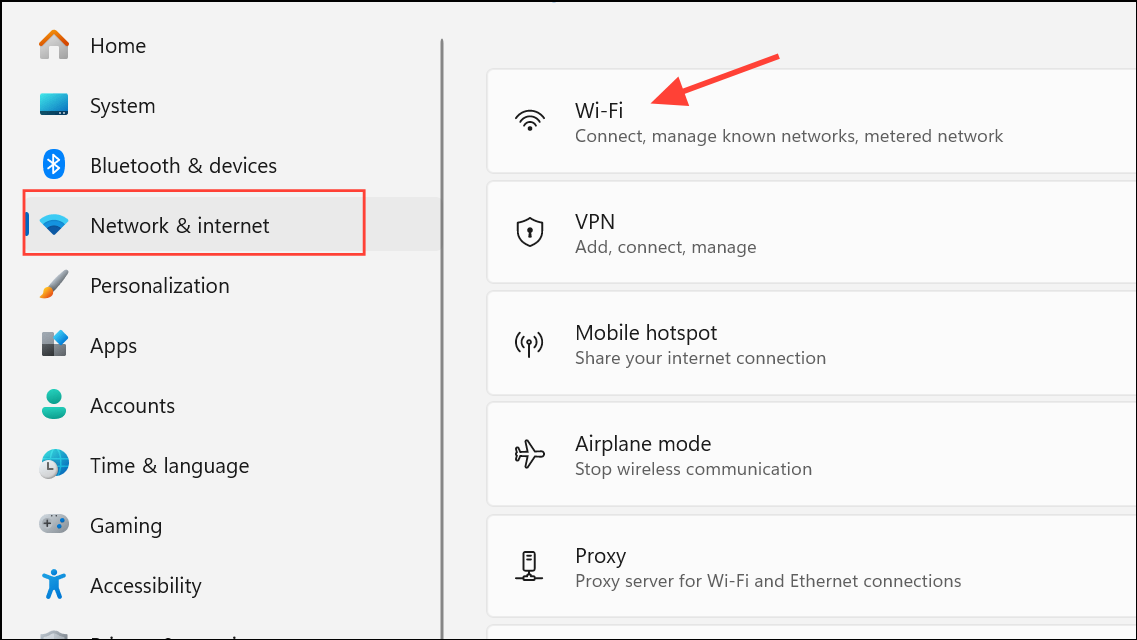
Step 1: Open the Windows 11 Settings app by pressing Windows + I on your keyboard. This shortcut quickly brings up the main settings window.
Step 2: In the left sidebar, select Network & Internet, then click on Wi-Fi to view available and known networks.
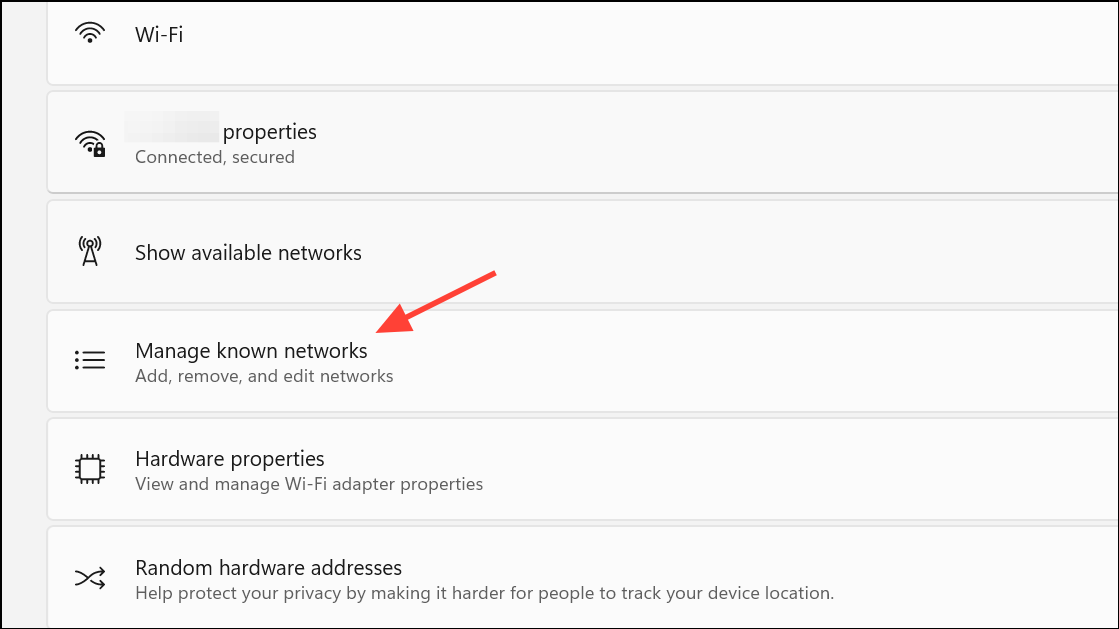
Step 3: Click on Manage known networks. This section lists all Wi-Fi networks your PC has previously connected to.
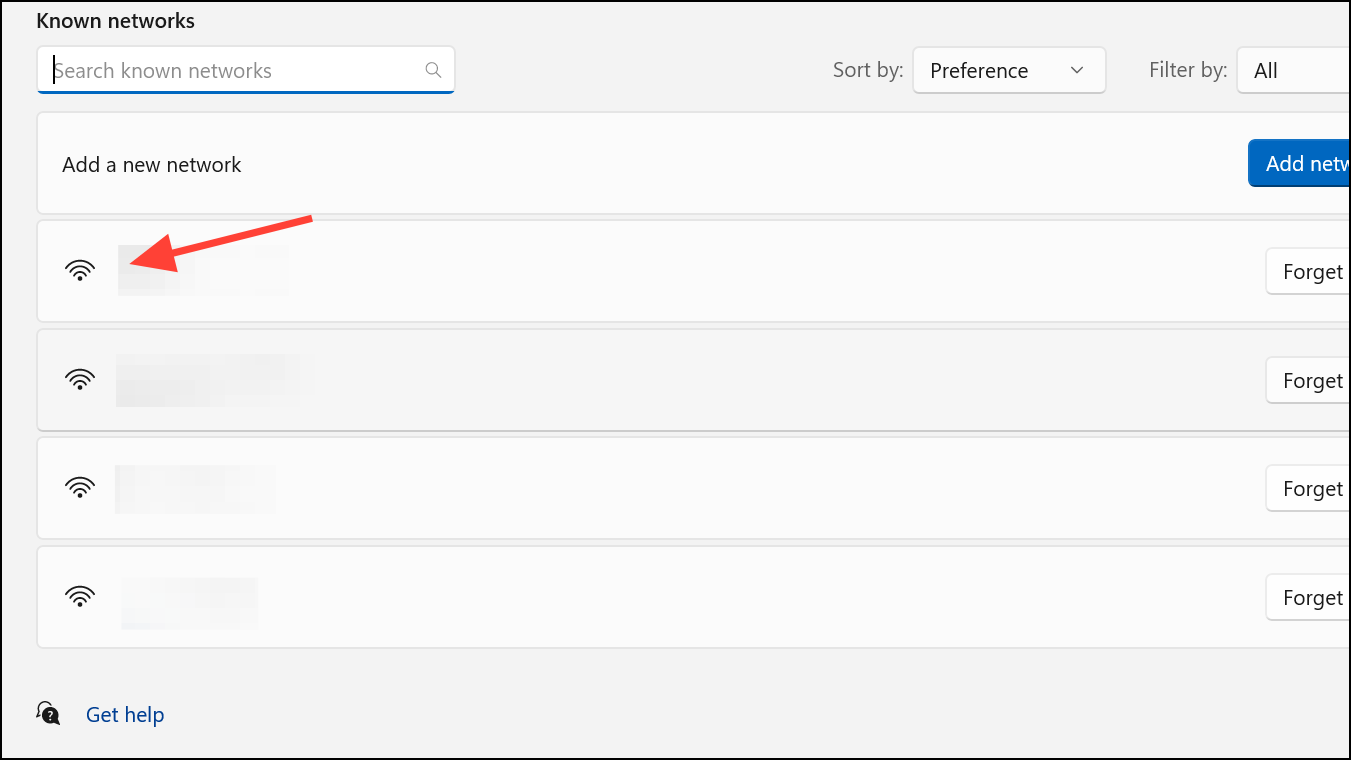
Step 4: Locate the network you want to prevent from auto-connecting. Click on it to open its settings.
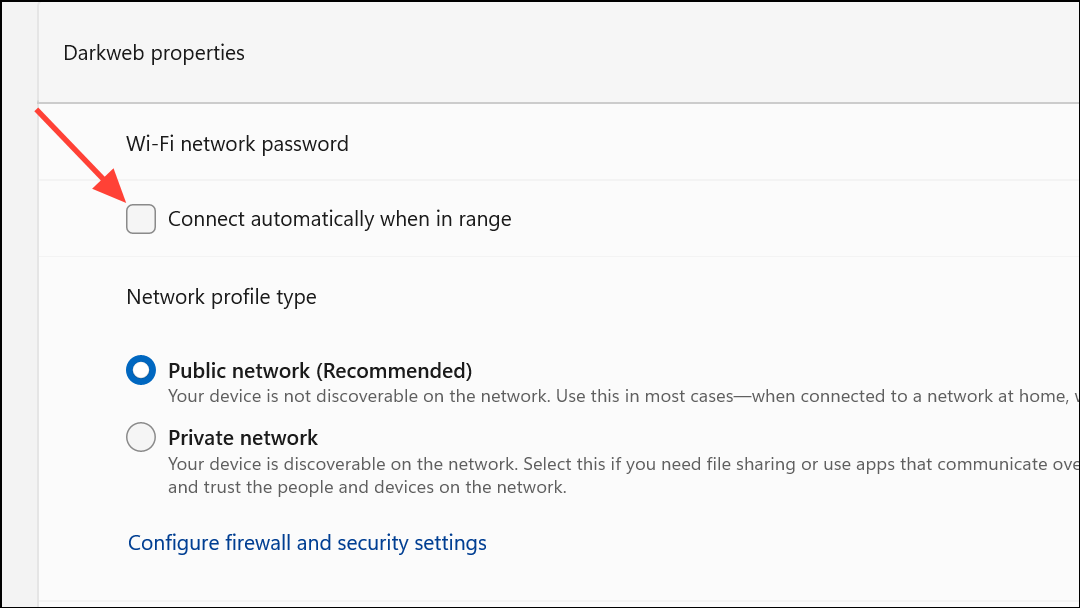
Step 5: Find the option labeled Connect automatically when in range and toggle it off. This setting ensures Windows 11 won’t automatically join this network in the future, though you can still connect manually if needed.
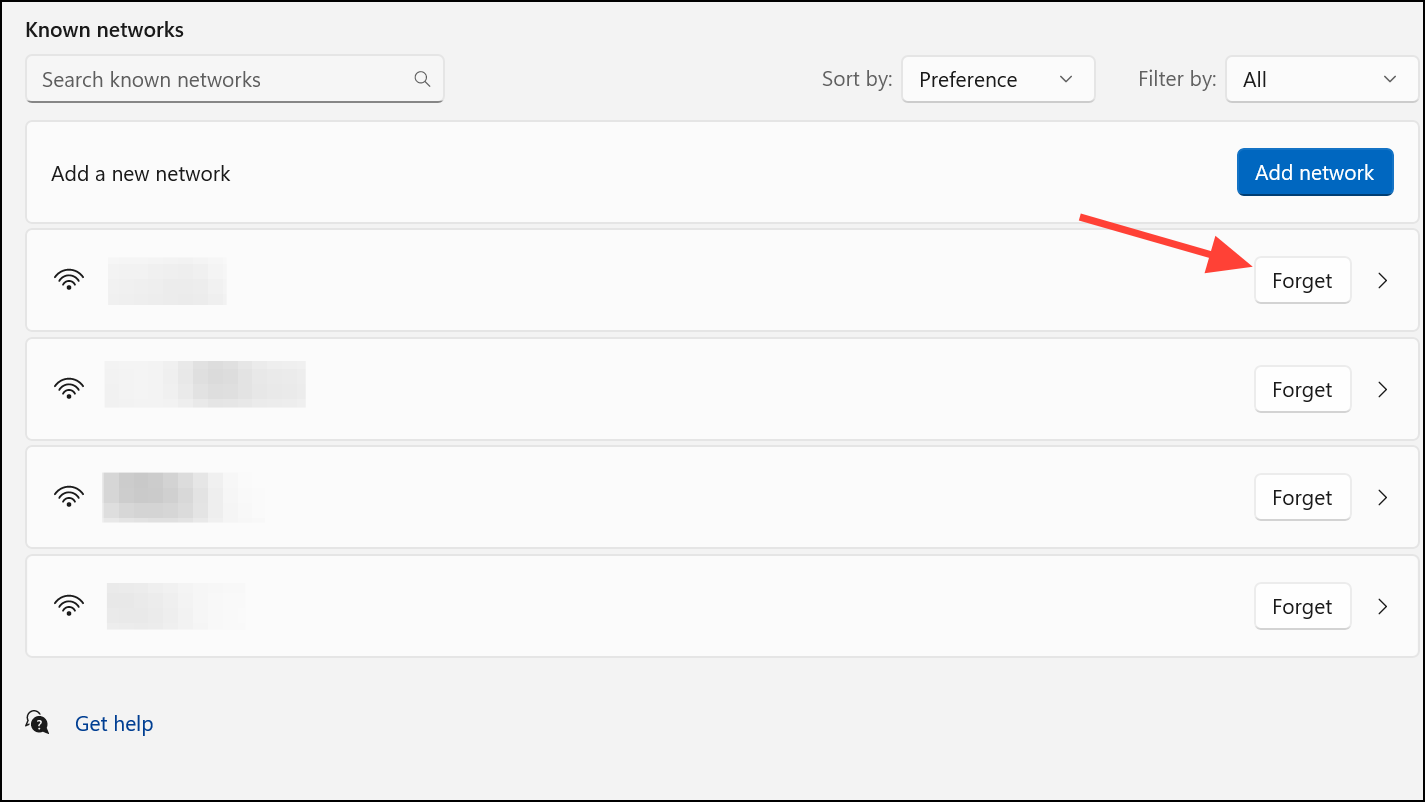
Forget a Wi-Fi Network Entirely
Forgetting a network removes all saved credentials and prevents Windows from reconnecting to it unless you manually join and re-enter the password.
Step 1: Open Settings using Windows + I, then navigate to Network & Internet > Wi-Fi > Manage known networks.
Step 2: Find the Wi-Fi network you want to remove and click Forget. This deletes the saved network profile and its password from your PC.
After forgetting a network, Windows 11 won’t attempt to reconnect unless you manually select it and provide the password again.
Turn Off Auto-Connect to Open Wi-Fi Hotspots
Windows 11 does not automatically connect to unknown open (unsecured) Wi-Fi networks by default. However, if you want to ensure your PC never tries to join public hotspots or suggested networks, you can check the following setting:
Step 1: Go to Settings > Network & Internet > Wi-Fi.
Step 2: Look for an option like Connect to suggested open hotspots or Connect to open networks, and make sure it is turned off. This prevents Windows from automatically joining open networks that could pose security risks.
If you don’t see this setting, it may not be available on all devices or builds, as Microsoft has reduced the automatic connection to public hotspots in recent versions.
Additional Tips and Considerations
- Windows 11 only auto-connects to networks you’ve previously joined and entered a password for. It will not automatically join unknown secured networks without your approval.
- If you use third-party wireless management software (such as Intel PROSet), check its settings for additional auto-connect options, as these can override Windows’ built-in preferences.
- For public or shared computers, regularly review and remove unnecessary saved networks to keep your device secure.
- Restart your PC after making changes to ensure the new settings take effect.
Adjusting your auto-connect settings in Windows 11 gives you more control over which networks your PC joins, helping you avoid accidental connections and improving your overall network security.