
Slow or unreliable internet connections can cause file syncing delays and even disrupt your workflow on Windows 11, especially when OneDrive attempts to upload or download large amounts of data. Pausing or stopping OneDrive syncing can prevent unnecessary bandwidth usage, reduce interruptions, and give you more control over when files are synchronized between your device and the cloud.
Pausing and Resuming OneDrive Syncing
Temporarily pausing OneDrive syncing is the most straightforward way to stop file transfers without unlinking or uninstalling the app. This approach is ideal if you only need to halt syncing for a short period—for example, when you're on a metered or slow connection, or when troubleshooting persistent "Processing changes" messages.
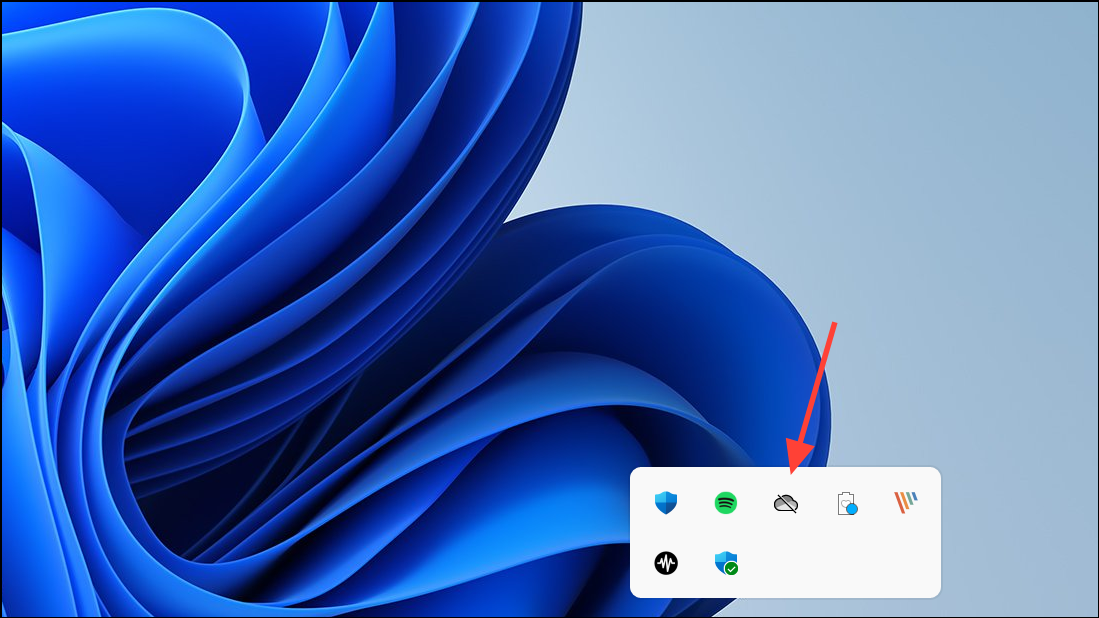
Step 1: Locate the OneDrive icon in your Windows 11 taskbar notification area (typically at the bottom right corner of your screen). The icon appears as a white or blue cloud.
Step 2: Right-click the OneDrive icon to open the context menu. If you do not see the icon, click the up arrow to reveal hidden icons, or check if OneDrive is running.
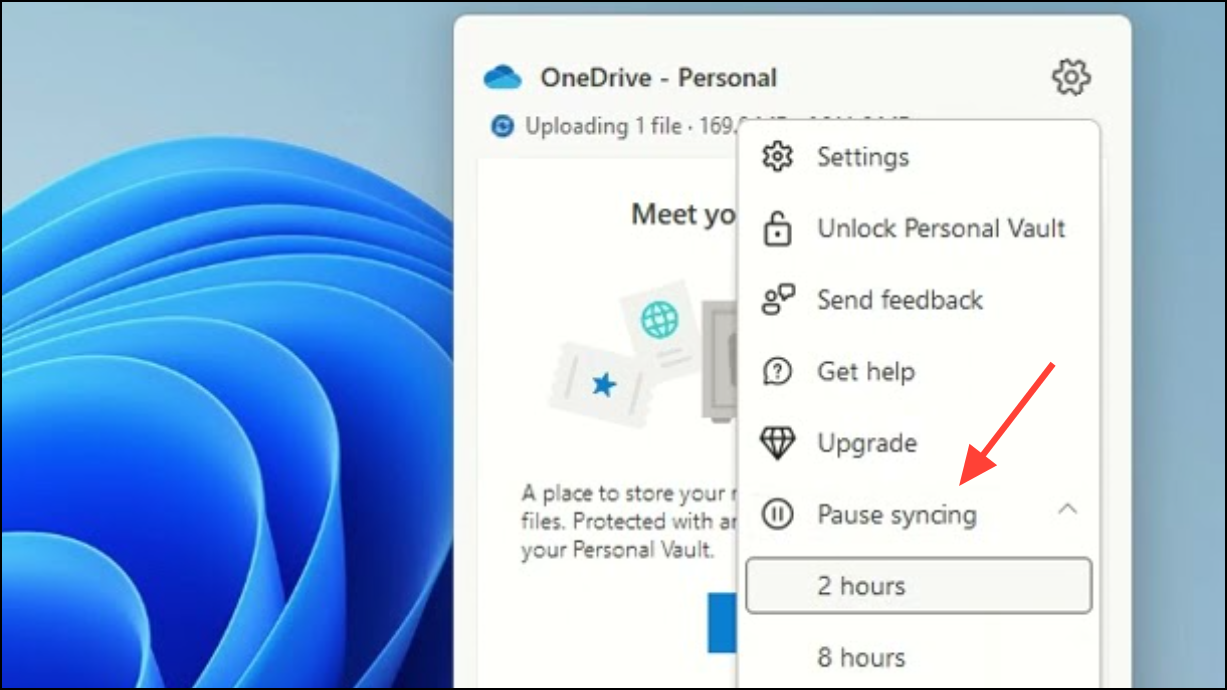
Step 3: From the menu, select Pause syncing. Choose the duration for which you want to pause syncing: 2 hours, 8 hours, or 24 hours. The OneDrive icon will display a "Paused" status to indicate syncing is halted.
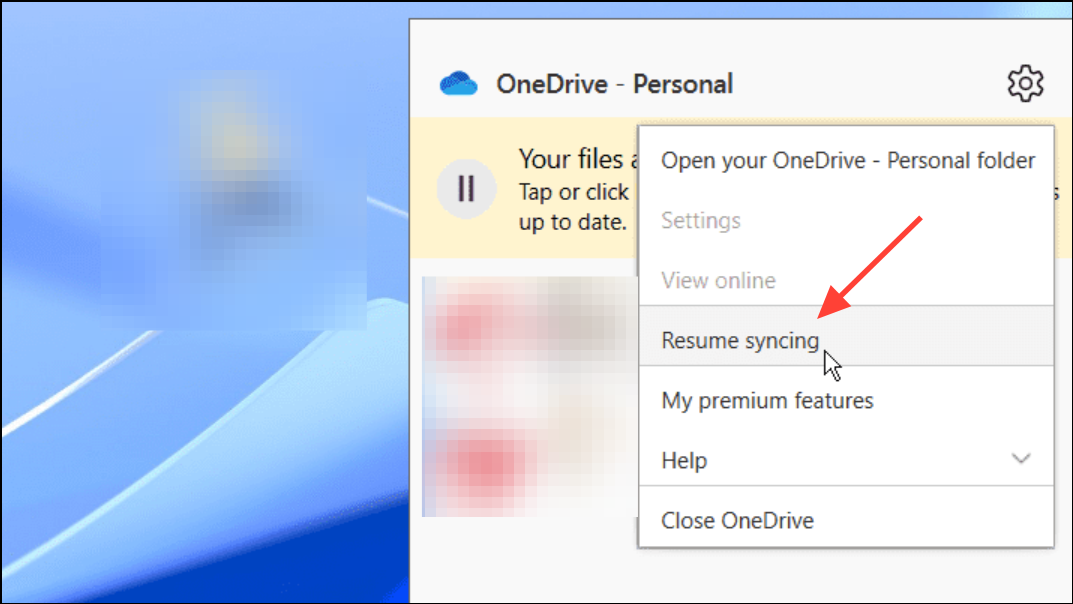
Step 4: When you're ready to resume syncing, click the paused OneDrive icon again. In the pop-up window, look for the yellow warning box or the "Resume syncing" button, and select it. Syncing will restart, and file transfers will continue as normal.
OneDrive automatically resumes syncing after the chosen pause duration ends. You can also manually resume at any time.
Stopping OneDrive Syncing Completely (Unlink or Quit)
If you want to stop OneDrive from syncing altogether—either temporarily or permanently—there are a few options. Unlinking your PC from OneDrive will disconnect your device from the service, while quitting OneDrive will close the application until you reopen it.
Unlinking OneDrive from Your PC
Step 1: Click the OneDrive icon in your notification area to open the OneDrive pop-up window.
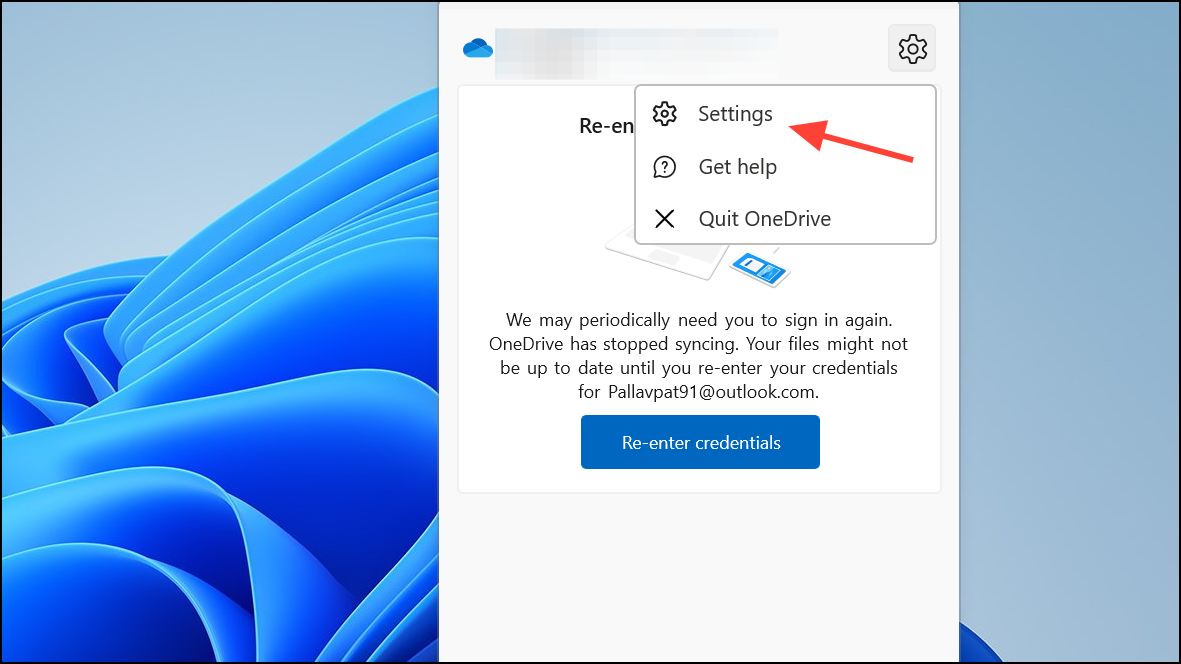
Step 2: Select the Help & Settings icon (usually a gear or three dots), then choose Settings.
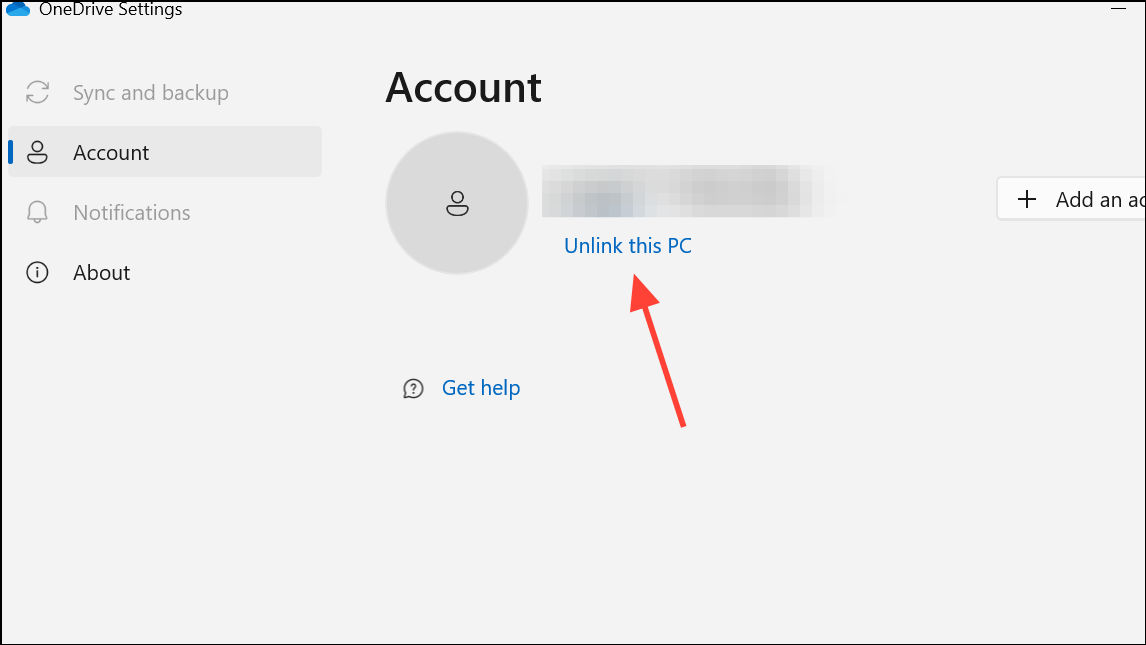
Step 3: In the Settings window, go to the Account tab.
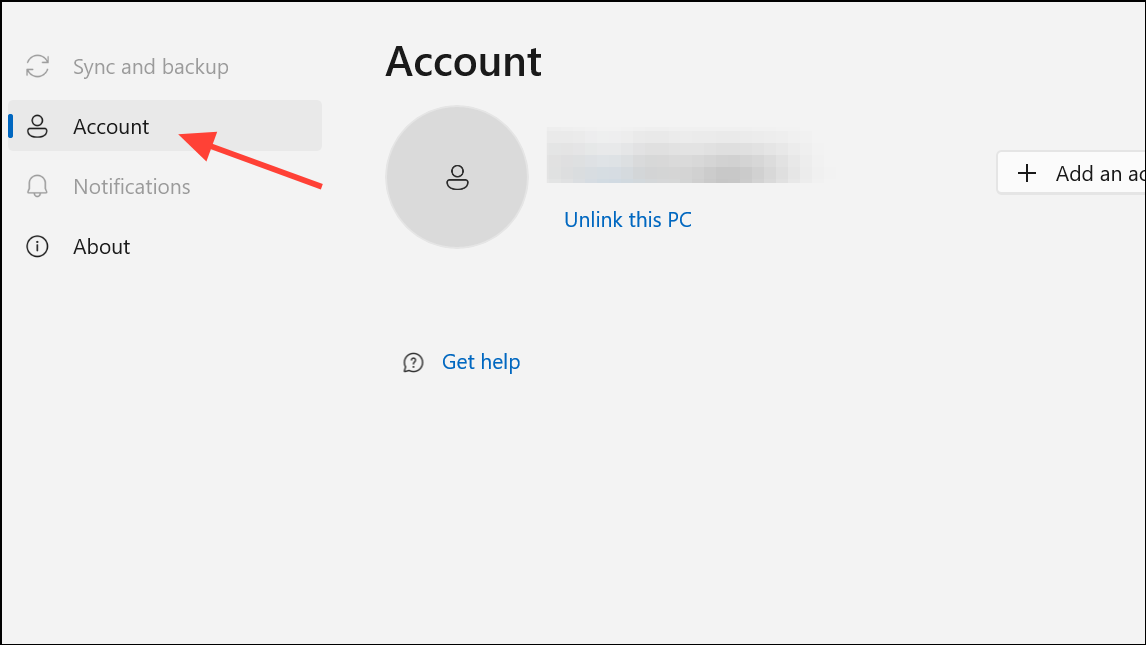
Step 4: Click Unlink this PC and confirm your choice. This will disconnect your device from OneDrive, stopping all syncing. Your files remain on your computer, and you can always reconnect by signing in again.
Quitting OneDrive (Shutting Down the App)
Quitting OneDrive fully closes the app and halts all syncing until you manually relaunch it. This can be useful if you want to stop syncing with a single action, without altering your account settings.
Step 1: Right-click the OneDrive icon in the taskbar notification area.
Step 2: Select Help & Settings, then choose Quit OneDrive. Confirm if prompted. OneDrive will close and stop all syncing operations.

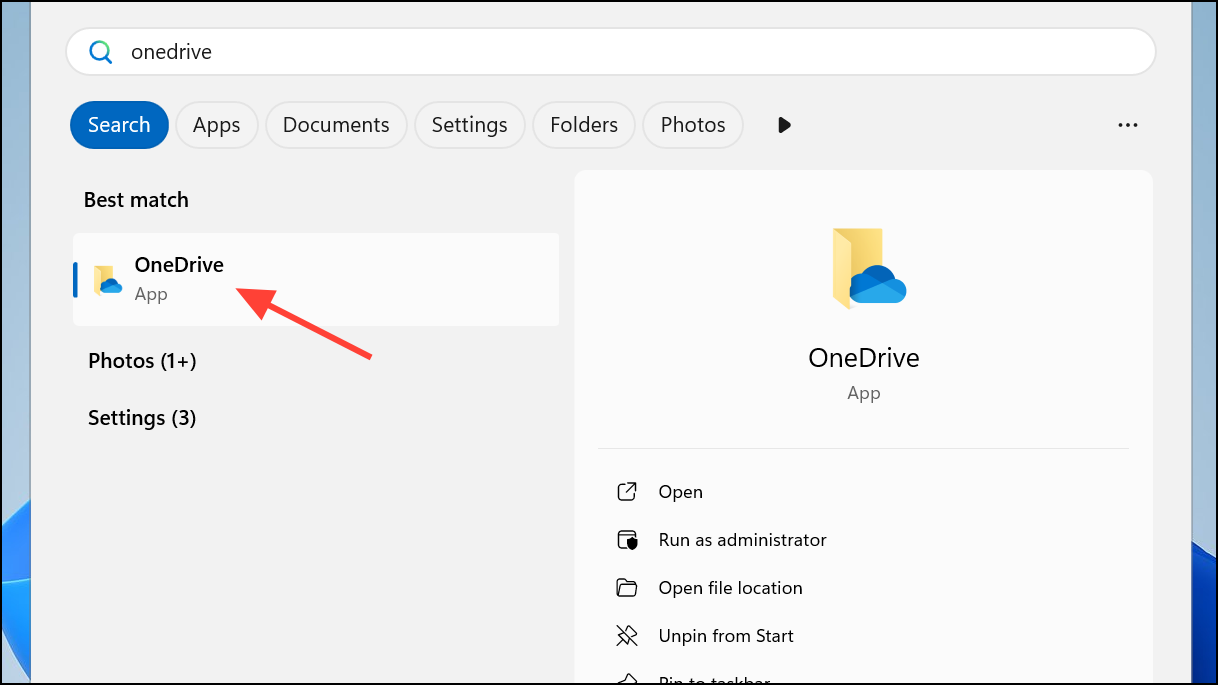
To restart syncing, open the Start menu, type OneDrive, and launch the app again. Syncing resumes automatically.
Pausing or Stopping Syncing with Command Shortcuts
For users who prefer keyboard shortcuts or automation, OneDrive can be paused or restarted using command-line shortcuts. This is especially handy if you want to create desktop shortcuts for one-click control.
Step 1: To stop OneDrive syncing, create a new shortcut on your desktop with the following command as the location:
"%localappdata%\Microsoft\OneDrive\OneDrive.exe" /shutdown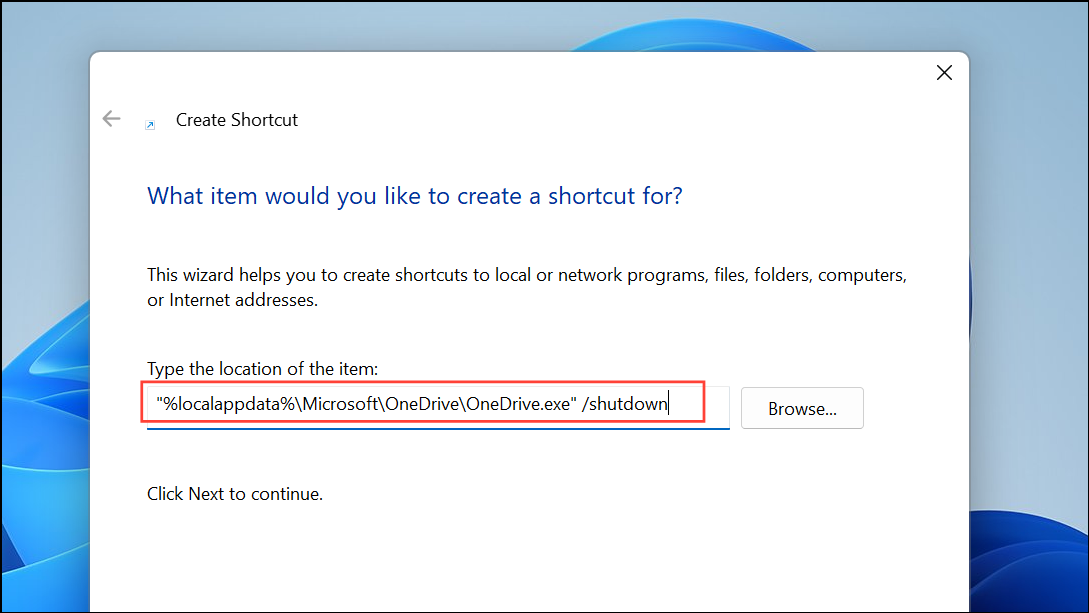
This command closes OneDrive, effectively stopping all sync activity.
Step 2: To resume syncing, create another shortcut with this command:
"%localappdata%\Microsoft\OneDrive\OneDrive.exe" /background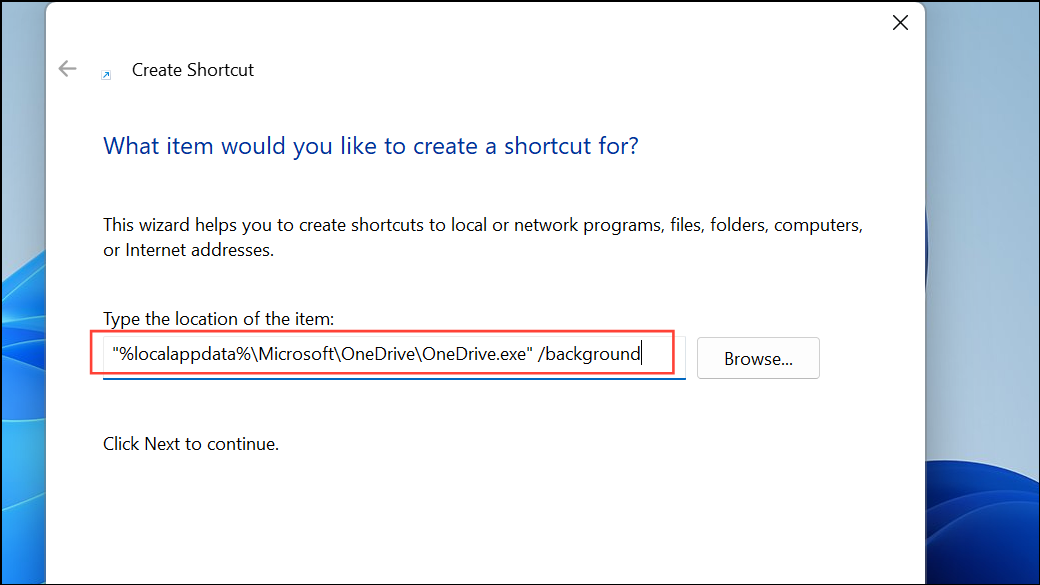
Double-clicking this shortcut restarts OneDrive and resumes syncing.
Selectively Syncing Folders in OneDrive
To limit which folders are synchronized between your PC and OneDrive (useful for saving disk space or bandwidth), you can choose specific folders to sync. However, this option is only available after the initial sync has completed. Attempting to select folders before the first sync may result in an error message requiring you to wait until synchronization is finished.
Step 1: Once OneDrive is running and initial sync is complete, click the OneDrive icon in the notification area.
Step 2: Open Help & Settings and select Settings.
Step 3: Go to the Account tab and click Choose folders.
Step 4: In the pop-up window, uncheck any folders you do not want to sync. Click OK to save your changes. Only the selected folders will remain on your device; others will be removed locally but stay in the cloud.
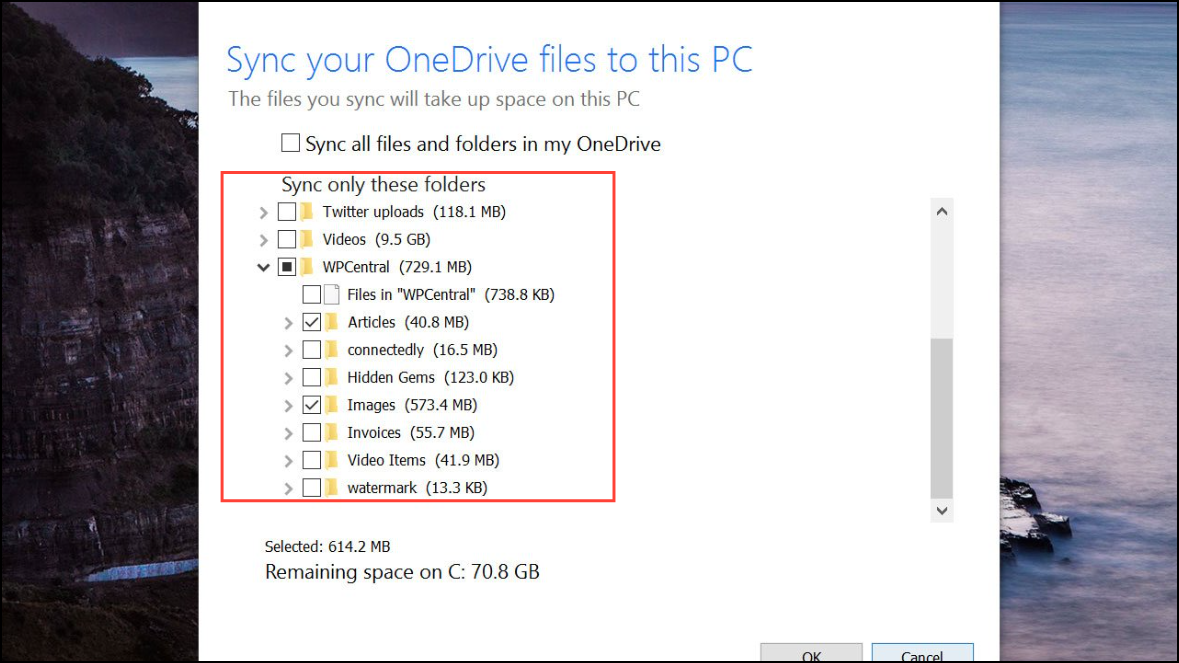
If you need to change your selection later, repeat these steps. Keep in mind that you cannot use this feature until OneDrive has completed its initial sync.
Alternative: Stopping Sync via Task Manager
As a last resort, you can force OneDrive to stop by ending its process in Task Manager. This is not the recommended method for regular use, but it can be effective if OneDrive is unresponsive or you need to stop syncing immediately.
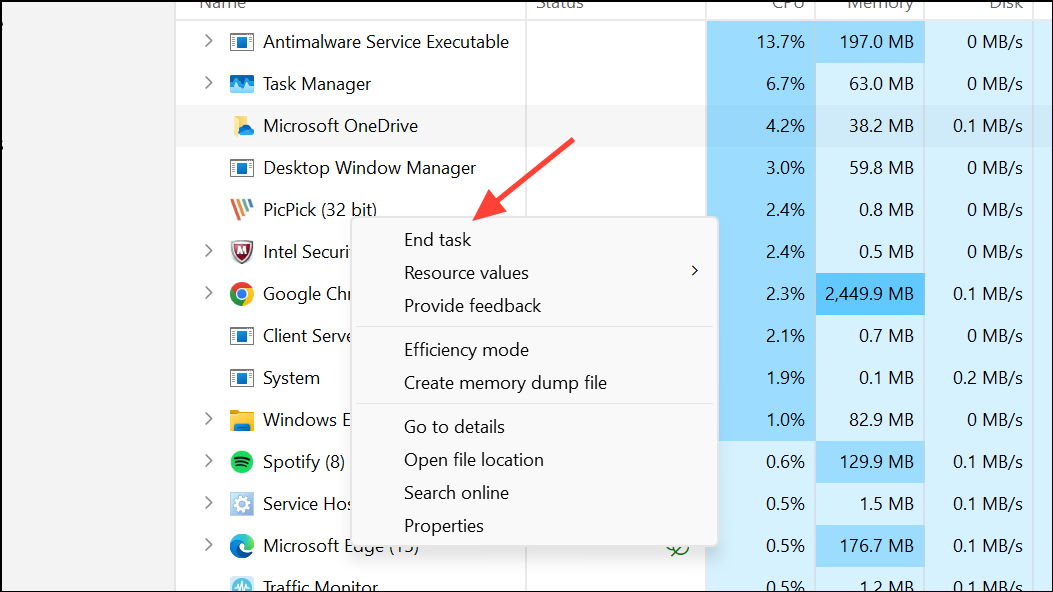
Step 1: Press Ctrl + Shift + Esc to open Task Manager.
Step 2: Locate OneDrive.exe under the Processes tab.
Step 3: Right-click OneDrive.exe and select End task. OneDrive will close and syncing will stop until you reopen it.
Pausing, resuming, or stopping OneDrive syncing on Windows 11 gives you more control over your files and network usage. Choose the approach that best fits your needs, and remember you can always restart syncing or adjust settings as your situation changes.