
Windows 11’s search indexing system catalogs files and their properties for faster search results. By default, Windows may include shared folders in the search index, which can lead to privacy concerns, unnecessary resource usage, or slowdowns, especially in networked environments. Disabling the automatic addition of shared folders to the search index ensures that only your intended locations are indexed, keeping searches focused and system resources optimized.
Prevent Automatic Indexing of Shared Folders Using Group Policy Editor
Step 1: Press Win+R to open the Run dialog, then type gpedit.msc and press Enter. This launches the Local Group Policy Editor.

Step 2: In the left pane, navigate to Computer Configuration > Administrative Templates > Windows Components > Search.
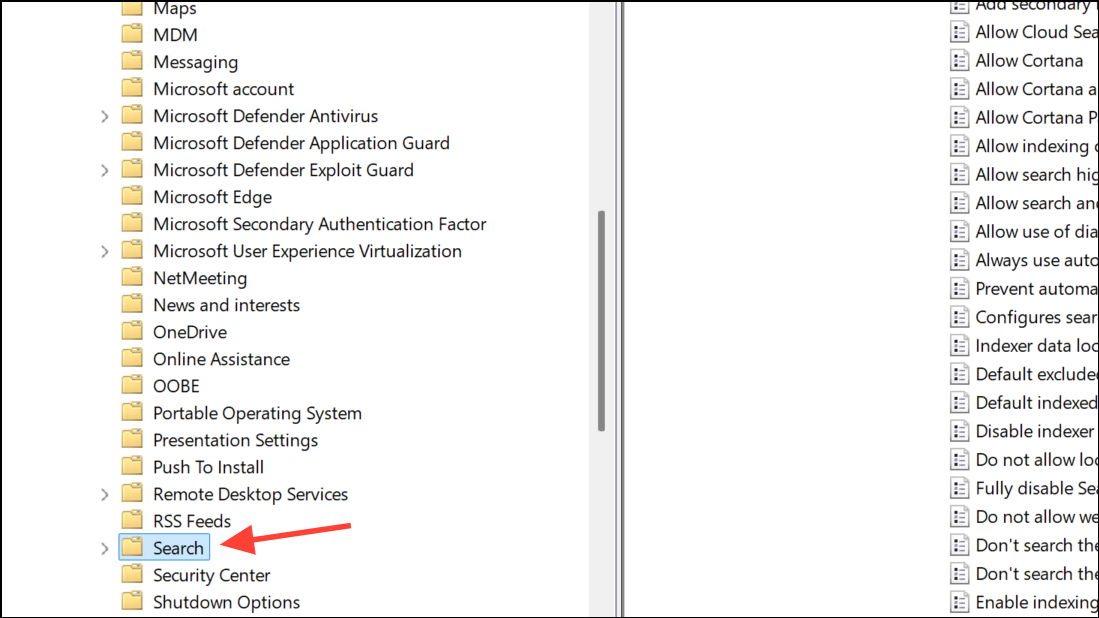
Step 3: In the right pane, locate the policy named Prevent automatically adding shared folders to the Windows Search index and double-click it.

Step 4: Select the Enabled option. This setting stops Windows from automatically indexing shared folders.
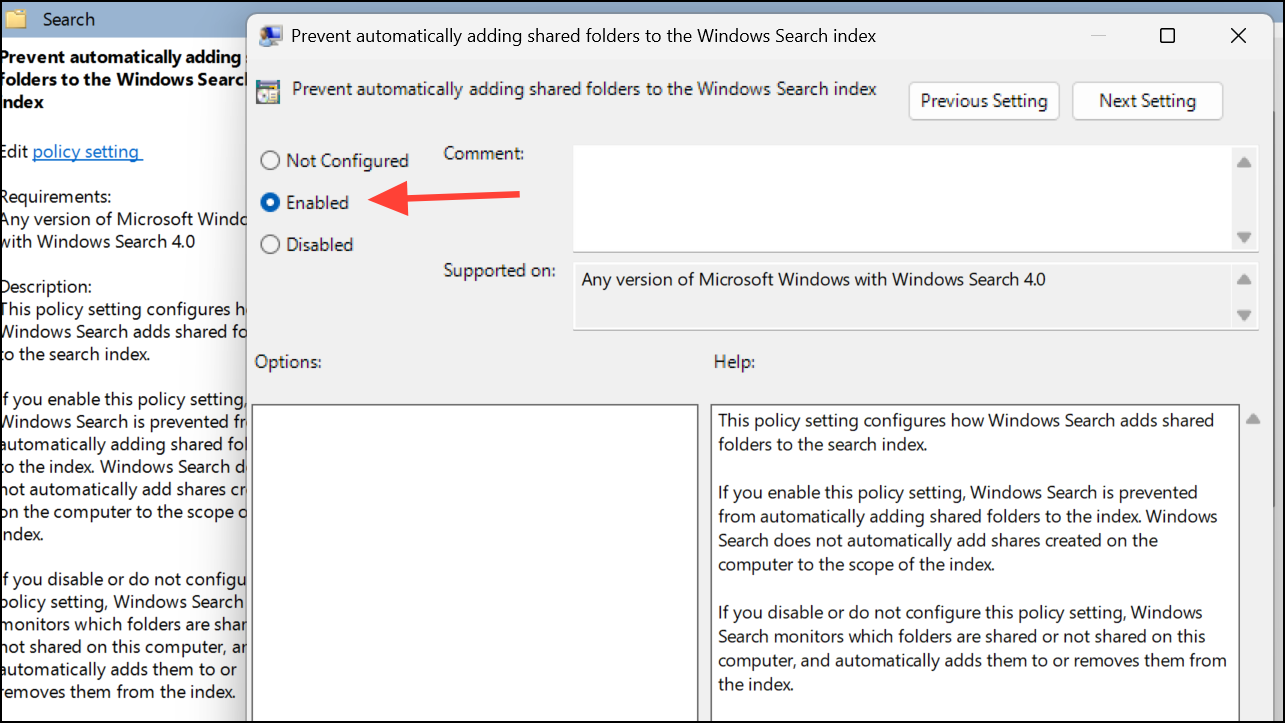
Step 5: Click OK to apply the changes. The policy takes effect immediately, preventing shared folders from being added to the search index on this PC.
Prevent Automatic Indexing of Shared Folders Using Registry Editor
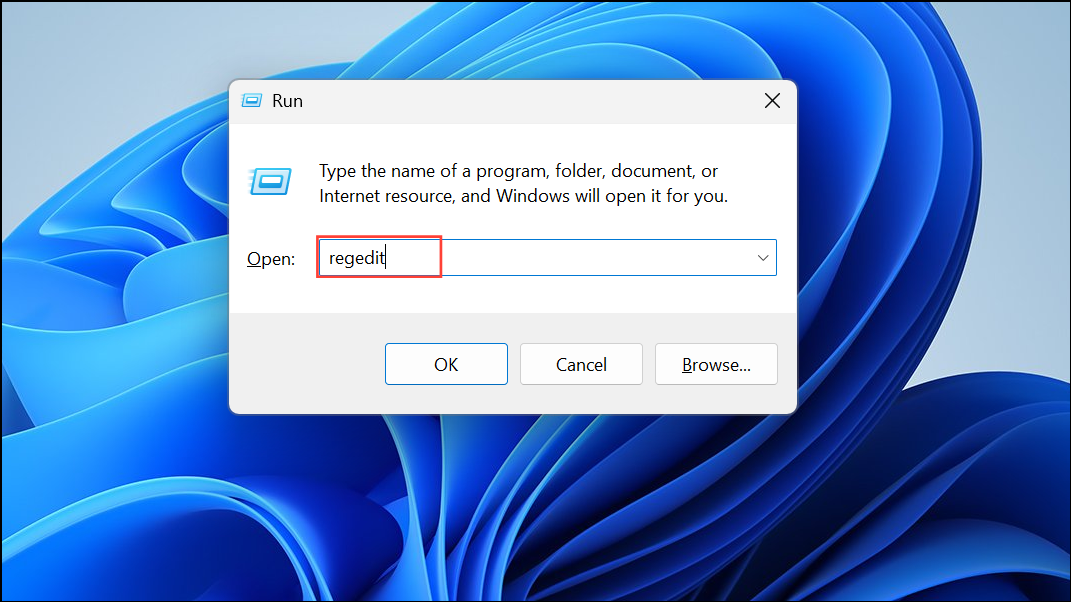
Step 1: Press Win+R, type regedit, and press Enter. Approve the User Account Control prompt if it appears.
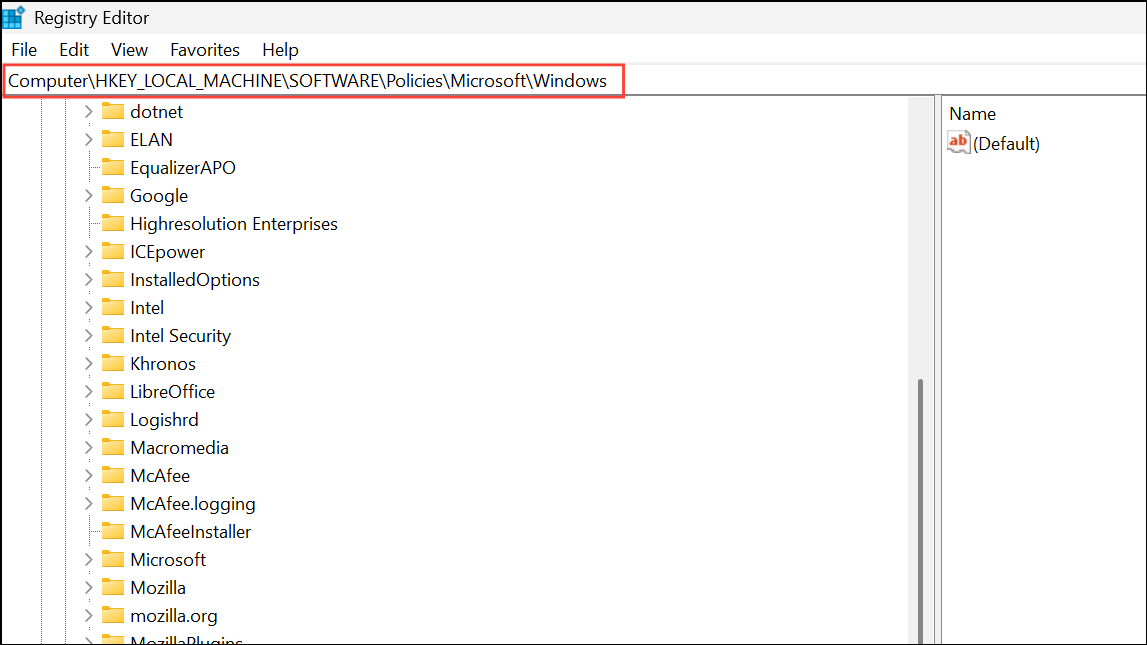
Step 2: In Registry Editor, navigate to HKEY_LOCAL_MACHINE\SOFTWARE\Policies\Microsoft\Windows.
Step 3: Right-click on the Windows key, select New > Key, and name the new key Windows Search.
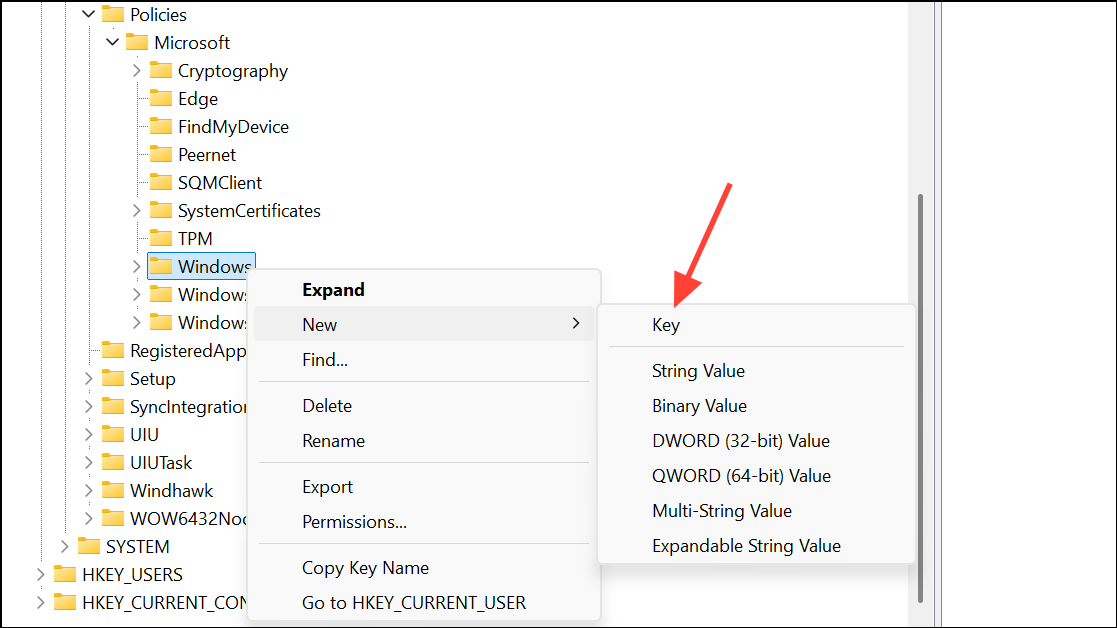
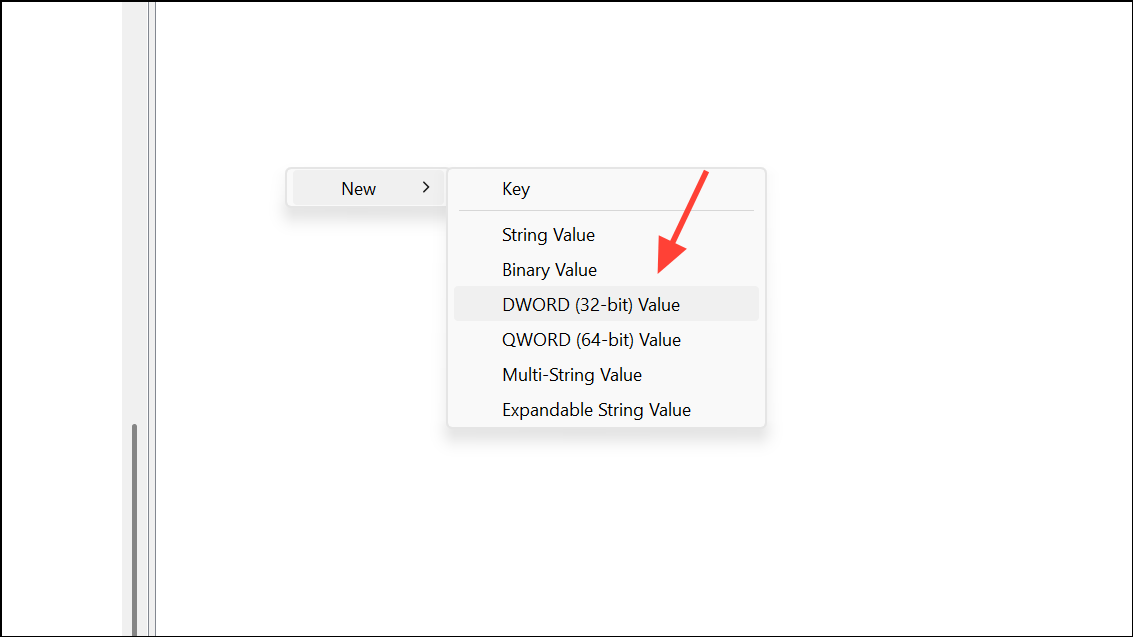
Step 4: Right-click on the newly created Windows Search key, choose New > DWORD (32-bit) Value, and name it AutoIndexSharedFolders.
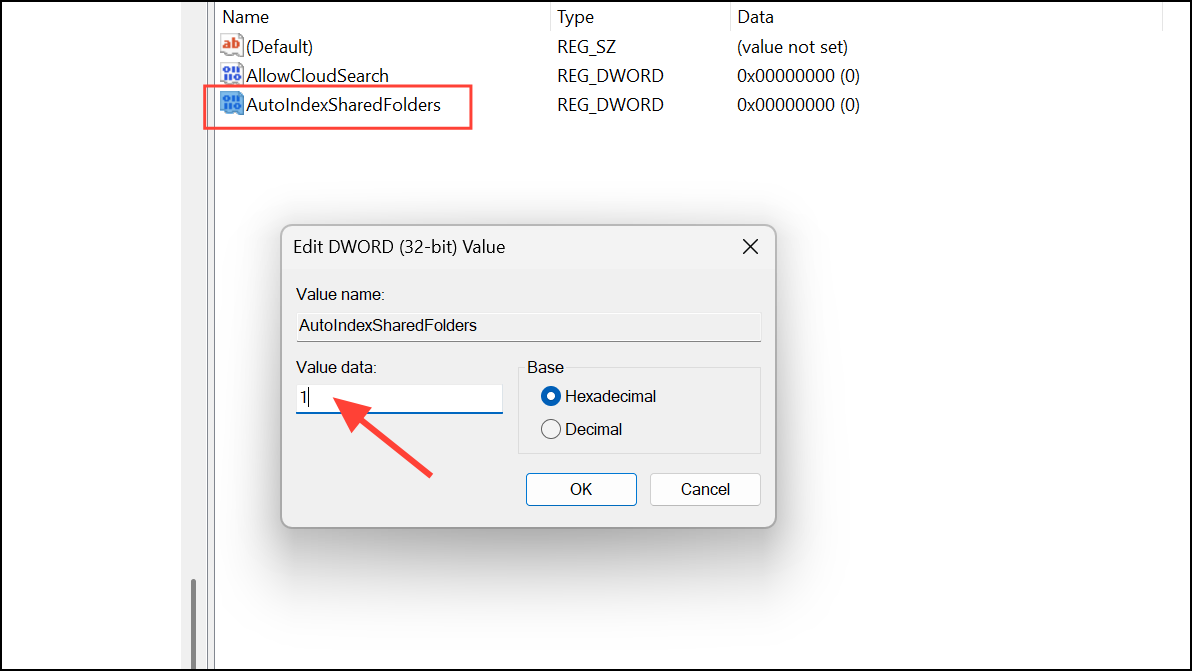
Step 5: Double-click AutoIndexSharedFolders, set its value data to 1, and click OK. This change prevents Windows from automatically indexing shared folders.
Step 6: Close Registry Editor. Restart your PC to ensure the change is fully applied.
Manually Exclude Shared or Network Folders from Search Index
To further control which folders are indexed, you can manually exclude specific shared or network folders using Windows 11’s built-in settings.
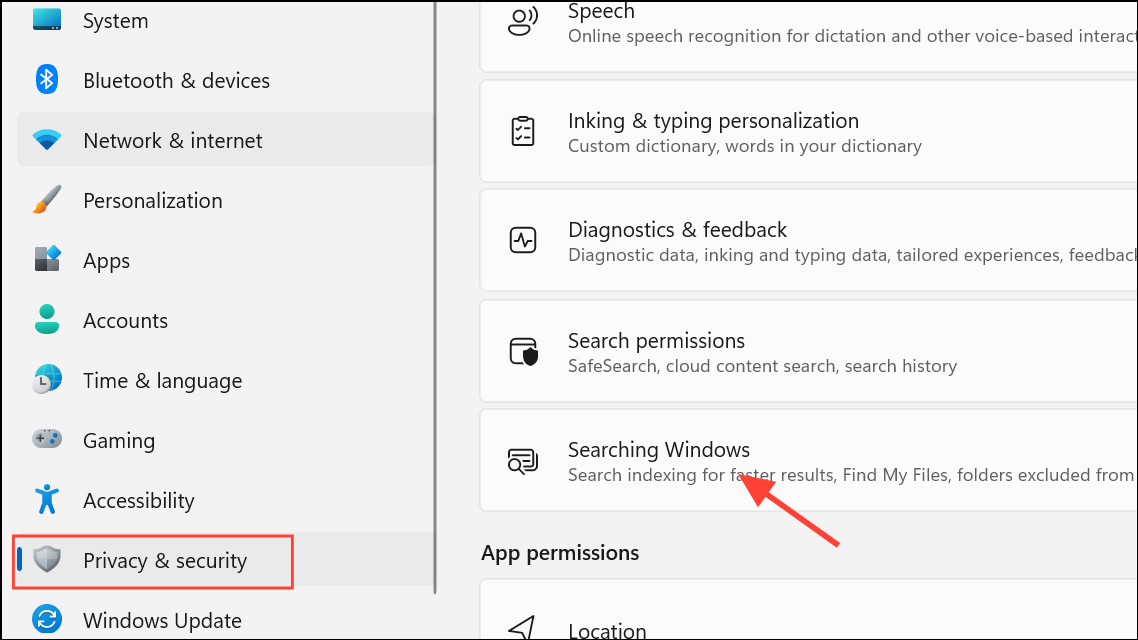
Step 1: Open Settings by pressing Win+I.
Step 2: Navigate to Privacy & security > Searching Windows.
Step 3: Under Exclude folders from enhanced search, click Add an excluded folder.
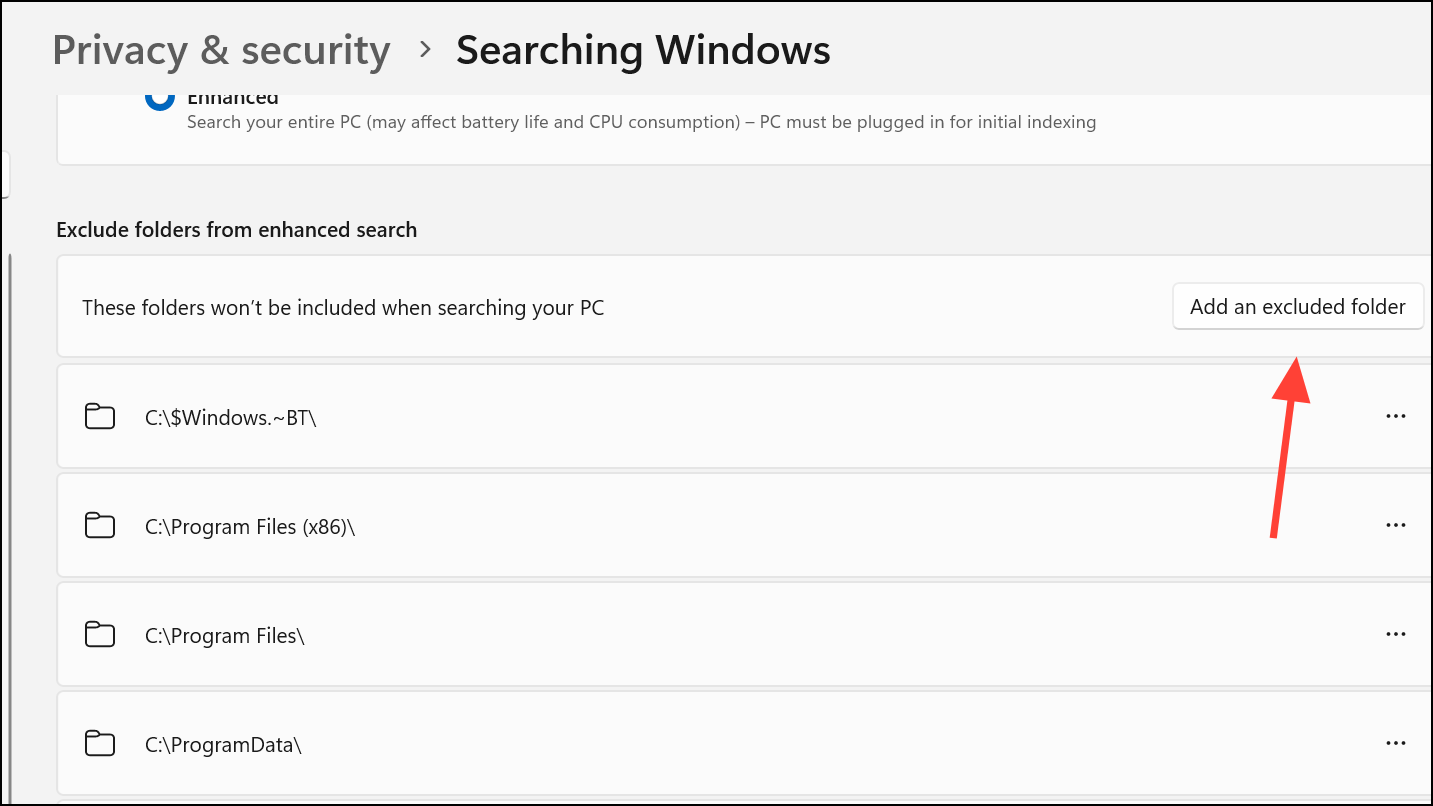
Step 4: Browse to and select the shared or network folder you wish to exclude. Click Select Folder to confirm.
Step 5: The folder will now appear in the exclusion list, and its contents will not be indexed by Windows Search.
Additional Notes and Troubleshooting
- Windows 11 does not index network locations by default. When searching network drives, the local machine typically passes the search request to the server hosting the shared folder. The server must have its own index for fast results.
- Disabling indexing for shared folders does not affect the ability to access or share files, but it does mean those files will not appear in local search results unless manually included.
- If you want to stop indexing for all files on a drive, open File Explorer, right-click the drive, select
Properties, and uncheckAllow files on this drive to have contents indexed in addition to file properties. This is a broader approach and may impact overall search speed for local files. - For advanced automation or deployment scenarios, scope rules for indexing can be managed using PowerShell scripts and the Windows Search API, though this is more complex and typically used by IT administrators.
Stopping Windows 11 from automatically adding shared folders to the search index gives you more control over search performance and privacy, especially in networked environments. These changes are simple to reverse if you decide to index shared folders in the future.