Bluetooth connectivity has become an essential feature in modern computing, offering seamless wireless connections for various devices. Windows 11 provides multiple ways to enable and manage Bluetooth functionality. This guide will walk you through the process of turning on Bluetooth, connecting devices, and troubleshooting common issues.
Method 1: Using Windows Settings
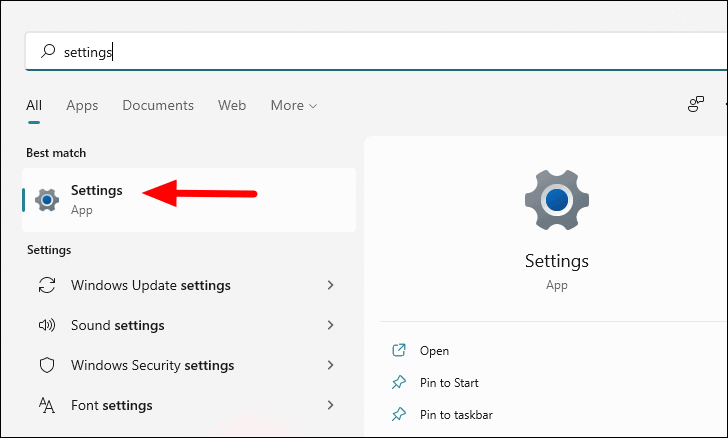
- Open the Start Menu and search for “Settings.”
- Click on the Settings app to launch it.
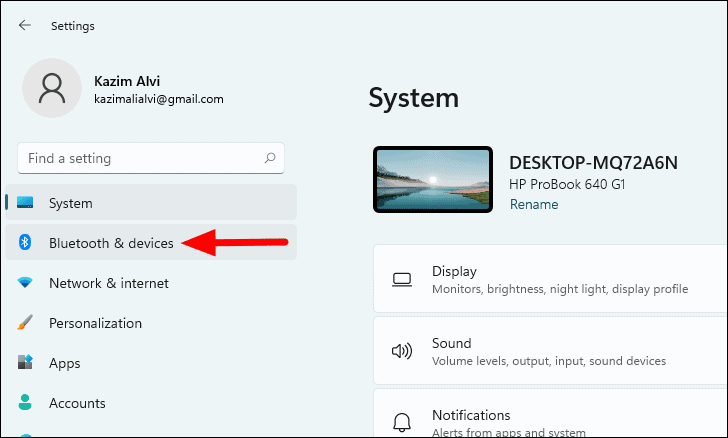
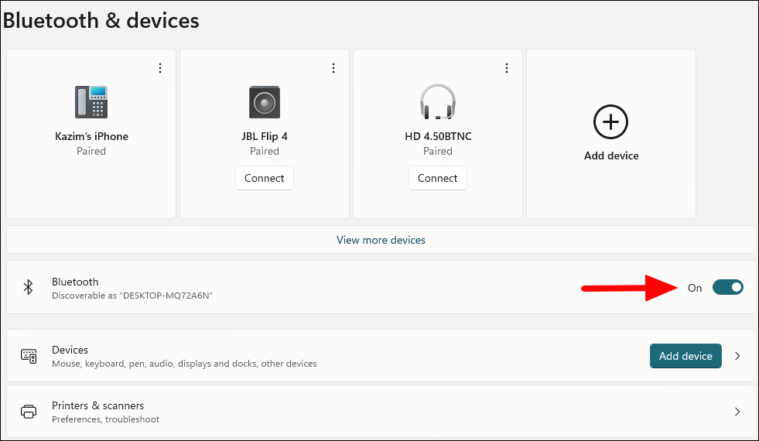
- In the Settings window, select “Bluetooth & devices” from the left sidebar.
- Locate the Bluetooth toggle switch and click it to turn Bluetooth on.
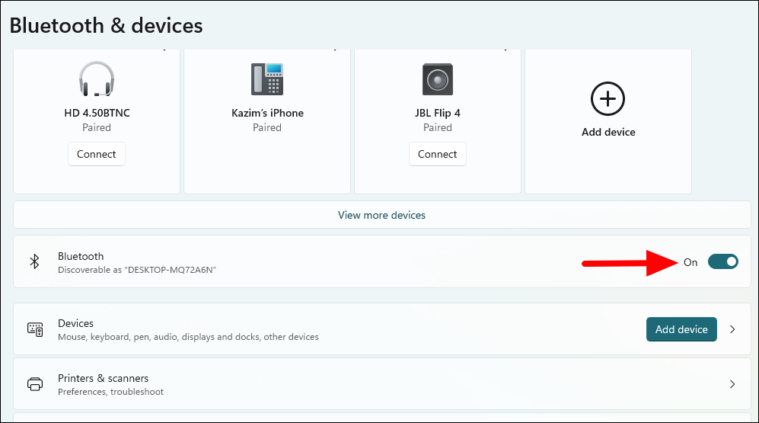
This method is particularly useful when you need to add a new Bluetooth device, as the option is conveniently located in the same settings panel.
Method 2: Using the Action Center
- Click on the Action Center icon in the bottom-right corner of your desktop.
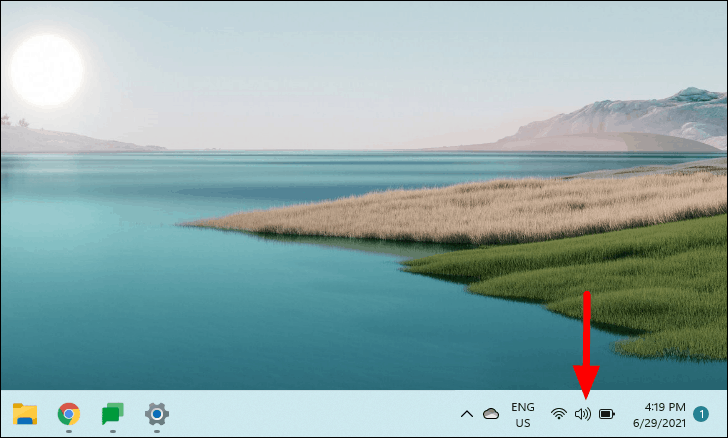
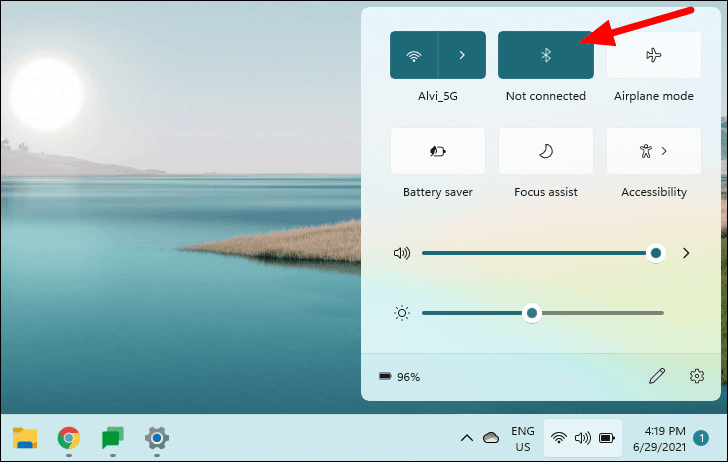
- In the Action Center, find and click on the Bluetooth icon to enable it. When activated, the icon will change to a darker shade based on your system’s theme color.
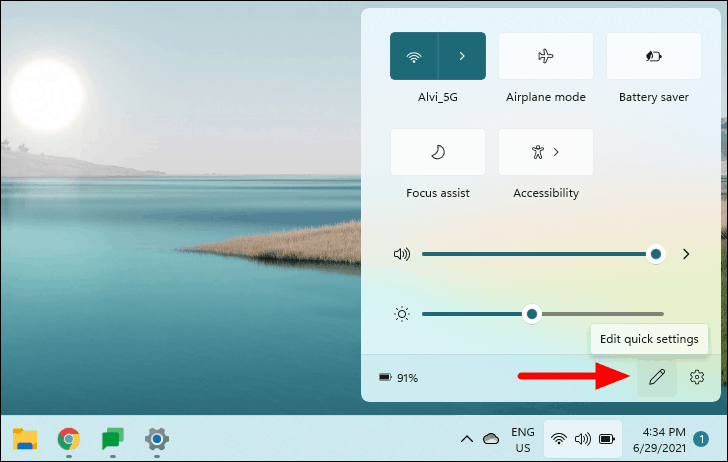
If the Bluetooth option is not visible in the Action Center, you can add it by following these steps:
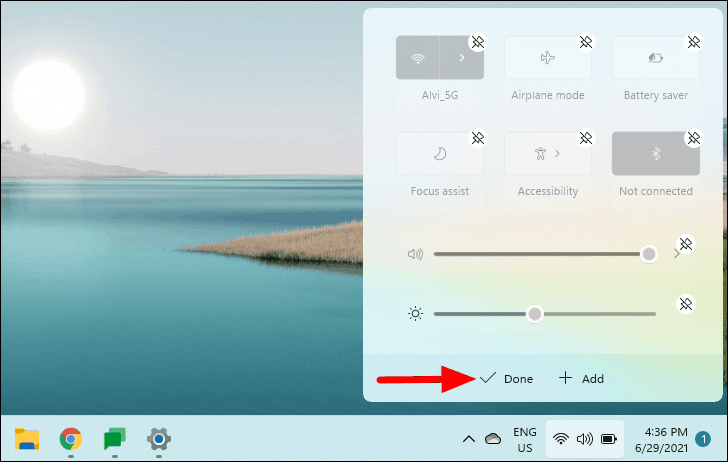
- Open the Action Center and click on the “Edit quick settings” icon (pencil symbol) at the bottom left.
- Click on “Add” when the tiles fade.
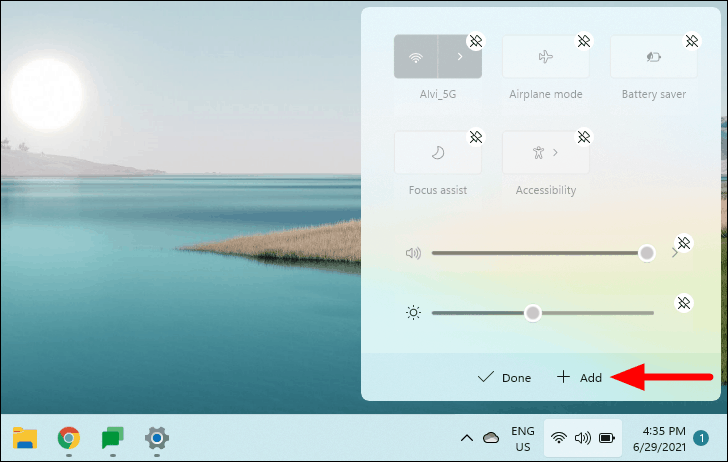
- Choose “Bluetooth” from the list of available options.

- Click “Done” to save the changes.
Pairing a Bluetooth Device in Windows 11
After enabling Bluetooth, you can pair your devices:
- Ensure both your PC and the device you want to pair are in Bluetooth pairing mode.
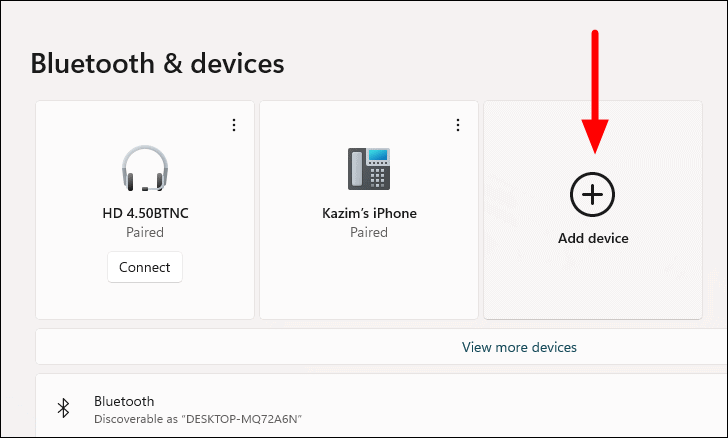
- Open Windows Settings and navigate to “Bluetooth & devices.”
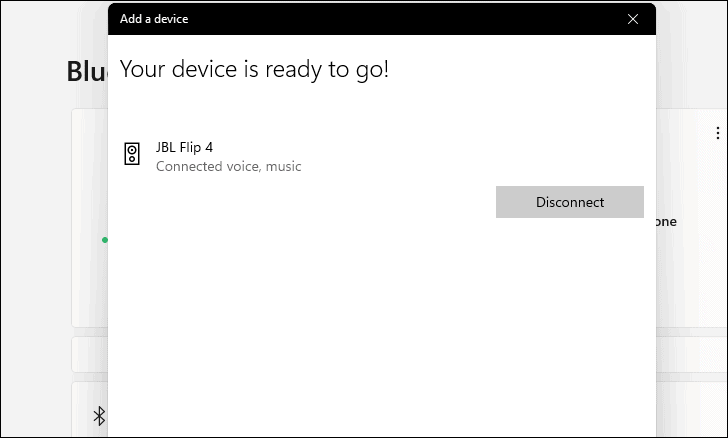
- Click on “Add device” at the top of the window.
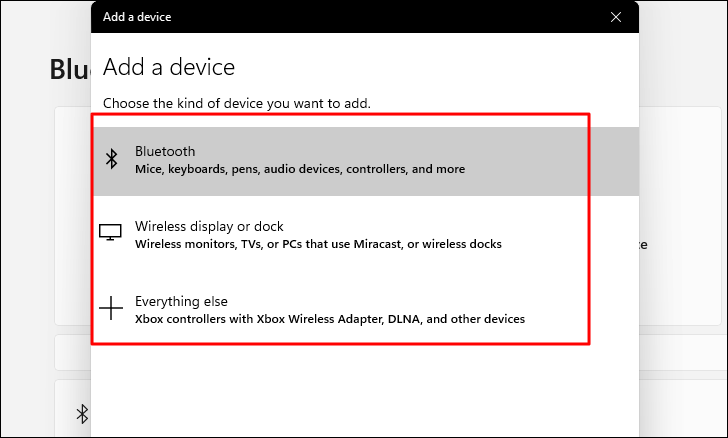
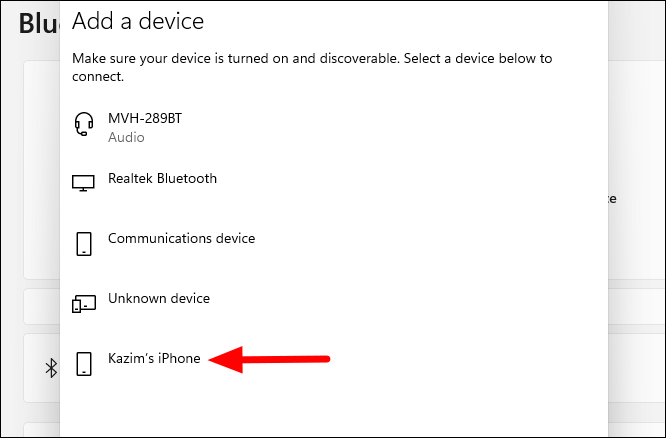
- Select the appropriate device category in the “Add a device” window.
- Choose your device from the list of available Bluetooth devices.
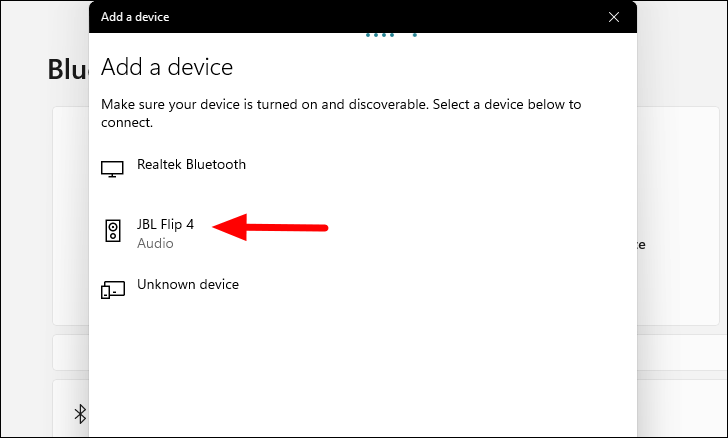
- Follow any on-screen prompts to complete the pairing process.
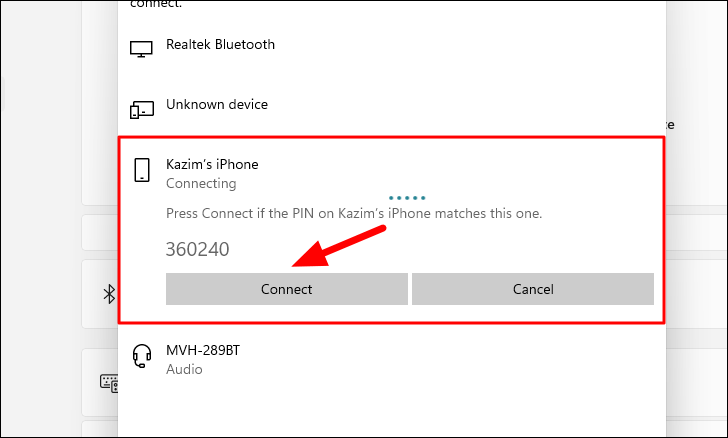
Some devices may require additional authentication steps:
- When connecting to a phone, enable Bluetooth on the mobile device and select it from the list.
- Verify that the PIN displayed on both devices matches, then click “Connect” on your PC and “Pair” on your phone.
Once paired, devices will automatically connect when in range and Bluetooth is enabled.
Troubleshooting Bluetooth Issues
Unable to Turn On Bluetooth
1. Verify Bluetooth Support
- Open Device Manager by searching for it in the Start Menu.
- Look for a “Bluetooth” entry in the list of devices.
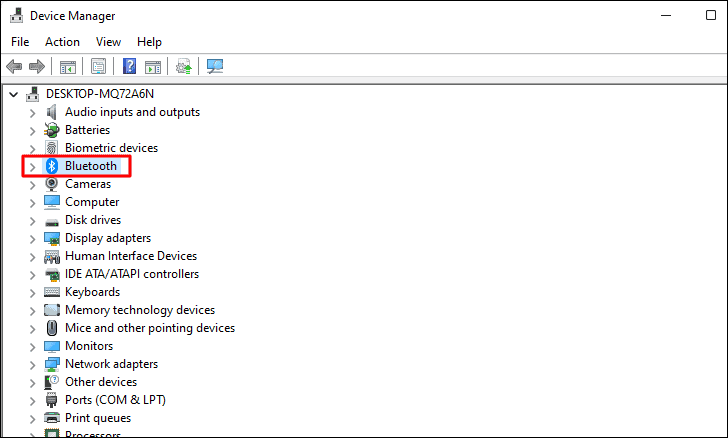
If Bluetooth is not listed, check under “Network Adapters.”
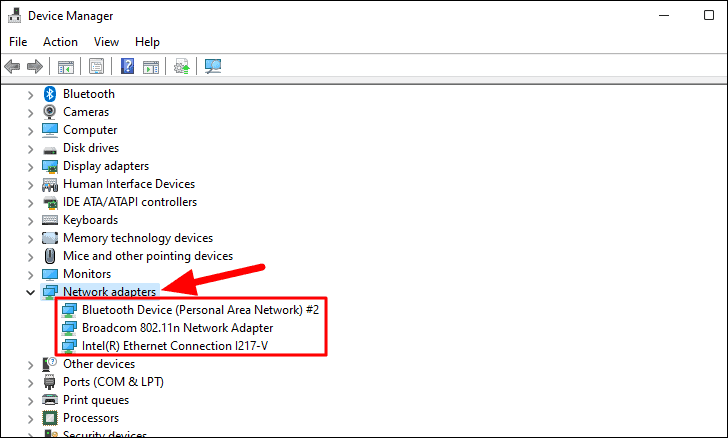
If you can’t find Bluetooth listed, your computer may not support it natively.
2. Check for Physical Bluetooth Switch
Some computers have a physical switch or key combination to enable Bluetooth. Consult your device’s manual for information.
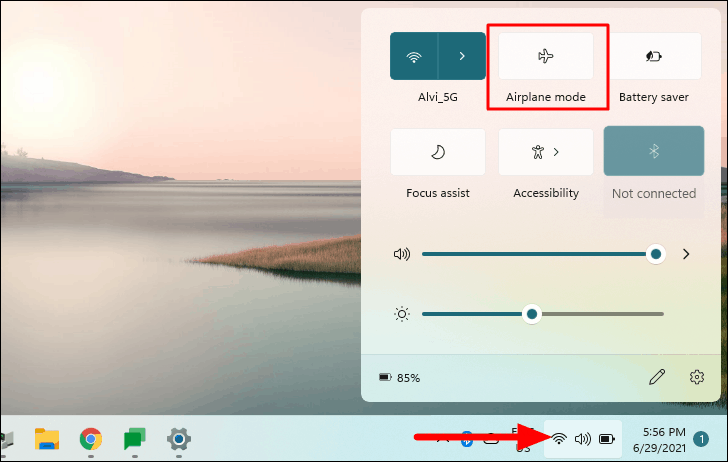
3. Disable Airplane Mode
- Click on the Action Center in the taskbar.
- Ensure that Airplane mode is turned off.
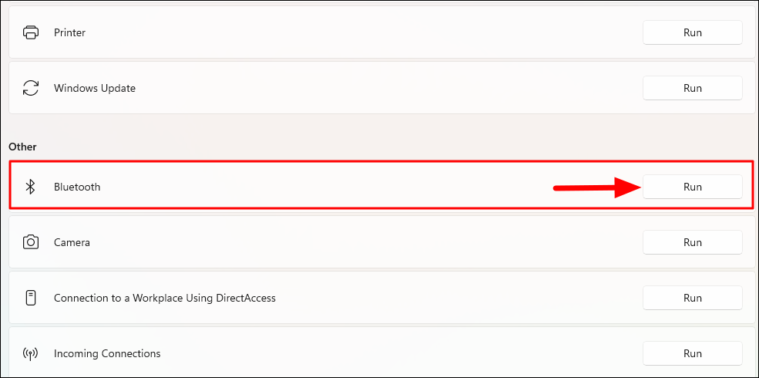
4. Run Bluetooth Troubleshooter
- Open Settings and navigate to System > Troubleshoot > Other troubleshooters.
- Locate the Bluetooth troubleshooter and click “Run.”
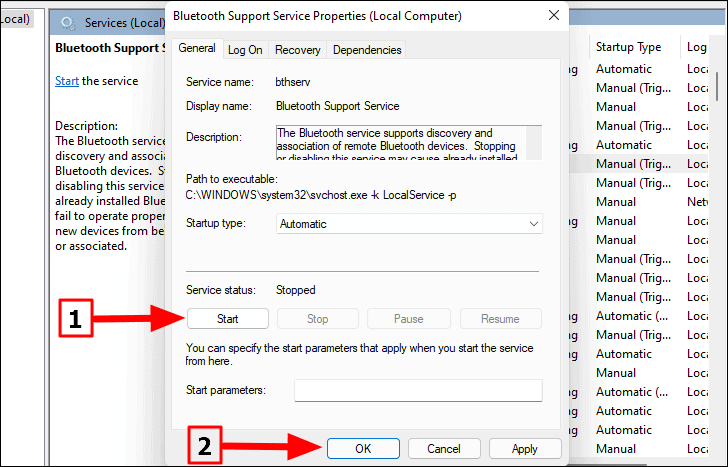
5. Check Bluetooth Support Service
- Search for “Services” in the Start Menu and open it.
- Find “Bluetooth Support Service” and double-click it.
- Set “Startup type” to “Automatic” and click “Start” under “Service status.”
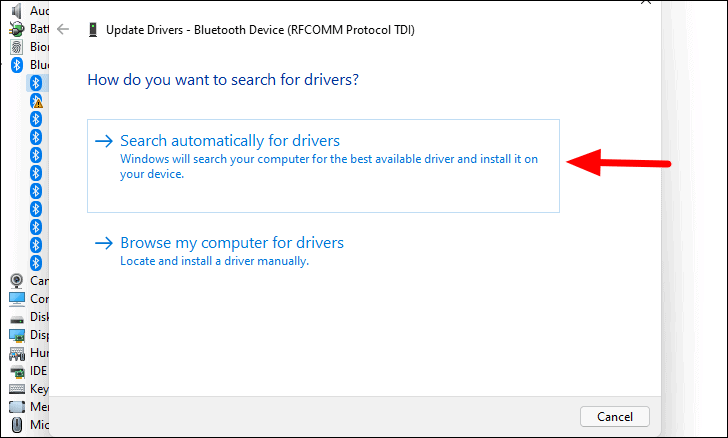
6. Update Bluetooth Drivers
- Open Device Manager and expand the Bluetooth section.
- Right-click on your Bluetooth device and select “Update driver.”
- Choose “Search automatically for drivers” and follow the prompts.
Unable to Connect to Bluetooth Device
1. Ensure Bluetooth is Enabled on Both Devices
Double-check that Bluetooth is turned on for both your PC and the device you’re trying to connect.
2. Verify Device is Within Range
Bring the Bluetooth device closer to your PC and remove any obstacles between them.
3. Toggle Bluetooth On/Off
- Go to Settings > Bluetooth & devices.
- Turn Bluetooth off, wait a few moments, then turn it back on.
4. Restart Your Computer
A simple reboot can often resolve Bluetooth connectivity issues.
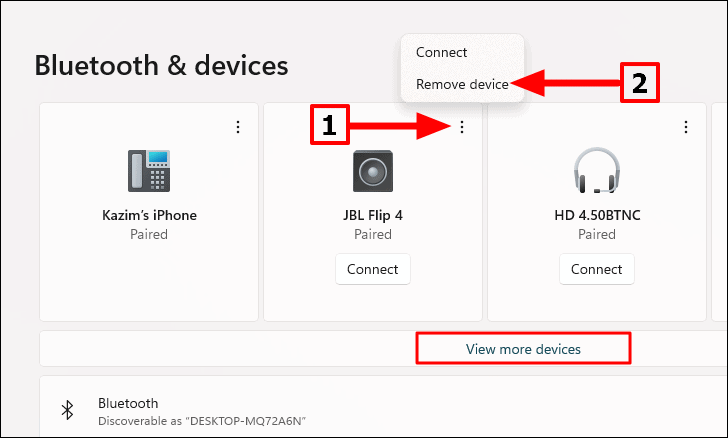
5. Re-pair the Device
- In Bluetooth & devices settings, find the problematic device.
- Click the ellipsis (…) next to the device and select “Remove device.”
- Confirm the removal and then re-pair the device following the earlier instructions.
By following these steps, you should be able to successfully enable Bluetooth, pair devices, and troubleshoot common issues in Windows 11.


