Microsoft recently released the 24H2 version update of Windows 11 to the public, and you can find various guides on how to install it on unsupported hardware. However, if you're running Windows 23H2 or 22H2 on your computer and just want to upgrade to the latest version instead of performing a fresh install, the methods available online may not help. This is because Microsoft has changed a lot of things under the hood in this update and blocked unsupported machines from getting the update through Windows Update. While this has made things difficult, it is still possible to upgrade to the latest version, and here is how you can do so.
Step 1: Download the ISO
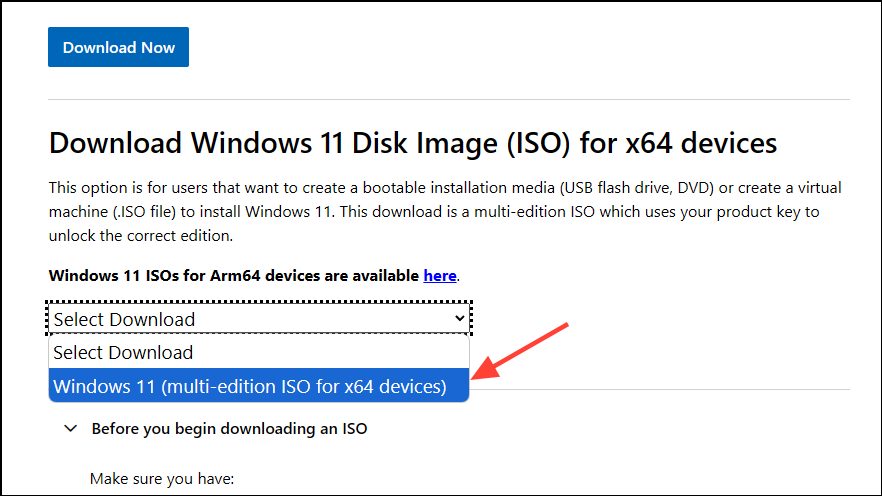
- Open a web browser and go to Microsoft's Windows 11 download page. Scroll down to the 'Download Windows 11 Disk Image (ISO) for x64 devices' section and select 'Windows 11 (multi-edition) ISO for x64 devices' by clicking on the dropdown menu.
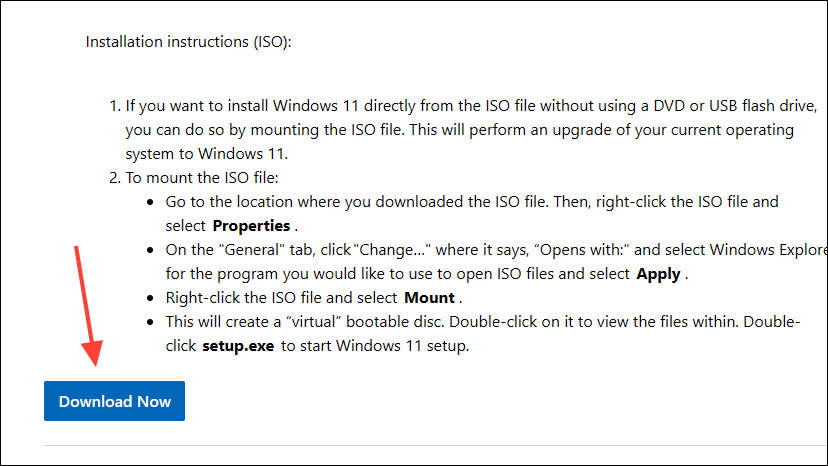
- Scroll further down the page and click on the 'Download Now' button.
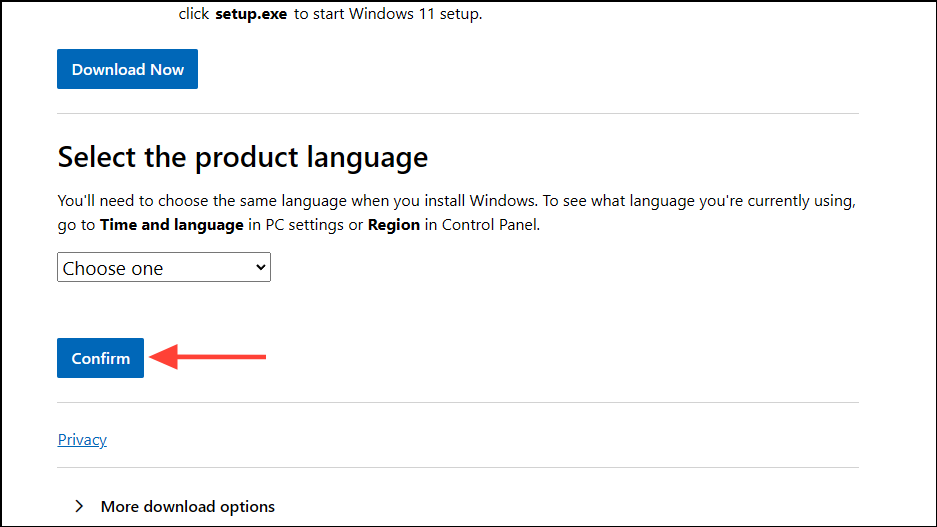
- Now select the language in which you want to install Windows from the dropdown list before clicking on the 'Confirm' button.
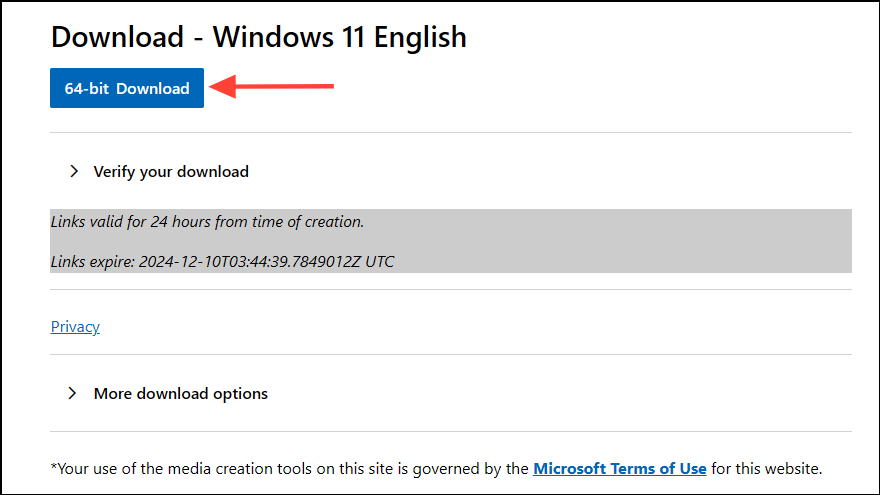
- Finally, click on the '64-bit Download' button to start downloading the ISO and wait for the download to complete.
Step 2: Prepare the ISO for installation
- Once you've downloaded the ISO, open a new tab in your browser and go to this page.
- Scroll down to the 'Option Two' section and click on the 'Download' button for the 'Allow_upgrade_to_Windows11_with_unsupported_system_requirements.reg' file.
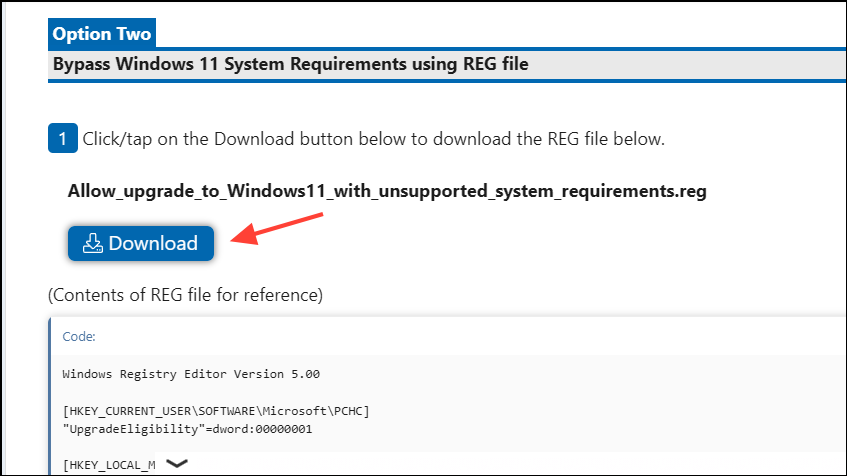
- Once the file is downloaded, open a new browser tab and go to the Rufus website. Rufus is the tool that will let you create a bootable USB for installing 24H2 on your computer.
- On the website, scroll down and click on the Rufus version you want to download depending on your system.
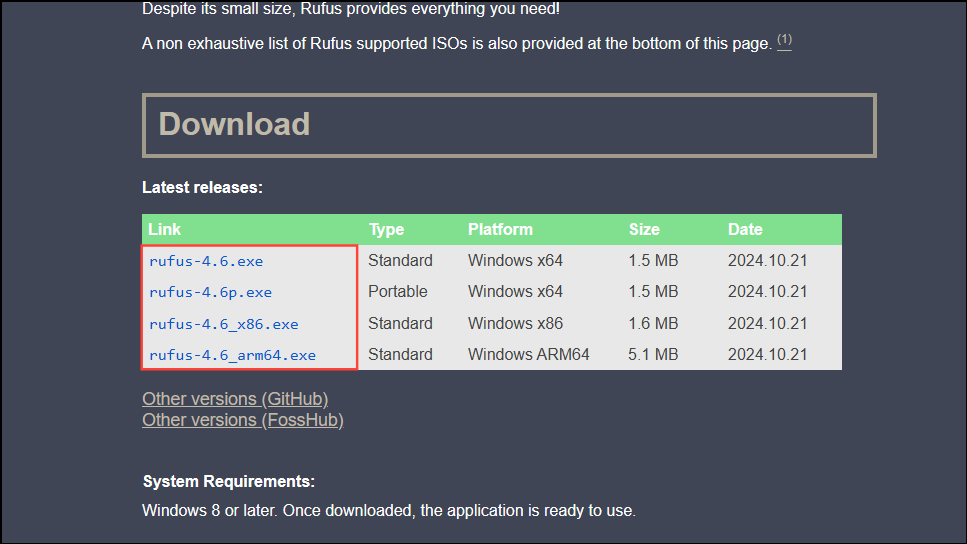
- Wait for Rufus to finish downloading and then open it by right-clicking or double-clicking. Rufus will launch instantly since it does not need to be installed to work.
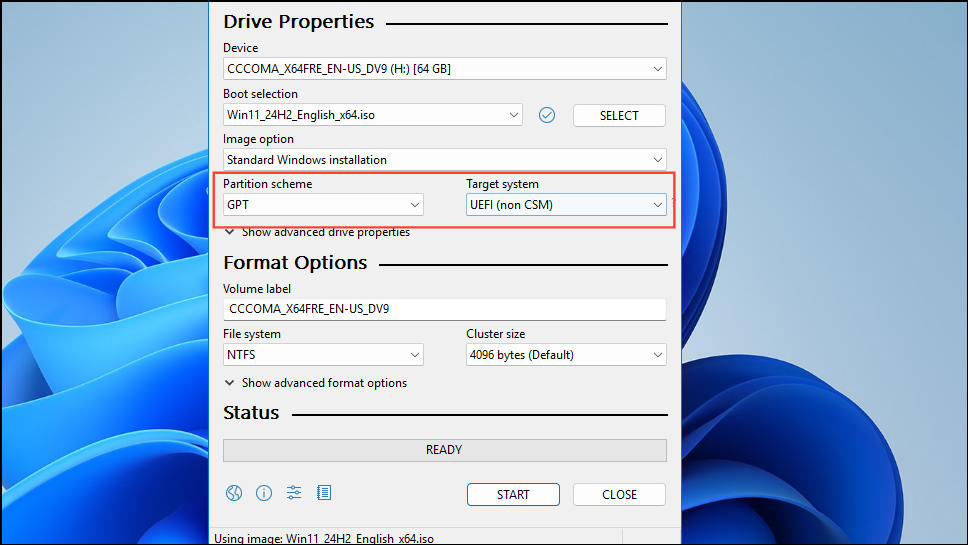
- Connect a USB drive to your computer with at least 16 GB of free space and it will show up in Rufus in the dropdown menu at the top.
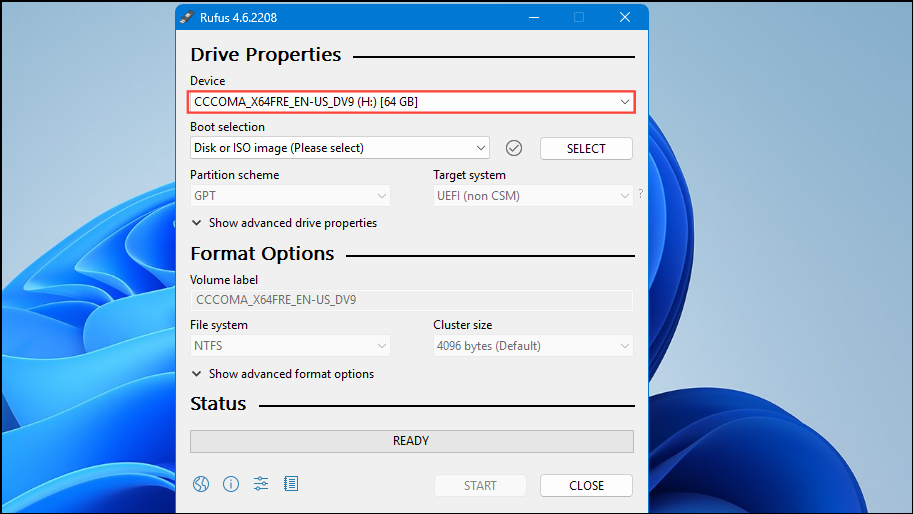
- Now click on the 'Select' button on the right and navigate to where you've downloaded the Windows 11 24H2 ISO. Click on it to select it and it will appear in the 'Boot selection' dropdown.
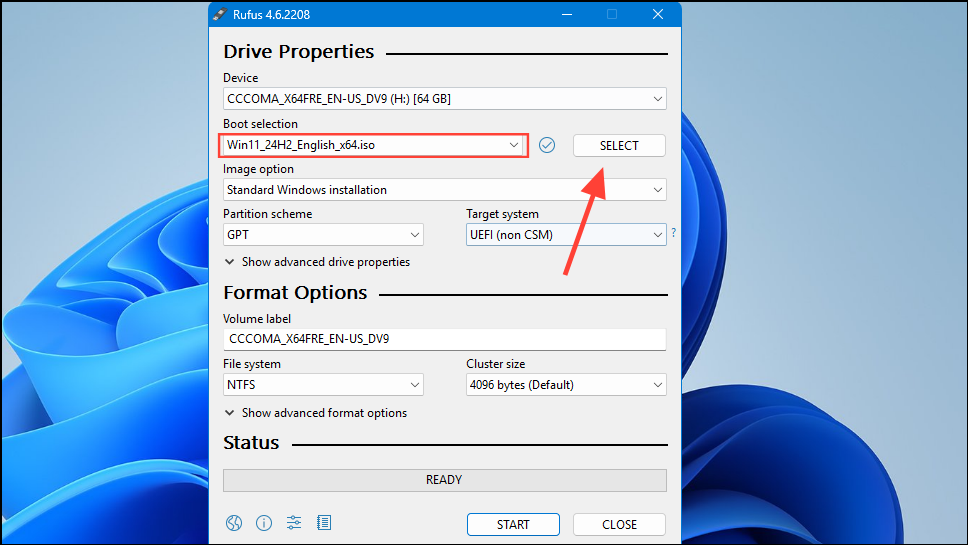
- Make sure the 'Partition scheme' and 'Target system' options match those of your system. You can change them by clicking on the dropdown menu for each option.
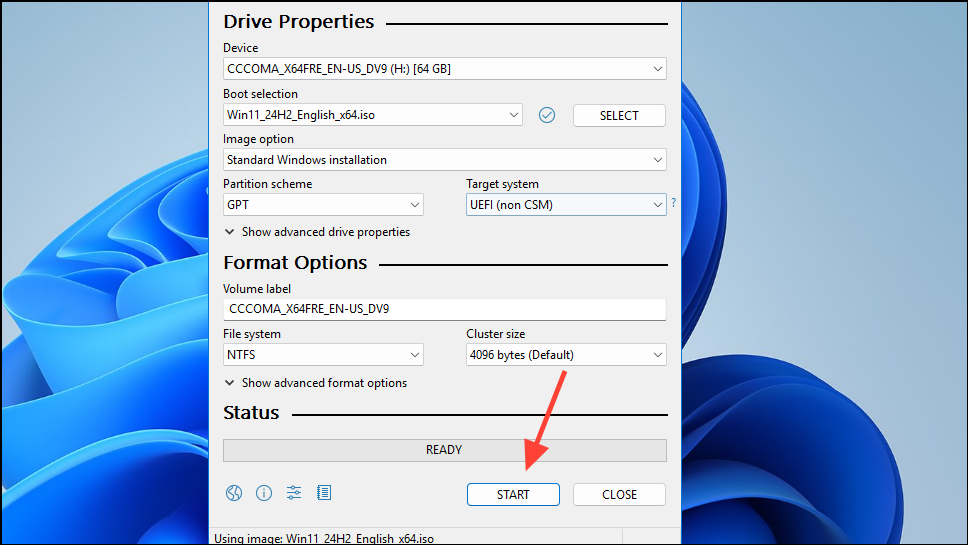
- When you're ready, click on the 'Start' button at the bottom.
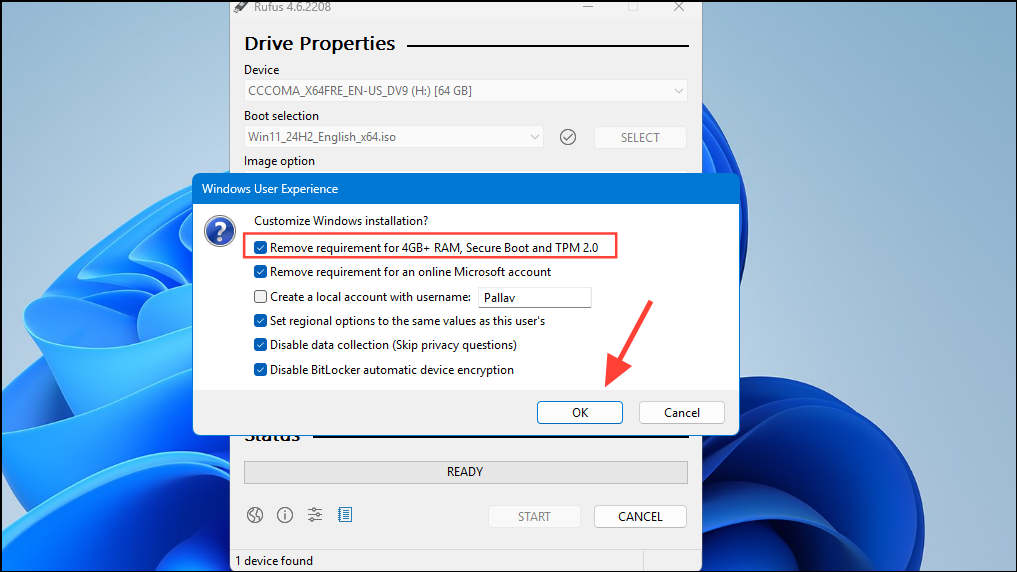
- A pop-up will appear on your screen and this is the most important part. Make sure to check the 'Remove requirement for 4GB + RAM, Secure Boot, and TPM 2.0' before clicking on the 'OK' button. If you want, you can also check the other options.
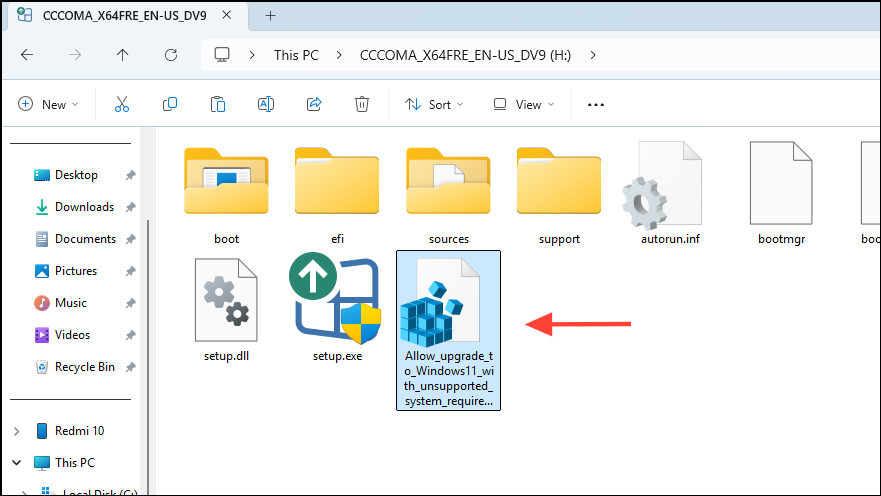
- Wait for Rufus to finish creating your bootable Windows 11 USB. It can take some time depending on your hardware. Once the process is complete, copy the .reg file you downloaded earlier and paste it into the USB.
Step 3: Install Windows 11 24H2
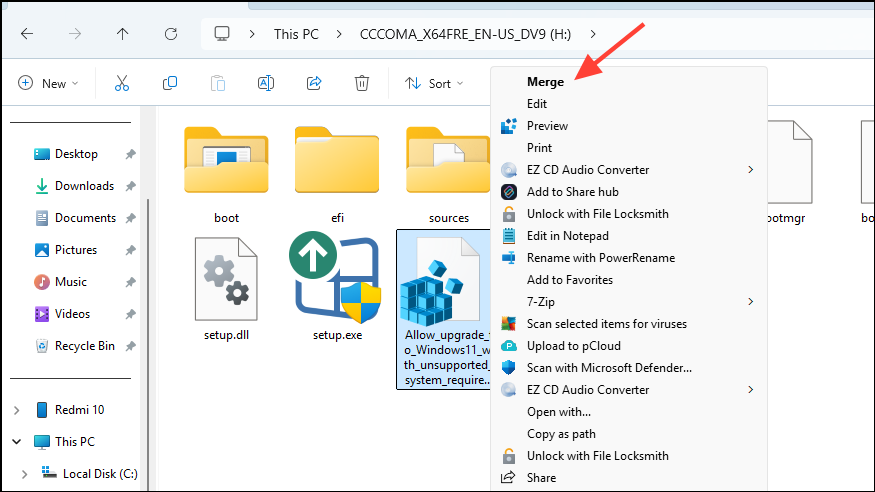
- Right-click on the .reg file inside and click on 'Merge' or double-click on the file and click on the 'Yes' button in the User Account Control pop-up.
- Now, restart your PC and press the boot key to view the available boot options. The boot key can vary depending on your machine and may include
F2,F10,F11,F12or any combination of those. Boot from the Windows installation USB, and then follow the instructions on your screen to upgrade to version 24H2.
Alternate method
If you are unable to upgrade to version 24H2 using the bootable USB method, you can try another method to do so. You do not need to create the bootable USB in this case.
- Go to Microsoft's Windows 11 download page and download the ISO as in the previous method.
- Once you've downloaded the file, download the .reg file from the ElevenForum website from the link shared above.
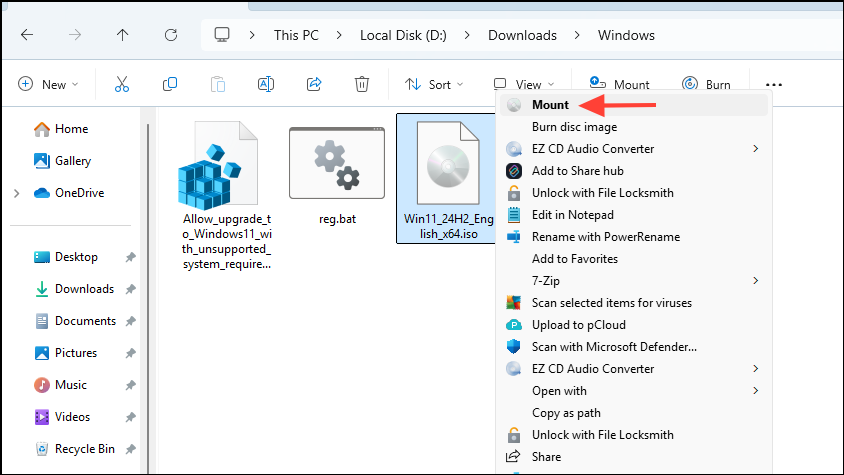
- Right-click on the download ISO file and click on 'Mount'.
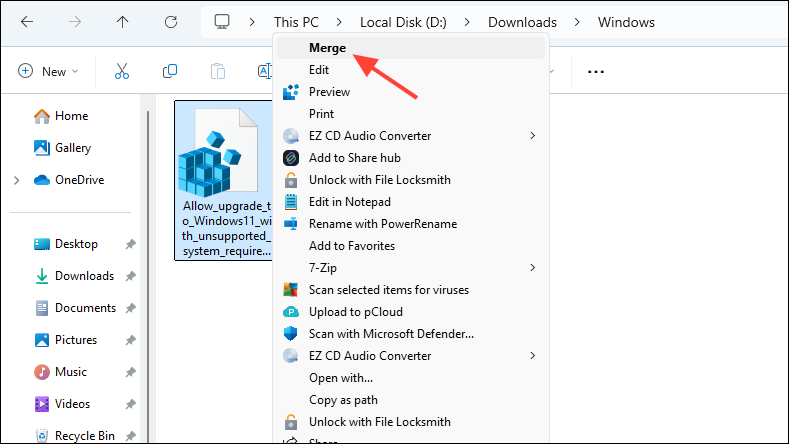
- Once the ISO is mounted, right-click on the .reg file and click on 'Merge'. Then click on the 'Yes' button in the User Account Control pop-up.
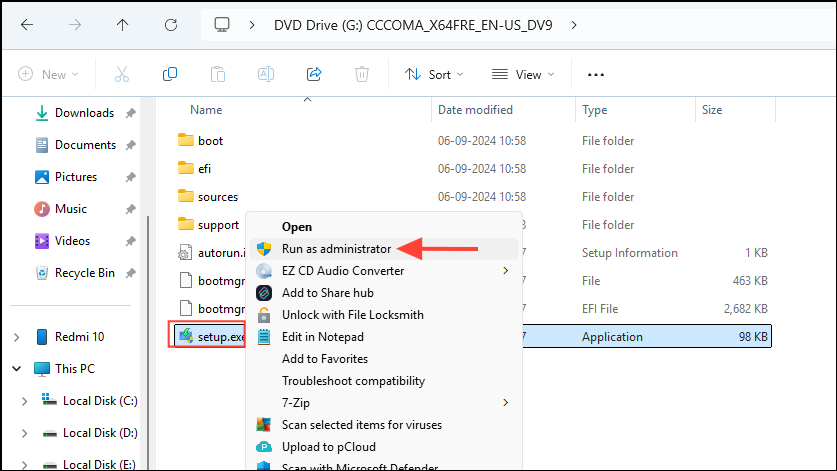
- Now, go back to the folder of the mounted ISO and right-click on the 'Setup.exe' file before clicking on 'Run as Administrator'.
- Follow the steps on your screen to install version 24H2 on your computer without performing a fresh install. Again, make sure to keep your files and settings when performing the upgrade.
Things to know
- If you get the 24H2 version update through Windows Update, try updating through that first. It is the best option if you just want to upgrade instead of a fresh install but it may not always work.
- When upgrading your copy of Windows, you may need your license key to reactive the OS, so make sure you have it close by.
- Version 24H2 does not bring a lot of visual changes to Windows but there are significant changes in the OS underneath. It may not perform very well on unsupported hardware, so make sure to back up your system using System Restore or some other utility so you can easily undo the changes if you want later on.
- Windows does not delete your existing installation of Windows automatically, which can be useful in case you find that the latest update does not perform well on your system. However, if you find that it is running fine, you can locate the old installation in your Windows system drive, usually 'C', and delete it from there to save storage space.


