Microsoft Excel's Copilot feature serves as an AI assistant that enhances your experience by helping you analyze, understand, and visualize your data more efficiently. With a Copilot Pro subscription and an active Microsoft 365 Personal or Family account, you can leverage this tool to interact with your datasets in a more intuitive way.
Getting started with Copilot in Excel
Before you can utilize Copilot in Excel, there are certain prerequisites you need to fulfill. First, ensure that you have an Excel table containing data in your worksheet; without it, the Copilot button will remain inactive.
Step 1: Open the workbook that contains your data.

Step 2: Select the cell or range of cells that you want to include in the table.
Step 3: Navigate to the 'Home' tab on the ribbon and click on the 'Format as Table' option.

Step 4: Choose a table style that suits your preference from the available options.
Step 5: In the dialog that appears, check the 'My table has headers' option if your data includes headers in the first row. Then, click 'OK' to create the table.

Now, your data is formatted as an Excel table.

Additionally, it's important to save your worksheet to OneDrive or SharePoint. Copilot in Excel requires the workbook to be stored in the cloud to function properly. Once you've saved your file online, the Copilot feature will become accessible.
Using Copilot in Excel
With your data prepared and your workbook saved to the cloud, you can now start leveraging Copilot's capabilities to enhance your data analysis.
Step 1: Open your Excel worksheet that contains the table.

Step 2: Go to the 'Home' tab on the Excel ribbon.
Step 3: Click on the 'Copilot' icon located in the Home ribbon. This will open the Copilot chat panel on the right side of the Excel window.

If your current data isn't formatted as an Excel table, Copilot can assist you in converting it. Simply select the data range, and Copilot will provide options to create a table from your selection.

To interact with Copilot effectively, ensure that a cell or range within your Excel table is selected. This allows the AI to provide context-aware assistance based on your data.
Find insights with Copilot
Copilot can help you uncover valuable insights from your data, such as trends, patterns, and summaries.
Step 1: In the Copilot chat panel, click on the 'Analyze' option.

Copilot will process your data and present you with a list of suggested prompts related to your dataset.

Step 2: Click on a suggested prompt to generate insights. Alternatively, you can type a custom prompt in the input area if you have specific queries about your data. After entering your prompt, click the 'Send' button.

Copilot will generate insights in various forms, such as PivotTables, charts, summaries, or highlight significant trends and outliers. If you find a chart or analysis useful, you can add it to your workbook.
Step 3: To insert a generated chart or analysis into your workbook, click on the 'Add to a new sheet' button.

You can explore additional insights by clicking on other suggested prompts or refresh the suggestions by clicking on the 'Refresh' button.
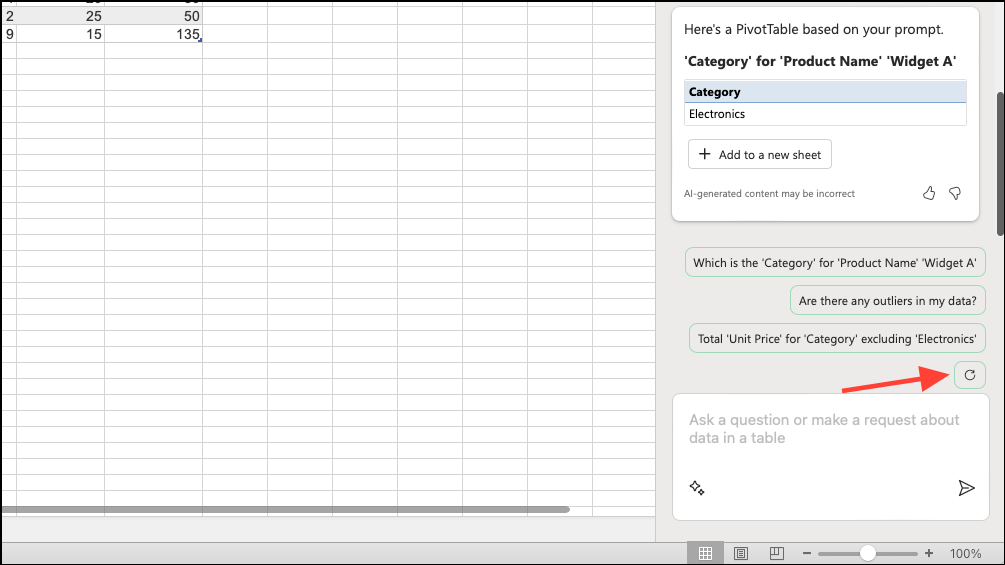
By analyzing your data through Copilot, you can gain a deeper understanding and make more informed decisions based on the insights provided.
Highlight and sort your data
Copilot can assist in organizing your data by highlighting key information and sorting or filtering your table based on specific criteria.
Step 1: In the Copilot panel, select either the 'Highlight' or 'Sort and filter' option.
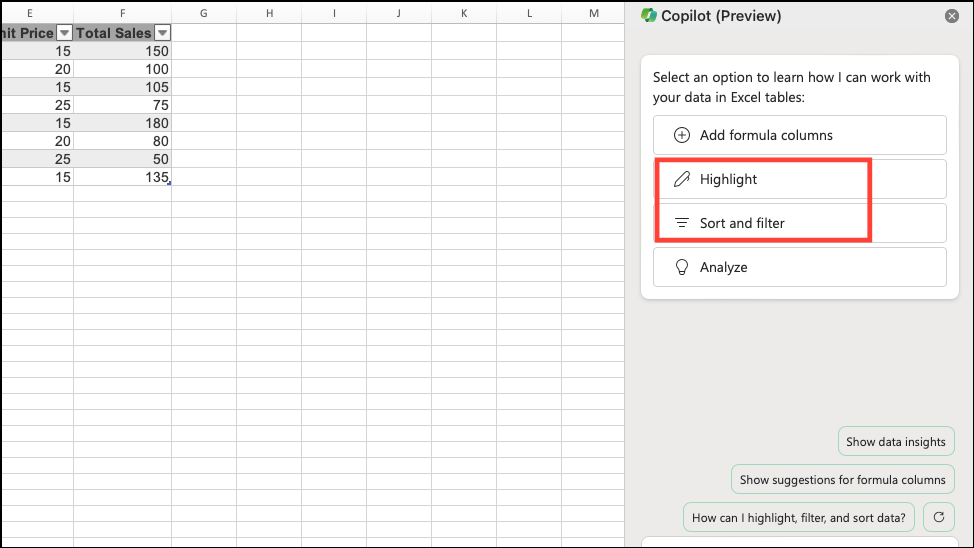
Copilot will analyze your data and offer relevant prompts for highlighting, sorting, or filtering.
Step 2: Click on a suggested prompt that matches how you want to modify your data.
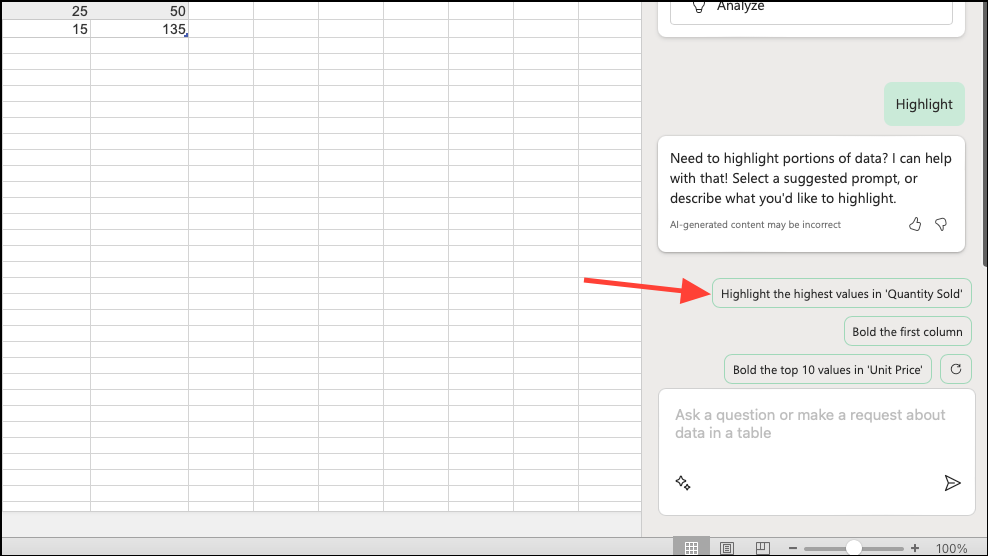
You can also provide custom instructions by typing your own prompt to specify exactly how you'd like Copilot to manipulate your table.
Step 3: Copilot will apply the changes to your table based on your selected or inputted prompt, helping you to better visualize and organize your data.
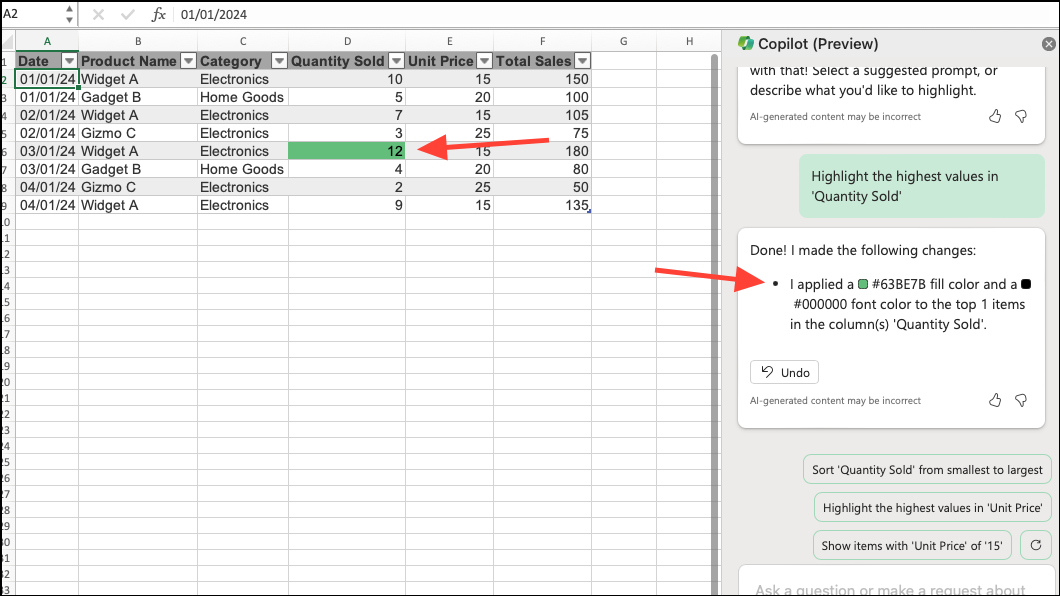
Generate formula columns
Creating new columns with formulas can be streamlined using Copilot. It can help you devise formulas and insert the new columns into your table seamlessly.
Step 1: In the Copilot chat panel, click on the 'Add formula columns' option.
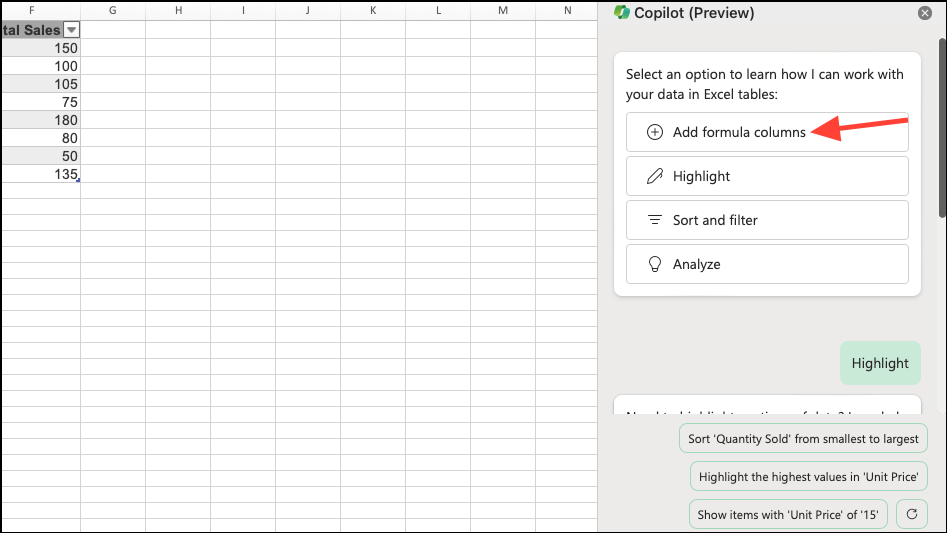
Copilot will suggest a list of possible formula columns that you might find useful.
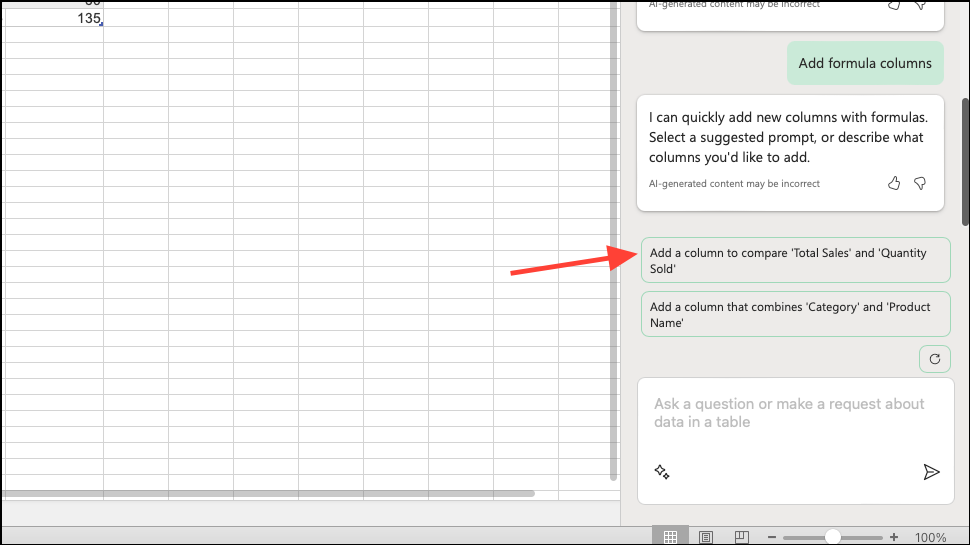
Step 2: Select a suggested prompt to create a formula column, or type in your own prompt describing the formula you need.
Copilot will generate the formula and provide an explanation of how it works.
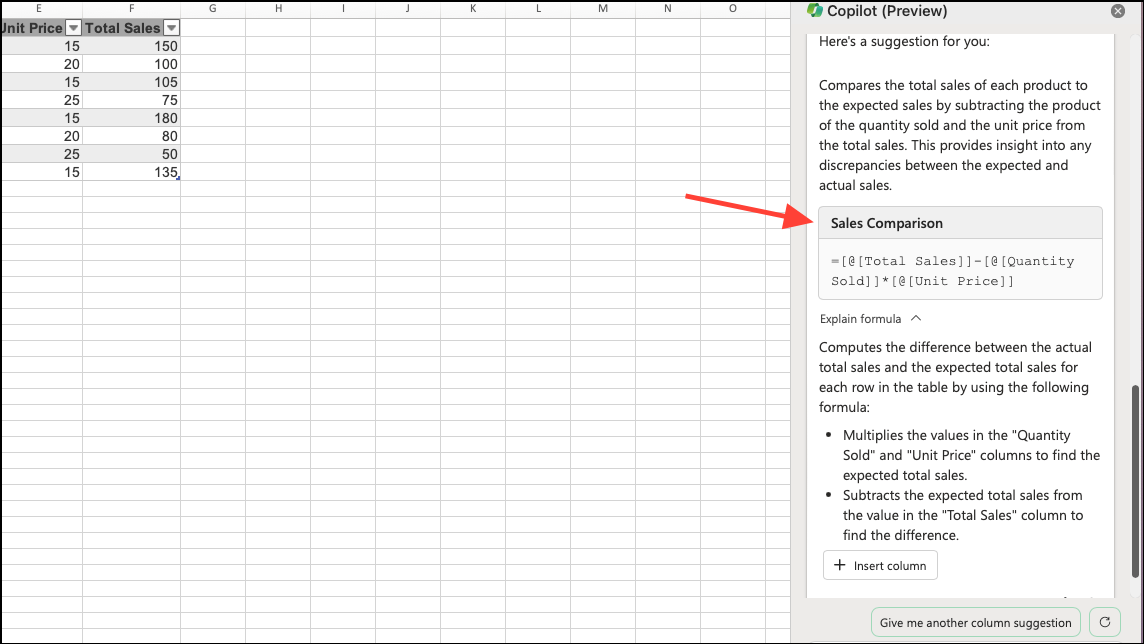
Step 3: To add the new formula column to your table, click on the 'Insert Column' button.

By integrating Copilot into your Excel workflow, you can enhance your data analysis and visualization processes. This intelligent assistant simplifies complex tasks, making data manipulation more accessible and efficient, ultimately empowering you to derive meaningful insights from your datasets.

