Disk Quotas are a great way to control the amount of storage space that different users sharing the same Windows 11 system can use. By setting a disk quota, you can ensure that users cannot use more storage space than allocated. You can do so in two ways – by setting a quota across the system or for specific users.
What are disk Quotas? Disk quotas are a feature in Windows 11 designed to make it easy to control the storage space that different user accounts can use. You can use it to ensure that the storage is shared between various system users as per their needs, and one user does not use up all the storage space. When a user exceeds the storage space allocated to them, they will see a warning and the feature even lets you prevent them from storing additional files until they free up the storage. The disk quota feature works only with partitions that are formatted as NTFS and you need an administrator account to use it.
Set a disk quota for all users
You can allocate the same amount of storage space for all user accounts using this method.
- Open the File Explorer, right-click on the Drive where you want to set a disk quota, and click on 'Properties'.
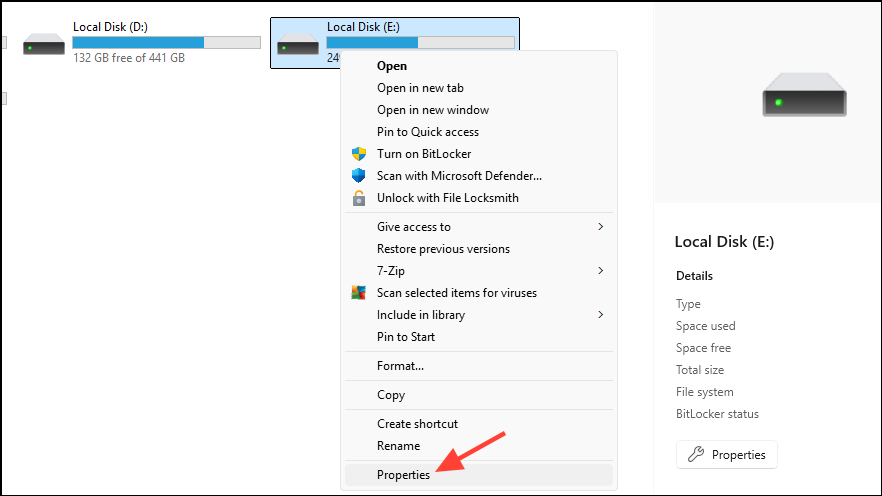
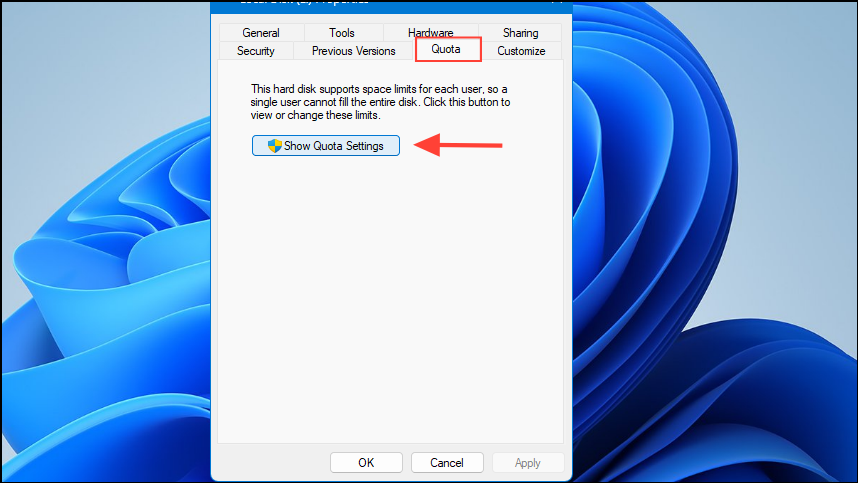
- When the Properties dialog box opens, click on the 'Quota' tab at the top and then on the 'Show quota settings' button.
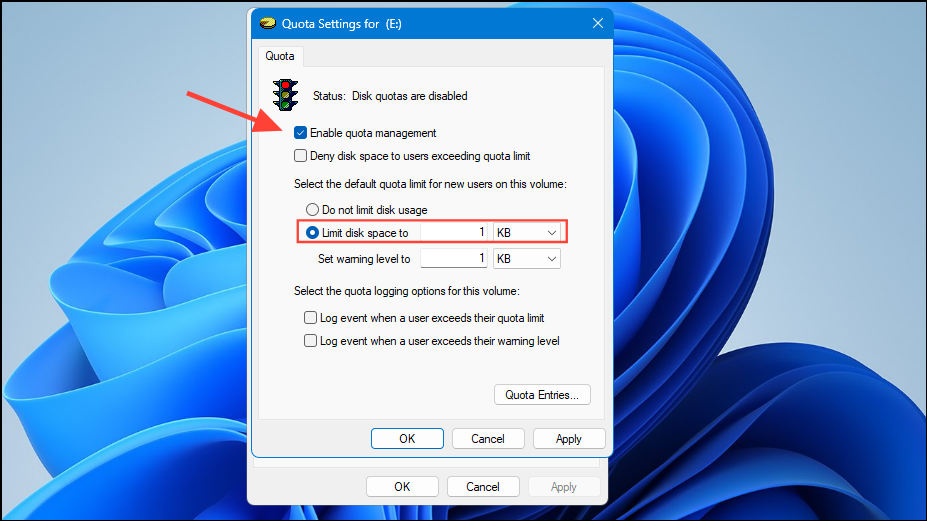
- Now, click on the 'Activate quota management' checkbox to enable it and select the 'Limit disk space to' option.
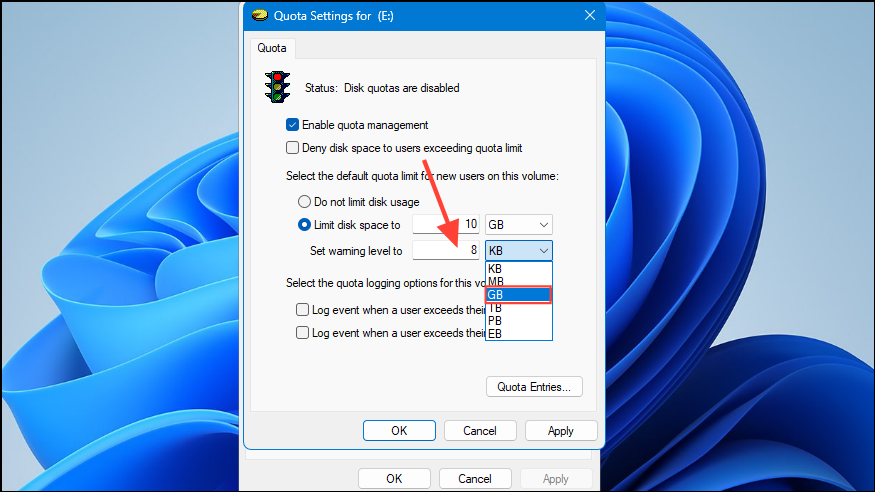
- Type in the quota you want to set for all users for that drive and click on the dropdown to select your preferred unit.
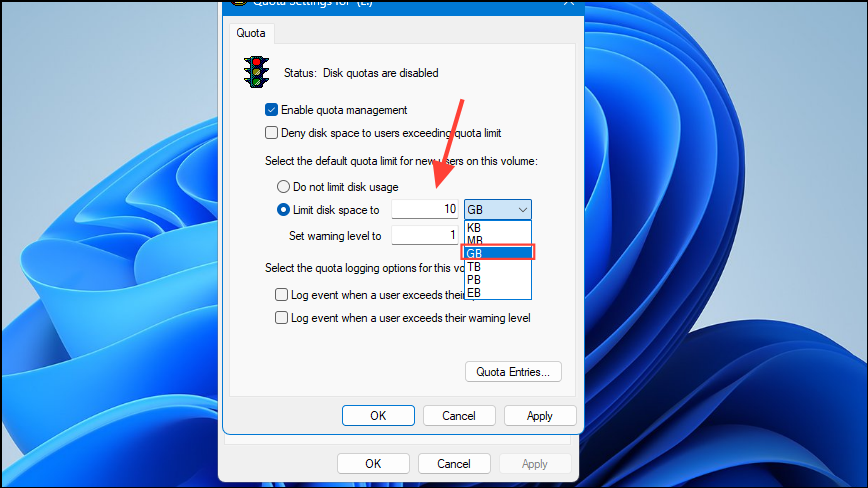
- Now set the warning level at which you want Windows to notify the users that they are nearing the end of their designated quota in the field below and again choose your preferred unit from the dropdown.
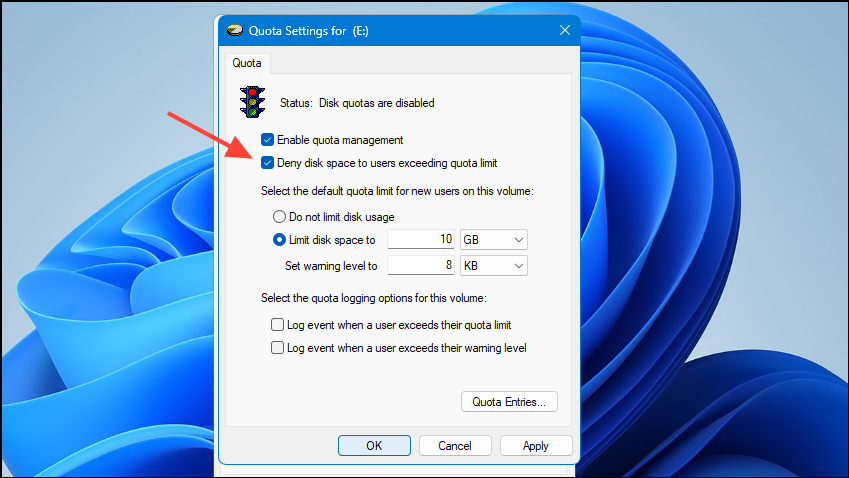
- If you want to prevent users from storing more files once they exceed their quota, click on the 'Deny disk space to users exceeding quota limit' checkbox. Then click on the 'Apply' and 'OK' buttons at the bottom.
Set a specific disk quota for each user
- To set a specific disk quota for each user of the system, start by following the same steps as in the previous method till you open the Quota Settings dialog box.

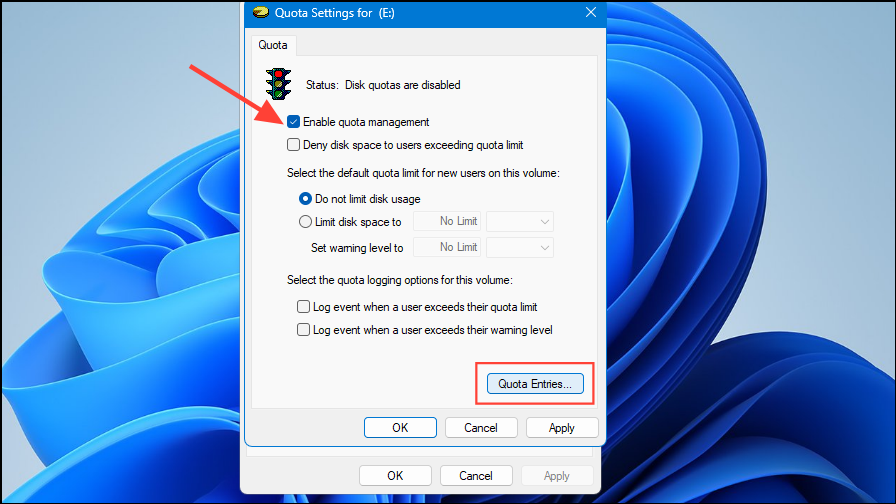
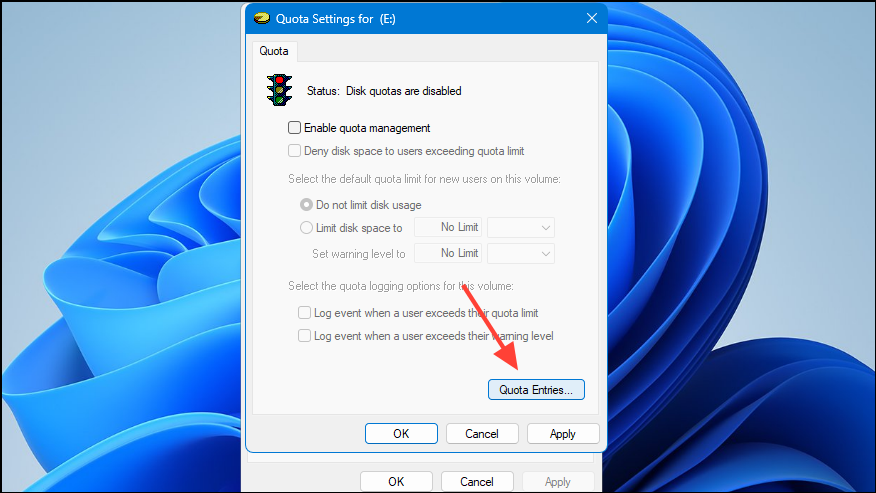
- Once the 'Quota settings for Windows 11' dialog box appears, click on the 'Enable quota management' checkbox and then on the 'Quota Entries' button at the bottom.
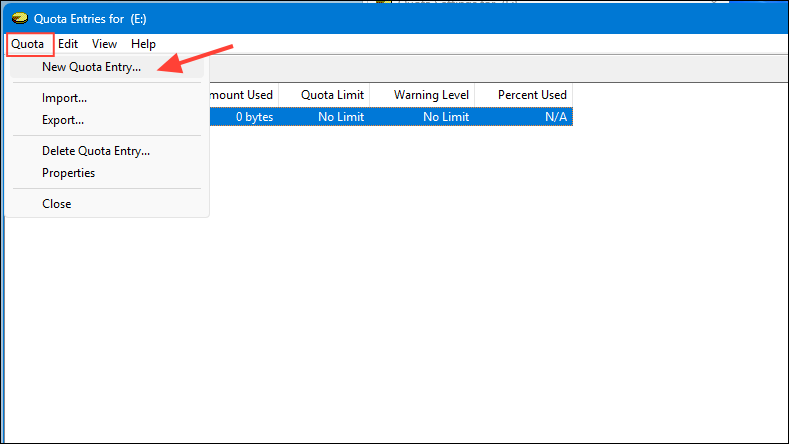
- When the Quota Entries window appears, click on the 'Quota' menu at the top left and then click on 'New Quota Entry'.
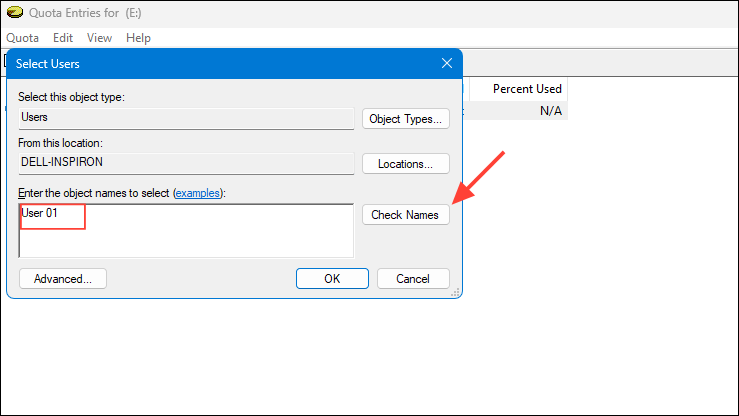
- In the 'Enter the object names to select' field that appears, type the name of the user account for which you want to set a quota and click on the 'Check Names' button before clicking on OK.
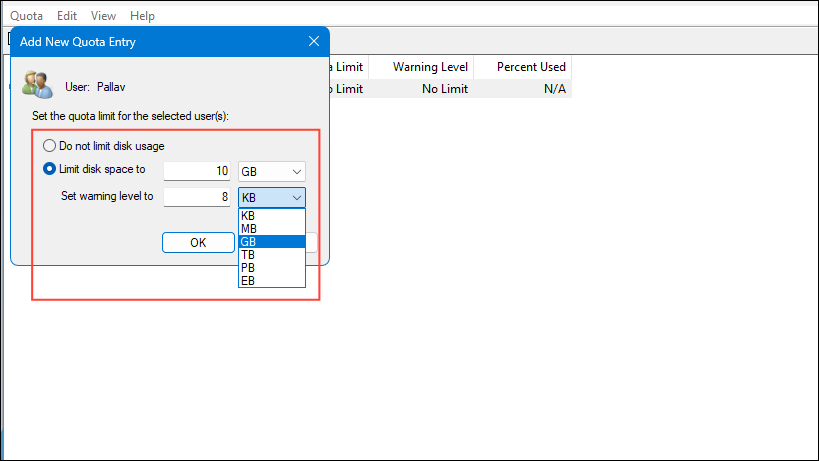
- Now click on the 'Limit disk space to' option and type in the quota in the provided field. Then click on the 'Set warning level to' and type in the quota at which the user will get a warning and select your preferred unit for both before clicking on OK.
- Repeat these steps for all the user accounts for which you want to set a quota.
Monitor disk usage
Once you've set up the disk quota for different users, you can easily monitor how your disk storage is being used.
- Open the File Explorer, right-click on the drive you want to monitor, and click on 'Properties'.

- Then go to the 'Quota' tab before clicking on 'Show Quota Settings' and then click on 'Quota Entries'.
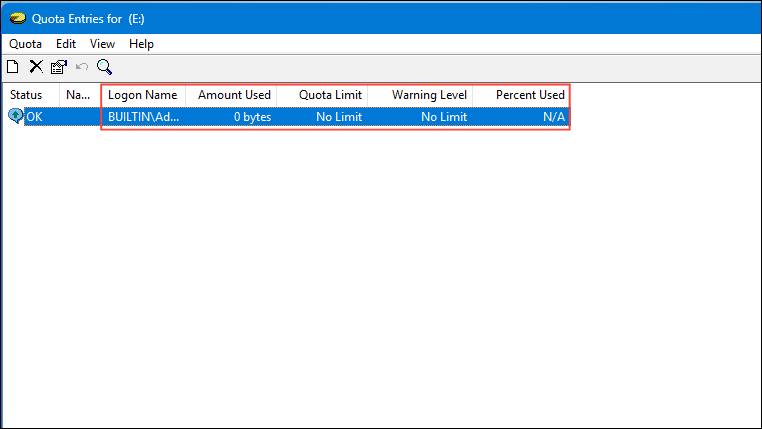
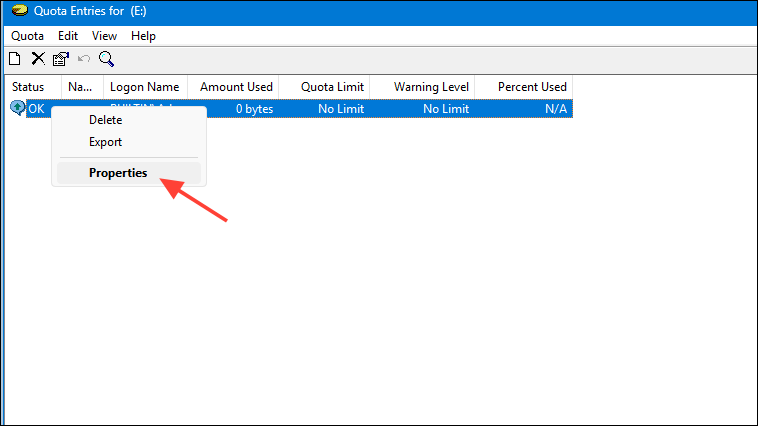
- The 'Quota Entries' window will show you the different user accounts along with their disk usage. You can see the amount used, quota limit, warning level, and percent used.
- You can also directly change the amount of storage space allocated to an account by right-clicking on that account and selecting 'Properties'. You can adjust the quota and click on OK.
Turn disk quotas off
- To turn off disk quotas for all or specific users, open File Explorer, right-click on the drive where you've set up disk quotas, and click on 'Properties'.

- Go to the Quota tab and click on the 'Show Quota Settings' button.

- Turn off disk quotas for all user accounts by disabling the 'Enable quota management' checkbox. Then click on OK.
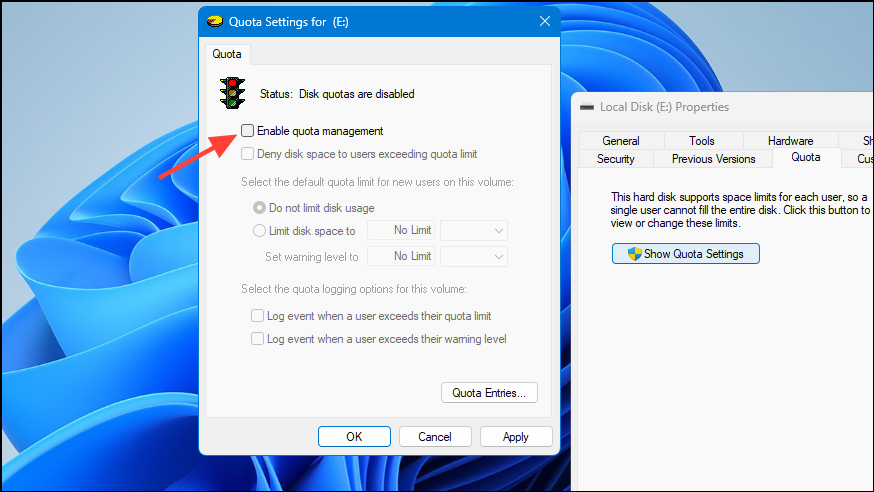
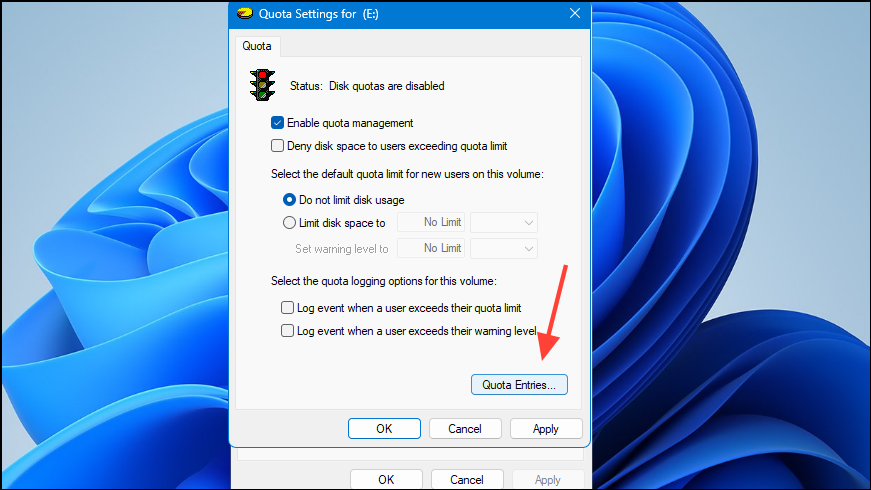
- To disable quotas for specific users, leave the 'Enable quota management' option enabled and click on the 'Quota Entries' button.
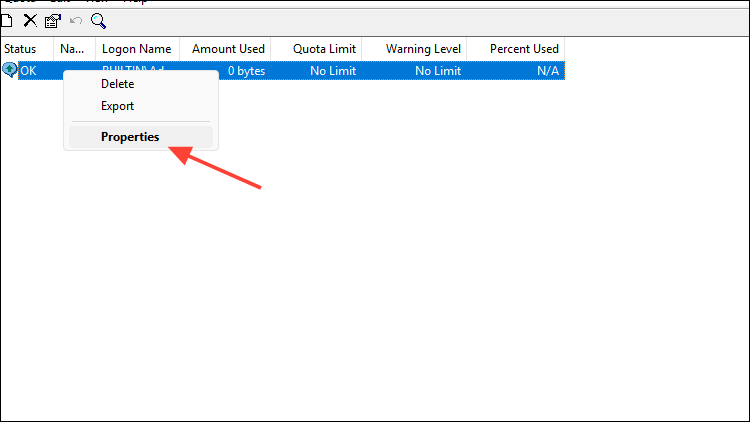
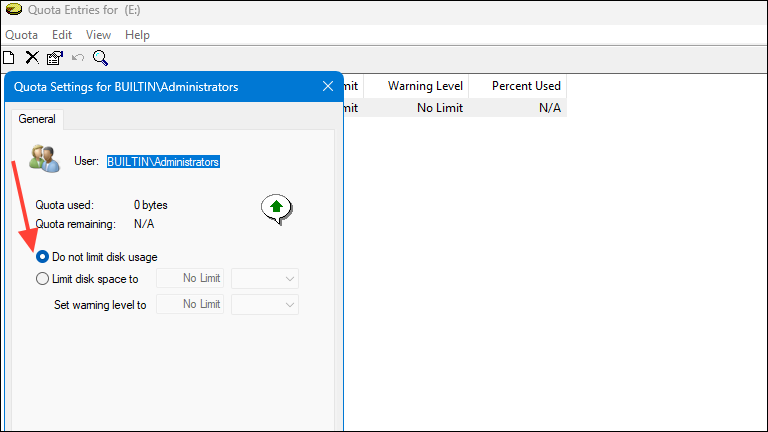
- Right-click on the user account for which you want to disable the quota and then click on 'Properties'.
- Next, click on the 'Do not limit disk usage' option and click the 'OK' button.
Things to know
- If you cannot see the 'Quota' option for a drive, it means that the drive hasn't been formatted as an NTFS partition. To fix this, open Command Prompt with admin privileges from the Start menu and type the following command before pressing Enter:
convert A: /fs:ntfs. - Make sure to enable the 'Deny disk space to users exceeding quota limit' option to prevent users from storing files even after exceeding their quota.
- It is a good idea to set the warning limit lower than the actual quota so users can be aware when they are close to exceeding their quotas. However, do not make the difference between the warning level and quota limit too great, as that will defeat the purpose of the warning.

