Microsoft To Do is an intuitive task management app integrated into Windows 11, designed to help you organize your personal and professional life. Whether you’re planning your day, setting reminders, or managing tasks across devices, Microsoft To Do offers a seamless experience. This guide will walk you through setting up and effectively using Microsoft To Do on your Windows 11 computer.
Set Up Microsoft To Do on Windows 11
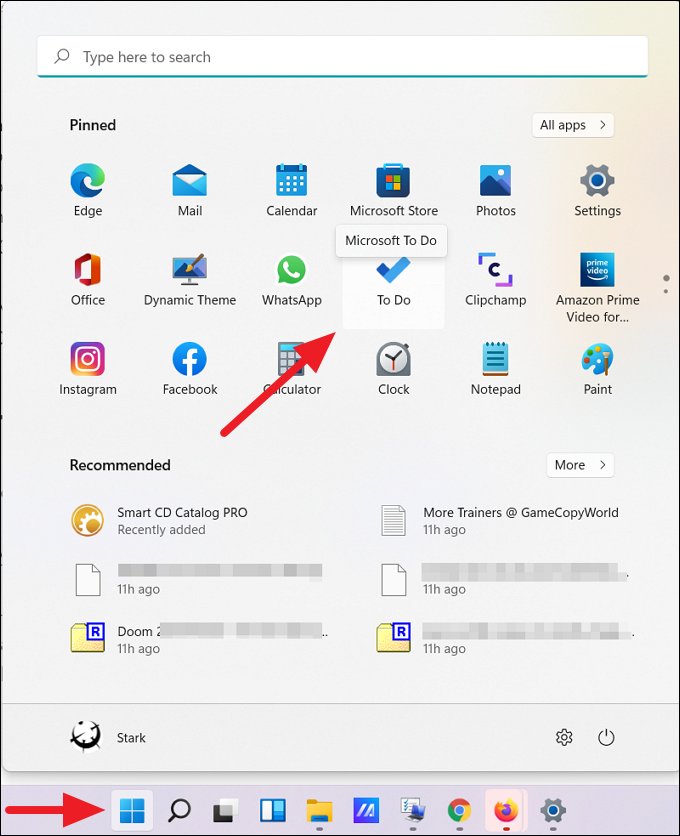
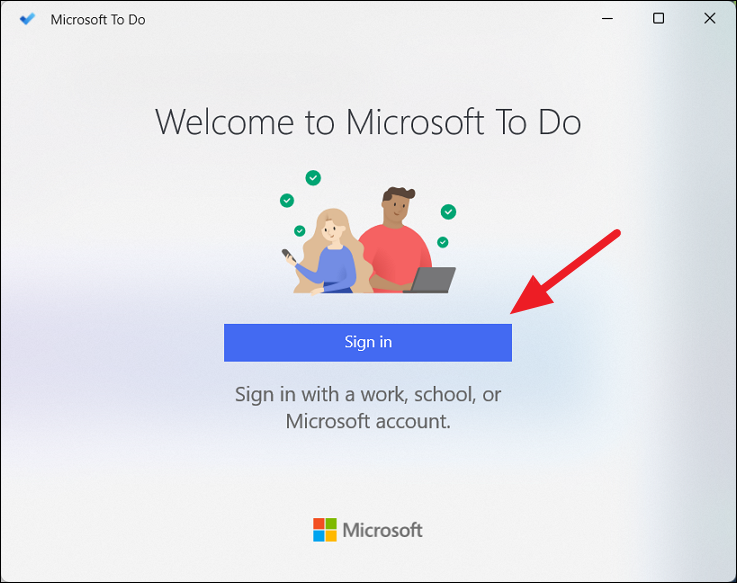
Microsoft To Do comes pre-installed on Windows 11, making it readily accessible without the need for additional downloads. It synchronizes tasks across devices when you’re signed in with your Microsoft account. Here’s how to get started:
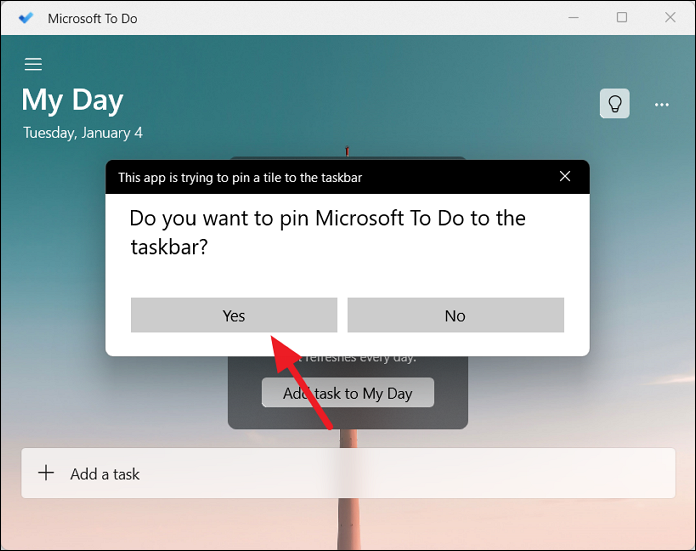
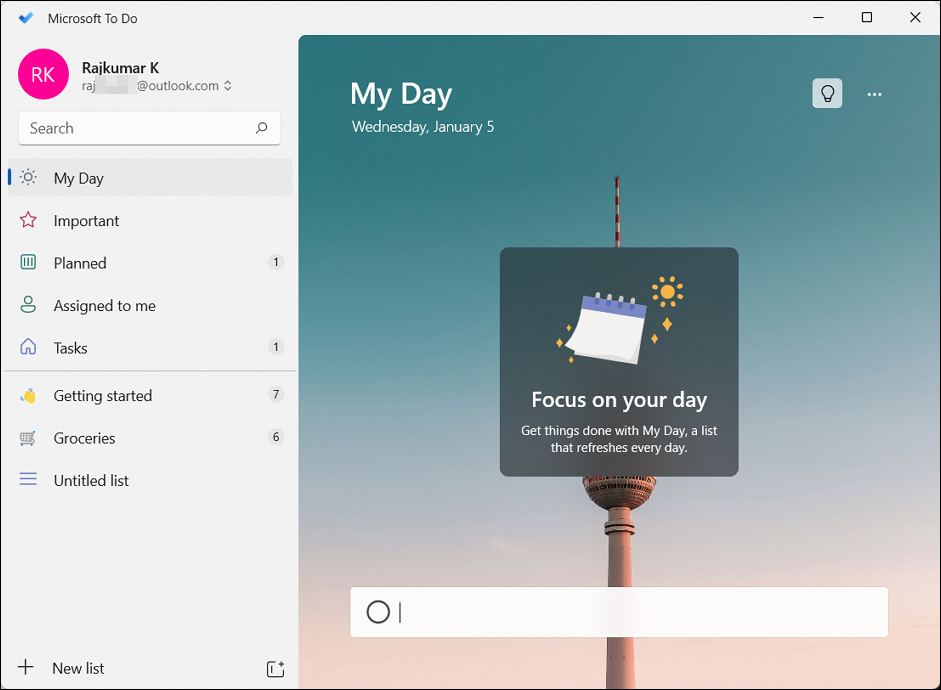
After signing in, you’ll see various categories like My Day, Planned, Important, Assigned to you, and Tasks on the left sidebar. These categories, known as smart lists, help you organize and manage your tasks efficiently.
Understanding Smart Lists in Microsoft To Do
Smart lists categorize your tasks, making it easier to prioritize and manage them. Here’s what each smart list represents:
- My Day: Tasks you plan to accomplish today. Tasks here reset daily, providing a fresh start each day.
- Important: Tasks you’ve marked as important with a star. These tasks are crucial and need your attention.
- Planned: Contains tasks with assigned due dates, helping you keep track of upcoming deadlines.
- Assigned to you: Tasks assigned to you from shared lists or Microsoft Planner.
- Tasks: A collection of all your tasks that aren’t categorized under other lists.
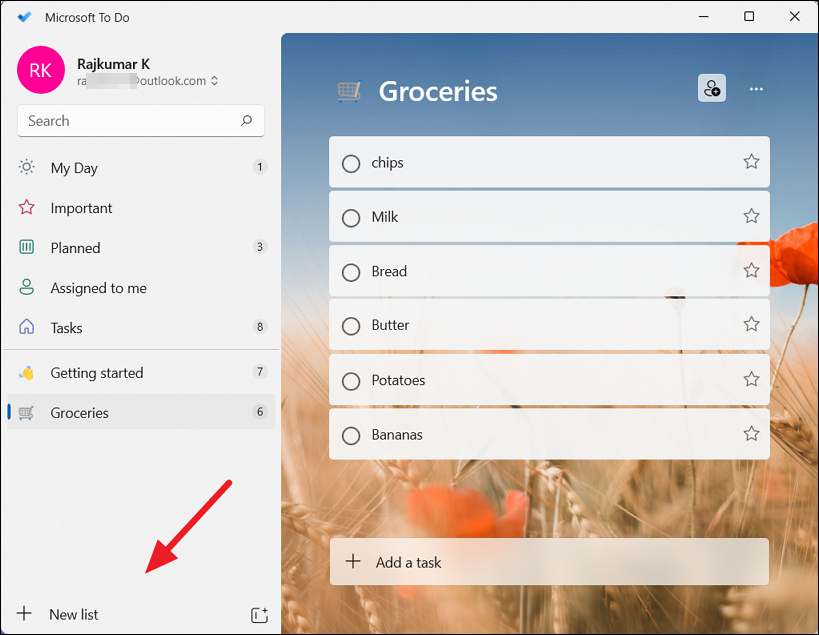
- Groceries: A specialized list for managing your grocery shopping items.
Creating Tasks in Microsoft To Do
Adding tasks to Microsoft To Do is straightforward. Follow these steps to create and manage your tasks:
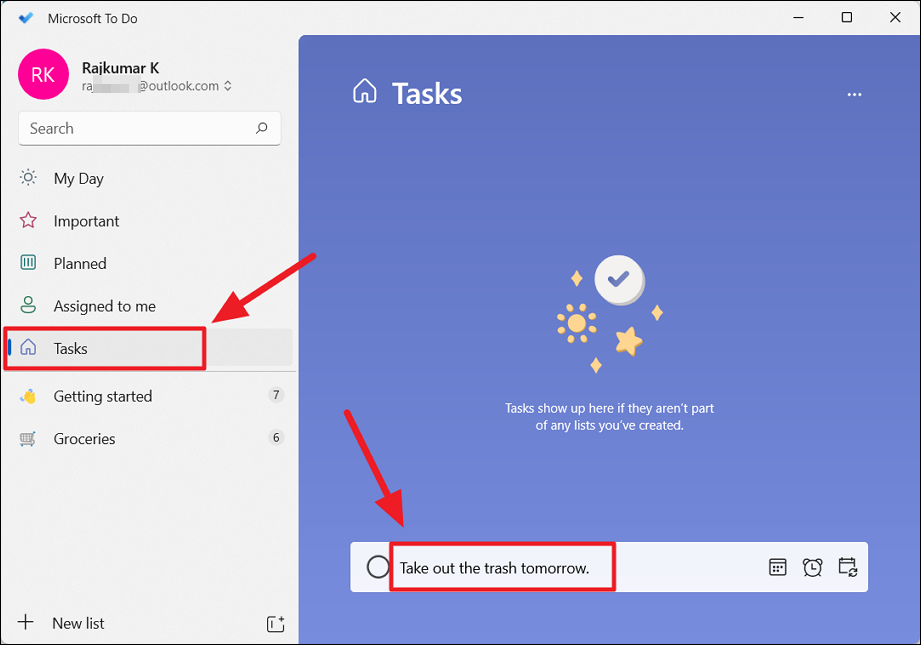
Enter, you can set a reminder, due date, or repeat schedule using the icons next to the task field. Alternatively, press Enter to add the task and modify details later.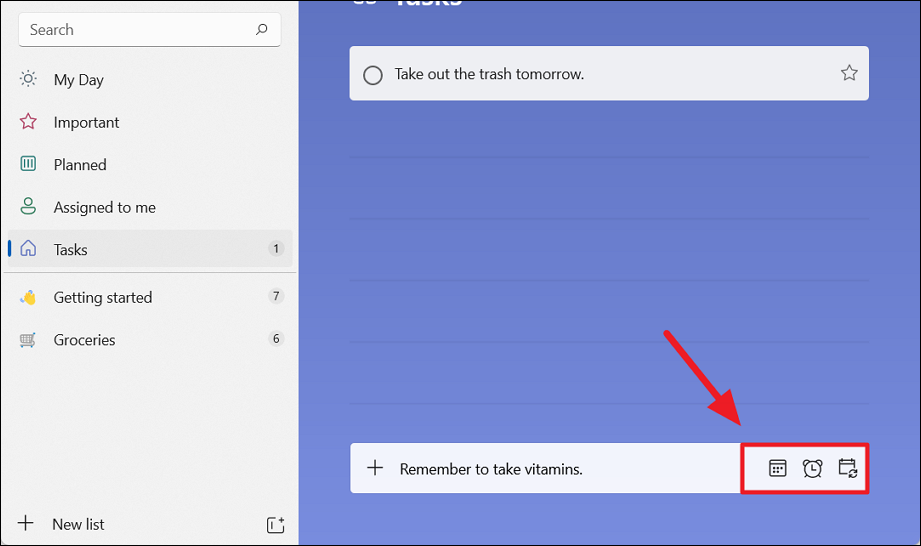
After adding your tasks, you can further refine them by adding steps, setting due dates, and organizing them into lists.
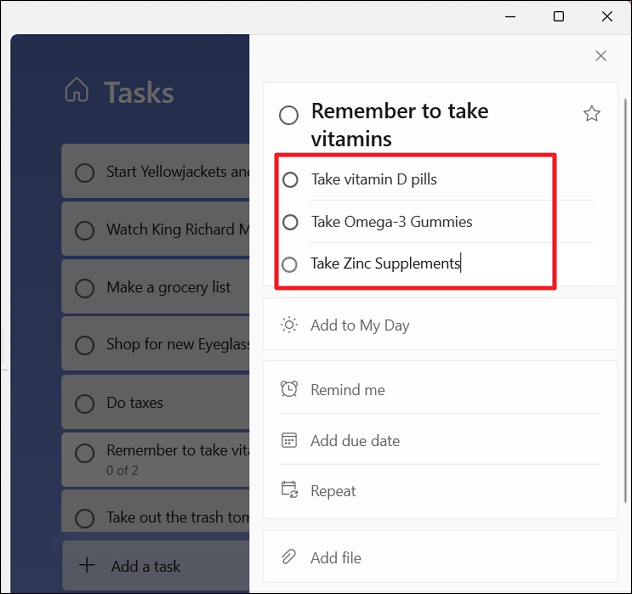
Adding Steps or Subtasks
To break down a task into smaller, manageable parts, you can add steps:
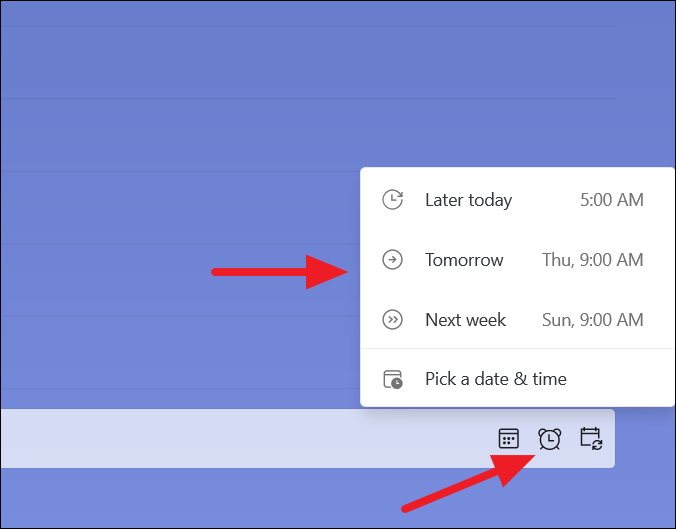
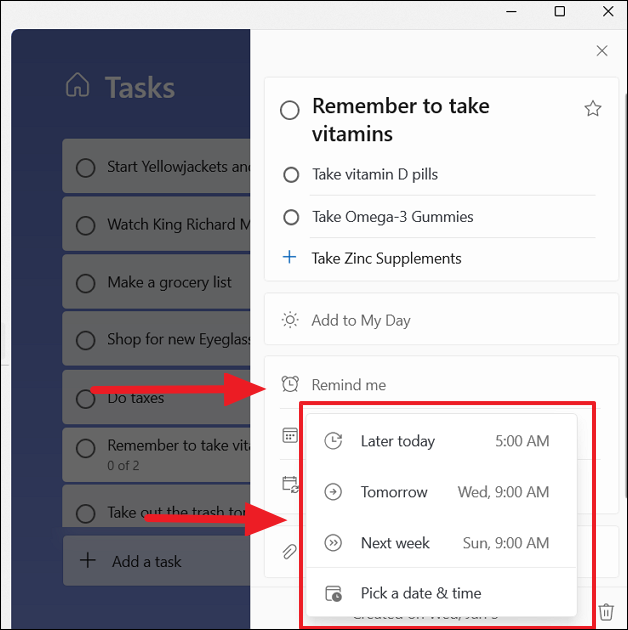
Setting a Reminder
Reminders ensure you don’t forget your tasks:
Adding a Due Date
Assigning due dates helps prioritize tasks:

Tasks with due dates automatically appear in the Planned list.
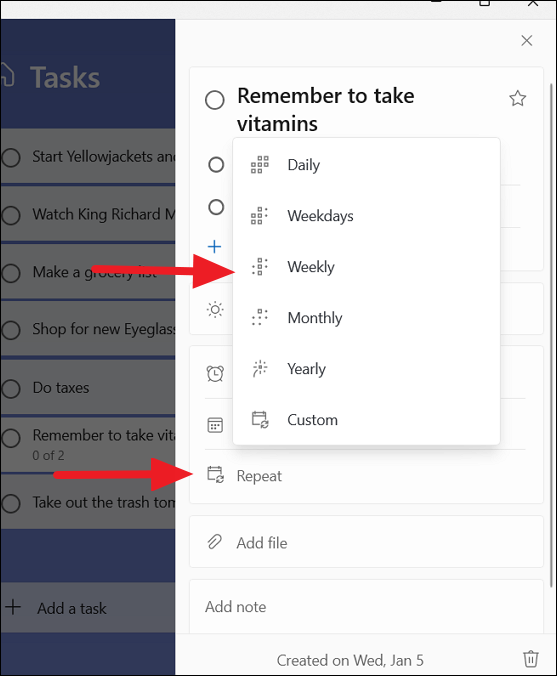
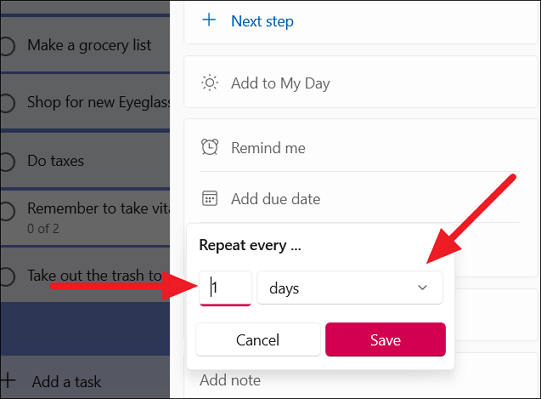
Setting Up a Repeat Schedule
For recurring tasks, establish a repeat schedule:
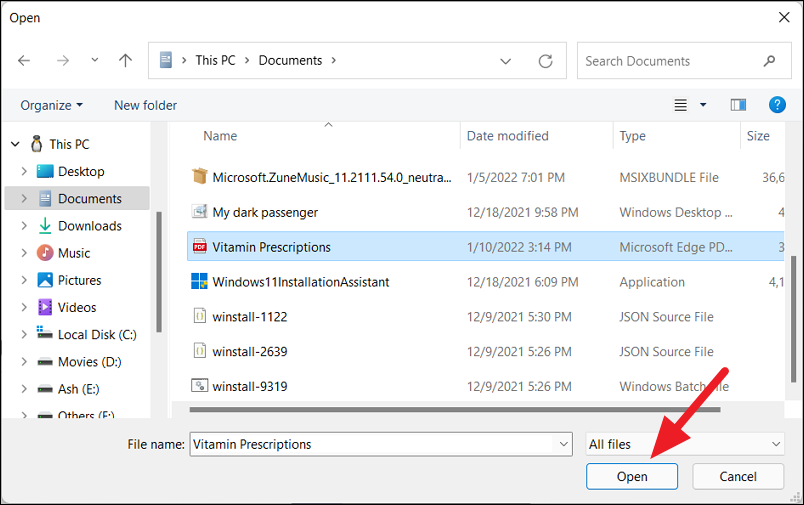
Add Attachments to Tasks
You can attach files to tasks for additional context:
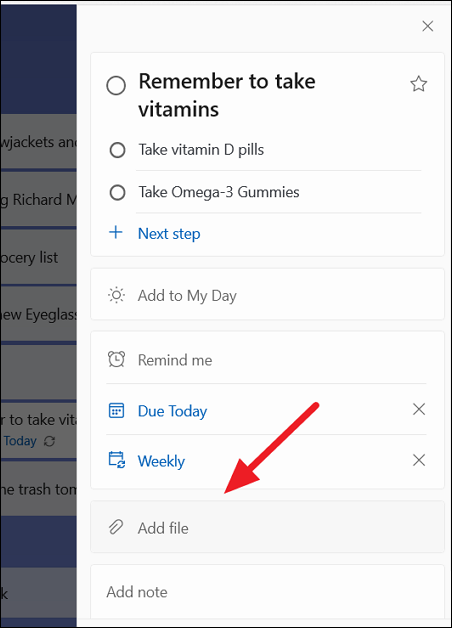
You can also add notes in the Add note section for additional details.
Create Tasks with Cortana
Microsoft To Do integrates with Cortana, allowing you to add tasks using voice commands:
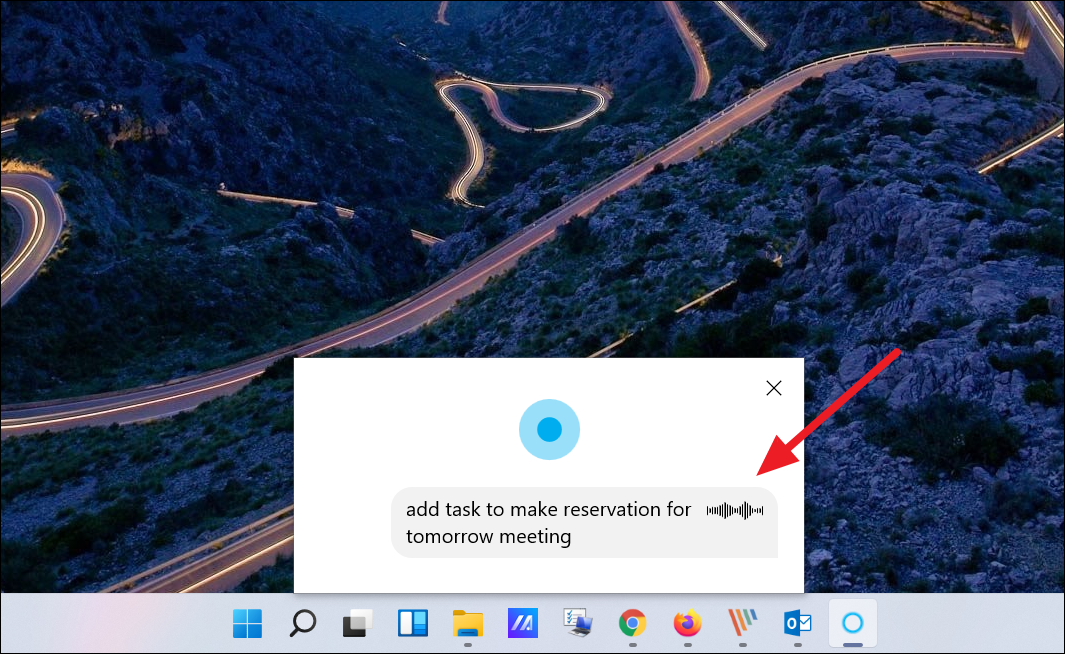
Cortana will recognize the command and add the task to your Microsoft To Do app.
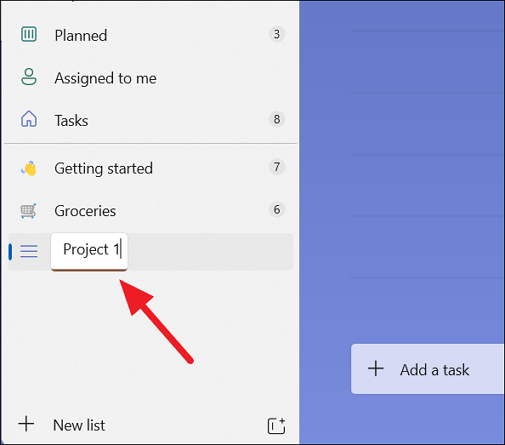
Create a List in Microsoft To Do
Organizing tasks into lists can enhance productivity. Here’s how to create a new list:
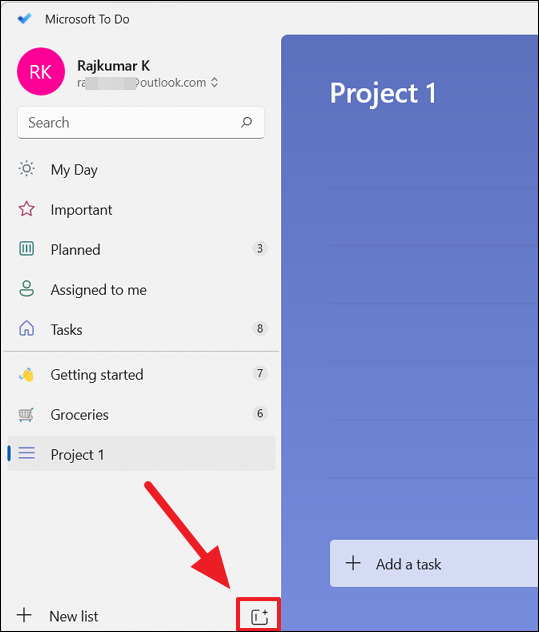
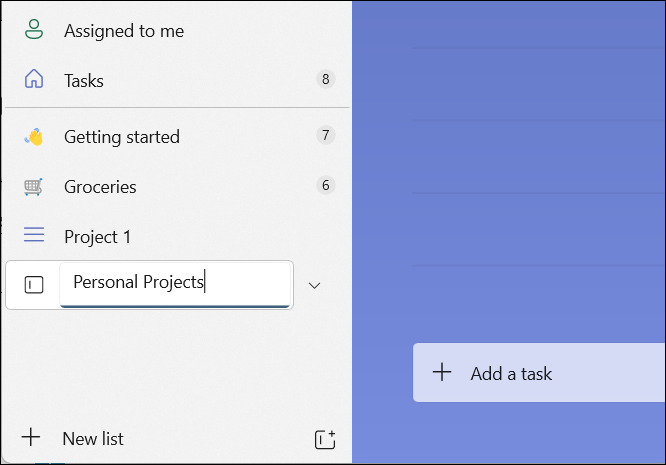
Create Groups in Microsoft To Do
Groups help you manage multiple lists by categorizing them under a common theme:
Managing Tasks, Lists, and Groups
Efficient task management involves organizing and prioritizing your tasks, lists, and groups.
Managing Tasks
Customize your tasks using these features:
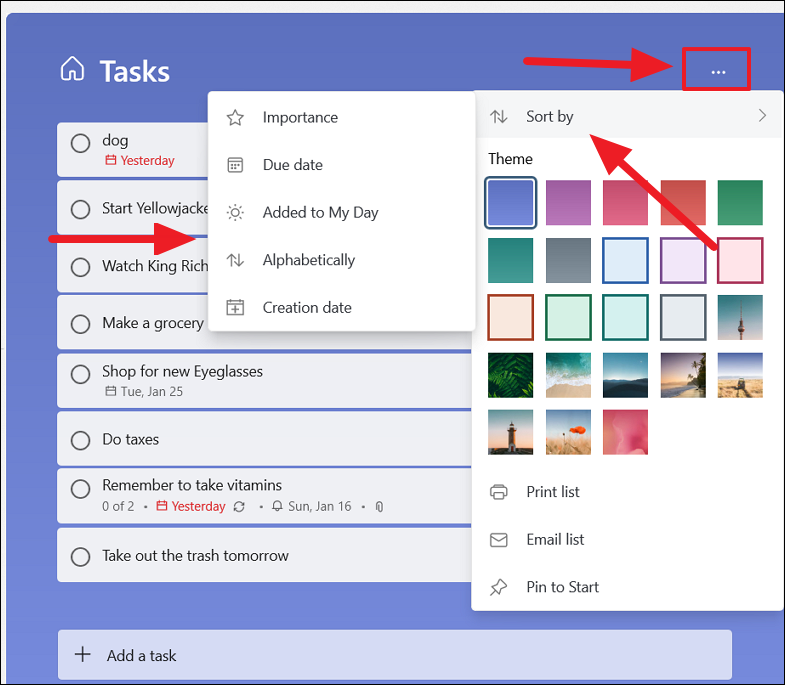

Managing Lists
Organize your lists to streamline your workflow:
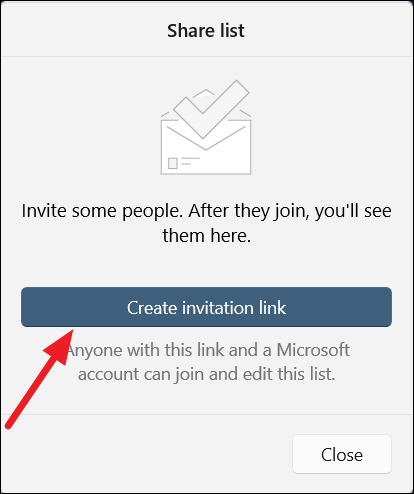
Sharing Tasks in Microsoft To Do
Collaborate with others by sharing your lists:
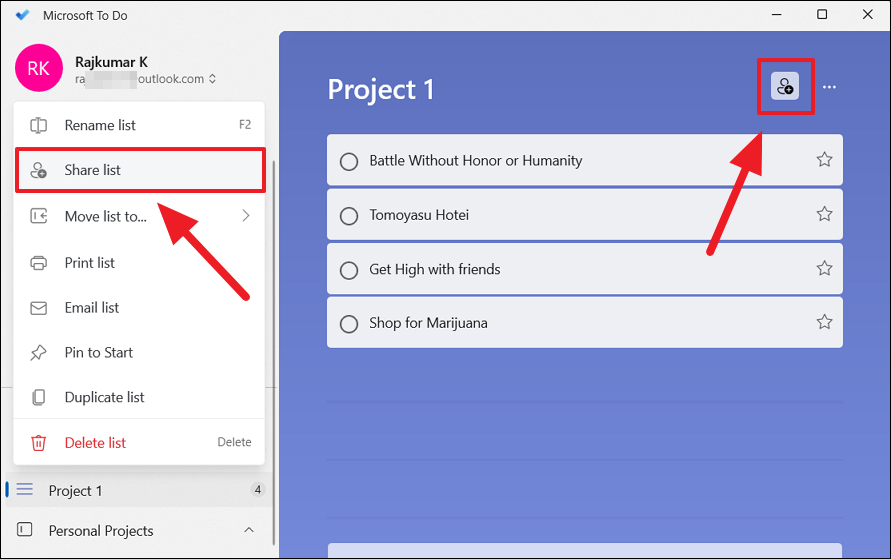
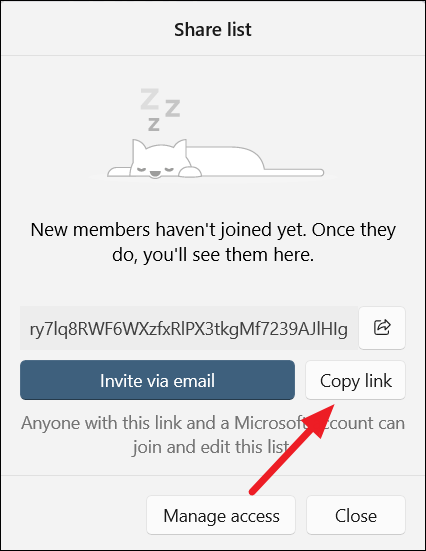
You can manage access or stop sharing the list in the Manage access section.
Microsoft To Do Keyboard Shortcuts
| Action | Keyboard Shortcut |
|---|---|
| Add a task | Ctrl+N |
| Create a new list | Ctrl+L |
| Add a task to My Day | Ctrl+T |
| Complete a task | Ctrl+D |
| Search | Ctrl+F |
| Sync | Ctrl+R |
Ctrl+P | |
| Toggle sidebar | Ctrl+1 |
| Paste files in task details | Ctrl+V |
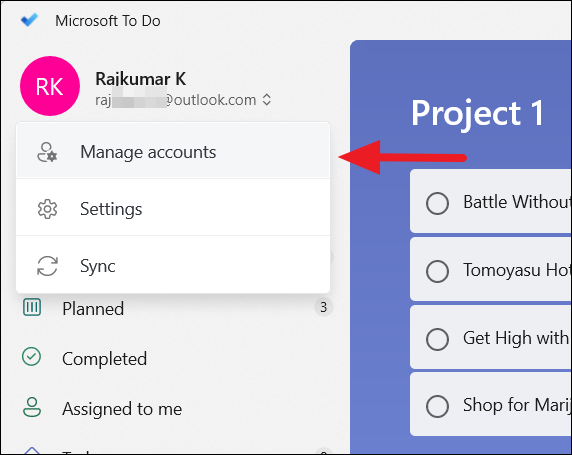
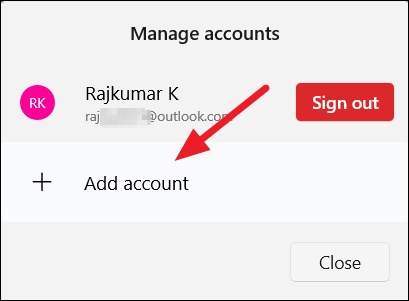
Switch Accounts in Microsoft To Do
You can manage multiple accounts within the app:
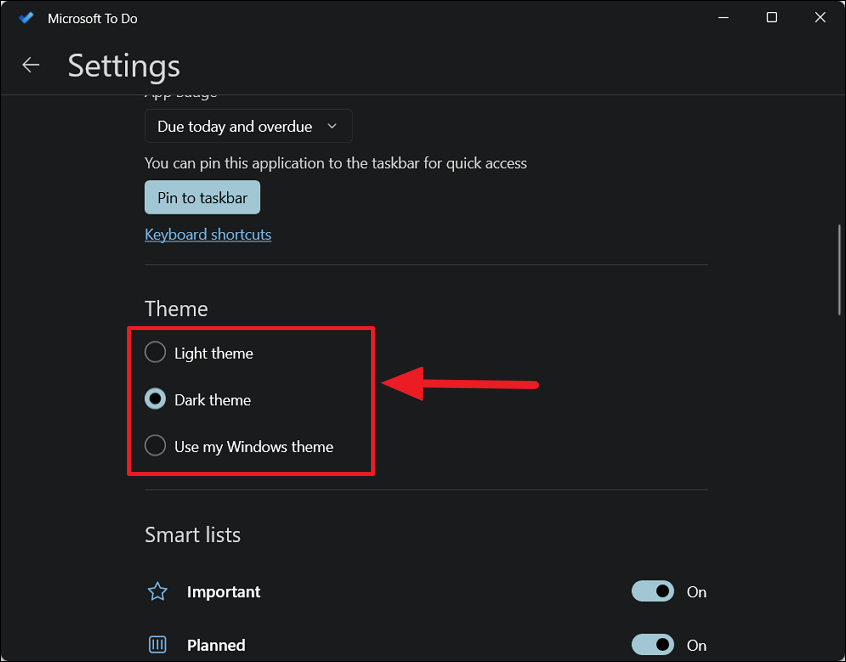
Customize Themes in Microsoft To Do
Change App Theme
You can switch between light and dark themes:
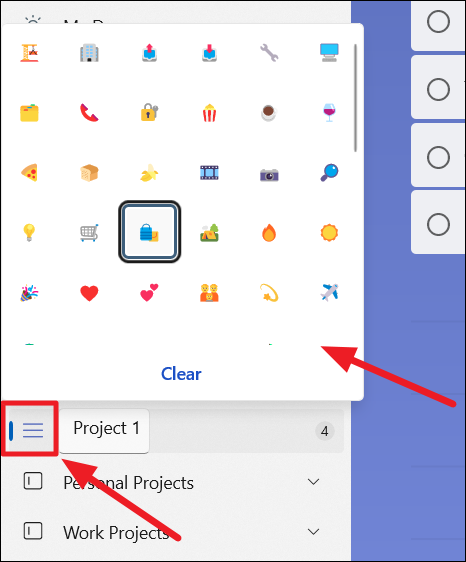
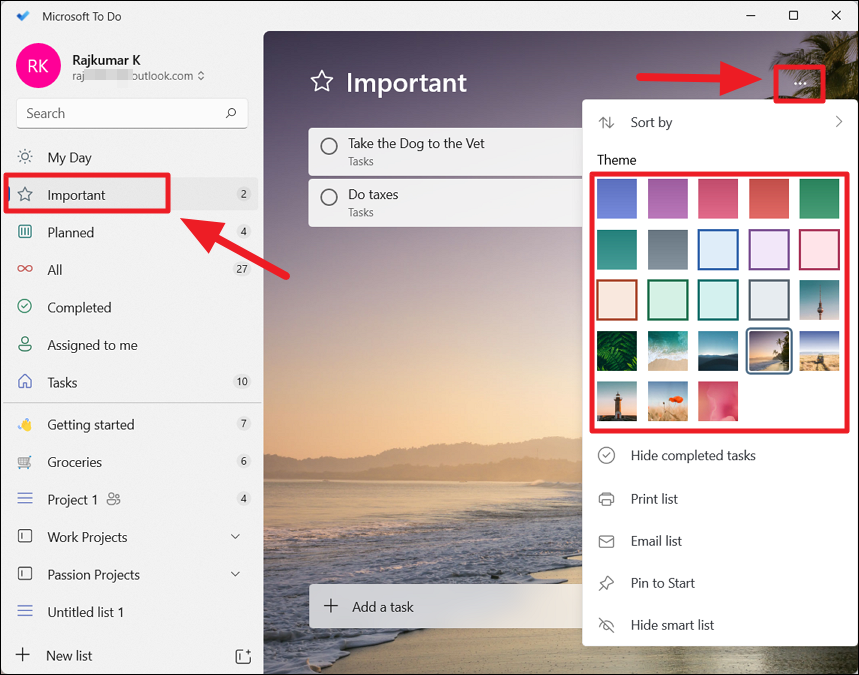
Change List Themes
Personalize individual lists with custom backgrounds:
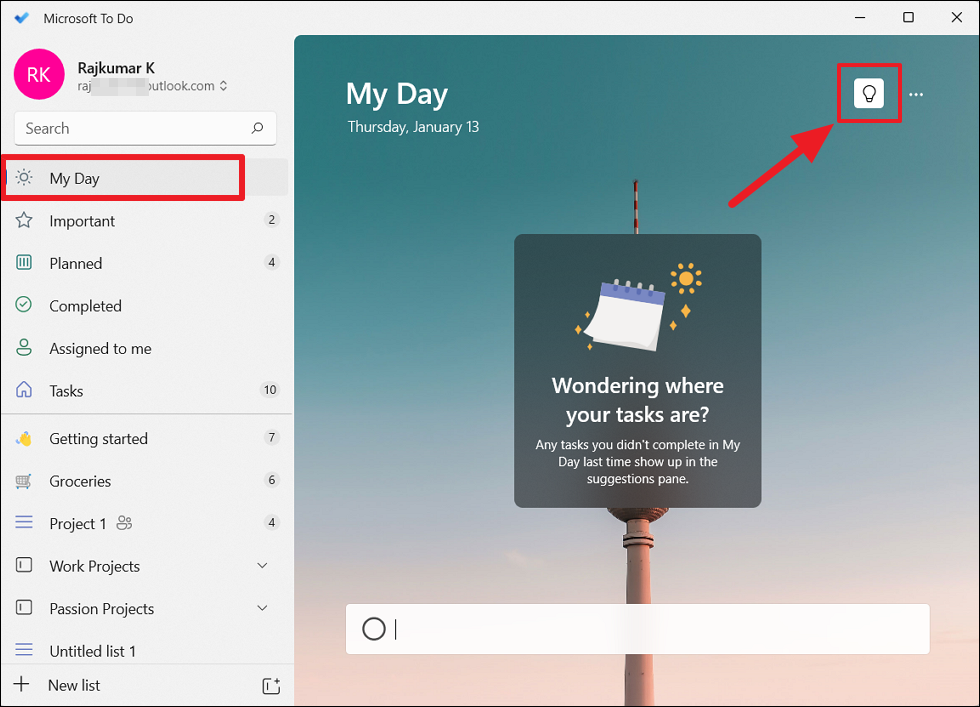
Utilize Suggestions to Manage Your Day
The My Day list offers personalized task suggestions:
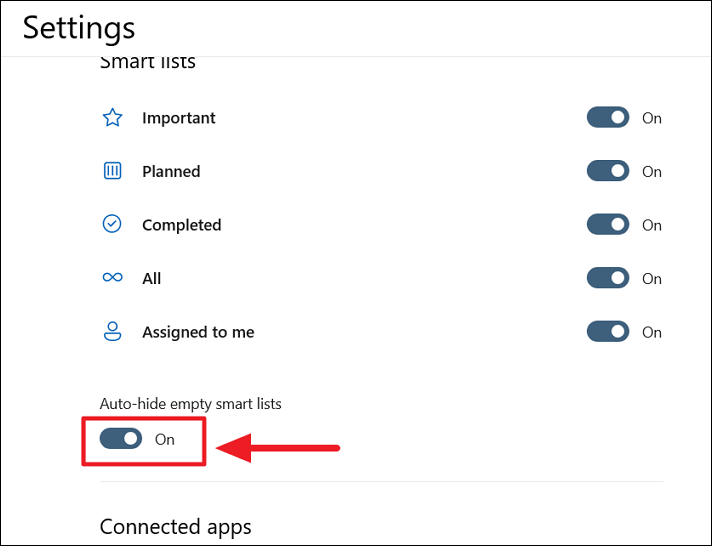
Enable or Disable Smart Lists
Customize which smart lists appear in your sidebar:
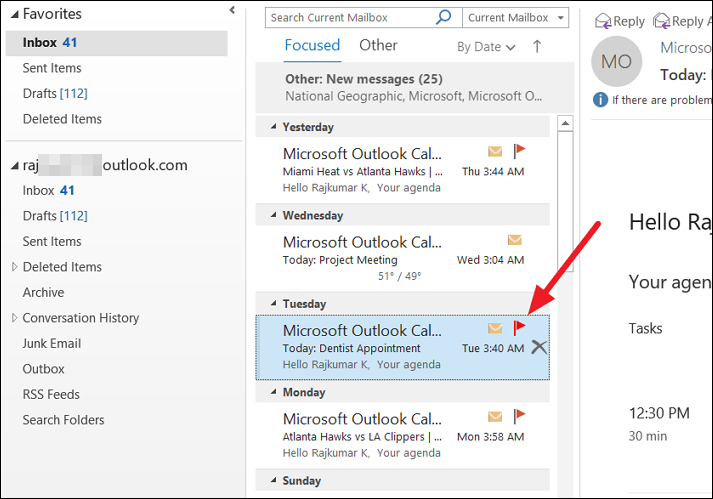
Handle Flagged Emails in Microsoft To Do
Integrate your Outlook emails with Microsoft To Do:

Create Tasks from Email in Microsoft To Do
You can convert emails into tasks directly from Outlook:
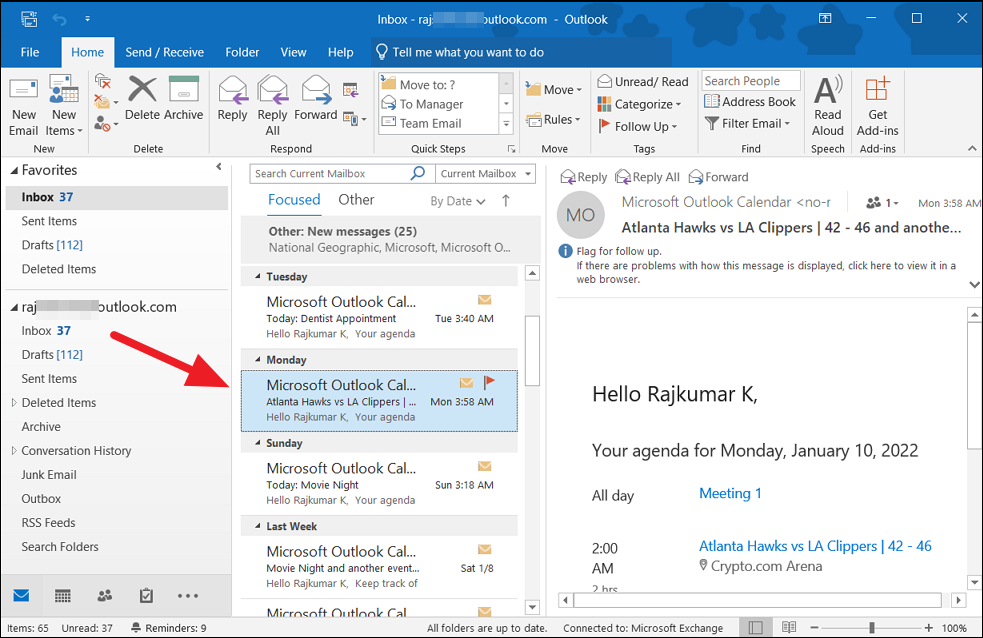
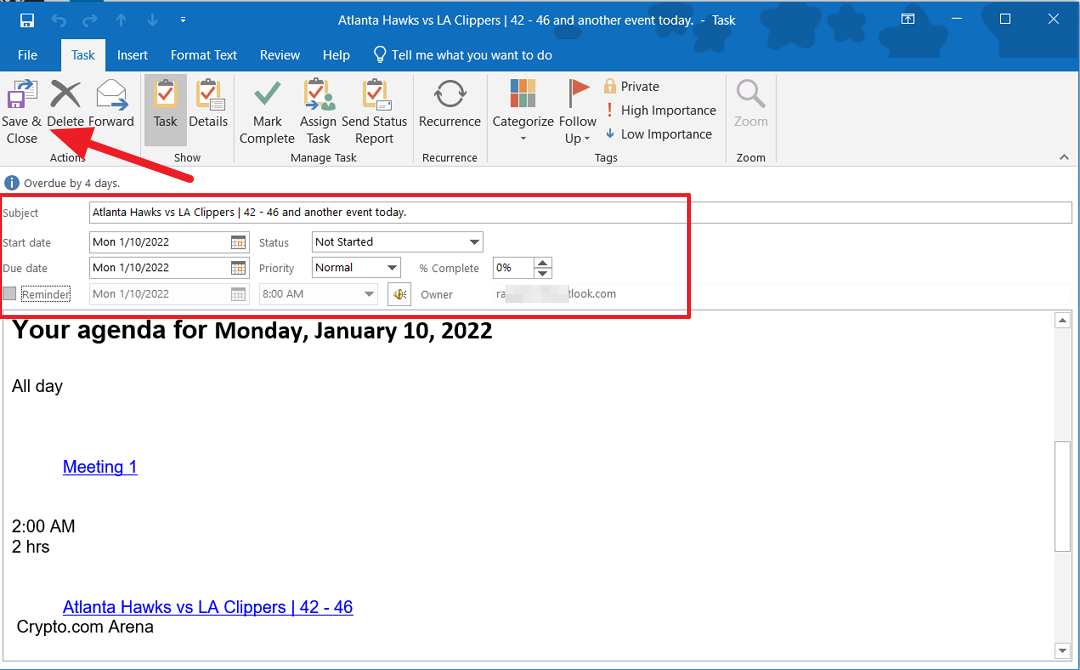
The task will now be available in Microsoft To Do under the Tasks list.
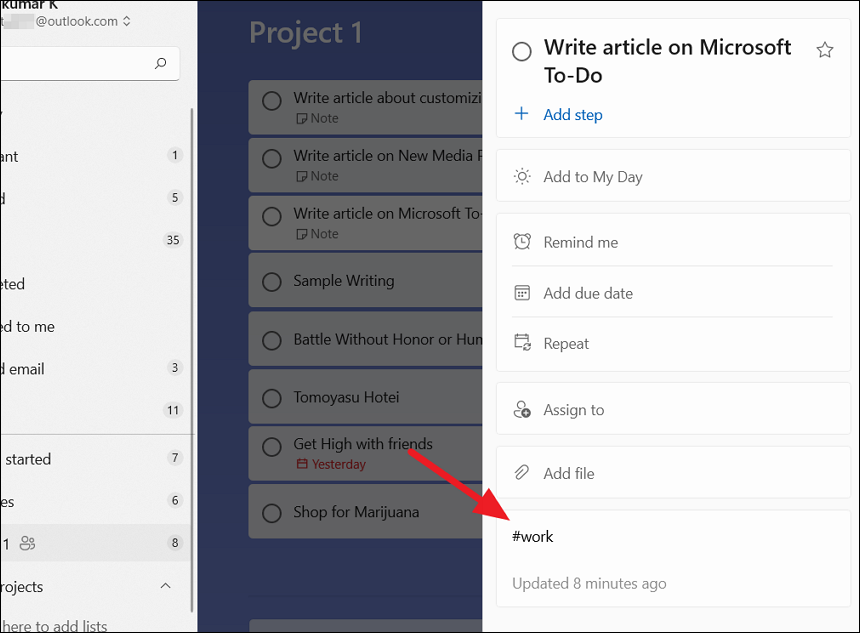
Add Hashtags to Your Tasks
Organize tasks using hashtags for easy searchability:
Plan Your Week with the Planned List
The Planned list helps you focus on upcoming tasks:
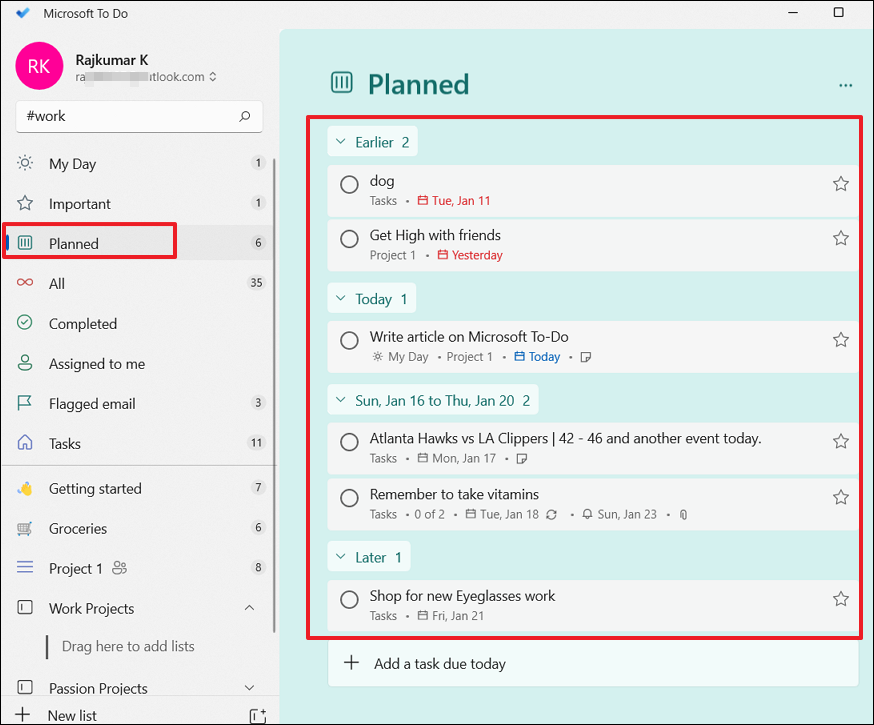
This view helps you prioritize tasks based on urgency and due dates.
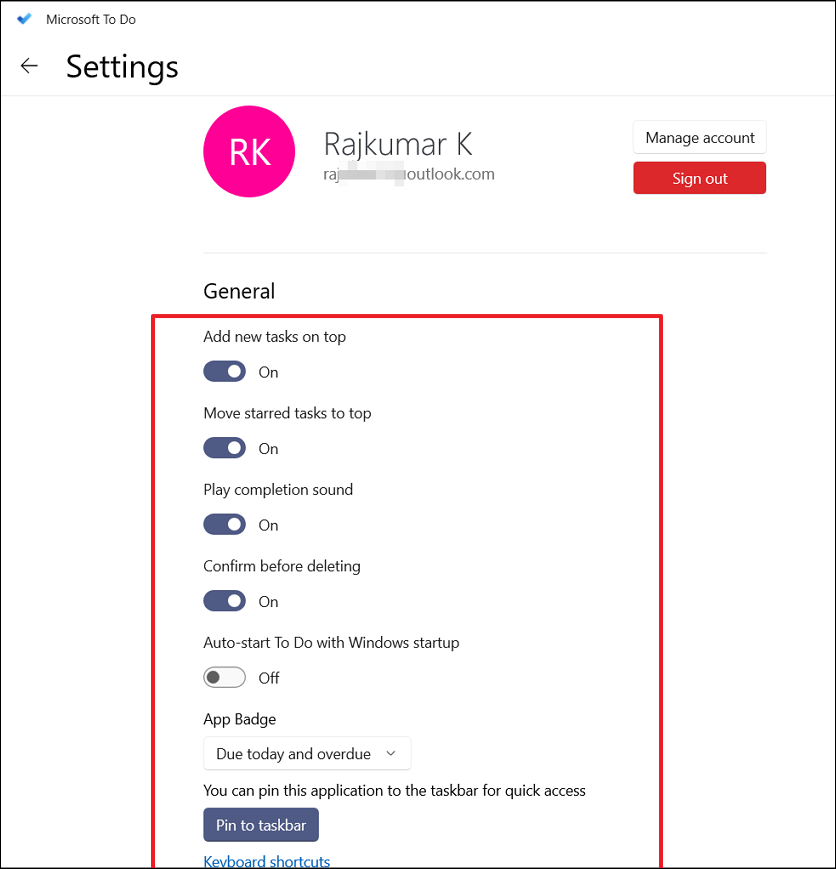
Configure Advanced Settings in Microsoft To Do
Customize the app to suit your preferences:
By mastering these features, you can enhance your productivity and stay organized with Microsoft To Do on Windows 11.