macOS Sequoia introduces new ways to communicate using the Messages app, including the ability to format text and schedule messages to send later. These features help you clearly express your intentions and manage your conversations more effectively. Follow these detailed instructions to start using these new messaging capabilities on your Mac.
How to Format Text in Messages on macOS Sequoia
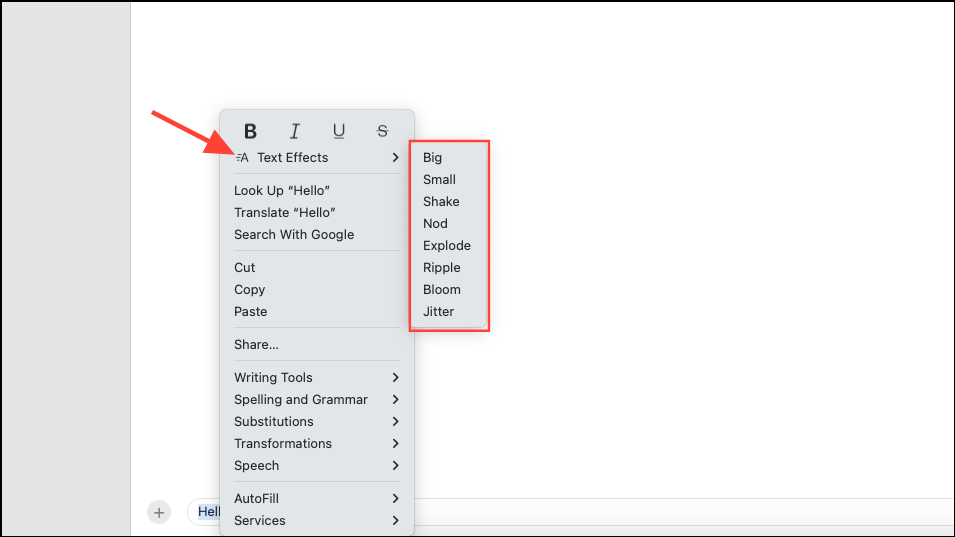
With macOS Sequoia, you can now apply text formatting directly within your messages. This includes bold, italic, underline, and strikethrough options. These formatting tools are helpful for emphasizing important points or clarifying your message.
Command-B for bold, Command-I for italic, or Command-U for underline.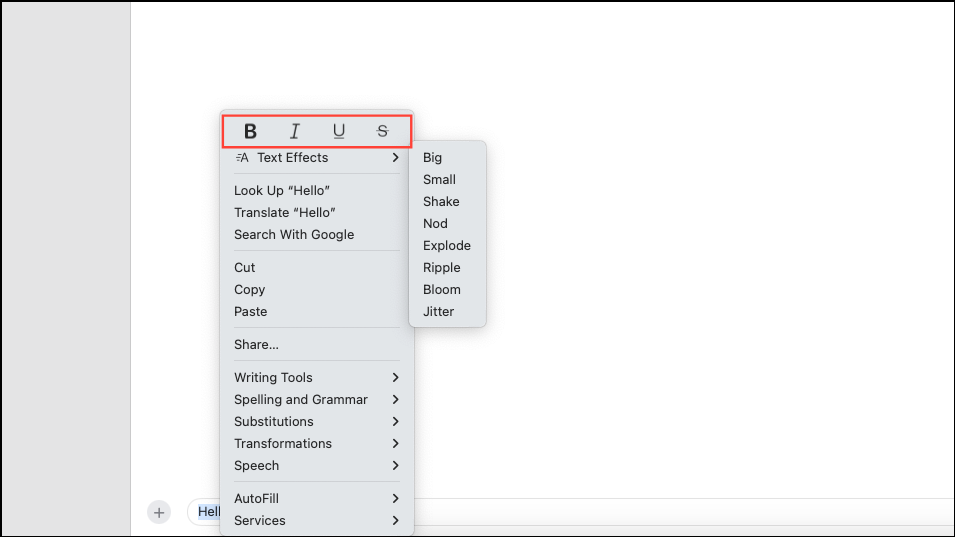
Recipients must also be using macOS Sequoia, iOS 18, or iPadOS 18 to view these formatted messages. Otherwise, the message will appear as plain text.
How to Schedule Messages to Send Later on macOS Sequoia
Scheduling messages allows you to compose messages ahead of time and have them sent automatically at a specified future date and time. This feature is useful for reminders, birthday greetings, or messages you don’t want to forget.
Return. Your scheduled message will appear below the current conversation with a dotted outline, indicating it’s scheduled and not yet sent.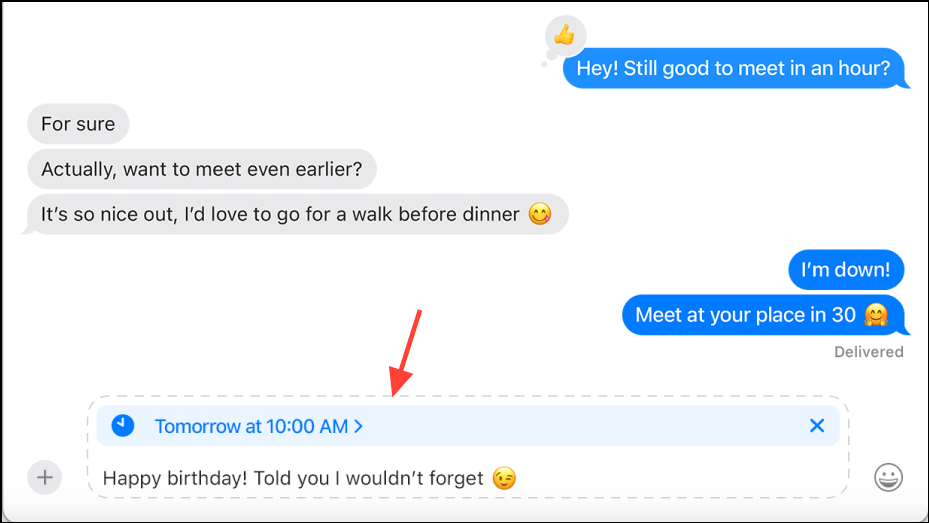
If you need to change or cancel your scheduled message, click Edit above the scheduled message. You can choose to reschedule, send immediately, or delete the message entirely.
Using Emojis as Tapback Reactions
macOS Sequoia also improves how you interact with messages by allowing you to react with any emoji. Previously, reactions were limited to a set of predefined options.
Your chosen emoji will appear as a small reaction attached to the selected message, providing a quick and expressive way to respond.
These new tools in macOS Sequoia’s Messages app simplify communication by allowing precise text formatting, convenient message scheduling, and expressive emoji reactions. Start using these features today to communicate more clearly and efficiently on your Mac.