If your Windows 10 computer has started experiencing issues and you wish it could return to its previous state when everything was functioning smoothly, there's a built-in feature that can help. System Restore allows you to roll back your operating system to a prior point in time, undoing recent changes that might be causing problems.
System Restore is a handy tool that can reverse system changes by restoring your computer to an earlier state using restore points. These restore points are created automatically by Windows or manually by you, provided the feature is enabled on your system.
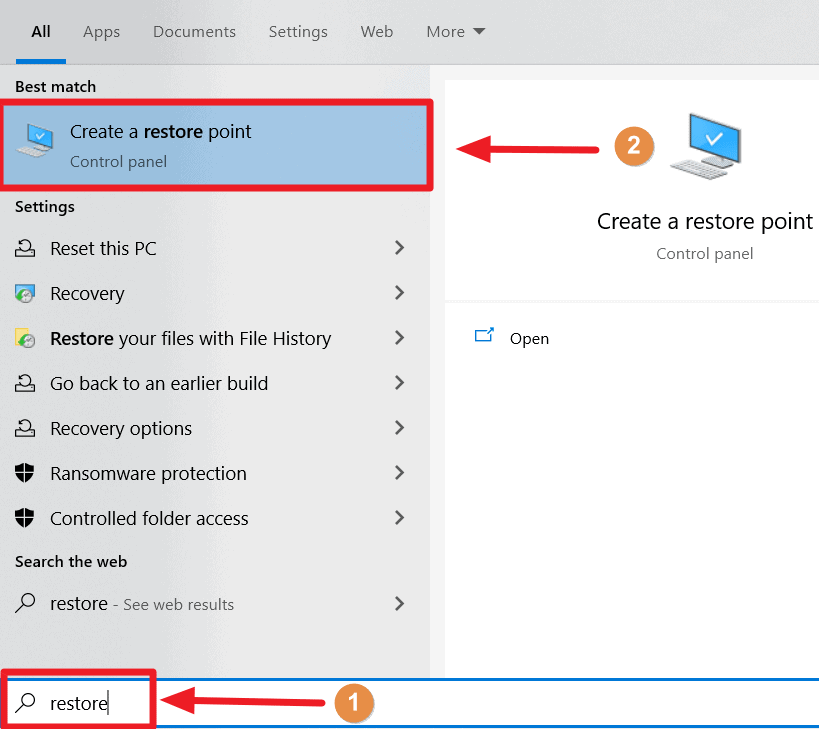
Step 1: Press Win + Q on your keyboard to open the search bar, type 'restore', and press Enter to access the 'Create a restore point' option.
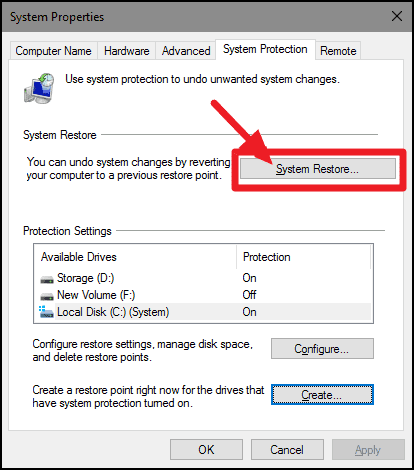
Step 2: In the System Properties window that appears, navigate to the 'System Protection' tab and click on the 'System Restore...' button to start the restoration process.
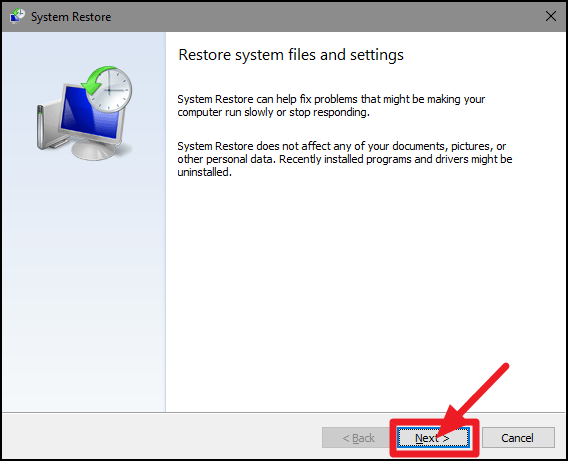
Step 3: The System Restore wizard will open. Click on 'Next' to proceed to the list of available restore points.
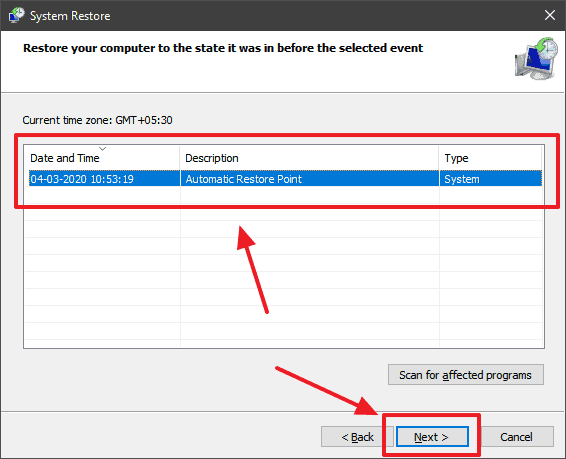
Step 4: Select a restore point from the list. Windows may have automatically created restore points when significant system changes occurred. If you haven't set one manually, choose the most recent 'Automatic Restore Point' and click 'Next'.
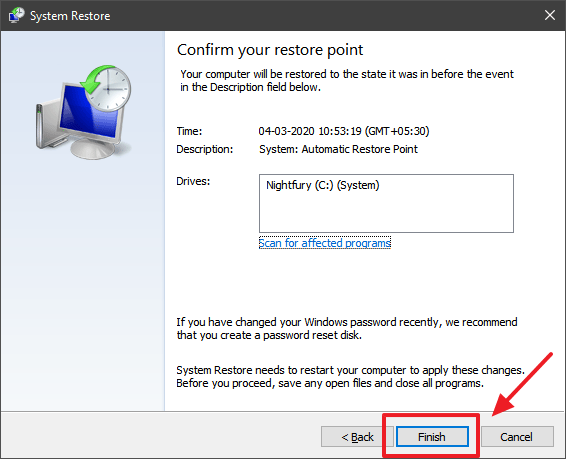
Step 5: Review your selected restore point and confirm by clicking the 'Finish' button. This will begin the process of restoring your system to the chosen state.
By utilizing System Restore, you can effectively undo recent system changes that may be causing issues, returning your Windows 10 computer to a stable and smooth-operating condition.

