
Zeroing your sniper rifle or designated marksman rifle (DMR) in Battlefield 6 can be confusing, especially when the Range Finder attachment offers a new way to do it. Instead of manually guessing the distance to your target and cycling through preset zeroing distances, the Range Finder streamlines the process by automatically calibrating your weapon to the exact range you’re aiming at. This directly improves your shot accuracy and reduces missed shots due to bullet drop miscalculations.
How to Use the Range Finder Attachment in Battlefield 6
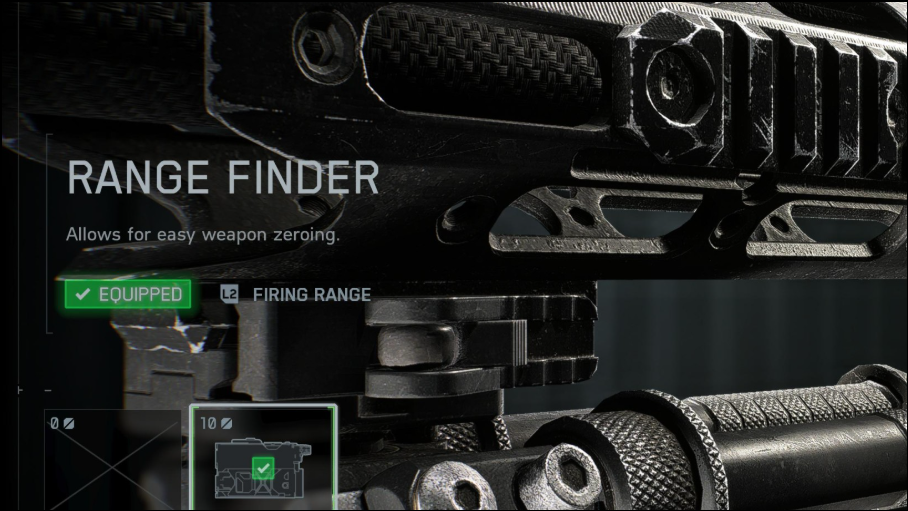
Step 1: Equip the Range Finder attachment to a compatible sniper rifle or DMR. You can unlock the Range Finder for weapons like the M2010 ESR and all DMRs by reaching Mastery Level 4 with each weapon. Attach it from your weapon customization menu before heading into a match.
Step 2: While in-game, aim down your weapon’s sights (scope) at the target you want to hit. Make sure you are scoped in, as the Range Finder only activates while aiming down sights.
Step 3: Press and hold your weapon zeroing button to activate the Range Finder. The default controls are:
Bon PC (keyboard)Downon the D-pad for Xbox and PlayStation controllers
Do not just tap the button—holding it down is required for the Range Finder to measure and set the distance.
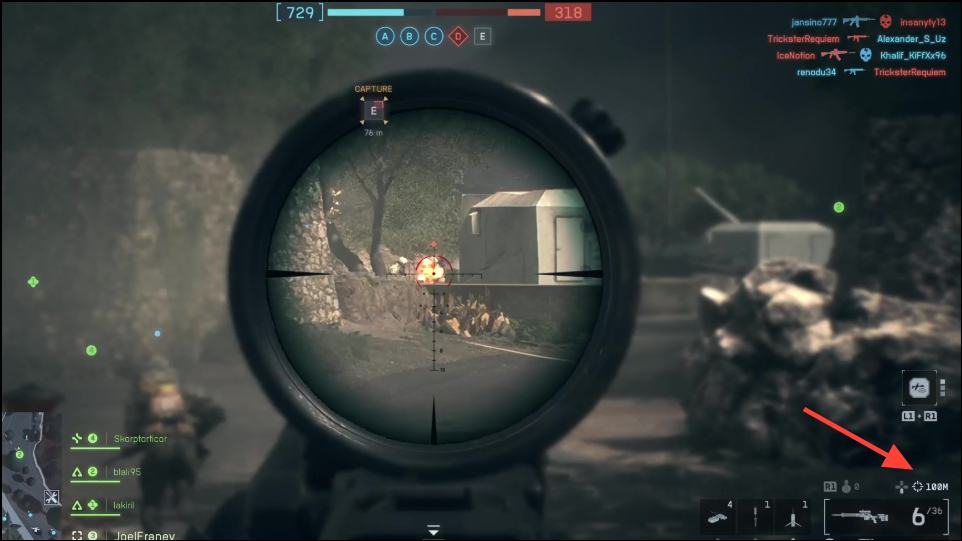
Step 4: Watch for the zeroing distance to update. The current zeroing distance is displayed in the bottom-right of your HUD, just above your ammo count. The number should change to match the distance to your target. This means your weapon is now zeroed for that exact range, making your shot much more likely to hit where you’re aiming, especially at longer distances.
Step 5: Fire your shot. With the Range Finder active, you no longer need to manually compensate for bullet drop at the measured distance—the weapon’s zeroing now matches your target’s range.
Manual Zeroing Without the Range Finder
If you haven’t unlocked the Range Finder attachment, you can still adjust your weapon’s zeroing manually. This involves cycling through preset distances (usually in 100-meter increments) using the same zeroing button:
- Press (not hold) the
Bkey on PC orDownon the D-pad on console while scoped in. Each press moves the zeroing distance up by 100 meters. - Estimate your target’s distance visually or by map familiarity, then select the closest zeroing preset.
- Adjust your aim to compensate for any remaining difference between the preset and the actual distance.
This method requires more experience and guesswork, and it’s less precise than using the Range Finder, but it’s still effective for skilled snipers who know the maps well.
Tips and Troubleshooting
- If you’re unsure which button is mapped to weapon zeroing, check your keybindings in the in-game settings menu. The zeroing control can be rebound to your preference.
- The Range Finder only works when equipped and while aiming down sights. It will not function from the hip or with incompatible weapons.
- Some users report minor discrepancies between the displayed zeroing distance and actual bullet impact, especially at extreme ranges. If you notice shots landing slightly off, try aiming slightly above or below the intended point, or double-check the zeroing display on your HUD.
- The Range Finder does not display the distance in your scope view, but it updates the meter in your HUD. Watch for the number change in the bottom-right corner to confirm activation.
- Once you’re comfortable estimating distances, you may prefer to use manual zeroing and save the attachment slot for another accessory.
Using the Range Finder in Battlefield 6 simplifies long-range sniping by automatically setting your rifle’s zeroing to match your target’s distance. This saves time and increases shot accuracy, especially for new players or those unfamiliar with map distances.