In a very short amount of time, Threads has gained immense popularity. If you haven’t heard of it yet, Threads is a text-based social app that allows you to post text updates of up to 500 characters which can contain pictures and videos that should last a maximum of 5 minutes.
Despite gaining such popularity, Threads is still only available as an app and has no web version. A mobile phone is definitely much more accessible and convenient, but it cannot beat the charm of consuming content on a big screen.
That being said, even though there is no official web version, you can either use BlueStacks or Windows Subsystem for Android to install Threads as an app on your computer.
Install Threads Using BlueStacks
This is the more convenient method to install Threads on your computer. BlueStacks has been around for quite some time now, and the process is just as easy as installing a regular app on your computer.
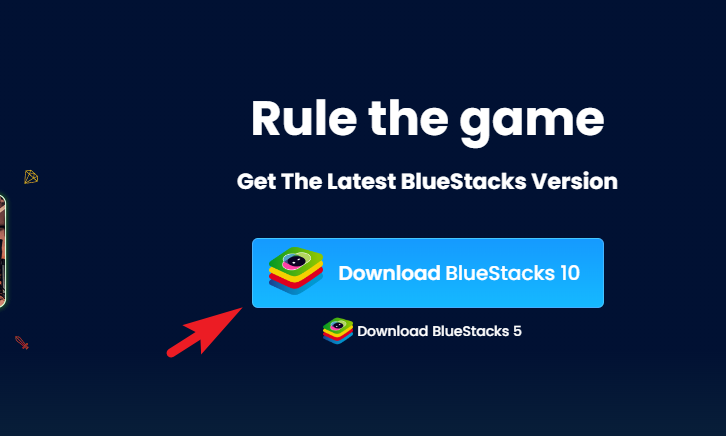
If you do not have BlueStacks installed on your computer, head to www.bluestacks.com/download and click the ‘Download BlueStacks’ button.
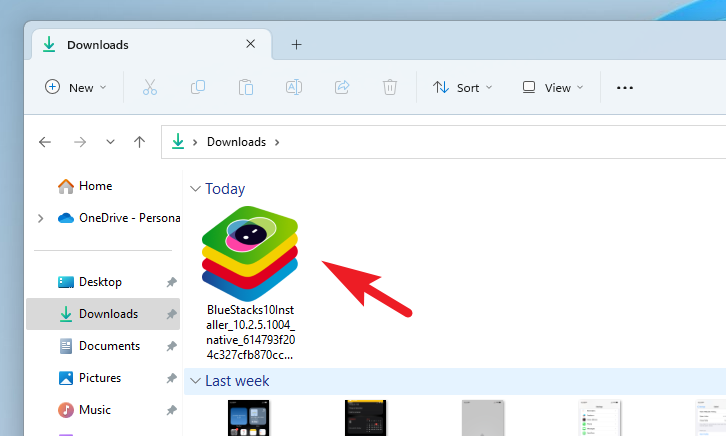
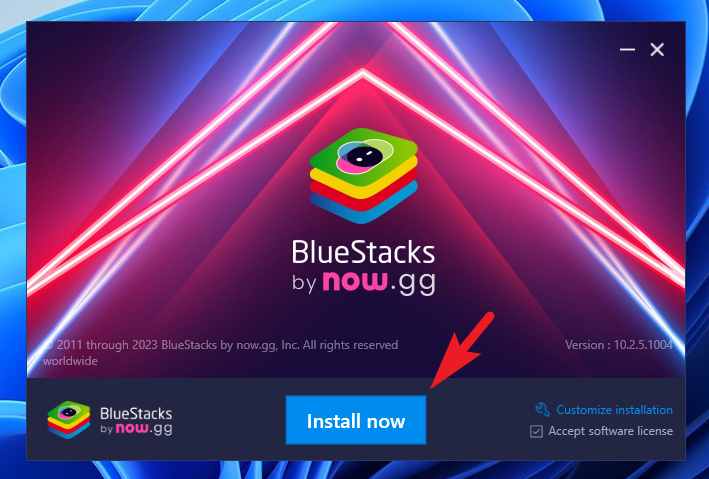
Once the setup has been downloaded, head to your default downloads directory and double-click on the .EXE file to run the setup.
On the installer window, click on the ‘Install now’ button. It will then download the necessary files. Make sure you are connected to the Internet.
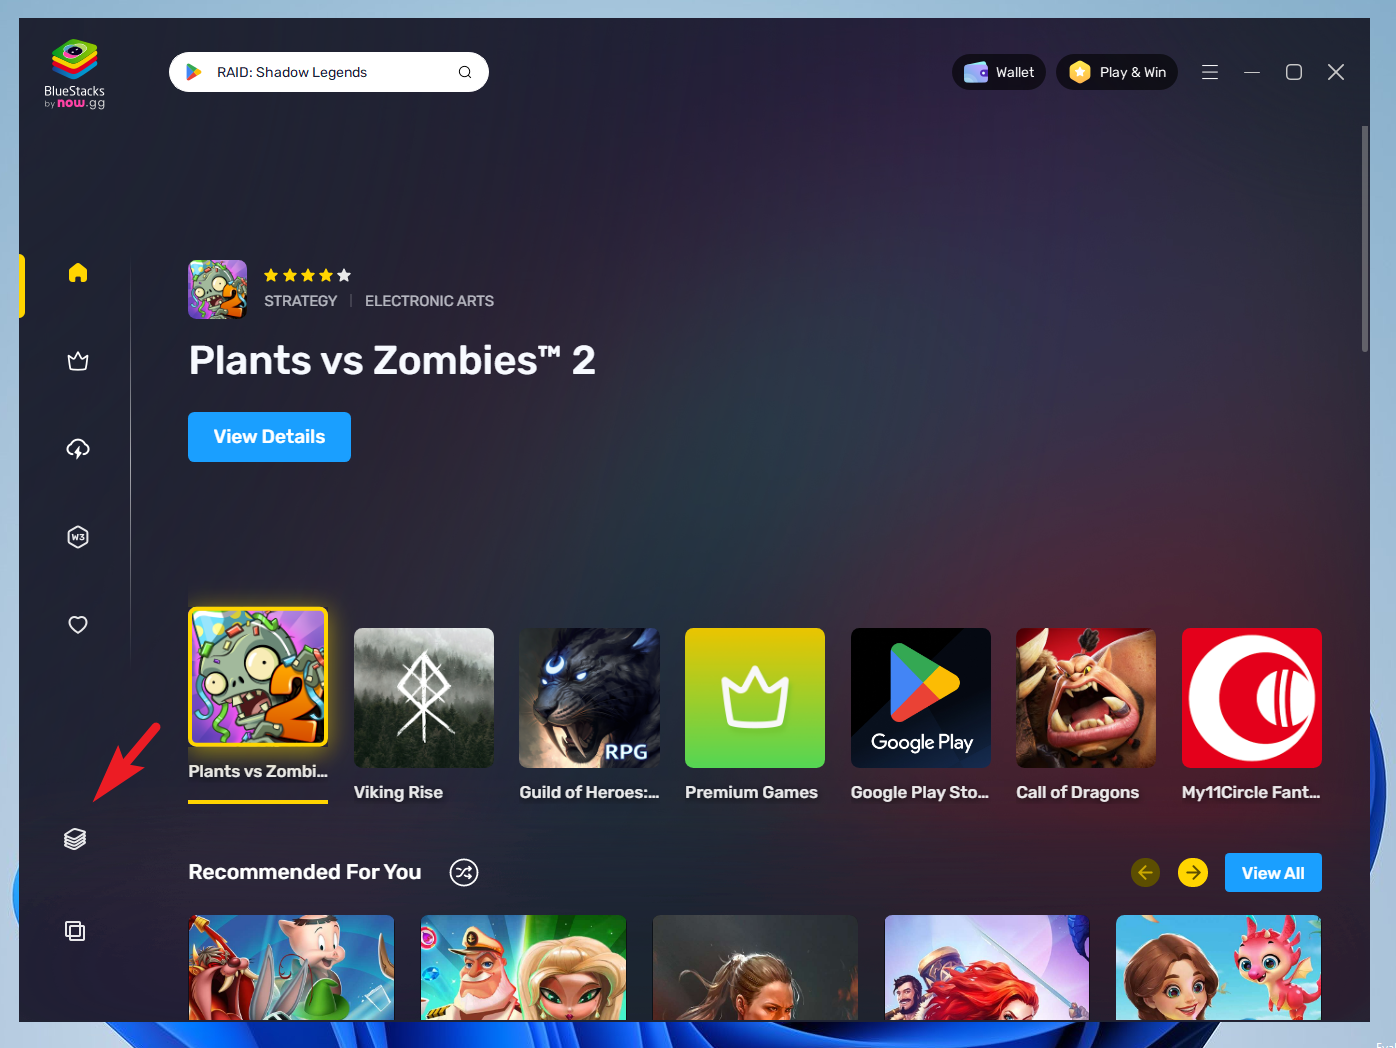
Once the app is finished downloading, the BlueStacks window will open. Now, click on the ‘BlueStacks Player’ from the left sidebar to proceed. This will bring an overlay window to your screen.
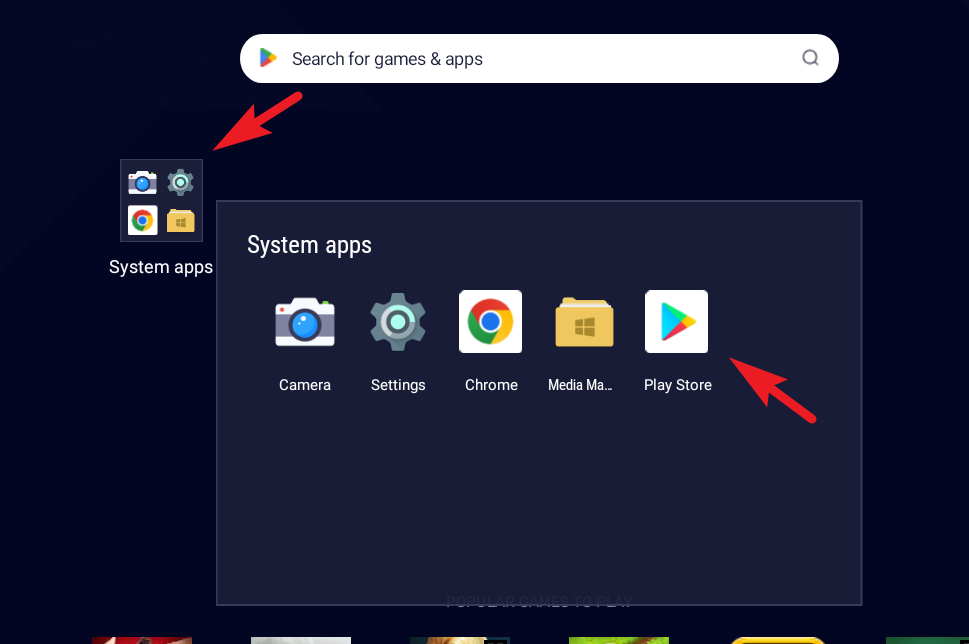
From the overlay window, click on the ‘System apps’ folder. Once it expands, click the ‘Playstore’ icon to continue.
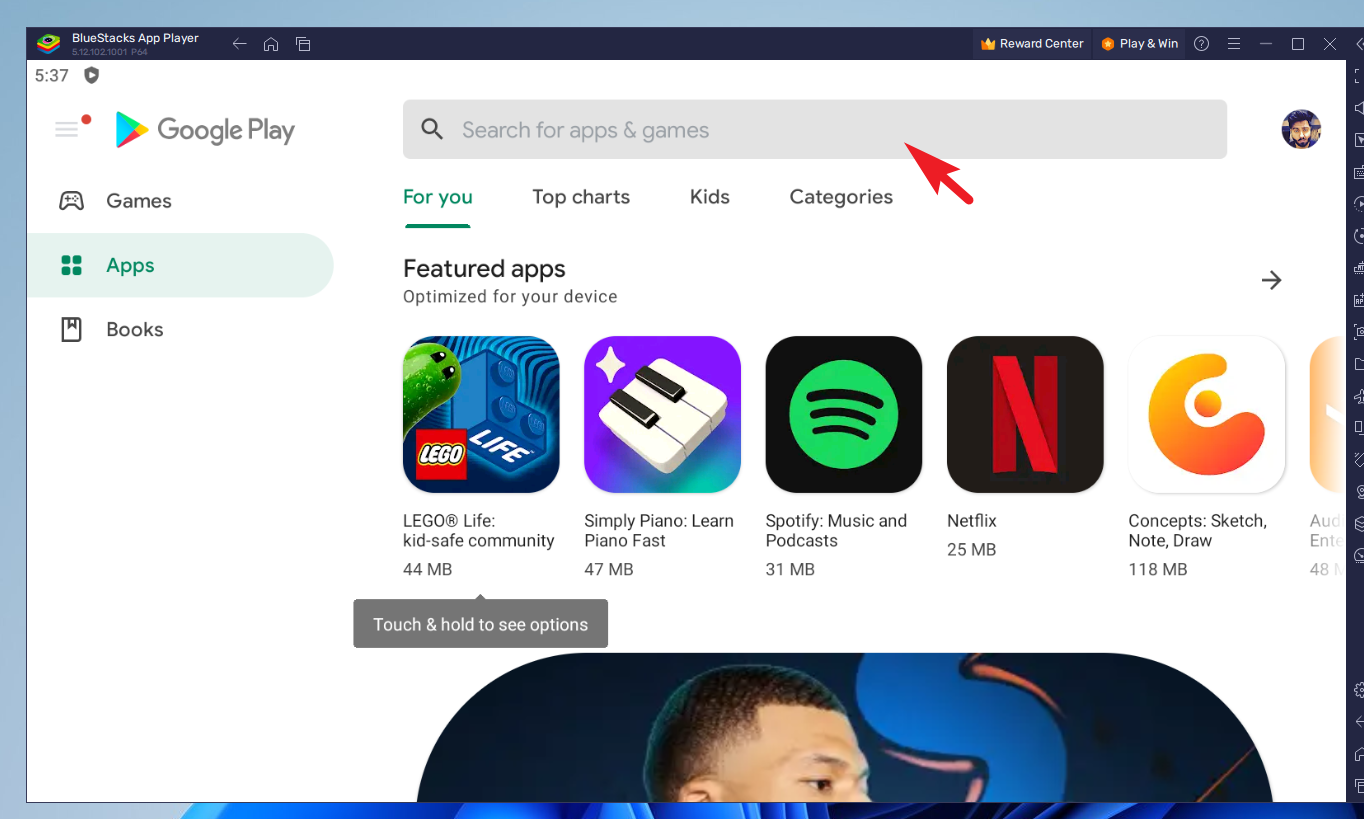
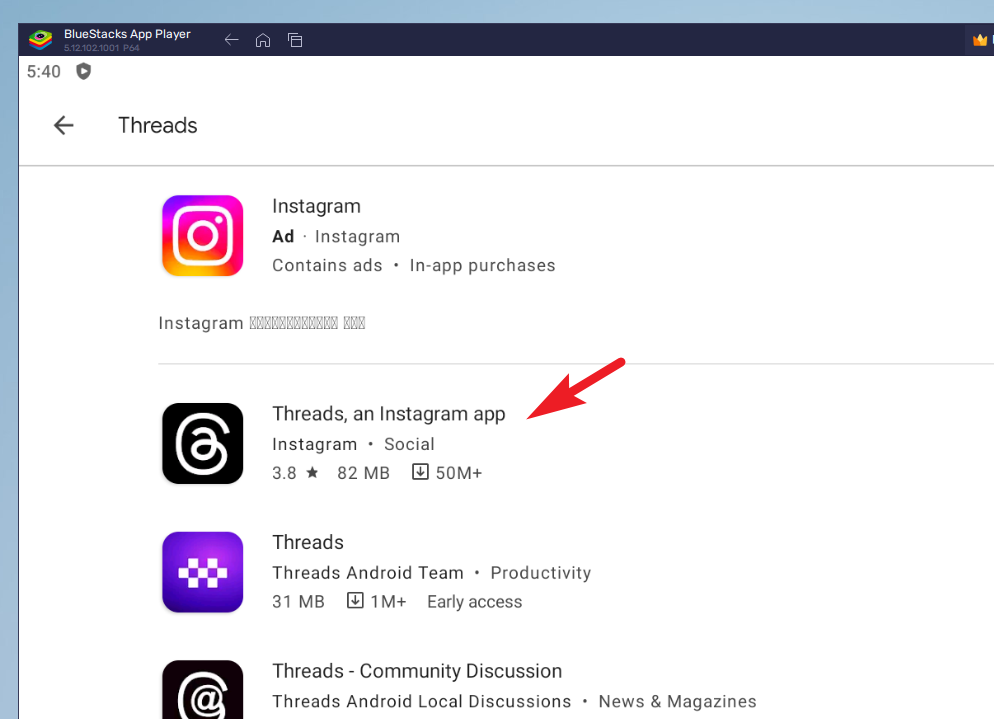
On the next screen, sign in using your Google account credentials. After you have logged in, you will see the PlayStore home screen. Type ‘Threads’ in the search bar on the top and hit Enter to perform a search.
From the search results, click on the ‘Threads’ app tile.
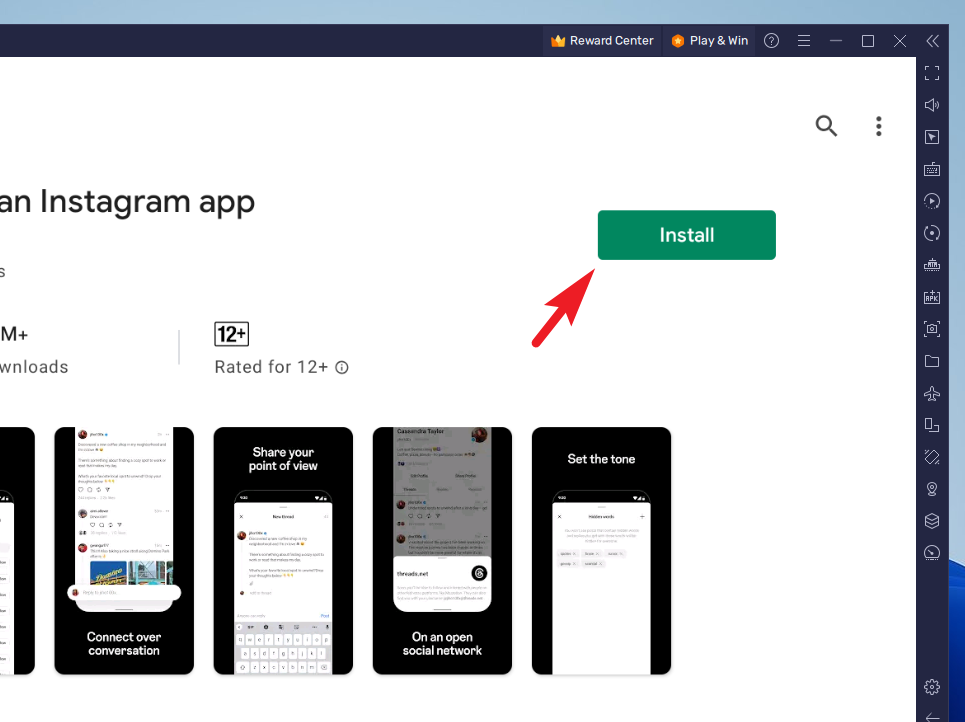
Next, tap ‘Install’ to download and install the Threads app.
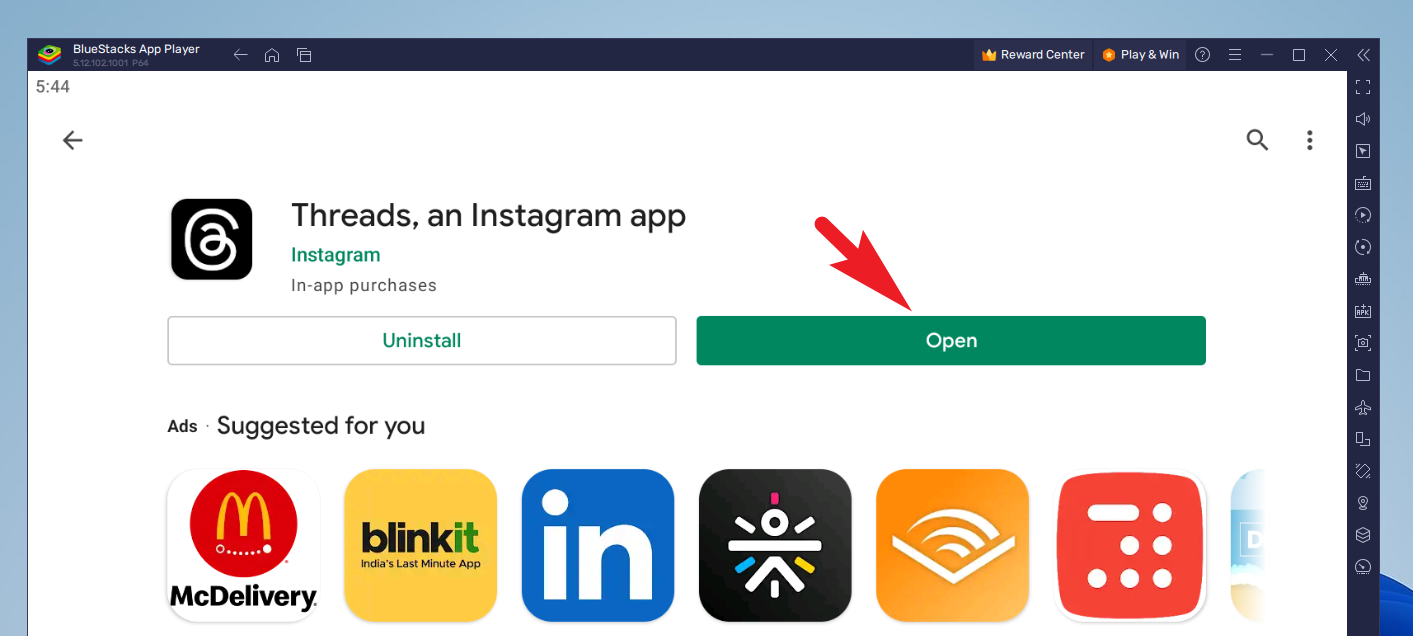
Once the app is downloaded, click the ‘Open’ button to launch it.
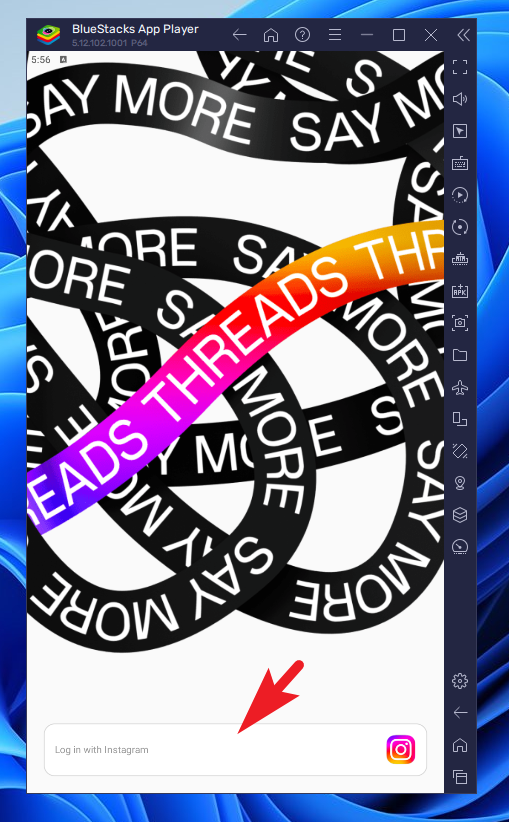
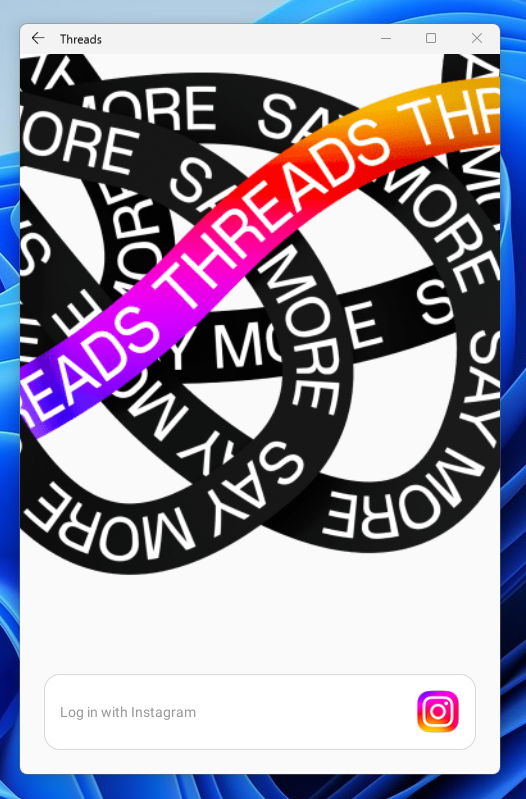
That’s it. You can now log in using your Instagram account credentials and start using ‘Threads’ on your computer.
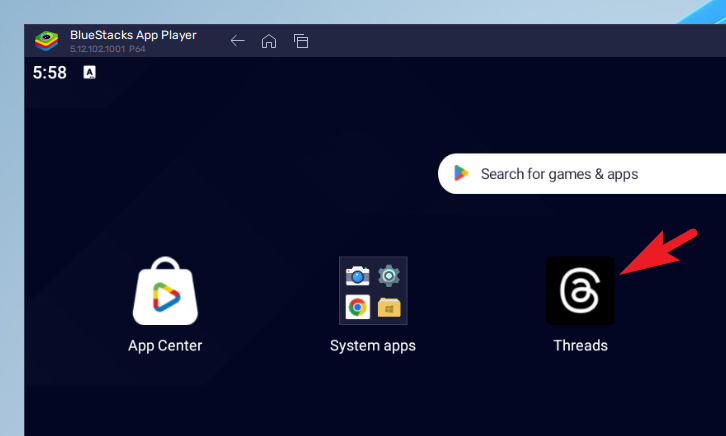
Now, every time you wish to check out what’s happening on ‘Threads,’ you can launch the app from the BlueStacks App player screen.
Install Threads Using Windows Subsystem for Android (WSA)
Microsoft, sometime after releasing Windows 11, added native support for Android apps that can be downloaded through the Amazon App Store. What it means in layman’s terms for you is that if you have a .APK for Threads app, you can install it on your Windows 11 computer with just a little effort.
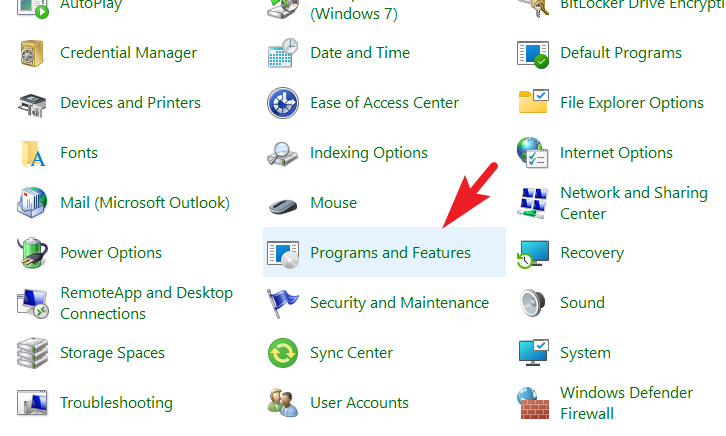
First, head to the Start Menu and type Control to perform a search. Then, from the search results, click on the ‘Control Panel’ tile.
After that, click on the ‘Programs and Features’ option to proceed.
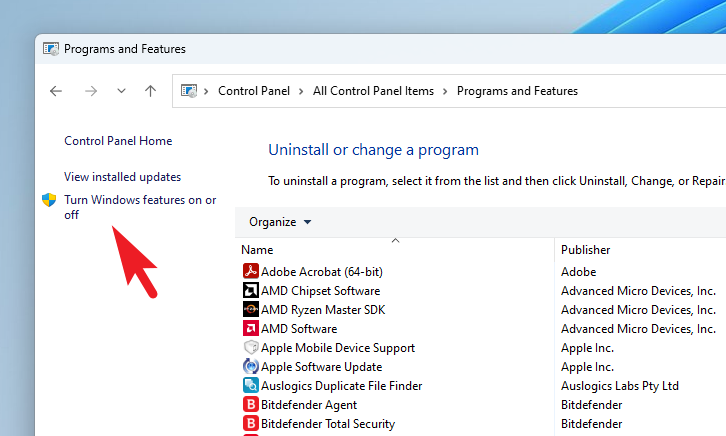
Next, click on the ‘Turn Windows features on or off” that will open a new window on your screen.
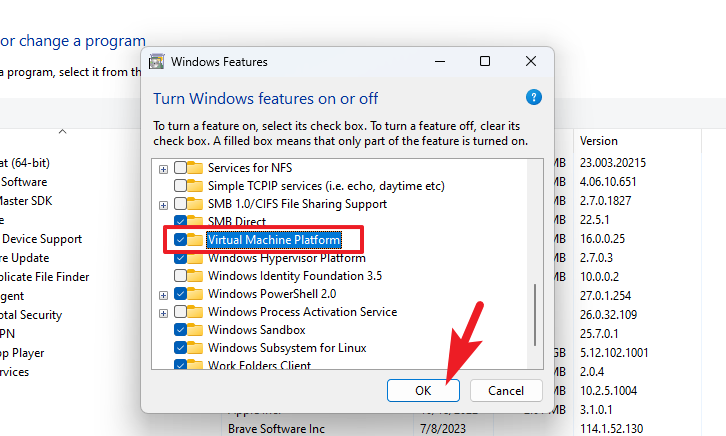
After that, locate and enable the ‘Virtual Machine Platform’ option. Then, click ‘OK’ to save the changes.
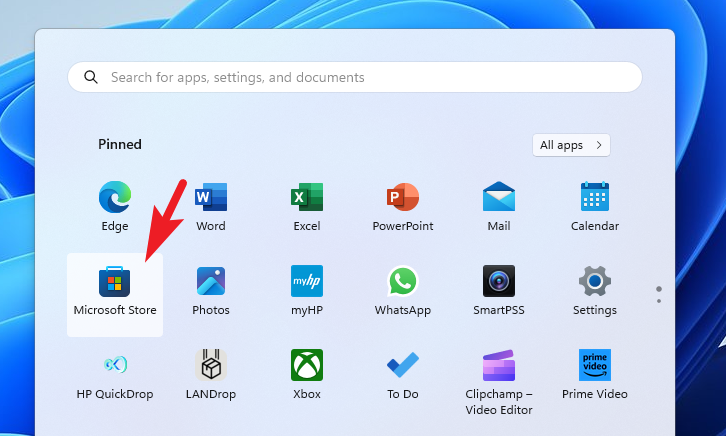
Now, restart your PC to let the changes take effect. Once restarted, head to the Start Menu and click the ‘Microsoft Store’ icon.
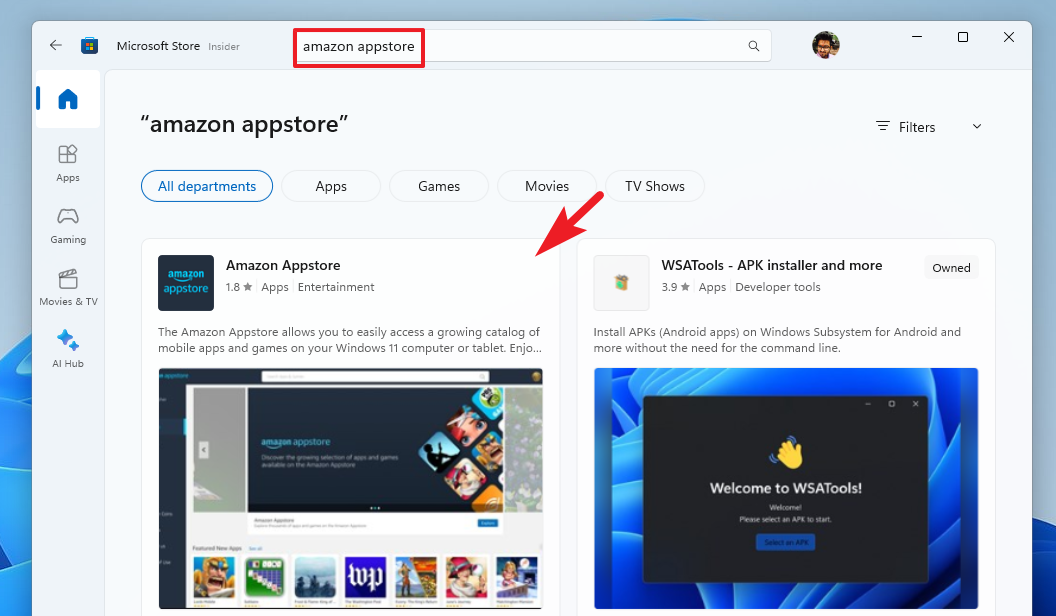
After that, type Amazon Appstore in the search bar and hit Enter. After that, from the search results, click on the ‘Amazon Appstore’ tile.
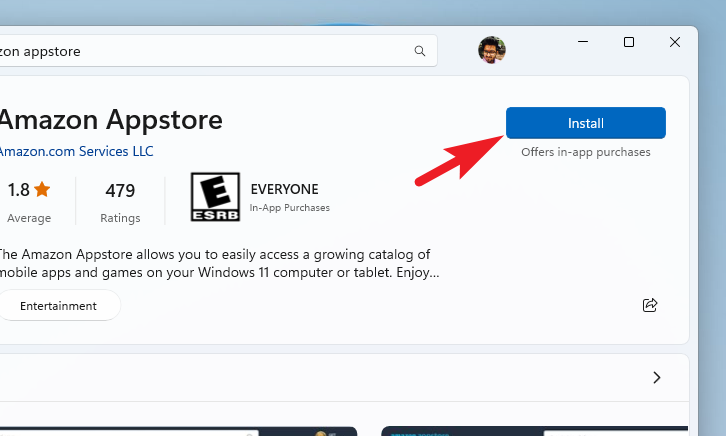
On the next screen, click on the ‘Install’ button. This will bring an overlay window to your screen.
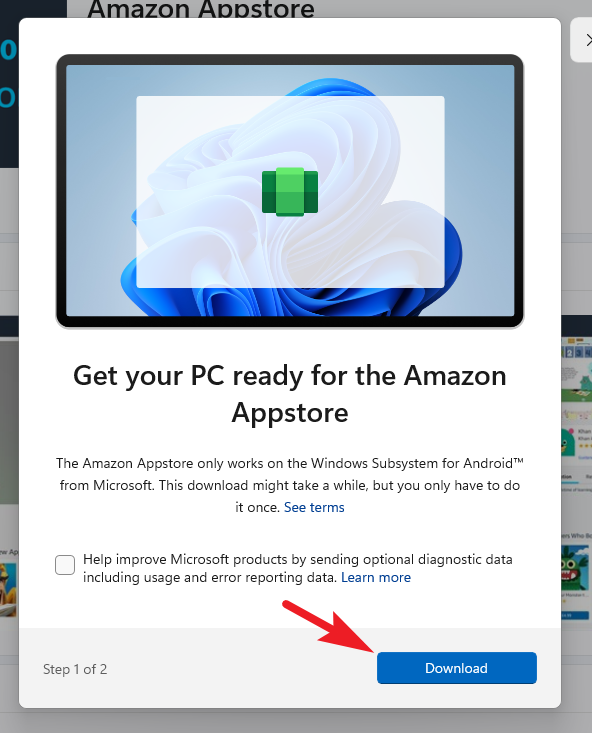
From the overlay window, click on the ‘Download’ button. This will download the Windows Subsystem for Android (WSA) that will be needed to install the Threads app on your PC.
Once it is installed successfully on your PC, you will receive the confirmation of the same. There’s no need to open ‘Amazon Appstore’; you can close the window.

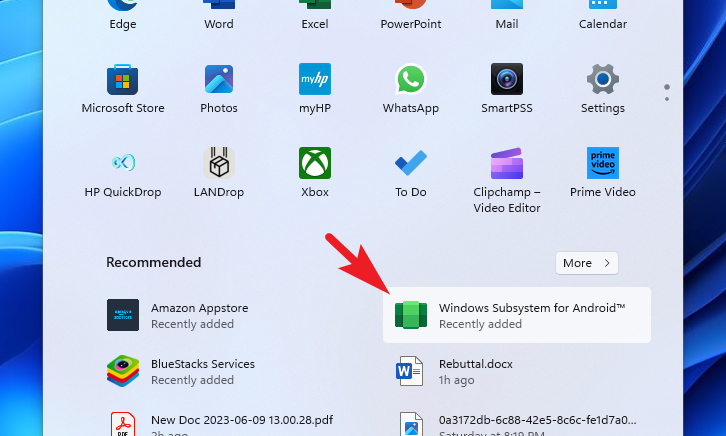
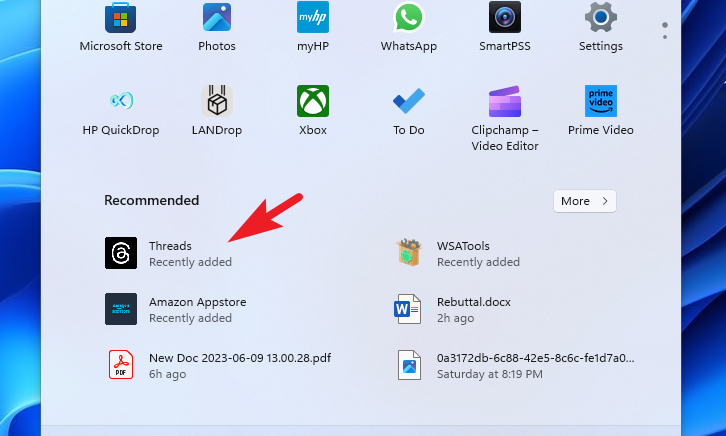
After that, head to the Start Menu and launch the ‘Windows Subsystem for Android’ app. You can find the app in the ‘Recently added’ section.
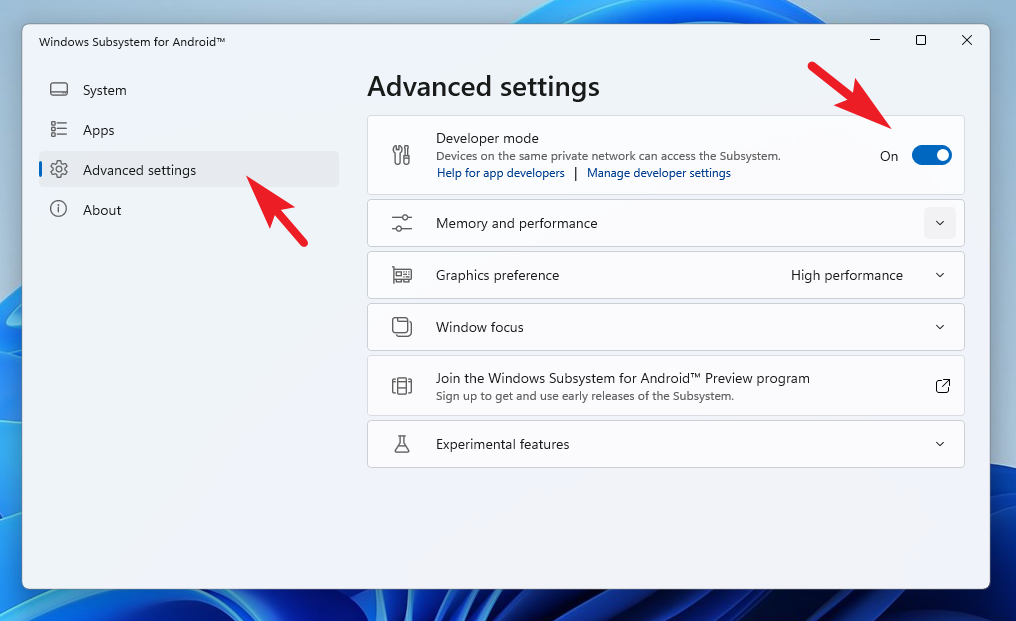
Once launched, head to the ‘Advanced settings’ from the left sidebar. After that, enable the ‘Developer mode’ by clicking on the toggle. This will help you sideload the apps.
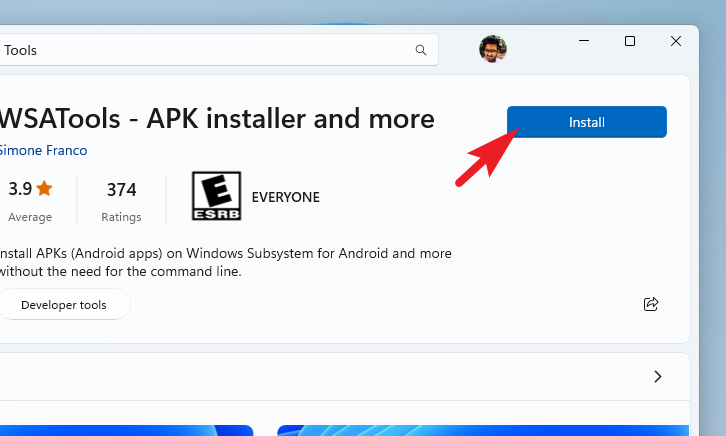
Now, head to the Microsoft Store and search for WSA Tools using the search bar. From the search results, click on the ‘WSATools’ tile to proceed.
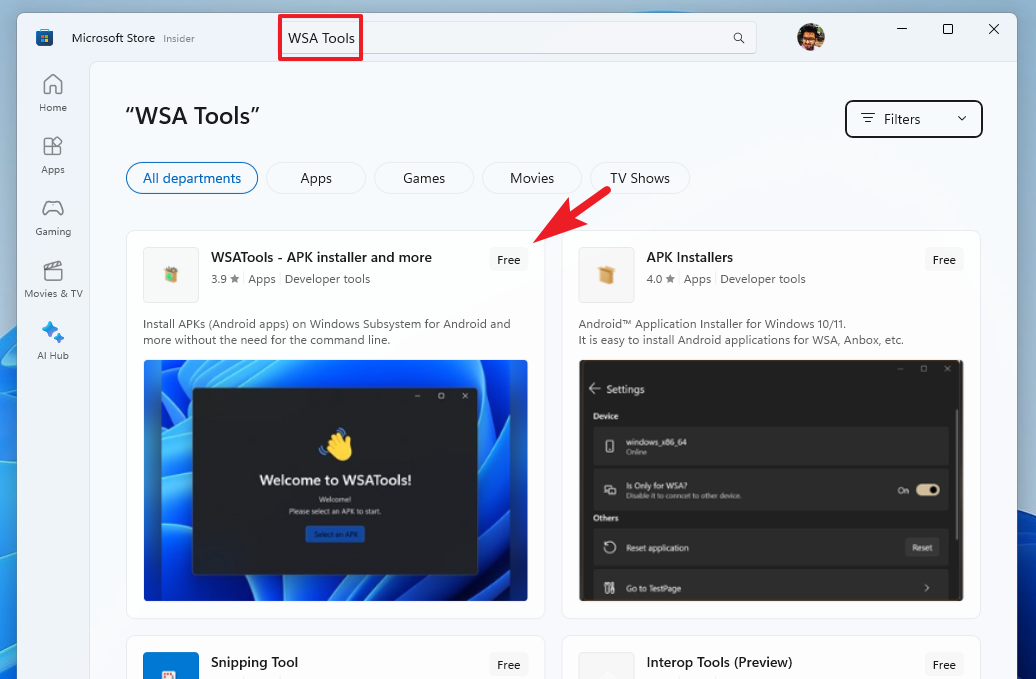
Click ‘Install’ on the next screen.
Note: Keep the .APK file of Threads handy as we will be using it in the next step.
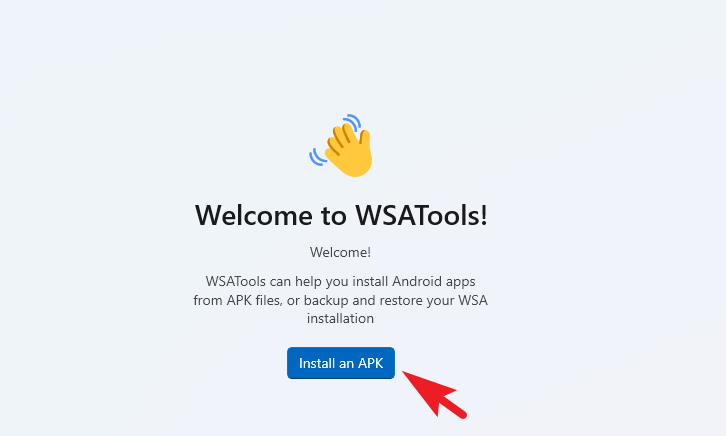
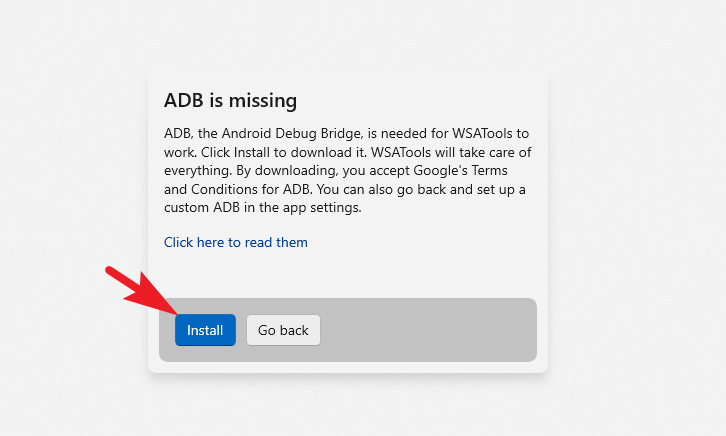
Launch the app from the Start Menu and click ‘Install an APK’. This will bring an overlay alert to your screen.
From the alert window, click on the ‘Install’ button.
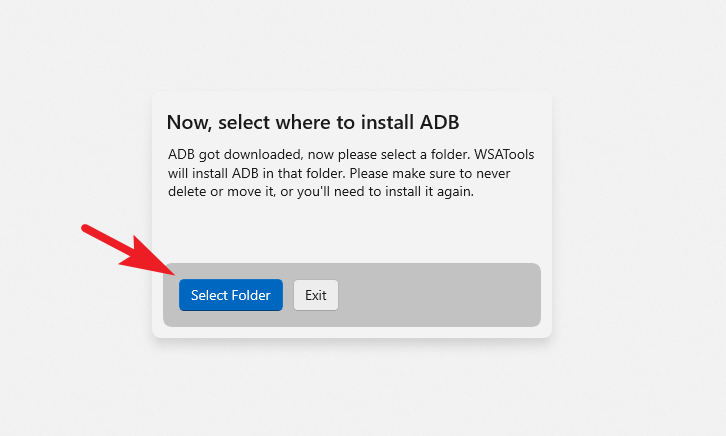
Once the ADB is downloaded, it will ask you to select a directory to install it. It is recommended to install it in a directory that you won’t be deleting, as once the ADB is deleted, you will need to install it again. Click on the ‘Select folder’ and choose a directory using the File Explorer window that opens.
As soon as the ADB is installed, a new File Explorer window will pop up. Navigate to the .APK file and double-click on it to select it.
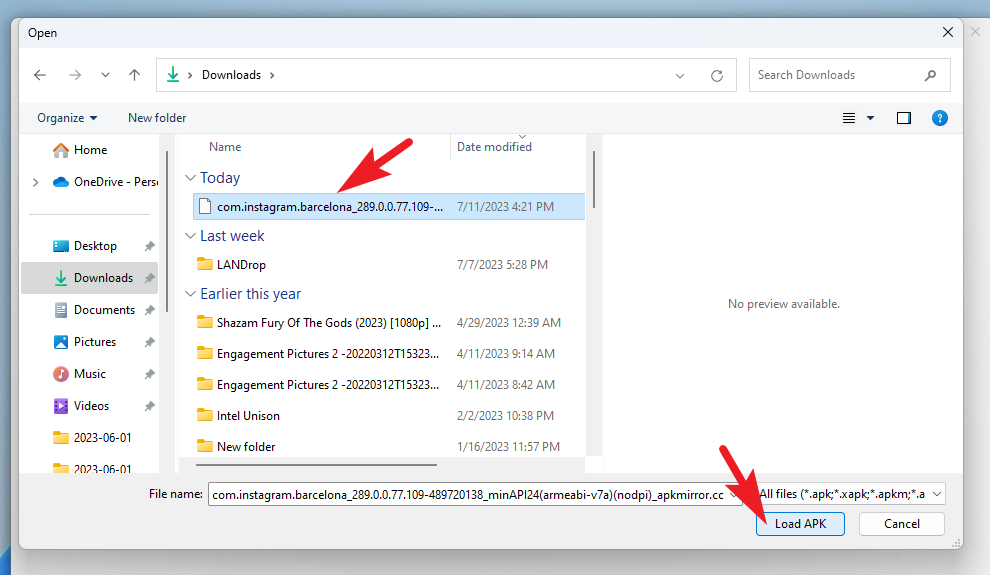
Once the .APK is loaded, click on the ‘Install’ button to continue.

After the app has been successfully installed, launch it from the Start Menu.
Now, you can log in using your Instagram credentials, and that’s it. You can now enjoy using Threads on your computer.
Though there might not be an official web version of Threads as of now, you can use either of the above-mentioned methods to install it on your computer.