
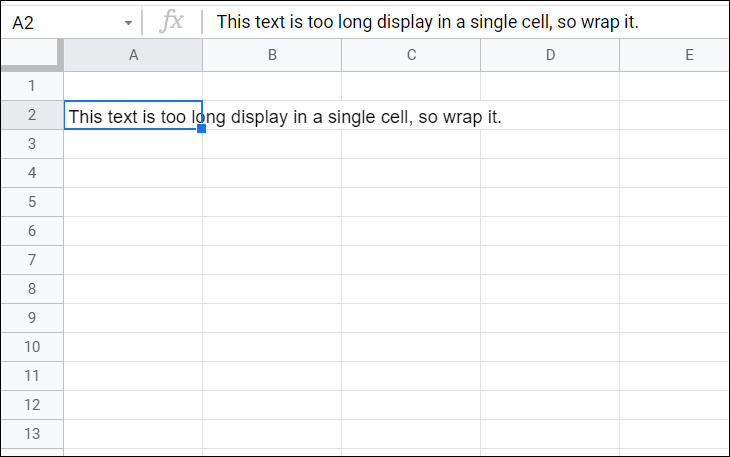
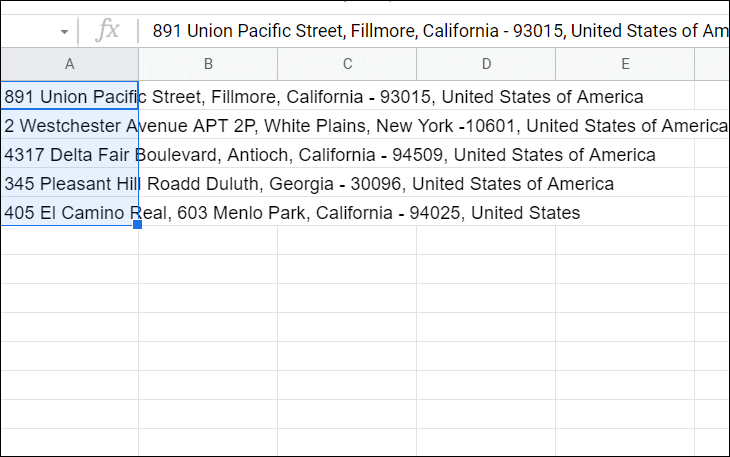
While working in a spreadsheet, you may enter a text string that is too long to fit in a cell, so it will either exceed the width of the cell or cuts off (if you type data in the cell next to it). This can happen when you enter a sentence, lengthy number, address, links, etc.
When that happens, you can use the wrap text option in Google Sheets to automatically adjust the height of your cells to show all of the cell’s contents within the cells.
The ‘Wrap’ option is one of three options available under the ‘Text wrapping’ feature, along with ‘Overflow’ and ‘Clip’. The overflow option is the default option that allows the string to overflow the cell’s boundary. And the clip option will only show the data that fits inside the current cell’s width. In this article, we will show you how to wrap, overflow, and clip text in Google Sheets.
Wrap Text Automatically in Google Sheets
By default, when you enter a long text in a cell, it is set to overflow the width of the column into the empty adjacent cell(s). But if you enter any data in the adjacent cell, you will not be able to see everything in the overflowing cell without clicking on it.
When that happens you can easily wrap text, so the text string can appear in multiple lines inside a single cell. Here’s how you do that:
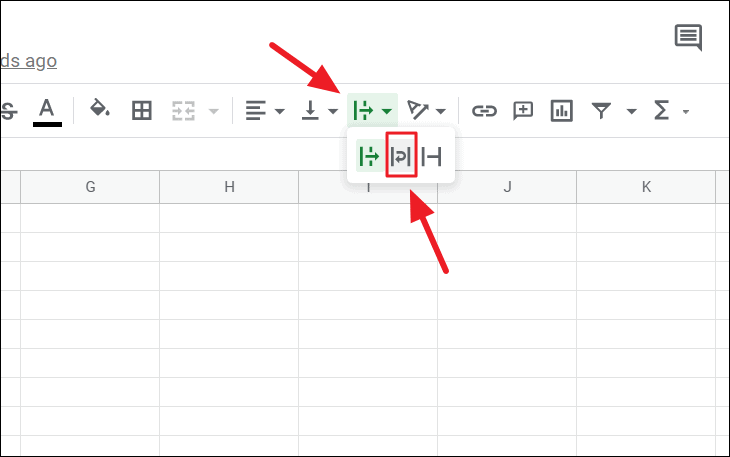
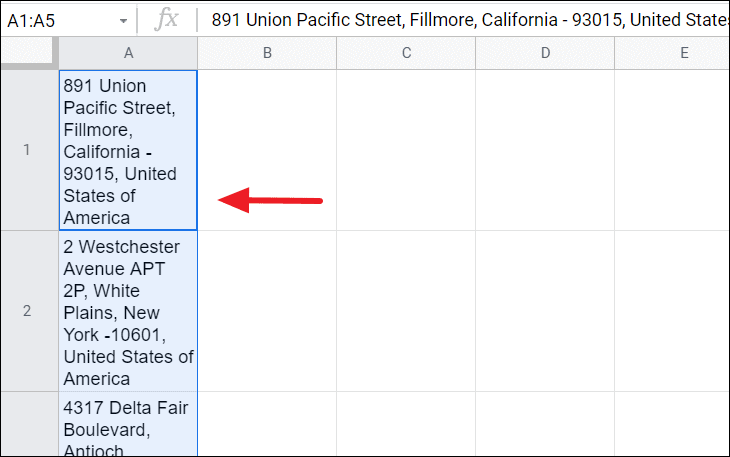
First, select the cell or range of cells that you want wrap.
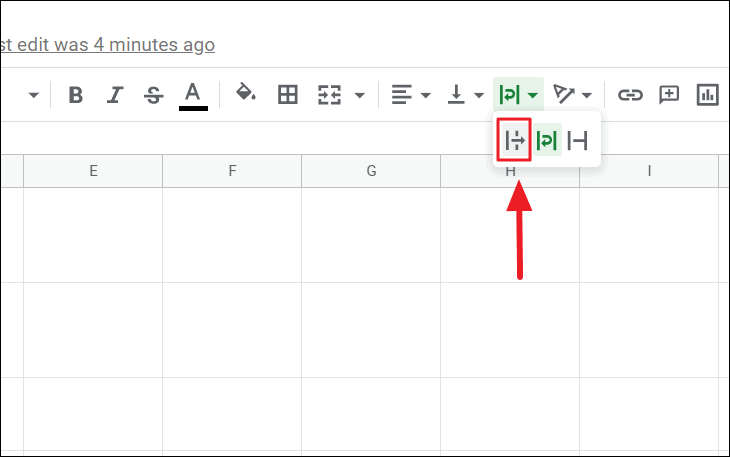
Then, click the ‘Text Wrapping’ menu from the toolbar and select the ‘Wrap’ option in the middle of three options. The other two options are ‘Overflow’ and ‘Clip’.
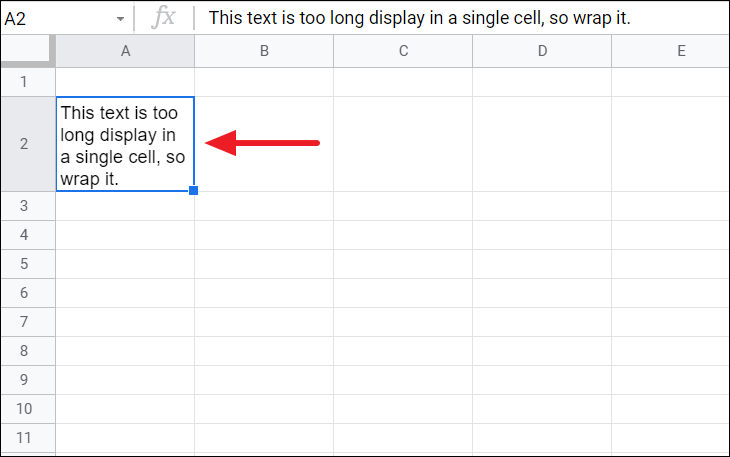
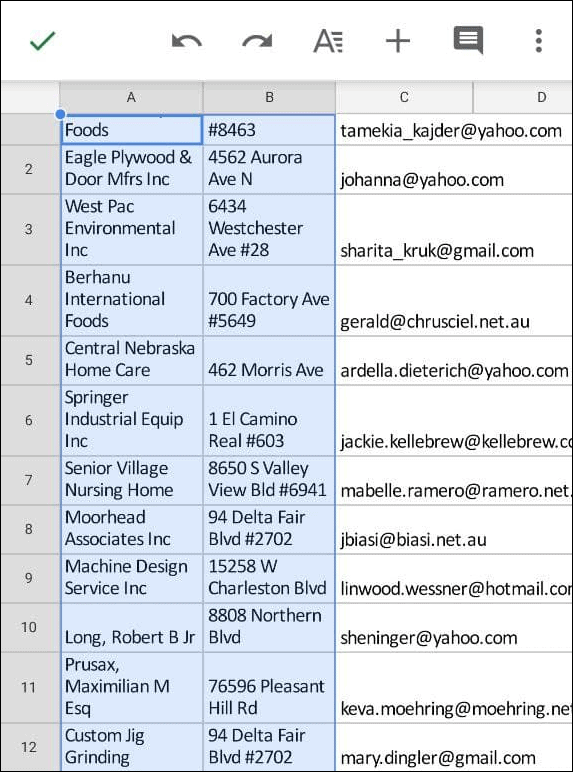
And your text will be wrapped. It will appear in multiple lines inside the cell. It’s not just text you can wrap, you can wrap long numbers, links, addresses, and other types of data as well.
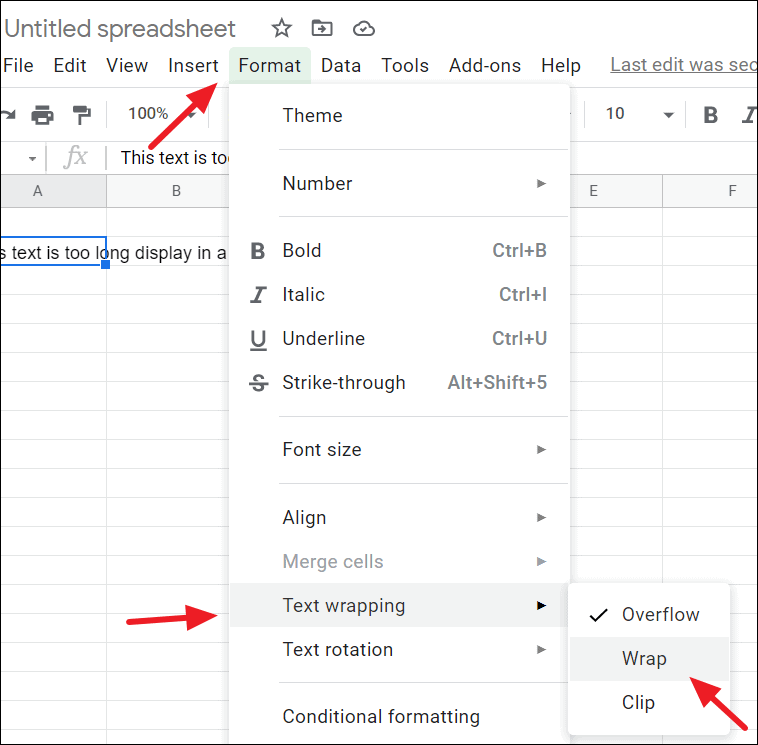
You can also warp text from the ‘Format’ meu at the top of the window.
Select the cell and click the ‘Format’ menu. Then, hover the cursor over the ‘Text Wrapping menu’ and select ‘Wrap’.
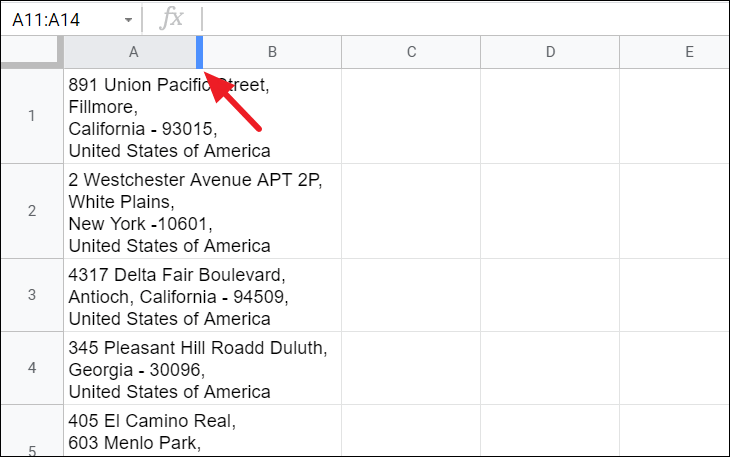
If you want to wrap an entire spreadsheet, you have to select all cells and click the ‘Wrap’ option to wrap the sheet. To select an entire sheet, click the blank box between row number 1 and header A or press ‘Ctrl + A’.

Wrap Text Manually in Google Sheets
Sometimes, you may not want to wrap text automatically, but instead, you may want to choose where the line break happens or you may want to control the width of your lines. The automatic Wrap text option doesn’t always put the line breaks in the right places and it may affect the readability of the text string. Thats’s why you may need to add text wrap manually.
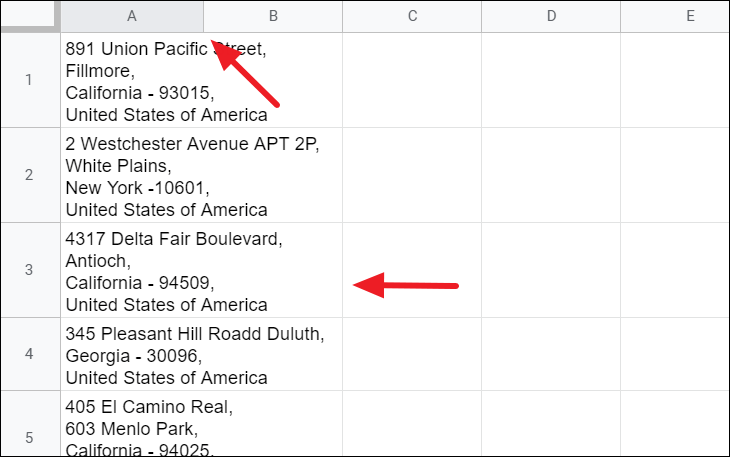
For example, if you use the automatic wrap option on the addresses in the below example, Google Sheets will wrap the texts based on the current column’s width.
You may want each part of the address in a separate lines, but instead you would get this:
To insert manual line breaks, select the cell you want to wrap text. Next, press the ‘F2’ button (double-click on the cell) to switch to edit mode. Now, move the cursor to the place where you want to insert the line break. In our case, ‘Fillmore’, so just click before it. Then, press and hold the ‘Alt’ key and press ‘Enter’.
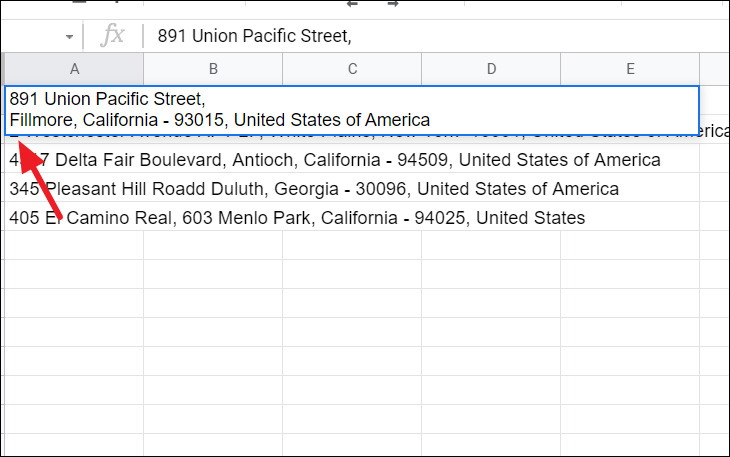
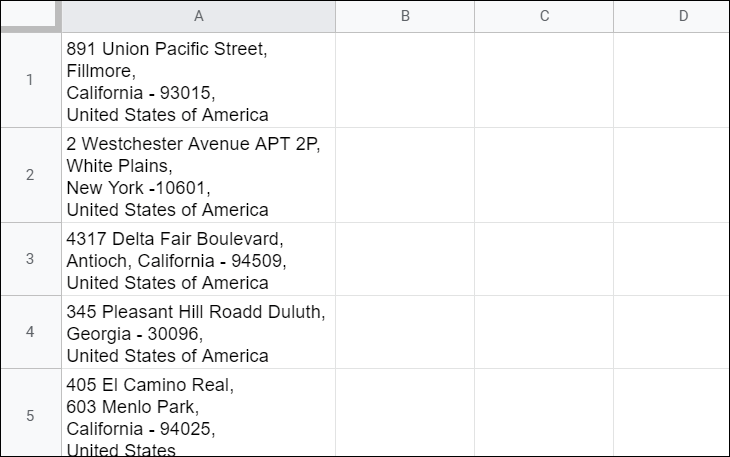
This inserts a line break after the street name. Insert a line break like this for each part of the address (city, state, and country). And you would get the neatly wrapped address, which is more readable than before.
The limitation of this method is that you can only do this one cell at a time, you cannot do this for a whole column.
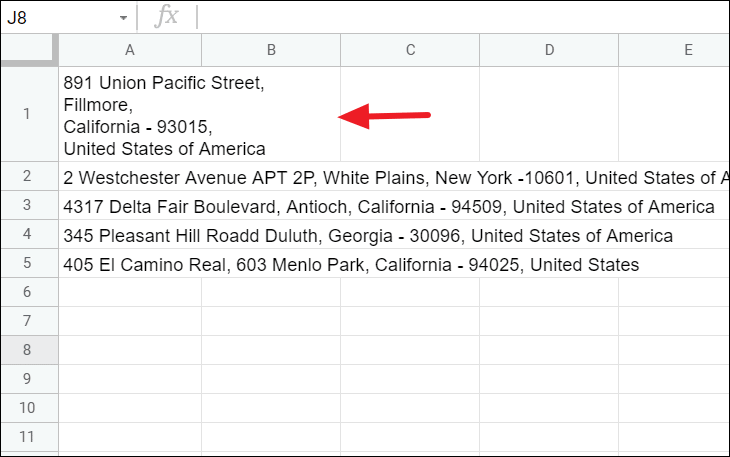
Now, repeat the same steps for the rest of the addresses in the sheet. You noticed the texts still overflow into the next cells (if empty).
To fix this, just double-click the blue line (which appears when you hover over the border between the headers) to adjust/resize the width of the cell and the text will fit inside the cell as you wanted.
Now, you fixed it.
Unwrap/Overflow Text in Google Sheets
If you want to unwrap or overflow the wrapped text, you can do that with the text wrap shortcut option on the toolbar or from the wrapping text feature from the format menu.
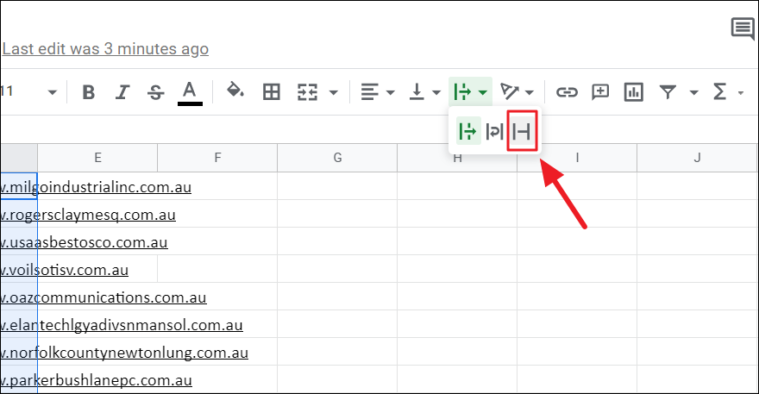
Select the cells that you want to unwrap. Then, select the ‘Text wrapping’ shortcut menu from the toolbar or from the ‘Format’ menu and click the ‘Overflow’ icon.
Your texts will be unwrapped now.
Note: If your column width is already wide enough to fit the text, then it will not spill into the next cells even when you apply the ‘Overflow’ option. And If you have any data to the right of the text where ‘Overflow’ is applied, the text will be clipped. It will only work if there is an empty cell next to it.
Clip Text in Google Sheets
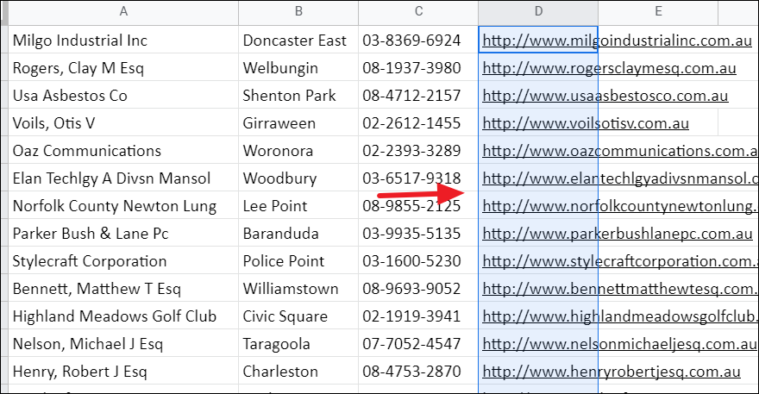
There are instances when you may not want your text wrapped or overflowed. For example, when you are entering URLs in a column. It is not really necessary to show full URLs in your dataset and people rarely see them.
In such cases, you can use the ‘Clip’ option from the text wrapping feature. The ‘Clip option’ will only show the portion of the content that fits within the column width and height, and it will stop showing any content beyond that. But you can still see the full text when you double click on the cell.
Select the cell or cells that has the texts you want to clip.
Open the ‘Text wrapping’ option from the toolbar or from the ‘Format’ menu and select the ‘Clip’ icon (last one).
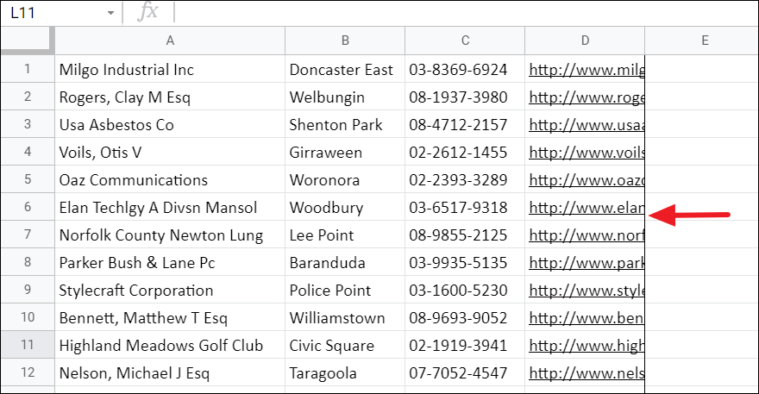
Here you go, you got your texts clipped. And you’ll only see the text that fits within the cell boundary.
Wrap Text on Google Sheets Mobile App
If you are editing a spreadsheet document via Google Sheets mobile app on your Android or iOS device, then wrapping text in the Google Sheets app is just as simple. The interface may be a little confusing to navigate, so here’s how you wrap text in Google Sheets mobile app.
Open the spreadsheet document you need to edit on the Google Sheets application. Then, select the cell or range you wish to text-wrap.
You can change the selection area by gently dragging the blue circle. You can also select an entire column or row by simply tapping on the column letter or row number.
Next, tap on the ‘Format’ button at the top of the application screen (icon of the letter A with horizontal lines).
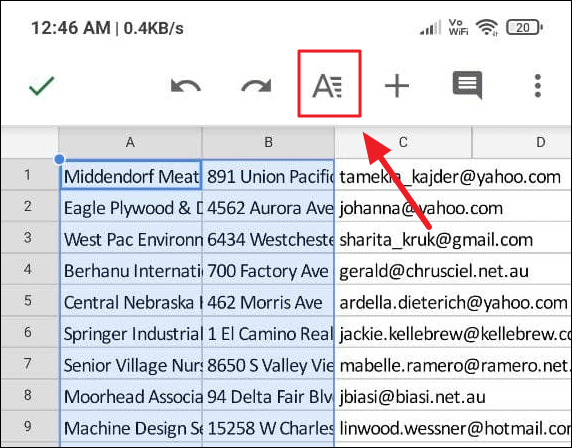
You will see a list the formatting options at the button of the app.
Select the ‘Cell’ section and scroll down to locate the ‘Wrap text’ Toggle. Then, turn on the ‘Wrap text’ toggle.
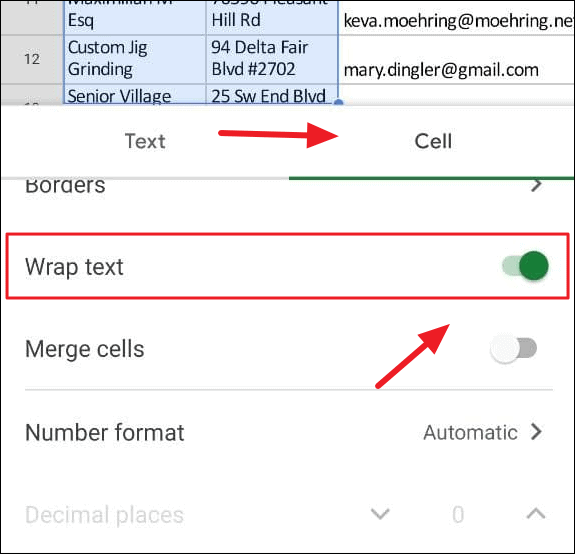
Now, the selected cell(s) are wrapped.
Just, click on the sheet to save the formatting settings.
That’s how you wrap text


