
Running Openshift Local on Windows 11 often defaults to installing all files on the C-drive, which can quickly consume valuable space and impact system performance. Allocating Openshift Local to a different drive streamlines storage management and prevents your primary system partition from filling up. This approach is especially helpful for systems with limited SSD capacity or when you want to separate development environments from core OS files.
Installing Openshift Local to a Non-C Drive Location
Step 1: Download the latest Openshift Local installer for Windows from the official Red Hat or Openshift Local website. Save the installer file directly to the drive where you want Openshift Local to reside (for example, D:\Downloads).
Step 2: Create a dedicated folder on your preferred drive for Openshift Local files. Use File Explorer to make a folder such as D:\OpenshiftLocal or any other location you prefer. This helps keep all related files organized and makes it easier to manage or remove them later.

Step 3: Extract the Openshift Local archive (if provided as a ZIP file) directly into your new folder. If the download is an executable installer, during installation, select the custom installation option and browse to the folder you created on your desired drive. This prevents files from being placed in the default C-drive location.
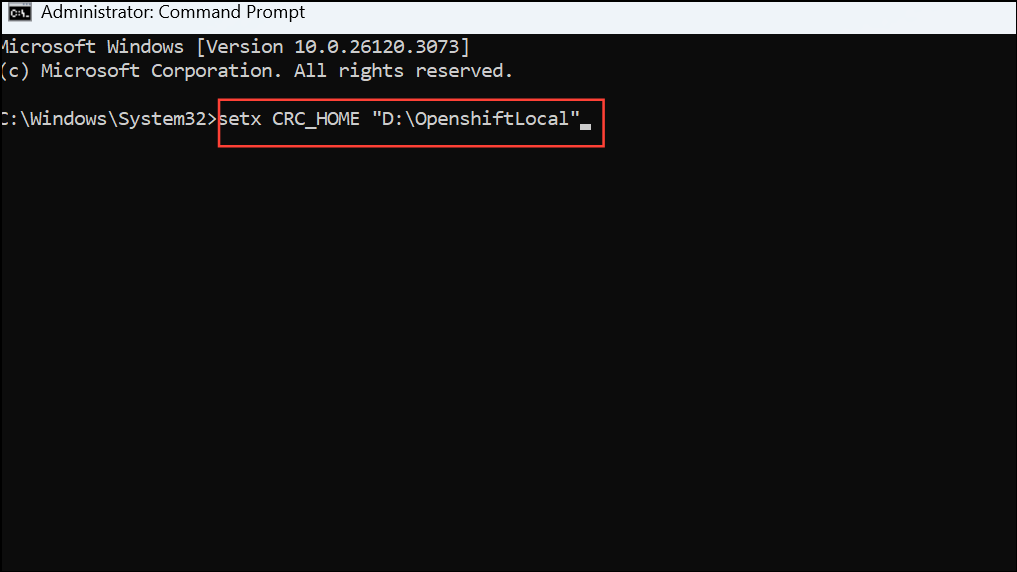
Step 4: Set up the Openshift Local environment variable to point to your chosen directory. Open a Command Prompt as Administrator and run:
setx CRC_HOME "D:\OpenshiftLocal"This ensures all Openshift Local configuration and cache files are written to the specified folder instead of the user profile or C-drive by default.
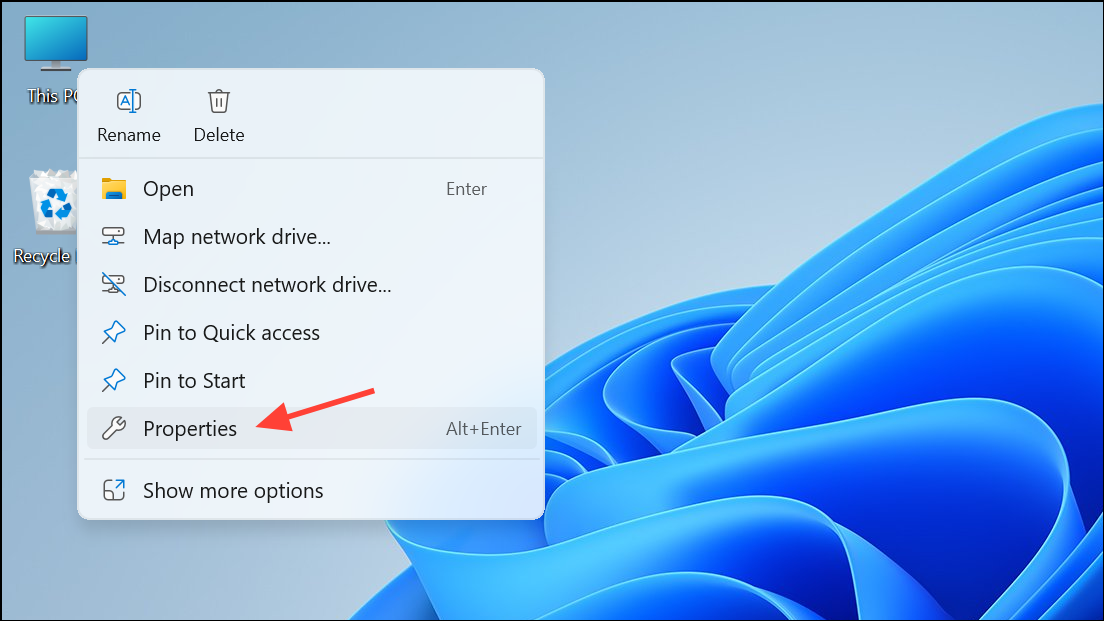
Step 5: Add the Openshift Local executable to your system PATH so you can run it from any directory. In Windows 11, right-click on This PC and select Properties.
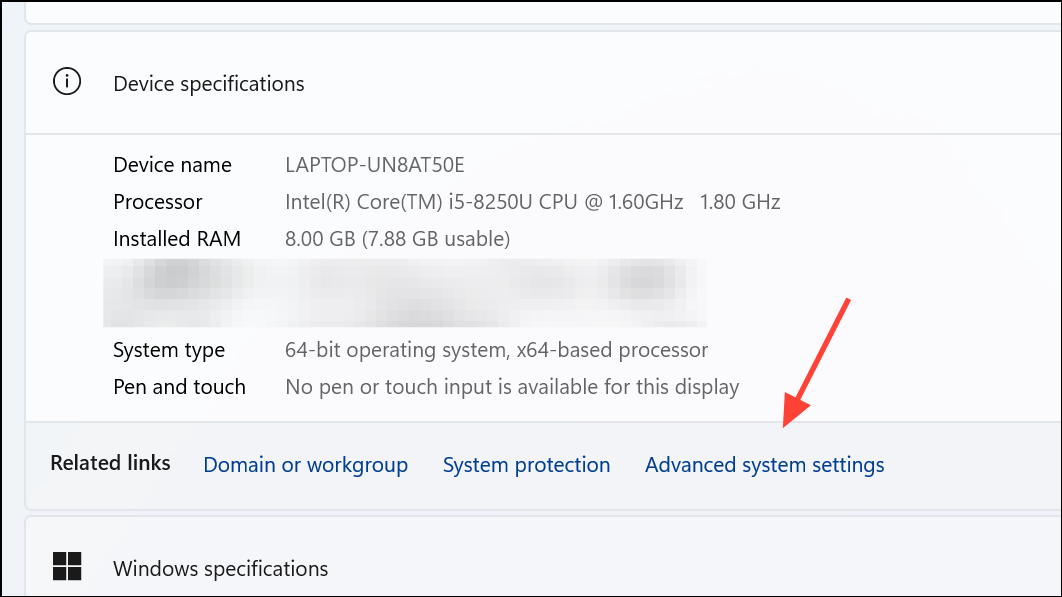
Step 6: Click on Advanced system settings in the window that opens.
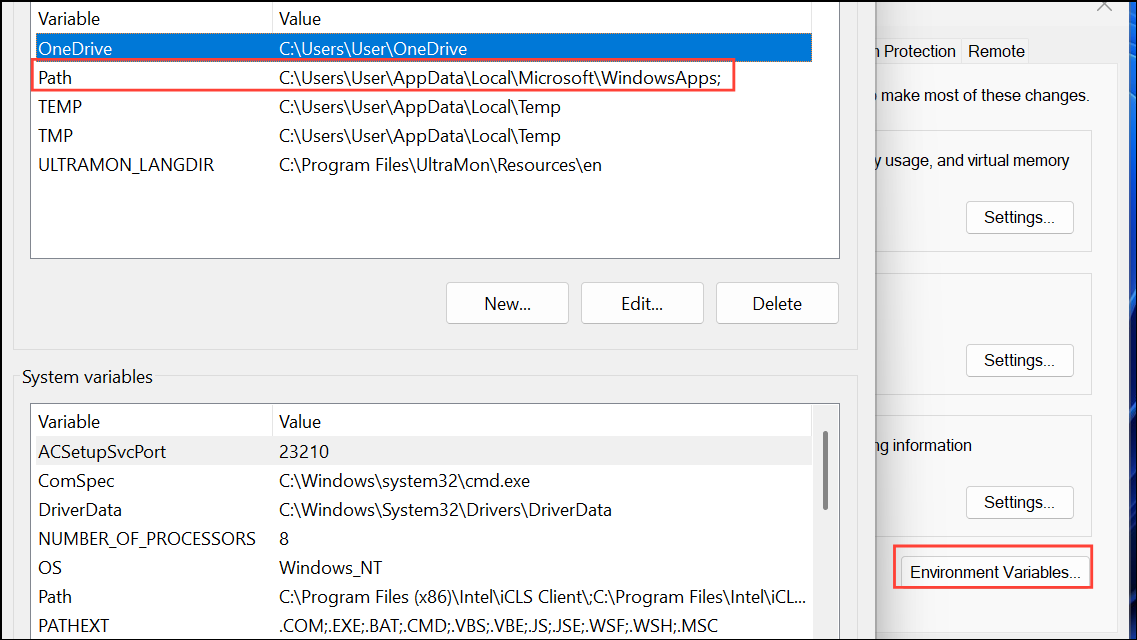
Step 7: Click on Environment Variables, and add the path to your D:\OpenshiftLocal folder in the ‘Path’ variable under your user account.
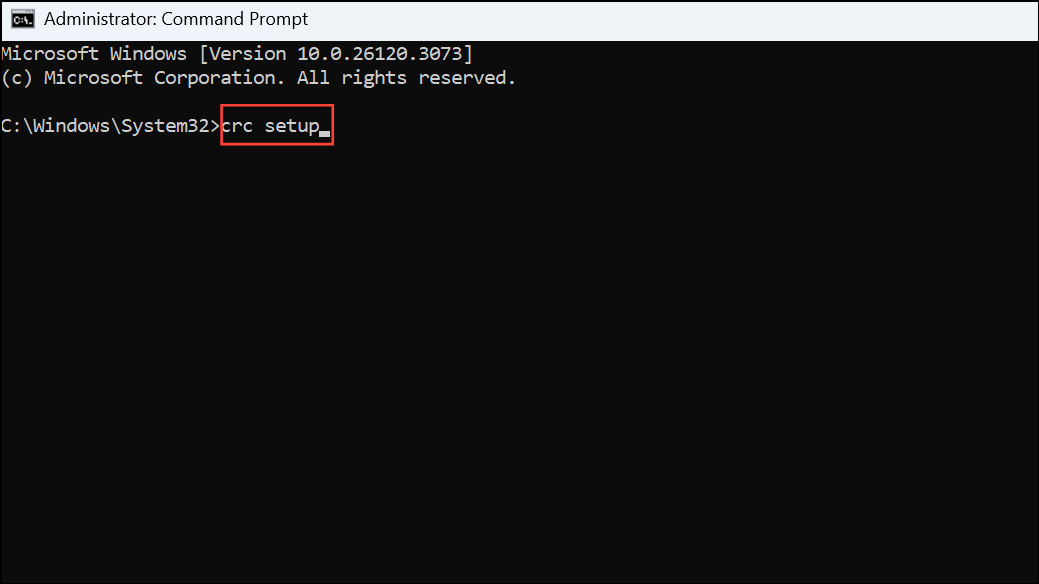
Step 8: Initialize Openshift Local from your chosen directory. Open a new Command Prompt window and run:
crc setupThis command prepares the environment and downloads required components into your specified folder, not on the C-drive.
Step 9: Start Openshift Local by running:
crc start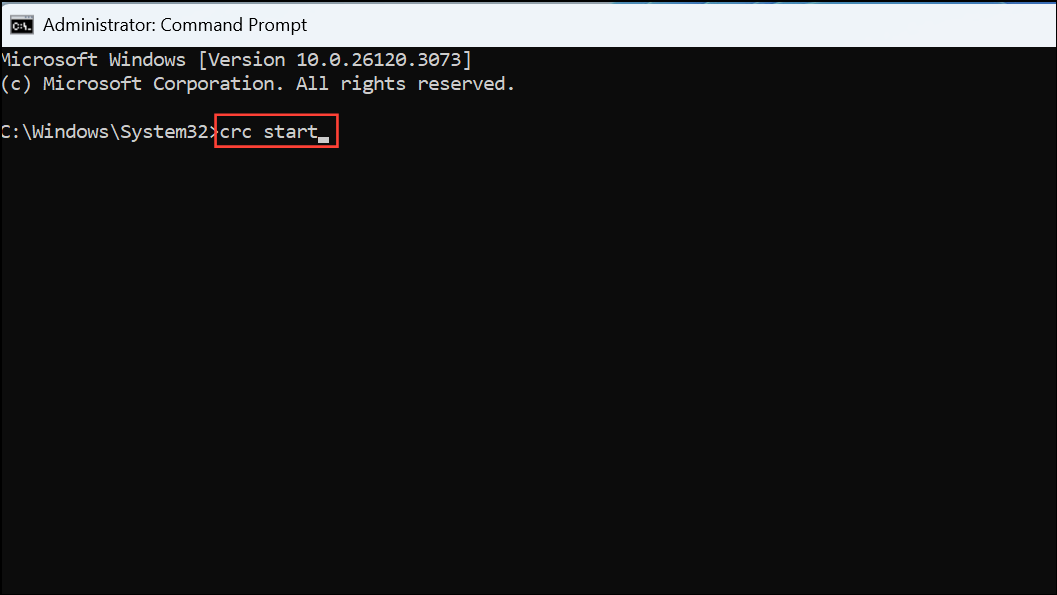
Follow any prompts to provide your pull secret and complete the setup process. All runtime files and caches will be stored on your selected drive, keeping your C-drive free from large files.
Alternative Method: Using Symbolic Links
When an application does not offer a custom install location, you can redirect storage using symbolic links. This method works by tricking Windows into thinking files are on the C-drive, when they are actually stored elsewhere.
Step 1: Move the Openshift Local cache or configuration folder from its default C-drive location (commonly C:\Users\YourUsername\.crc) to your preferred drive, such as D:\OpenshiftLocal\.crc.
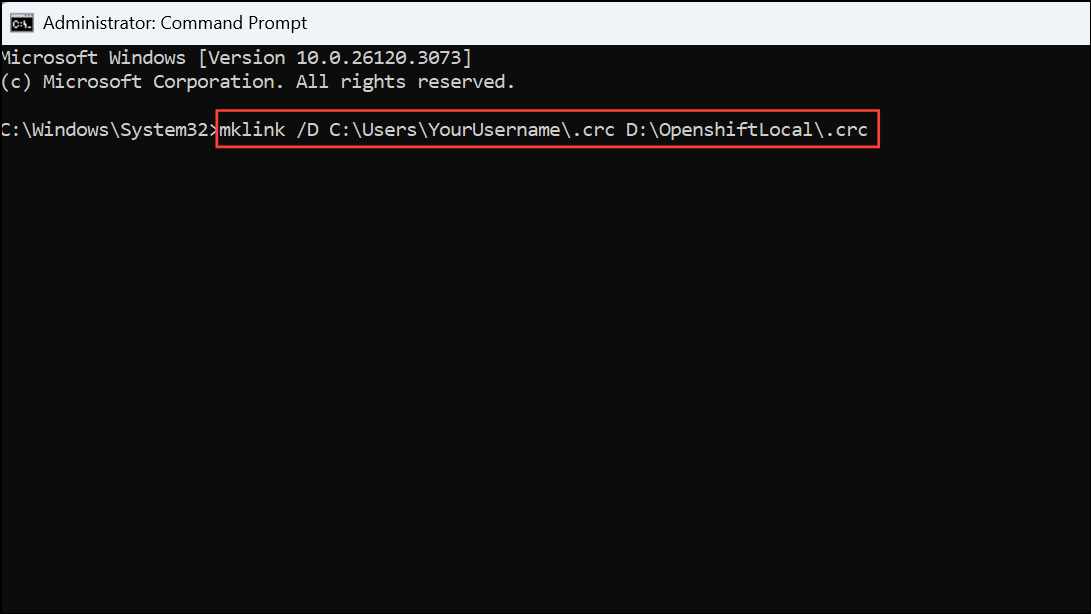
Step 2: Open Command Prompt as Administrator and create a symbolic link using:
mklink /D C:\Users\YourUsername\.crc D:\OpenshiftLocal\.crcThis command creates a directory link, so any files written to C:\Users\YourUsername\.crc are actually stored on your D-drive. This method is useful if Openshift Local does not respect the CRC_HOME variable or if certain components always default to the user profile directory.
Allocating Openshift Local to a different drive on Windows 11 reduces C-drive usage and makes managing large development environments simpler. For future updates or troubleshooting, check Openshift Local documentation for any changes in supported environment variables or installation practices.