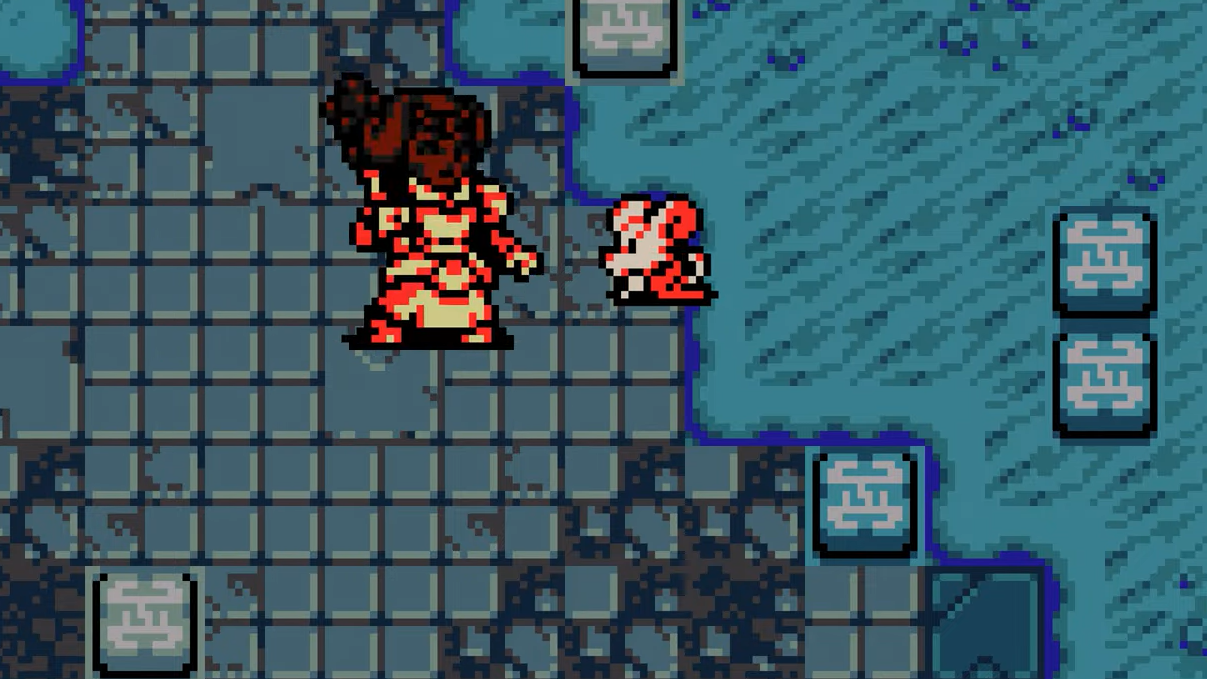
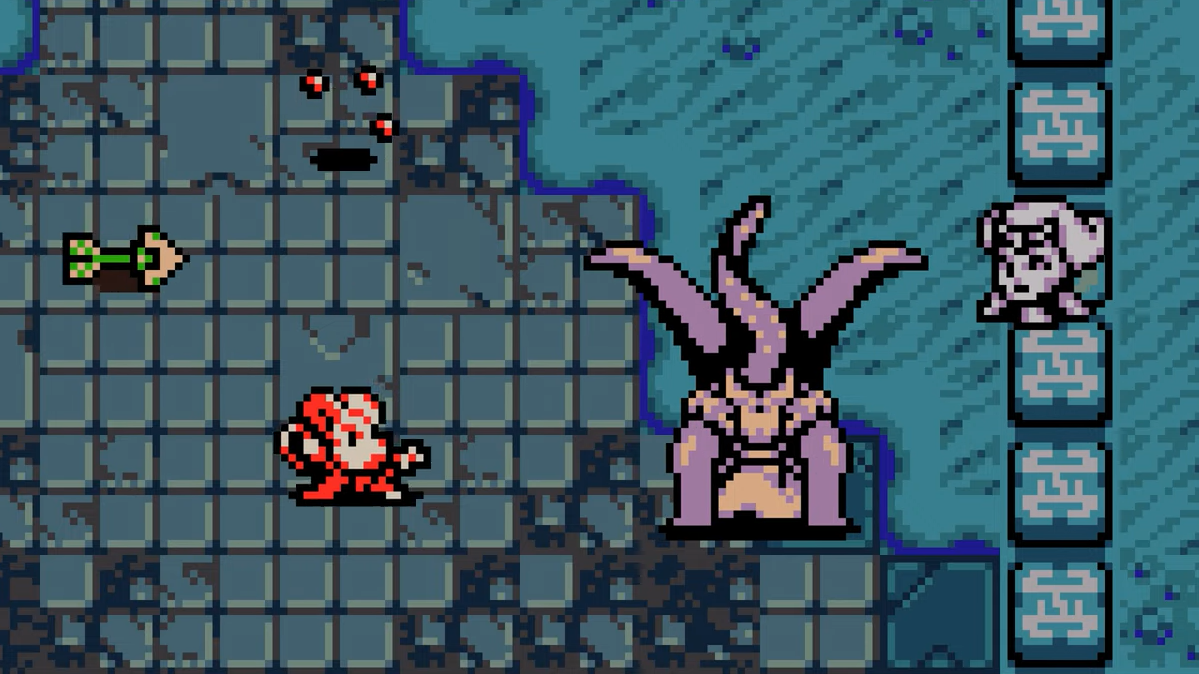
The Duchess is one of the forced bosses in Mina the Hollower, standing guard over the Spark Generator inside Queensbury Crypt. She looks like a giant stone statue, but that armor hides a second, far nastier form. Clear her first health bar, and the real fight begins, so come prepared for two very different phases.

What you need before the Duchess boss fight
You do not need much gear, but a ranged Side Arm makes both phases far easier because the arena keeps forcing you back. If you arrive without one, break the tombstone in the top-left of the room just before the Duchess boss door. It drops a useful spread of Side Arm options.
If the fight keeps going badly, you can leave Queensbury Crypt, grind a few levels in another area, and return stronger. Turning on one or two Assist settings is also fair game if you want extra breathing room.
How to beat the Duchess (first phase)
The opening phase is the gentle one. The Duchess has a wide horizontal swing that covers a lot of ground, so watch for the wind-up animation and burrow underground to dodge it. She also hops around the arena and lands on floor buttons, which fire arrows across the room.
Those arrows do not damage the Duchess the way they hurt normal enemies, but they shatter on contact with her body. Position yourself so she sits between you and the incoming arrows, and she effectively becomes a shield that wipes the projectiles out for you.
From there, it is about patience. Hold your spacing, punish openings after the swing, and avoid getting greedy with long combos. Empty the bar, and she pauses briefly before transforming.
How to beat the Duchess (second phase)
After the break, the statue removes its own head and exposes the mass of tentacles that was controlling it the whole time. The detached head now bounces around the floor, mashing the arrow buttons on its own, so expect arrows to keep spawning through almost the entire phase unless the head gets stuck in a corner.
The tentacle form hits much harder. Here are the attacks to track:
| Attack | How to avoid it |
|---|---|
| Fast swing into a lunge | The swing is quicker than phase one and is followed by a forward lunge. This is the only vertical-reaching move, so respect the gap-close. |
| Tentacle ground slam | She shouts, wiggles tentacles from her armor, then slams them down. Tentacles burst out of the floor at your position 3 to 6 times, so keep moving. |
| Arrow traps | The bouncing head keeps firing arrows. Burrow whenever you can to slip under them. |
The key read is that none of her attacks reach straight up or straight down, apart from that lunge after the swing. That makes the space directly above and below the boss your safest standing ground. Park yourself there, stay on the move, and lean on ranged Side Arms whenever it is too risky to walk in for melee hits.
Duchess fight rewards and the Duke choice
Beating the Duchess pays out a stack of Bones and a health upgrade, which is the standard payout for clearing a generator guardian. There is also a branch tied to escorting The Duke. If you are running that escort and choose to seal him up, you walk away with the best Trinket in the game.
You will know the fight is over when the second health bar empties and the generator unlocks, letting you climb and progress past Queensbury Crypt. If you wiped repeatedly, the most common cause is staying in line with her horizontal attacks instead of sitting above or below the boss, so reposition vertically and try again.