
Display scaling affects how text, apps, and other items appear on your screen. On Windows, custom scaling lets you specify a precise scaling percentage, which can resolve issues with blurry text or interface elements that appear too large or small on high-resolution displays. PowerShell provides a way to set custom scaling values beyond the standard options available in the Settings app, allowing for more granular control.
Change Custom Scaling with PowerShell
Setting custom scaling through PowerShell involves editing the Windows Registry, which stores system configuration settings. Adjusting these values can immediately impact how your display renders text and UI elements. It’s important to back up your registry before making changes, as incorrect edits can cause system instability.
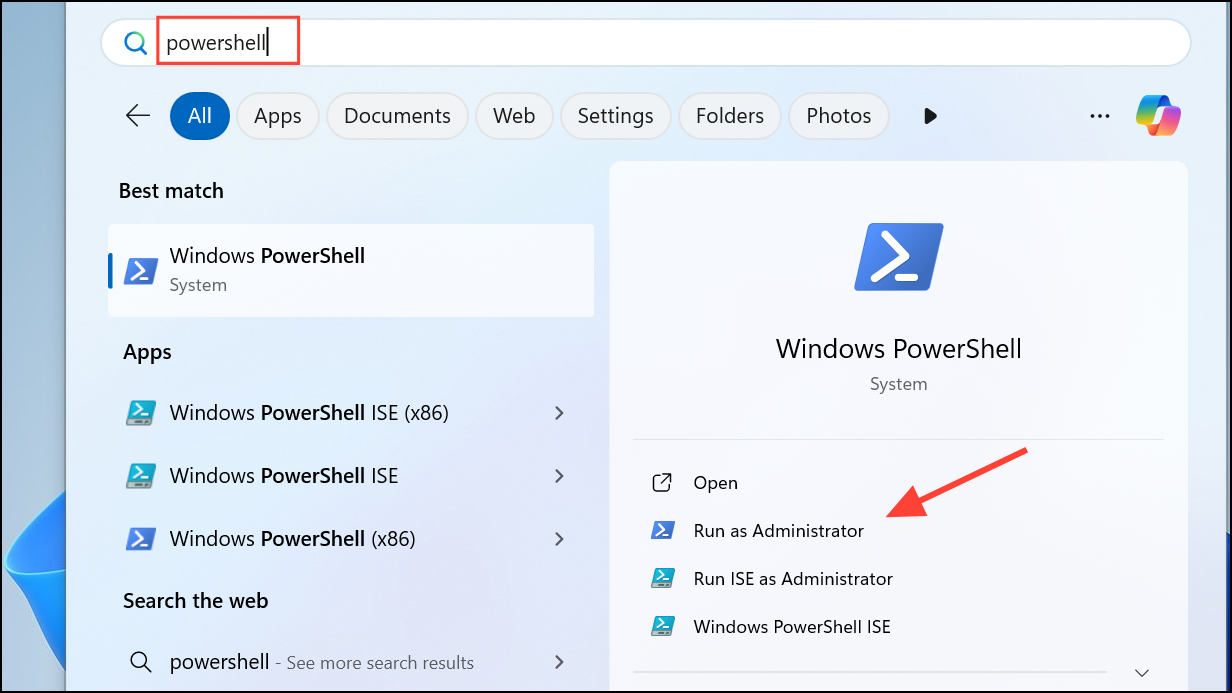
Step 1: Open PowerShell as Administrator. Type powershell in Windows Search and select Run as administrator from the menu. Running as administrator is required to modify system registry settings.
Step 2: Back up your registry. In PowerShell, you can export the relevant registry key with the following command:
reg export "HKCU\Control Panel\Desktop" "$env:USERPROFILE\Desktop\Desktop_Backup.reg"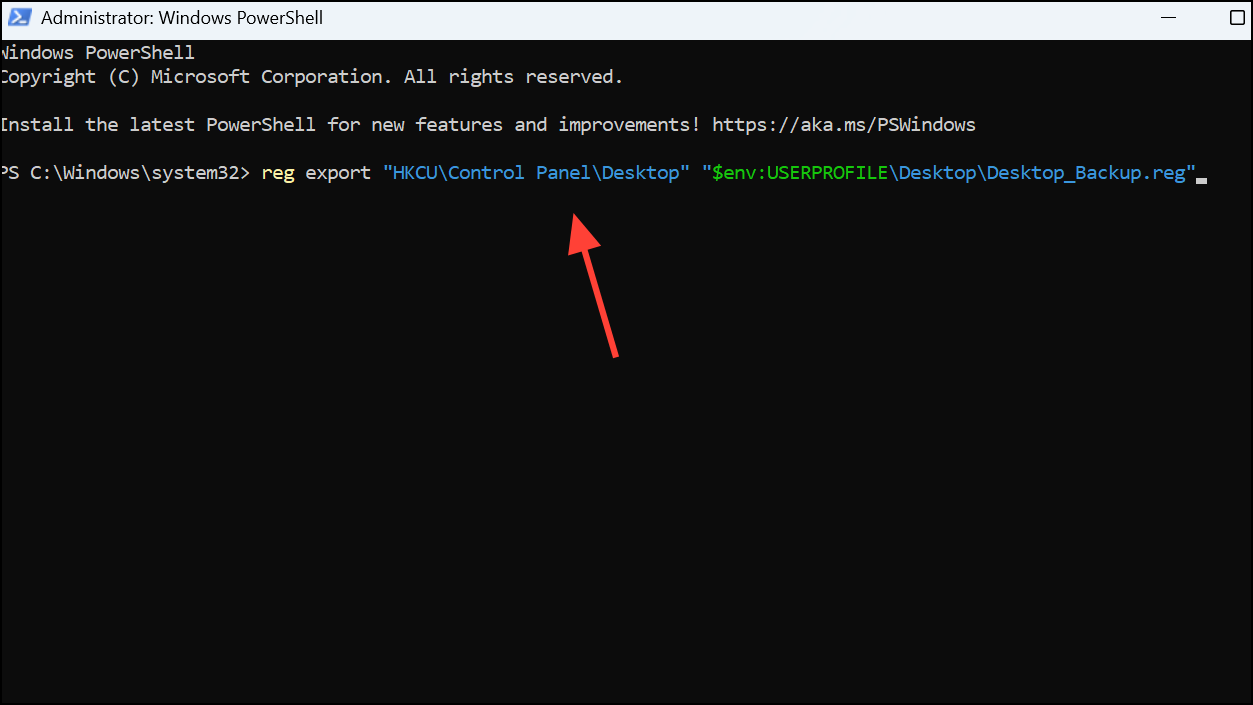
This command creates a backup file on your desktop. If anything goes wrong, you can restore your settings by double-clicking the backup file.
Step 3: Set the custom scaling value. The scaling percentage is controlled by the LogPixels registry value under HKEY_CURRENT_USER\Control Panel\Desktop. The value is a DWORD representing DPI (dots per inch). For example, 100% scaling is 96 DPI, 125% is 120 DPI, 150% is 144 DPI, and so on. To set a specific DPI, use this command (replace 120 with your desired value):
Set-ItemProperty -Path "HKCU:\Control Panel\Desktop" -Name "LogPixels" -Type DWord -Value 120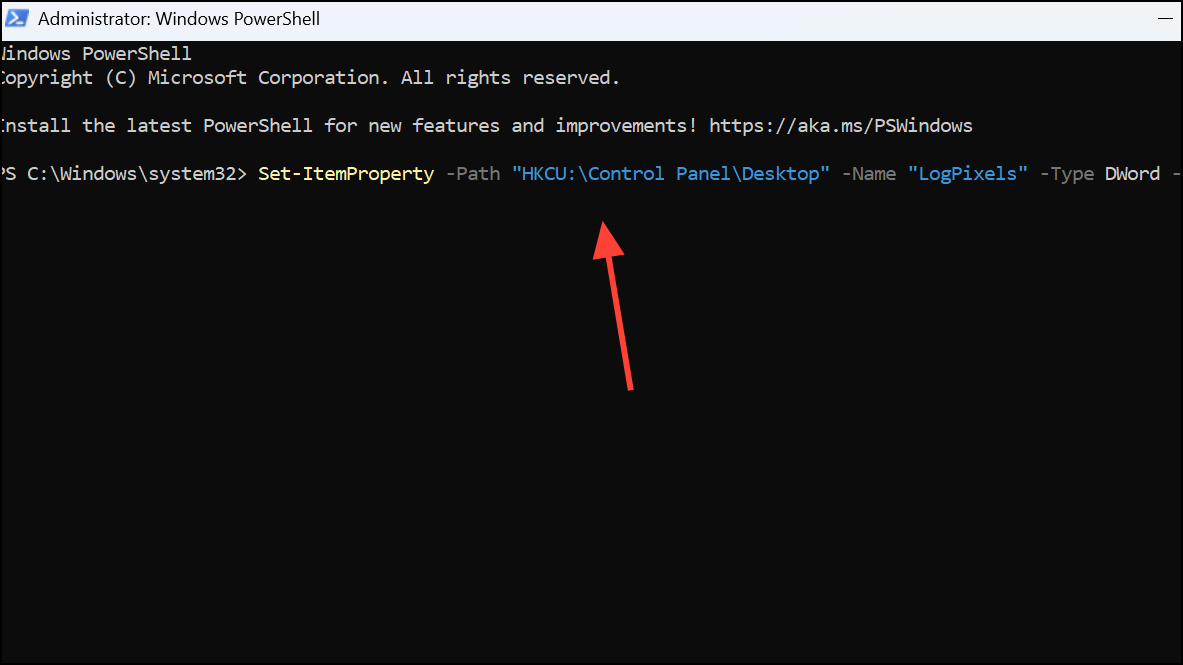
Common values:
- 96 = 100% scaling.
- 120 = 125% scaling.
- 144 = 150% scaling.
- 192 = 200% scaling.
Choose a value that best matches your preferred scaling level.
Step 4: Sign out and sign back in. Changes to display scaling require you to sign out of your Windows account and sign back in. Save your work, then sign out from the Start menu or by pressing Ctrl + Alt + Del and choosing Sign out.
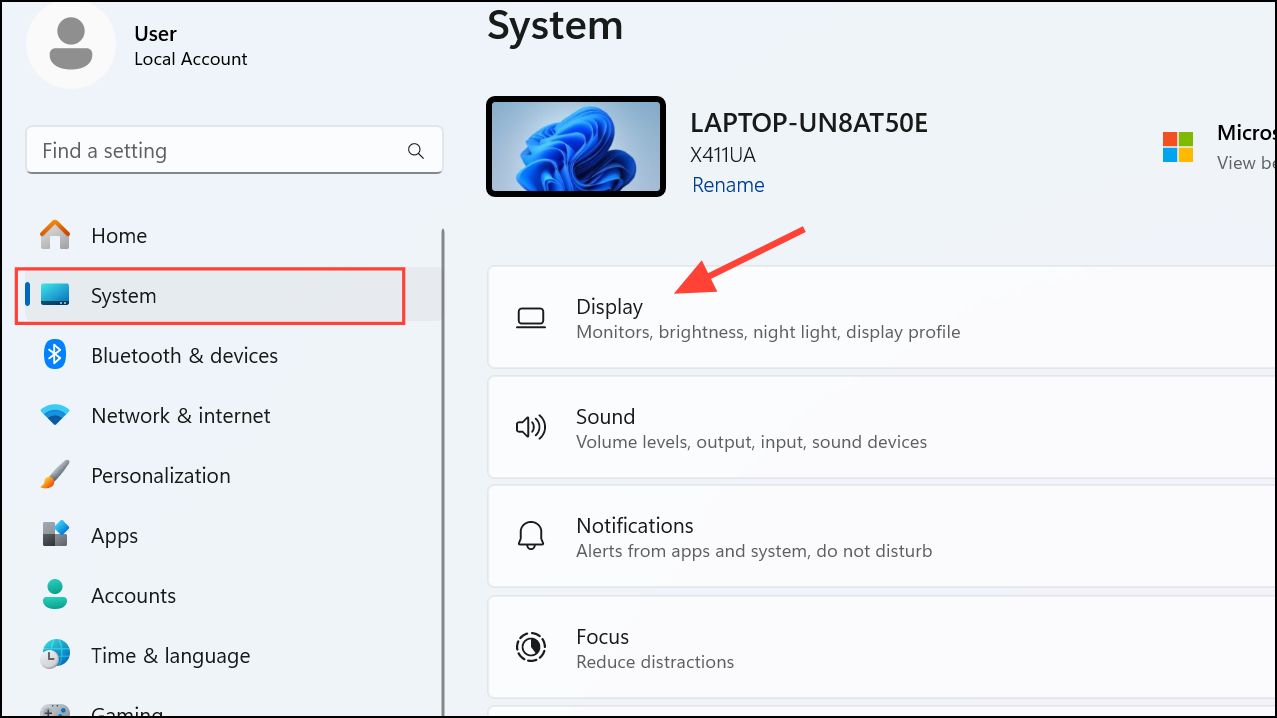
Step 5: Verify your new scaling setting. After signing back in, your custom scaling should be applied. You can check or adjust further by opening Settings > System > Display.
Alternative: Remove Custom Scaling Value
If you want to revert to Windows’ default scaling options, you can remove the custom scaling registry value you set. This will allow you to use the scaling slider in the Settings app again.
Step 1: Open PowerShell as Administrator as described above.
Step 2: Remove the LogPixels value with this command:
Remove-ItemProperty -Path "HKCU:\Control Panel\Desktop" -Name "LogPixels"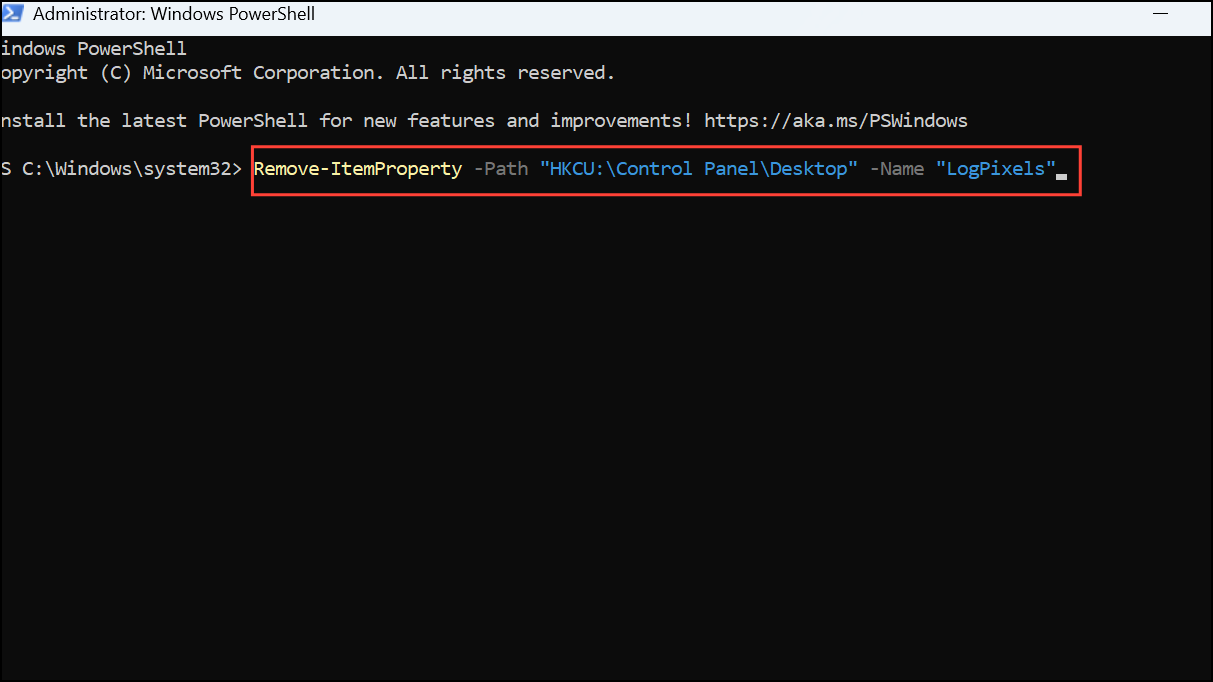
Step 3: Sign out and sign back in for the change to take effect.
Additional Tips and Cautions
- Setting a non-standard scaling value may cause some applications to display incorrectly or with blurry text.
- If you experience display issues, restore your registry backup or use the Settings app to reset scaling.
- Always back up your registry before making changes.
- Some scaling changes may not take effect until after a full restart, depending on your system and apps.
Adjusting custom scaling with PowerShell gives you more precise control over your display settings. If you run into problems, restoring your registry backup or removing the custom value will quickly return things to normal.