
Limited storage on your primary drive leads to slowdowns, failed updates, and a cramped experience when running Windows 11. Migrating the entire Windows 11 installation—including all apps, settings, and files—to a larger or faster drive, such as an SSD, resolves these problems and delivers faster boot times and improved responsiveness. This process avoids the hassle of reinstalling Windows or manually moving files, while ensuring your system remains fully functional on new hardware.
Move Windows 11 Installation Using Disk Cloning Software
Cloning your drive creates an exact copy of your current Windows 11 setup, including all system partitions, onto the new drive. This method is efficient, preserves your installed applications and settings, and minimizes downtime. DiskGenius is a reliable and user-friendly tool for this process, but other disk cloning utilities can achieve similar results.
Step 1: Prepare your new drive by ensuring it has more free space than the used space on your current Windows drive. Connect the new drive to your PC alongside the old one. If you're upgrading to an M.2 SSD, install it in the appropriate slot and confirm that your system detects it in BIOS or Windows.
Step 2: Download and install DiskGenius from the official website. Avoid installing it on either the source or target drive to prevent accidental data loss.
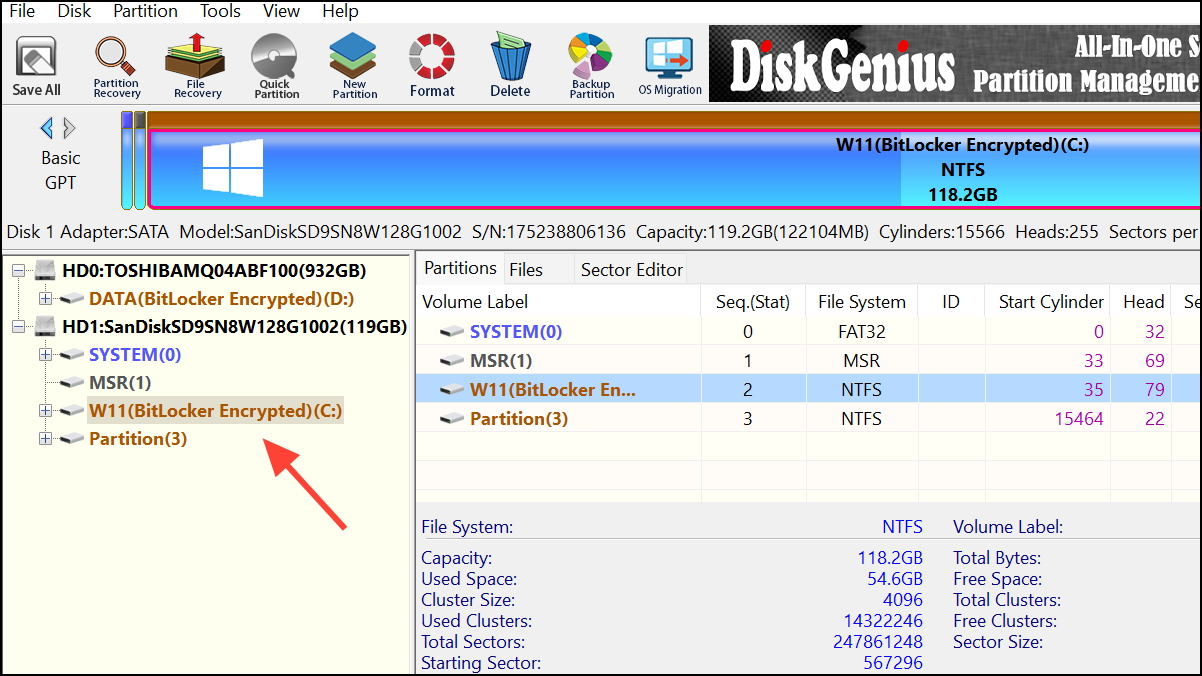
Step 3: Open DiskGenius. In the left panel, you’ll see all connected storage devices. Select your current Windows drive as the source and the new drive as the target.
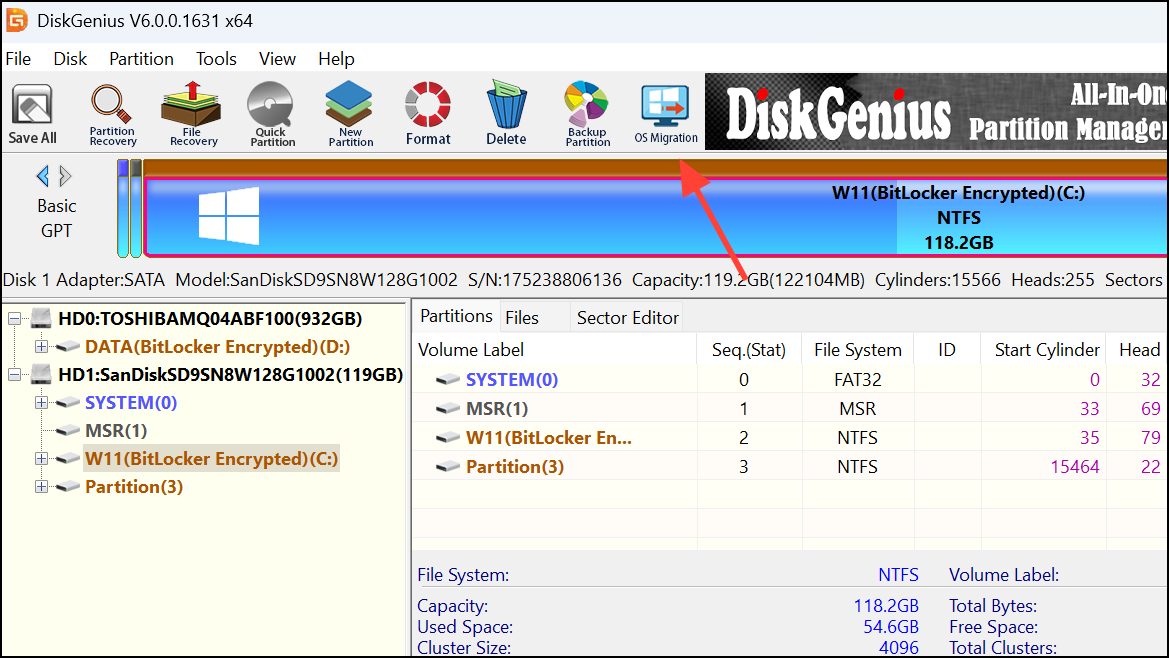
Step 4: Click on the OS Migration option in the top menu. In the dialog that appears, confirm your target disk selection and click OK. DiskGenius will warn you that all data on the target drive will be erased—confirm to proceed.
Step 5: In the migration settings, choose whether to let DiskGenius automatically update the boot order or do it manually. Manual configuration gives you greater control and insight. Select the option to automatically enter BIOS after rebooting, then click Start.
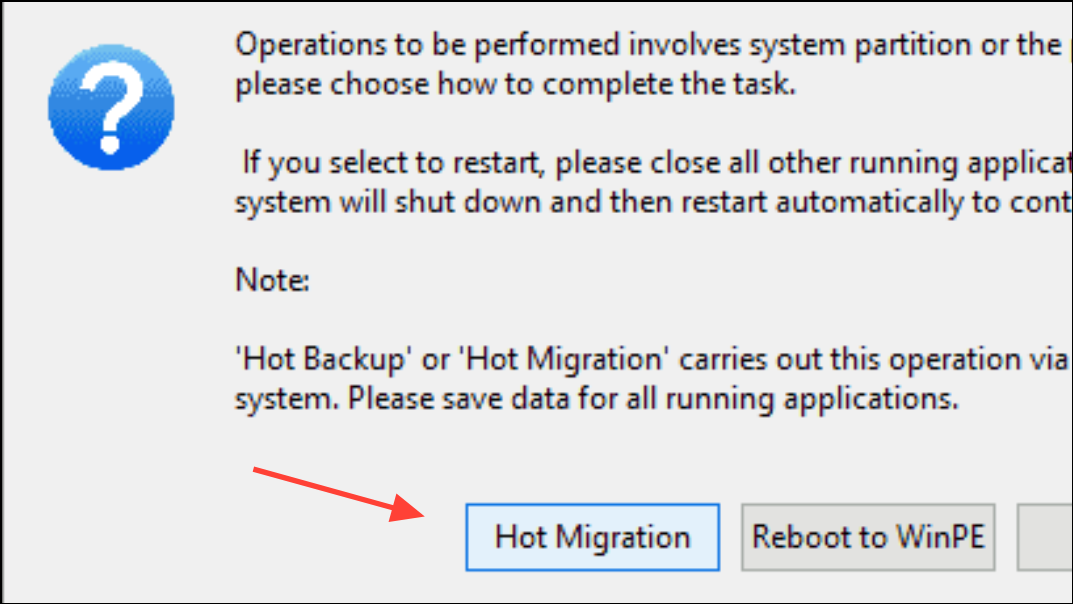
Step 6: When prompted, select Hot Migration. This option allows the migration to take place without restarting immediately, reducing downtime. The process duration depends on the amount of data being transferred.
Step 7: Once migration completes, you’ll be prompted to restart your computer. Confirm to restart. Your PC will enter the BIOS or UEFI firmware settings.
Step 8: In BIOS, navigate to the Boot Options menu. Use the provided keys (usually F5 and F6) to move the new drive (often listed as OS Boot Manager) to the top of the boot order. Save changes and exit BIOS.
Step 9: Allow Windows 11 to boot from the new drive. Open File Explorer and verify that your files, applications, and system settings are intact. Compare the used space on the new and old drives—minor discrepancies (around 5-6 GB) are normal due to system operations during migration.
Step 10: If you wish, format the old drive to reclaim it for storage or other purposes. This step is optional but recommended if you want to maximize available space and avoid confusion.
Transfer Windows 11 Using Built-In Backup and Restore
Windows 11 includes a legacy Backup and Restore feature (originally from Windows 7) that lets you create a full system image and restore it to a new drive. This method is built into the operating system and does not require third-party tools, but it can be more time-consuming and may require a bootable USB drive.
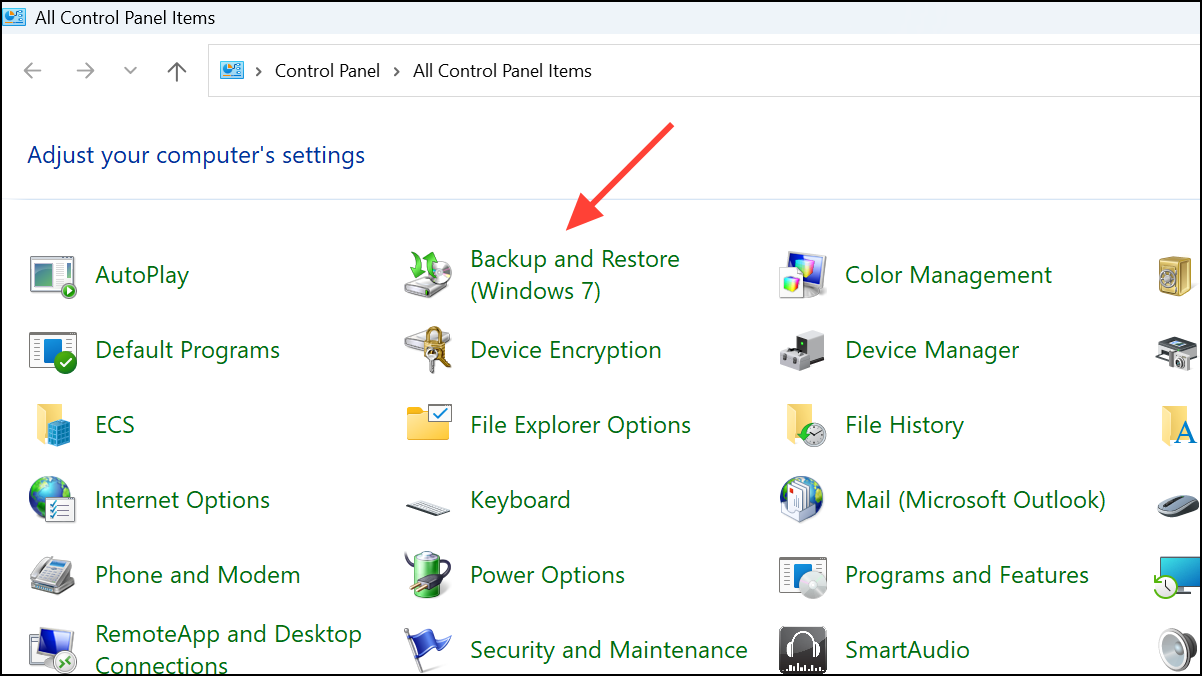
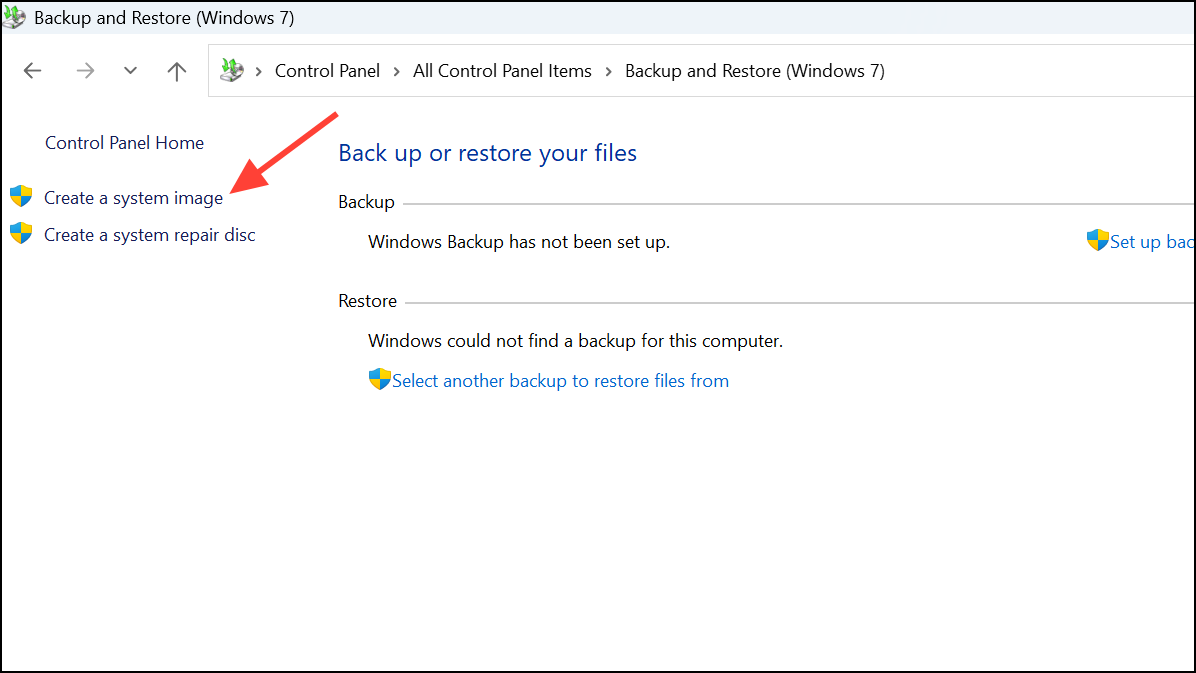
Step 1: Open the Control Panel and navigate to System and Security > Backup and Restore (Windows 7).
Step 2: Click Create a system image in the left pane.
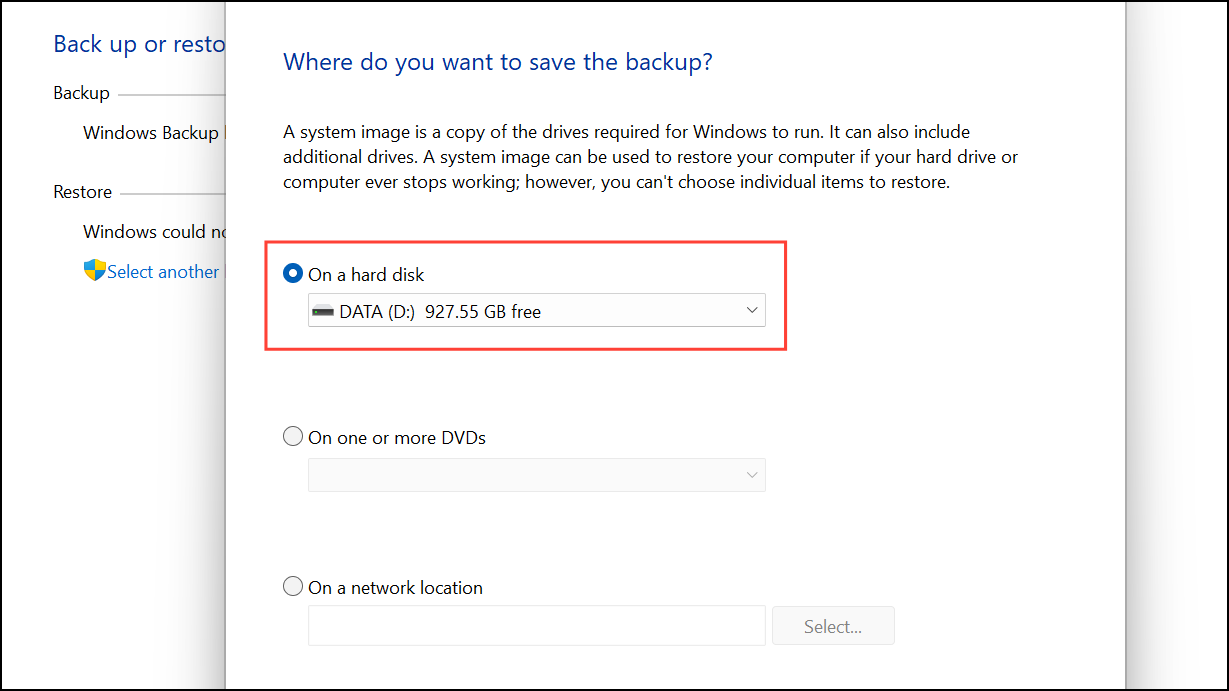
Step 3: Choose On a hard disk and select a backup destination (ideally an external drive). Include any additional drives if needed, then start the backup process. This creates a full image of your system, including all partitions required for booting.
Step 4: Use the Windows Media Creation Tool to make a bootable USB drive with Windows 11 installation files. Download the tool from Microsoft’s website, run it, and select USB flash drive as the target.
Step 5: Power down your PC and replace the old drive with the new one. Reconnect all cables and ensure the new drive is properly seated.
Step 6: Insert the bootable USB drive and power on your PC. Enter BIOS/UEFI and set the USB drive as the primary boot device if necessary. Save and exit BIOS to boot from the USB drive.
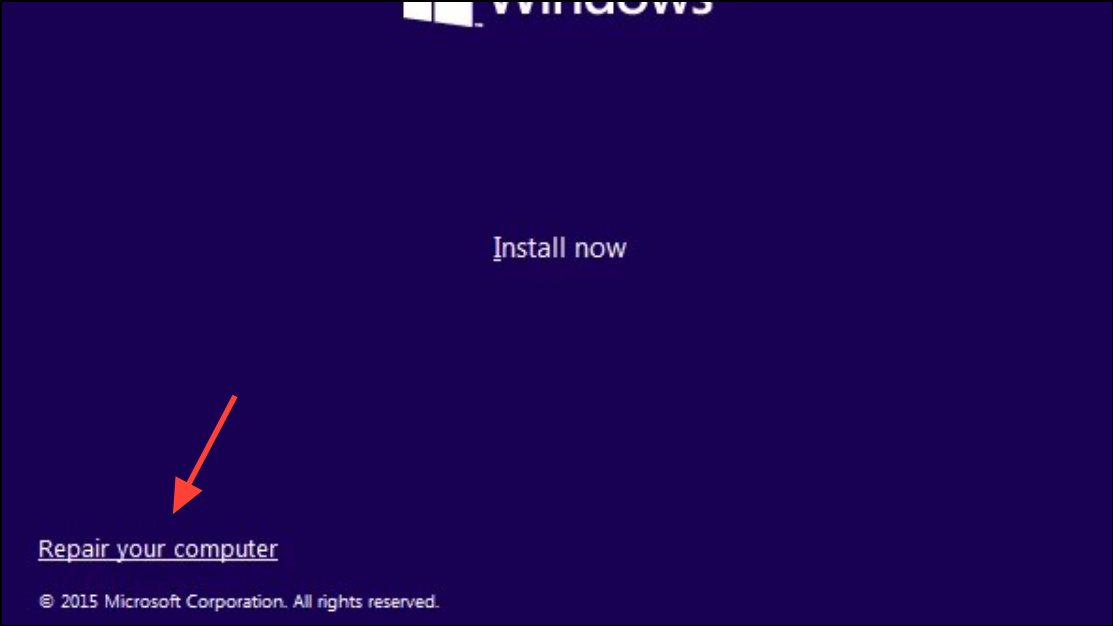
Step 7: In the Windows Setup wizard, select your language and region, then click Repair your computer instead of installing Windows.
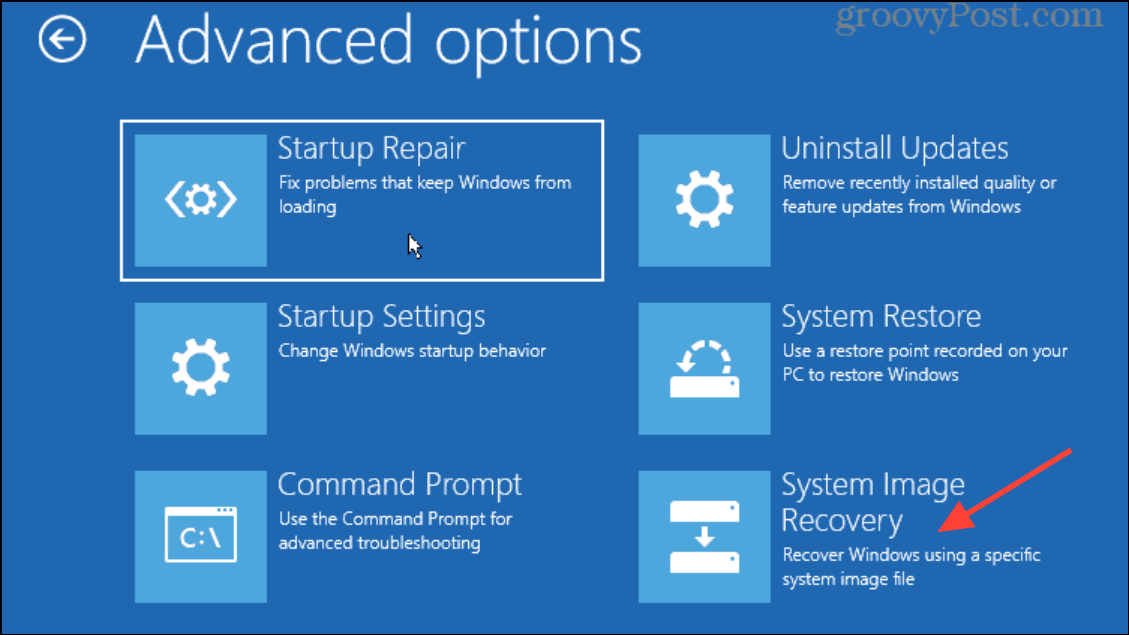
Step 8: Go to Troubleshoot > System Image Recovery. Select your system image backup and follow the prompts to restore it to the new drive. The process will overwrite the new drive with your old Windows 11 installation.
Step 9: After recovery, Windows will boot from the new drive. You may need to create a new PIN and re-enable BitLocker if you were using drive encryption. If your new drive is larger than the old one, you might see unallocated space at the end of the drive.
Step 10: To use unallocated space, open Disk Management and create a new partition, or extend your existing partition if possible. If the recovery partition blocks extension, you may need to delete and recreate it using diskpart commands in the Command Prompt. Always back up your data before modifying partitions.
Important Considerations and Troubleshooting
Disk cloning and system image restoration both require that the new drive have enough capacity to hold all data from the old drive. If your Windows license is an OEM type (pre-installed by the manufacturer), it may be locked to your original hardware and not transferable; retail licenses are portable. Before starting, check your license type using tools like ShowKeyPlus from the Microsoft Store.
Attempting to manually copy files using CTRL+A and drag-and-drop will not result in a bootable system. Windows relies on multiple hidden partitions and boot configurations that only cloning or imaging tools can properly transfer.
After migration, if Windows fails to boot, double-check BIOS boot order settings and ensure the correct drive is set as the primary boot device. If you encounter BitLocker or device encryption issues, disable encryption before migrating and re-enable it after verifying the new drive boots successfully.
For users experiencing driver or activation issues after migration, especially when moving between different hardware, a clean installation of Windows 11 may be the most stable solution. This process, however, requires reinstalling applications and restoring files from backup.
Transferring your Windows 11 installation to a new drive solves storage limitations and speeds up your system, all while keeping your apps and settings intact. With careful preparation and the right tools, the process is straightforward and delivers immediate, noticeable results.