
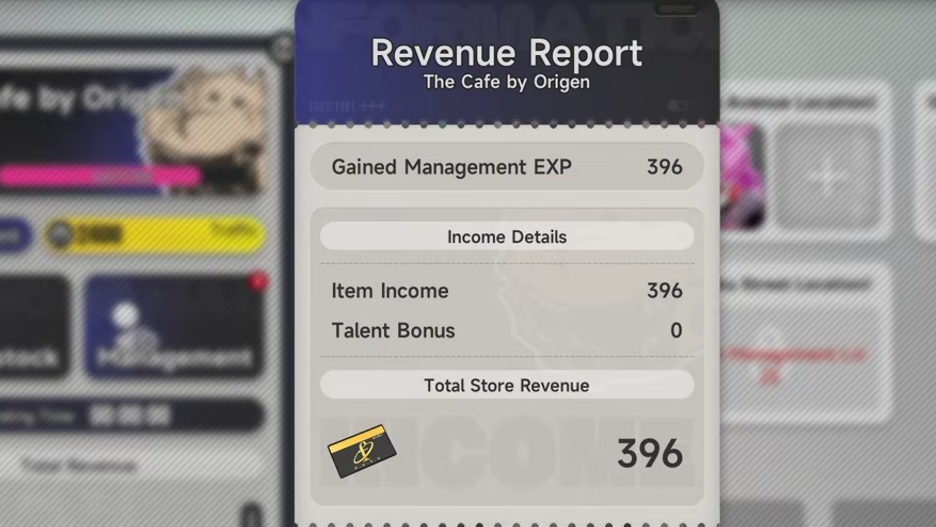
The Cafe by Origen is the passive income engine in Neverness to Everness (NTE). Once it is running, it pays out Fons every hour while you do other things, and the gap between a casual player and a fast progressor usually comes down to how well their cafes are stocked, staffed, and decorated. The system has two parts working together. There is the passive shop management layer, where you set menus, hire employees, and restock ingredients, and there is the Owner’s Selection mini-game, where you take direct control behind the counter for a higher per-stamina payout.
Quick answer: Reach City Tycoon Rank 4 (200,200 Fons earned and 10 City Stamina spent), buy your first cafe on Bluebeard Road for 5,000 Fons, place two employees, unlock the highest-priced recipes available, and restock for 24 hours. Repeat the cycle on every login and buy each new shop slot the moment it appears.
Unlock requirements for the Cafe by Origen
The cafe is gated behind early City Tycoon progression rather than the main story. You first need to trigger City Tycoon itself by completing the early quests Good Business, Better Treasure and Good Morning, Hethereau, then talking to Chiz at Pink Paws Bank. From there, you ramp through Tycoon ranks until rank 4 unlocks the cafe.
The fastest path is to clear quest objectives while spending stamina on Garage races and City Delivery, since those activities also feed your Fons total. Once the cafe unlocks, finishing the Coffee Curator tutorial quest at rank 5 raises the City Stamina cap to 200 and opens property purchases.
| Tycoon Rank | Fons required | Key task | Unlock |
|---|---|---|---|
| 2 | 45,500 | Complete New Commission | Garage and Races |
| 3 | 118,300 | Own one four-wheeled vehicle, Legendary Driver quest | City Delivery, Swift Travel |
| 4 | 200,200 | Spend 10 City Stamina total | The Cafe by Origen |
| 5 | 327,600 | Coffee Curator tutorial | Stamina cap 200, Property |
All five cafe locations and management level requirements
Five cafes can be owned at the same time, each tied to a Management Level threshold and a one-time purchase cost. Management Level rises through cafe revenue, so it scales naturally as you keep the existing shops running. Buy each new cafe the moment it becomes eligible, since each new shop adds employee slots and dish slots that compound your hourly Fons output.
| Cafe location | Mgmt. Level | Cost (Fons) | District |
|---|---|---|---|
| Bluebeard Road | 1 | 5,000 | Bridge Crossings |
| Fiscus Avenue | 5 | 20,000 | Unheard Shores |
| North Davidia Avenue | 10 | 40,000 | Bridge Crossings |
| Moomin Street | 17 | 75,000 | Bridge Crossings |
| Hankaku Street | 25 | 100,000 | Bridge Crossings |
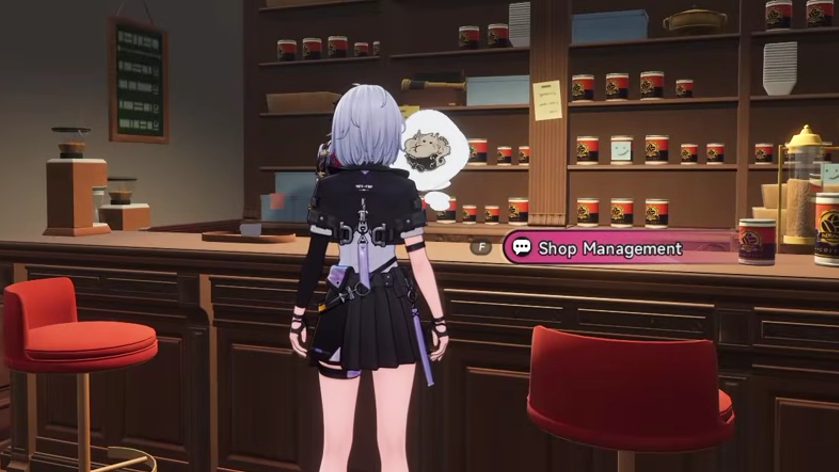
Daily cafe operating loop
Each cafe runs on a simple cycle. You set the menu, restock the ingredients, let the shop earn passively, then collect revenue and refresh the menu. Keeping the timer full matters more than any single optimization, because empty stock or expired operating time stops Fons generation entirely.
Best employees by Life Skill
Employees fall into two buckets. Price buffs add a flat or tag-based Fons increase to dishes, and Traffic buffs raise the customer flow rate. Price buffs scale better in almost every menu configuration because they multiply across every dish sold, so prioritize price characters when both are available. Traffic still matters for filling the second slot once your top price buff is placed.
| Character | Skill | Type | Core effect |
|---|---|---|---|
| Haniel | A Pro on the Job | Price | +0.12 Fons per dish (+0.18 at Lv5) |
| Adler | Coffee Master | Price | +0.12 Fons per dish, auto-coffee in Owner’s Selection |
| Mint | Mint Tornado | Price | +0.12 Fons per dish, combo tip stacks (5 max) |
| Sakiri | No Work, No Reward | Price | +0.12 Fons; +0.3 when a dish has 3 identical tags |
| Nanally | Family Business | Tag price | +0.2 Fons per Main Dish tag (+0.3 per 2 tags at Lv5) |
| Aurelia | Perfect Fit | Tag traffic | +1% traffic per Beverage tag (+1.5% per 2 tags at Lv5) |
| Edgar | Knowledge in Action | Traffic | +18 traffic (+27 at Lv5) |
| Skia | Middle Manager | Traffic | +18 traffic; +50% customer patience in Owner’s Selection |
| Baicang | Thriving Daily | Traffic | +18 traffic; combos persist on patience loss or hammer |
| Chiz | Lobby Manager | Traffic | +18 traffic; price ramps per correct dish (15 max) |
| Daffodill | The Art of Hospitality | Traffic | +18 traffic; high-priced dish targeting in Owner’s Selection |
At Management Level 1, the realistic opening pair is Haniel with either Mint or Adler, since all three are price buffs and most players have access to them on day one. Nanally becomes worth slotting at Level 4 once Tomato and Fried Egg Croissant unlocks the first Main Dish tag. Between Levels 8 and 10, the menu loses Main Dishes, so swap Nanally out for another price character during that window. Aurelia activates at Level 12 once Beverage tags reappear consistently in the menu.

Decoration and popularity
Decoration is not cosmetic. Tables raise customer spending, walls increase dish pricing, and general decor items lift customer flow. Specific decor items also add a direct Fons bonus on top. Together, a fully decorated cafe pushes the popularity meter higher, which in turn applies multipliers at fixed thresholds. Hethereau toy shops scattered around the city sell furnishings exclusive to the cafe mode, so swing by them while you are out completing other Tycoon objectives.
Owner’s Selection mini-game
Owner’s Selection unlocks the moment you purchase your second cafe on Fiscus Avenue. Each run costs 6 City Stamina and converts that stamina into Fons at a higher rate than passive collection alone. The objective is to hit a revenue target before the timer ends by serving correct customer orders, ignoring fake customers (Danzaburou), and chaining combos.
The most efficient three-character setup uses Mint, Baicang, and Nanally with their Life Skills at level 3. Mint stacks tips up to five times per combo, Baicang prevents combos from breaking when a customer leaves or is hit by the hammer, and Nanally turns the hammer into a 115% dish-price payout. With this trio active, the optimal line is to ignore most cooking, hammer customers for instant payouts, and let combo persistence carry the score to a 3-star clear.

You know the run succeeded when the post-round results screen displays the star rating and lists the Fons payout, with any new Management Guide milestones marked as complete. If you fall short, the most common reasons are running out of time on the round timer, serving incorrect orders to fake Danzaburou customers, or entering without level 3 Life Skills on the meta trio, which removes the combo persistence and tip stacking that the strategy depends on.
Spending priority for cafe-related Fons
Once the cafe is generating income, the highest-return reinvestment is more cafe slots, not vehicles or character outfits. Each new shop adds employee and dish slots that compound on top of your existing setup, while cosmetics return zero passive income. The order below puts every Fons expenditure in the queue where it pays back fastest.
| Priority | Purchase | Reason |
|---|---|---|
| 1 | Next Cafe by Origen shop | Direct increase to passive Fons rate |
| 2 | First and second apartments | Anomaly Furniture stat bonuses, stamina effects |
| 3 | Vehicles | Exploration comfort, Racing performance |
| 4 | Interior decor | Raises Collection Value and stamina cap; some items boost cafe income |
| 5 | Character gifts | Affection unlocks invite features |
| 6 | Outfits | Cosmetic only, lowest return |
The cafe rewards consistency more than optimization. Logging in twice a day to collect revenue, swap to the freshest high-price recipes, and restock for 24 hours produces a higher weekly Fons total than infrequent sessions with perfectly tuned employees. Once Management Level 17 opens Moomin Street and the fourth shop, the income loop is comfortably self-sustaining and feeds directly into vehicle purchases, Hunter Exchange materials, and Chiz constellation upgrades through the higher Tycoon ranks.