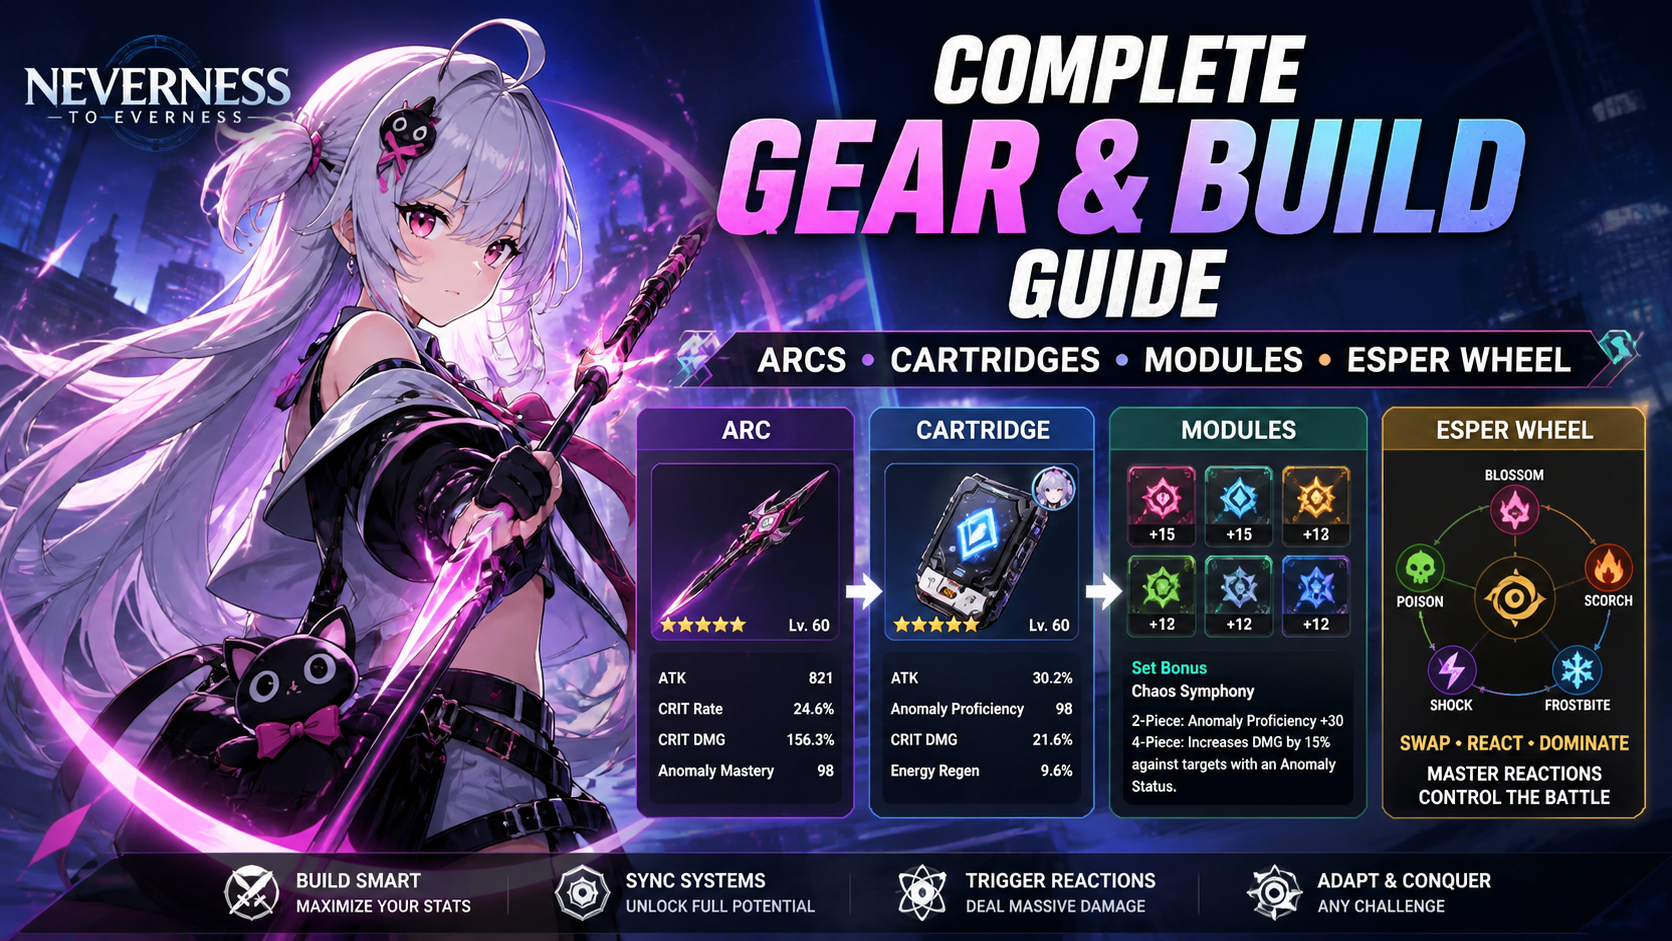
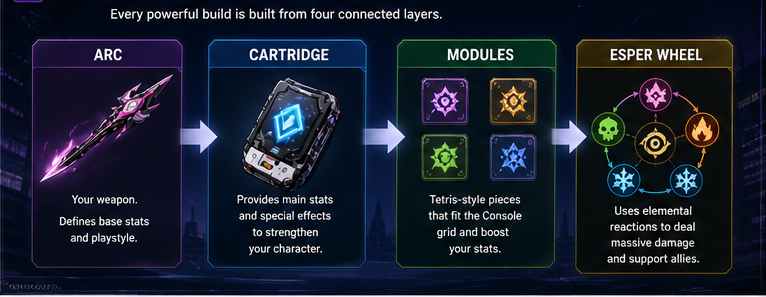
Building a character in Neverness to Everness comes down to four moving parts that all feed each other: an Arc (weapon), a Cartridge set, Module fillers on the Console grid, and a team that respects the Esper Cycle wheel. Get those four right and even free A-Class units perform; ignore them and an S-Class limited Esper will underperform in endgame fights.
Quick answer: Equip the character’s best-in-slot Arc, complete a 4-piece Cartridge set that matches their role (DPS, Buffer, or Survival), fill the rest of the Console grid with their preferred Module shape, then pair them with two adjacent elements on the Esper Wheel to trigger reactions.
The four layers of an NTE build
Every Esper has the same gearing skeleton. Understanding what each layer does prevents wasted resources on the wrong upgrades.
| Layer | What it does | Where it comes from |
|---|---|---|
| Arc (weapon) | Provides the largest single stat block plus a passive that defines the character’s identity | Tri-Key gacha pulls; Standard Arcs are also obtainable in the open world later |
| Cartridge | Themed set with 2-piece and 4-piece bonuses; one Main Stat and four Sub Stats | Anomaly Dungeons, open-world bosses, Anomaly Commissions, in-game shops |
| Module | Shape-based stat fillers that occupy the rest of the Console grid; fixed Flat HP and Flat ATK Main Stats plus four random Sub Stats | Console Rewind system using Carrota Coins (Easy = B, Normal = A, Hard = S) |
| Awakenings | Permanent passive upgrades unlocked from duplicate copies of a character | Pulling additional copies or, for free units, story and event rewards |
How the Console grid works
Each character carries a handheld Console with a unique rectangular grid. Cartridges and Modules sit on that grid like Tetris pieces, and you can rotate them to fit. Empty cells produce nothing, so you want every cell covered.
A Cartridge does not activate its set bonuses on its own. Slotting one declares which set you are chasing, but the 2-piece and 4-piece effects only switch on once the required cell pattern is filled with matching pieces. Verify by opening the Console screen — if the pattern lights up, the bonus is live.
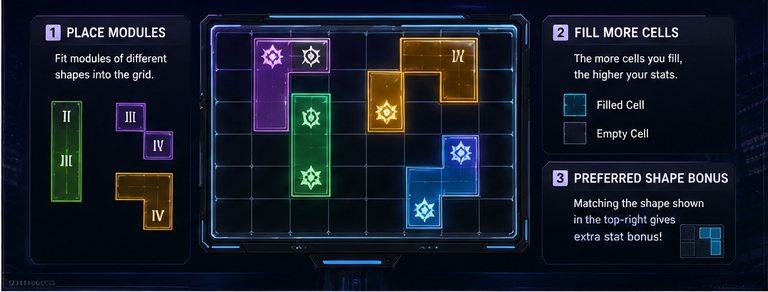
Modules come in three sizes: Type II (smallest), Type III, and Type IV (largest). Type IV pieces hold the highest stat values but are hardest to slot. Type II Modules plug awkward 2-cell gaps, which is why well-rolled Type II pieces stay valuable deep into endgame.
Note: Each character has a preferred Module shape (2-block or 3-block) listed on their equipment page. Filling leftover cells with the preferred shape grants extra bonus stats that stack with the Cartridge set effect. For example, Nanally rewards Type II Modules with extra CRIT Rate.
Stat priorities by role
Build direction is decided by the role first, not the element. There are three working roles in the current roster.
| Role | Priority Sub Stats | Cartridge focus |
|---|---|---|
| Main DPS | CRIT Rate / CRIT DMG, ATK%, Elemental DMG Bonus | 4-piece damage set matching their element |
| Sub DPS / Buffer | ATK%, Energy Regen, Cycle Intensity | 4-piece team-buff set (e.g., Speedy Hedgehog) |
| Survival / Healer | HP%, DEF%, Energy Regen | 4-piece sustain set; main stats matter less than the bonus itself |
Cartridge Sub Stats are locked the moment a piece drops and unlock progressively at +5, +10, +15, and +20. Leveling only raises the Main Stat. The same is true for Modules. That means re-rolling Sub Stats is not possible — you farm pieces and keep the ones that already rolled the lines you need.
Best-in-slot pairings for the launch roster
The 1.0 roster has settled into clear best-in-slot Arcs and Cartridges per character. Use these as the default targets and only deviate if you are missing pieces.
| Character | Best Arc | Best Cartridge (4-pc) |
|---|---|---|
| Nanally | Ready-Ready | Fireflies and the Forest |
| Sakiri | Good Boy’s Grand Adventure | Speedy Hedgehog |
| Jiuyuan | Reality Refuge | Fireflies and the Forest |
| Baicang | Camellia Society | Crimson: Twin Butterflies |
| Daffodill | Youthful Fantasy | Diabolos |
| Hathor | Raging Flames | Street Boxer |
| Fadia | Eternal Waltz | Devil’s Blood: Curse |
| Esper Zero | The Rain That Shook the World | Lost Radiance |
| Chiz | Contemplative Cat | Lost Radiance |
| Haniel | Blow up the Crowd | Speedy Hedgehog |
| Adler | Umbrella | Kingdom’s Guard |
| Mint | Clear Skies | Fireflies and the Forest |
| Aurelia | Fluff of Fortitude | Devil’s Blood: Curse |
| Edgar | Call of the Twisted City | Thea’s Night Tavern |
| Skia | Watch Your Heads! | Street Boxer |
Standard Arcs are reachable through the open world after enough story progress, so free-to-play accounts can equip every Standard character with their signature without spending Tri-Keys.
Team building around the Esper Wheel
A character only reaches full output inside a team that produces Esper Cycle reactions. The wheel has six elements — Cosmos, Anima, Incantation, Chaos, Psyche, and Lakshana — arranged in a circle. Reactions only happen between neighboring elements; non-adjacent swaps trigger nothing.
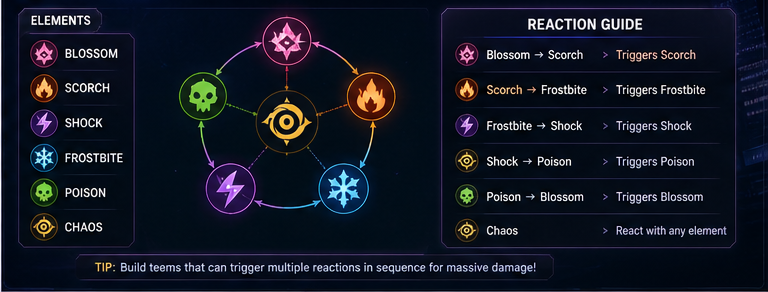
The basic combat loop is consistent across every team: build a character’s Esper Meter to 100, wait for the glowing portrait, swap to a neighboring element to trigger a reaction, then keep cycling. Trigger two reactions inside the same trio (top: Lakshana–Cosmos–Anima, or bottom: Incantation–Chaos–Psyche) and a stronger Trio reaction fires on top.
| Reaction | Elements | Effect |
|---|---|---|
| Blossom | Cosmos + Anima | Spawns Levin Blooms that deal damage over time |
| Hexed | Anima + Incantation | High-impact burst damage |
| Scorch | Incantation + Chaos | Increases damage-over-time taken by enemies |
| Charge | Chaos + Psyche | Restores Ultimate energy on follow-up triggers |
| Stain | Psyche + Lakshana | Foundational debuff for Trio reactions |
| Remora | Lakshana + Cosmos | Slows enemies for a set duration |
Cycle Intensity, a stat that rolls on Cartridges, raises the damage of these reactions. When two characters swap, the higher Cycle Intensity between them is the one that counts — so stack it on the character who triggers the reaction, not necessarily the highest-damage Esper on the team.
Build order: what to upgrade first
Awakening priorities
Awakenings unlock when you collect duplicate copies. They are not optional for A-Class units — Adler, Haniel, Mint, Edgar, and Skia only become competitive in late-game content after several Awakenings, which is why the game hands out free dupes for several of them through pre-registration rewards, story milestones, and the City Tycoon system.
For S-Class characters, the first one or two Awakenings give the largest jump. Nanally’s strongest two are A3 (Call Me the Boss) and A5 (Followers Everywhere) because they create stacking follow-up attacks. Sakiri’s first picks are Wishful Reliance for the larger ATK buff and Sensory Collapse for free Ultimate energy when she lifts enemies with her hold Skill.
Common build mistakes
- Slotting any Module shape into the Console without checking the character’s preferred type — this leaves the preference bonus dormant.
- Leveling a Cartridge past +5 before checking which Sub Stats unlocked. If the +5 reveal is poor, save the upgrade materials for a better piece.
- Stacking CRIT DMG without enough CRIT Rate. Aim for roughly a 1:2 ratio between Rate and DMG before adding more DMG%.
- Pairing two characters who are not adjacent on the Esper Wheel. The team will still work mechanically but produces no reactions, which removes a major damage source.
- Using Edgar as the only sustain unit. He heals and nothing else, which is why most teams prefer Adler’s shield or Fadia’s survival passives instead.
A finished build in NTE is one where the Arc passive, the 4-piece Cartridge bonus, the preferred Module shape, and the team’s elemental adjacency are all firing at the same time. When all four are active, even a starter team featuring Zero, Mint, Adler, and Haniel can clear early endgame content; once you swap in a limited DPS like Nanally with the same discipline, the same rotation scales straight into harder Anomaly tiers.