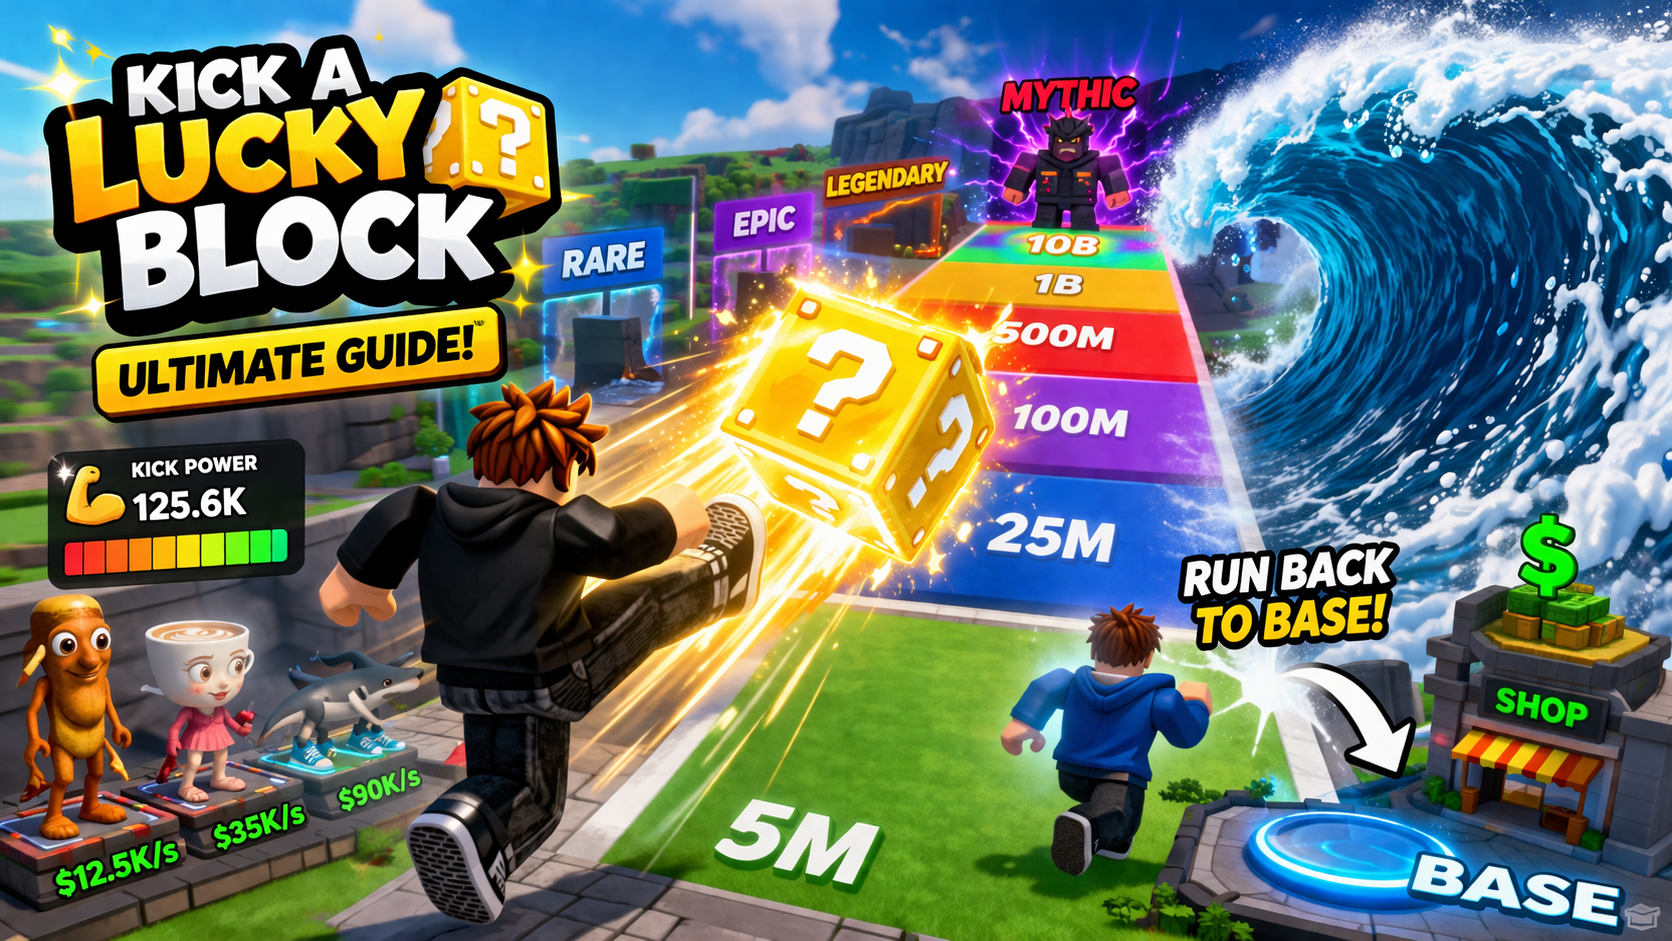
Kick a Lucky Block is a Roblox collection game by No More Flops where you train leg power, launch a Lucky Block into rarity zones, and race a tsunami back to base with the Brainrot you rolled. Survival is not optional. If the wave catches you, the Brainrot is lost. Everything in the loop, from weights to speed shop to rebirths, exists to push you into farther zones and keep higher-rarity Brainrots alive long enough to earn cash at your plot.
Quick answer: Train with the Wooden Stick, save for the Bone Barbell at $7,500, skip the Stone Block, then jump straight to the Copper Plate at $500K to unlock the Epic zone. After that, prioritize Speed upgrades before chasing higher-tier weights, and take your first Rebirth at around 1,000 Kick Power for the permanent 2x cash multiplier.
How the core loop works
The cycle has four moving parts and they all feed each other. Train Kick Power by lifting weights, kick a Lucky Block into the highest rarity zone you can reach, become the rolled Brainrot, and sprint back to your base before the tsunami hits. Once a Brainrot is placed, it generates passive income, even while you are offline up to a daily cap. That income funds better weights, Speed upgrades, and eventually Rebirths.
Timing matters at the kick meter. Filling the green bar to the top triggers a Perfect Kick, which adds extra distance and a luck boost. The luck boost increases your odds of pulling a mutated Brainrot, and mutations carry permanent earnings multipliers that can push income up to roughly 8x for the same unit.
Tip: Mutated low-rarity Brainrots are usually worse long-term than non-mutated higher-rarity ones, but a mutated Mythic or Godly is where real income spikes.
Rarity zones from Common to Celestial
There are eleven rarity zones in the game. Distance scales with Kick Power, and Brainrot value scales with distance. Tsunami speed also scales with distance, so reaching a zone is only half the problem. Getting back alive is the other half.
| Zone | Stage | What to expect |
|---|---|---|
| Common | Starter | No training required. Skip past it quickly. |
| Rare | Starter | Light training reaches it. Don’t linger here. |
| Epic | Early | Unlocked after Bone Barbell. First real income tier. |
| Legendary | Early-Mid | Copper Plate range. Speed starts mattering. |
| Mythic | Mid | Strong income. Upgrade these Brainrots and add base slots. |
| Godly | Mid-Late | Donut Barbell range. Brainrots earn millions per second. |
| Secret | Late | Heavy power and speed required. |
| Divine | Late | Post multi-rebirth territory. |
| Hacked | Endgame | Top three zone. Higher mutation chances. |
| OG | Endgame | Brainrots earn billions per second. |
| Celestial | Endgame | Rarest zone. Maximum-value Brainrots. |
Weight progression and what to skip
Weights determine how much Kick Power you gain per lift. The price gaps between tiers are sharp, so the right move is often to save past one or two tiers rather than buy every weight in order. The Stone Block in particular is a trap purchase. Save the cash for the Copper Plate instead.
| Weight | Price | Power per lift | Notes |
|---|---|---|---|
| Wooden Stick | Free | 2 | Starter. Replace as soon as possible. |
| Bone Barbell | $7,500 | 5 | First real upgrade. Buy immediately. |
| Stone Block | — | ~10–45 | Skip. Save for Copper Plate. |
| Copper Plate | $500K | 50 | Unlocks Epic zone consistently. |
| Iron Plate | $7.2M | 150 | Pushes into Legendary zone. |
| Ice Barbell | $350M | ~400–450 | Carries through Mythic. |
| Donut Barbell | $6.3B | 1,000 | Strong post-rebirth catch-up tool. |
| Golden Barbell | $85B | 2,500 | Late-game. Reaches Godly fast. |
| Heaven Plate | $1.2T | 6,250 | Late-game. Divine and above. |
| Mega Golden Barbell | $18T | 15,000 | Hacked-zone tier. |
| Neon Pulse | $500T | 40,000 | OG-zone tier. |
| Giant Gold Star Barbell | $20Q | ~99,999 | Endgame weight. Highest power gain. |
Note: Numbers vary slightly between in-game tooltips and external trackers, especially for Stone Block and Ice Barbell. Treat the table as a planning guide and confirm exact values in your shop before committing cash.
Speed and the tsunami
Every kick spawns a tsunami that chases you back to your plot. Get caught and the Brainrot dies before it reaches a slot. The Run Upgrade Shop sits in the safe zone and is the only counter to the wave. Wave speed scales with how far your block traveled, so a Mythic-zone kick produces a much faster tsunami than a Rare-zone kick.
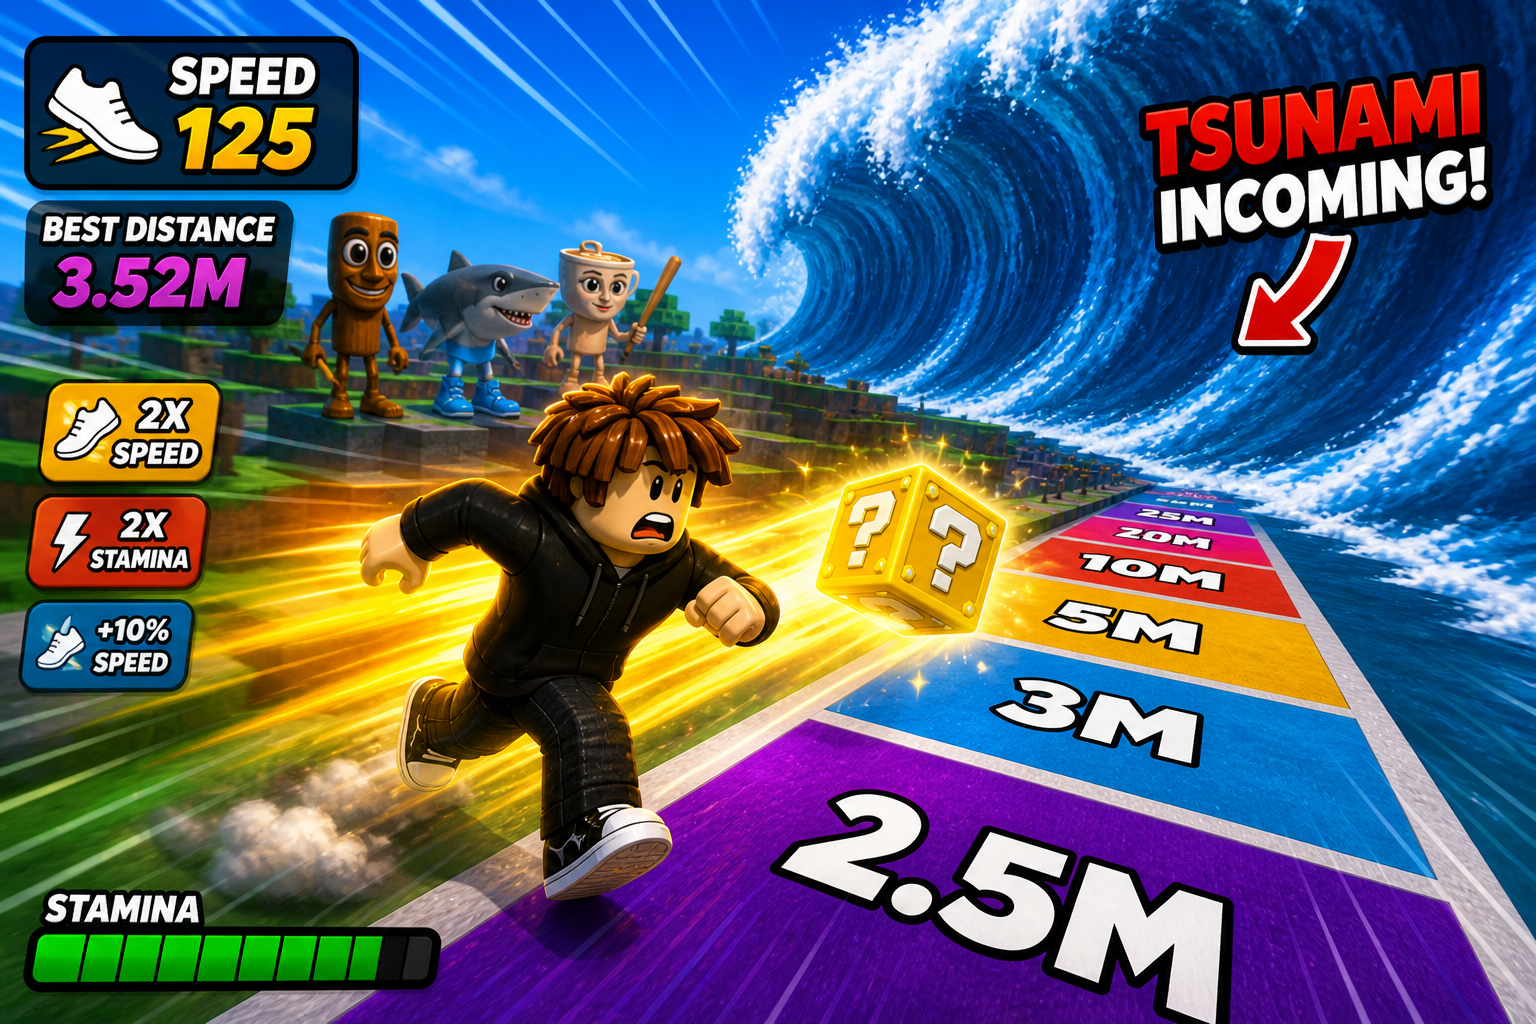
Through Common, Rare, Epic, and Legendary the wave is slow enough that a few cheap Speed levels are sufficient. Once you start aiming at Mythic and above, expect to pour millions into Speed before you can reliably bring back high-rarity pulls. Underleveled Speed is the single most common reason new players plateau in mid-game.
Brainrots, slots, and base income
Brainrots are the income engine. They generate cash continuously, including offline up to the daily cap, so an empty plot is wasted progression. Place every Brainrot you bring back, and unlock the second-floor slots once you start pulling Mythics regularly.
Upgrading Brainrots costs cash but multiplies their per-second earnings. Spending money on Common, Rare, or Legendary upgrades is generally a poor return. Start upgrades at Mythic and roll them up until they earn millions per second, then shift focus to Godly and beyond. Sell off low-rarity Brainrots once your slots are full of better units. The cash from selling stacks of low-tier Brainrots becomes a meaningful side income once your floor is mostly Legendaries and above.
Mutations and Perfect Kicks
Mutations are permanent earnings multipliers attached to a specific Brainrot. Common mutation tiers include Gold, Diamond, Plasma, Molten, Radioactive, and Nuclearosis, with Nuclearosis and OG-area mutations sitting at the top. Each Brainrot can carry only one mutation.
The fastest way to increase mutation odds is to combine distance with Perfect Kicks. Filling the kick meter to the top awards a luck boost on top of the distance multiplier, and higher-tier zones already include a built-in luck scaling. The practical rule: don’t settle. If a Brainrot drops without a mutation in a Mythic-or-above zone, let it die and re-roll on the next kick.
When to Rebirth
Rebirth grants a permanent cash multiplier and resets your Kick Power. It does not touch your weights, Brainrots, or base. The first Rebirth is a 2x cash multiplier and unlocks at 1,000 Kick Power, which is reachable quickly with the Bone Barbell and Copper Plate.
Take the first Rebirth as soon as you hit the threshold. The early multiplier compounds with every Brainrot at your base. After that, hold off on additional Rebirths until two conditions are true. You own a weight that can rebuild your previous Power level in a short session, and your base is stocked with Brainrots that benefit from the new multiplier. Rebirthing too early in the mid-game wastes hours of progress for a marginal gain. There is also a 99 Robux option to claim the multiplier without resetting Power, if you prefer to skip the rebuild.
Beginner mistakes that slow you down
- Buying every weight in order. The Stone Block is the main offender. Save and jump tiers.
- Ignoring Speed until you can’t escape. Mythic-zone tsunamis will eat you without a Speed investment.
- Leaving Brainrots in inventory. Unplaced units earn nothing.
- Upgrading low-rarity Brainrots. Start upgrades at Mythic.
- Settling for non-mutated pulls in high zones. Re-roll until you get a mutation.
- Chasing distance without timing. A Perfect Kick on a smaller weight often beats a sloppy kick on a bigger one.
A clean early-game order of operations
Kick a Lucky Block rewards focus more than luck. Train, kick, escape, place, repeat. Skip the trap weights, keep Speed even with your Power, and time Rebirths around weights that let you bounce back fast. Once your plot is generating passive income on Mythics and above, the rest of the climb to Hacked, OG, and Celestial becomes a matter of patient cycles rather than active grinding.