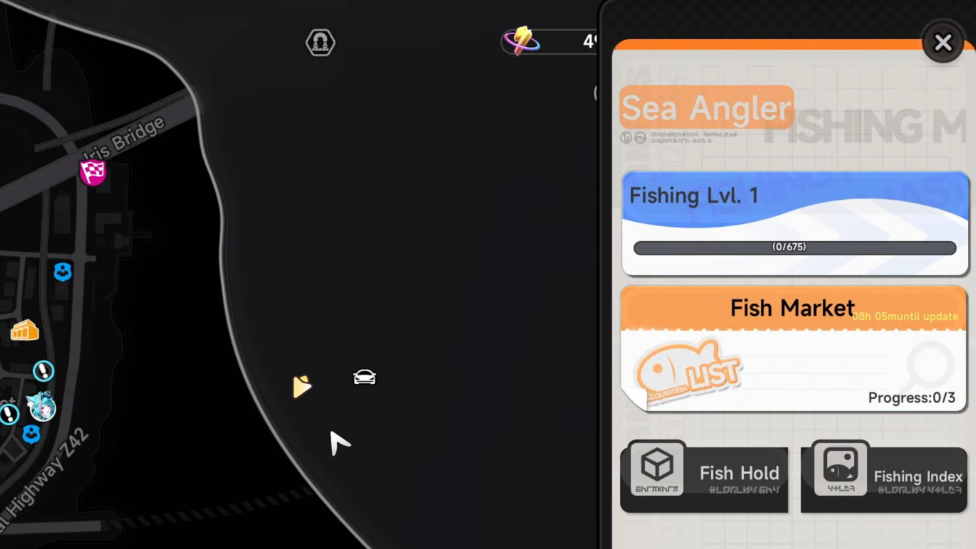
Sea Angler is the fishing hobby in Neverness to Everness (NTE), tied to the City Tycoon system in Hethereau City. It runs on its own loop of bait, rods, Fish Stamina, and Scale Points, separate from the main combat economy. The fastest path to consistent catches is to unlock the hobby, lock in a Tier 2 rod, and reserve specialty bait for daily in-demand fish.
Quick answer: Unlock Sea Angler by reaching City Tycoon Level 3 (118,300 Fons in lifetime earnings, a four-wheeled vehicle, and the Legendary Driver quest). Then open the City Tycoon app on your phone, choose Hethereau Hobbies, select Sea Angler, and use Go Fishing to track the nearest spot.
Unlock requirements for Sea Angler
Sea Angler unlocks at City Tycoon Level 3, alongside Swift Travel. Level 3 is gated behind cumulative Fons earnings and a vehicle-based side quest, so you cannot rush it purely with combat or commission rewards.
| Requirement | Detail |
|---|---|
| City Tycoon Level | Level 3 |
| Lifetime Fons earned | 118,300 Fons |
| Vehicle | Own a four-wheeled car |
| Quest | Complete Legendary Driver |
| Unlocks together with | Swift Travel |
You can verify it worked when Sea Angler appears as the third tile in the top row of Hethereau Hobbies inside the City Tycoon phone app, and the Go Fishing button becomes active.
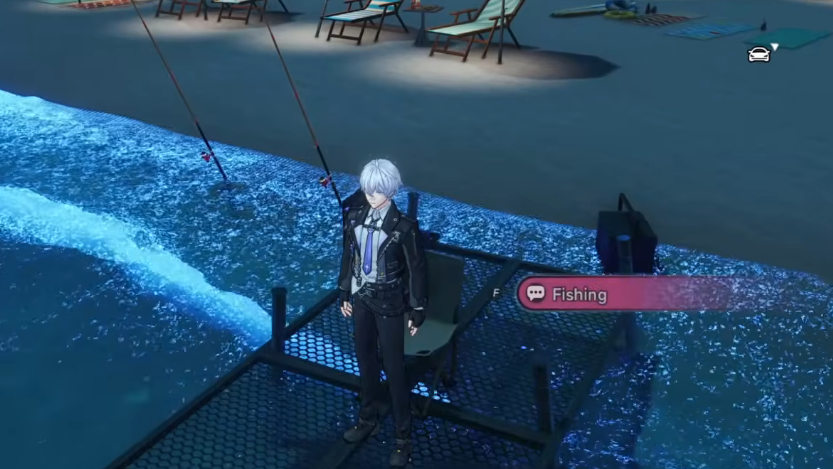
Start a fishing run
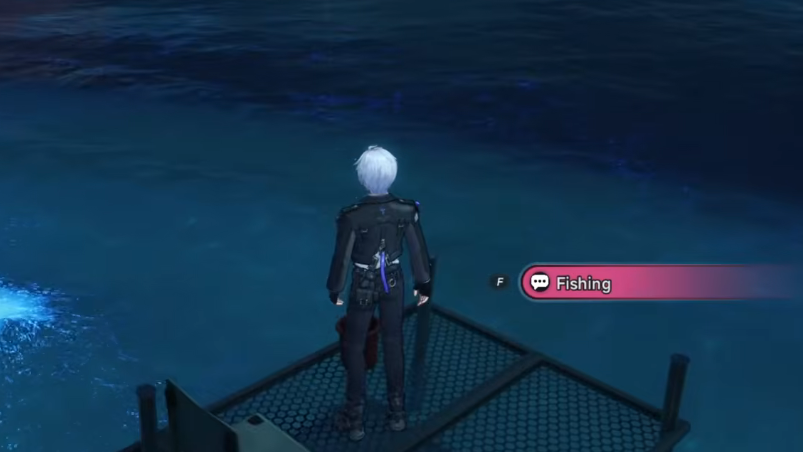
How the reel-in mini-game works
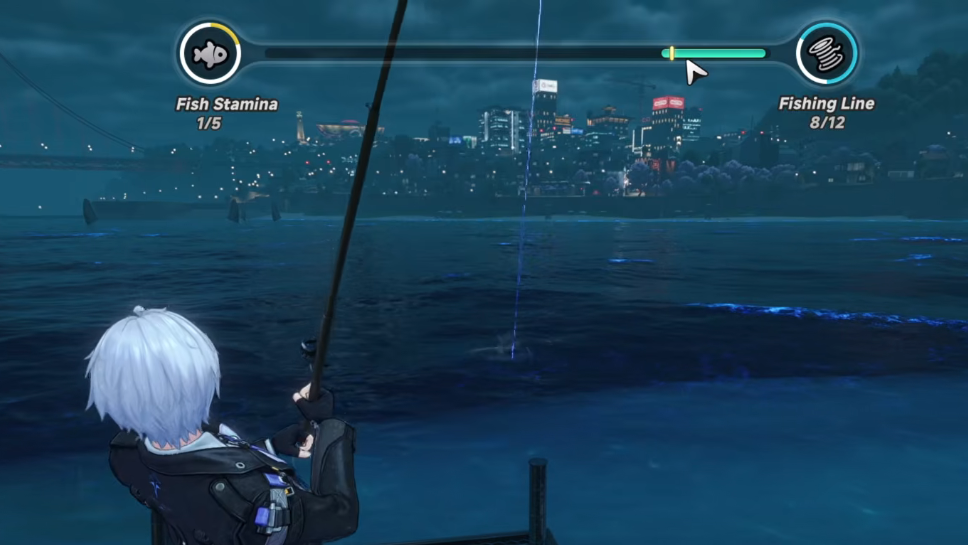
Once a fish is hooked, a meter appears at the top of the screen with a green bar that moves erratically. Use A and D to move your small white indicator and keep it overlapping the green bar.
Two values control the outcome. Fish Stamina drops only while your indicator is aligned with the green bar. Fishing Line durability ticks down every second regardless of alignment. The catch is decided by which value reaches zero first.
| Meter | Behavior | Outcome at 0 |
|---|---|---|
| Fish Stamina | Drains while bars are aligned | Fish is caught |
| Fishing Line | Drains continuously | Fish escapes |
You know a catch succeeded when Fish Stamina hits 0 first, and the fish is added to your inventory. If the line breaks first, no catch is recorded, and the bait is consumed.
Rods, bait, and what to prioritize
The starter rod has a Fishing Line durability of 12, which is enough for low-tier fish but tends to break on higher-rarity catches. The Tier 2 rod raises durability to 18, which covers most gold-rarity fish that require a durability of 12 to 15. Tier 3 and Tier 4 rods only increase the weight (and therefore sell price) of catches; weight does not affect Fishing Experience.
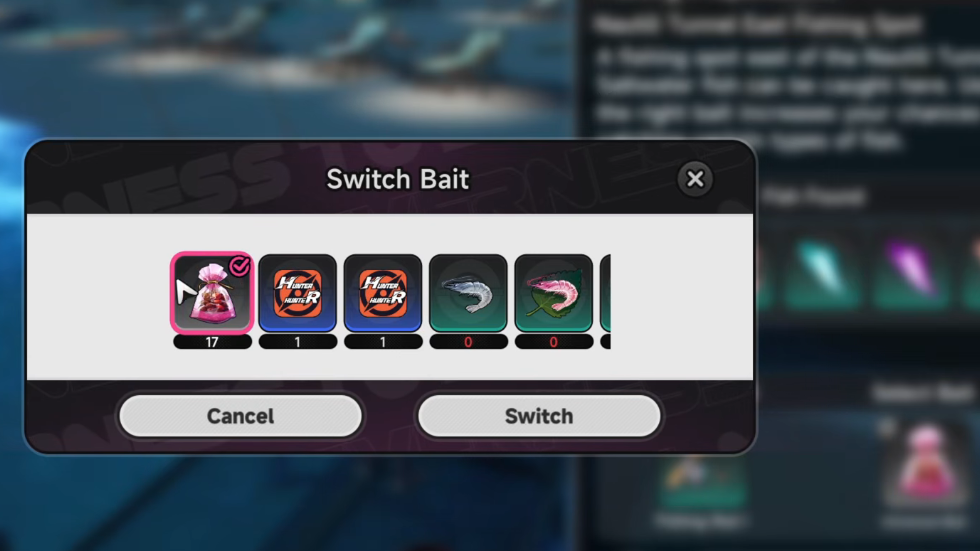
Bait priority is simpler than it looks. Universal Bait is the workhorse and should be used by default. Specialty baits each list which species they boost on the item description, and they cost Scale Points, which are slow to earn early on.
| Item | Use case | Notes |
|---|---|---|
| Starter rod | Common fish | 12 line durability |
| Tier 2 rod | Gold-tier fish | 18 line durability; main upgrade target |
| Tier 3/4 rods | Higher catch weight | More Fons per sale, no XP impact |
| Universal Bait | Daily fishing and leveling | Buy daily stock with Fons at the Fishing Tackle Shop |
| Specialty bait | In-demand fish only | Costs Scale Points; reserve for 300% sell windows |
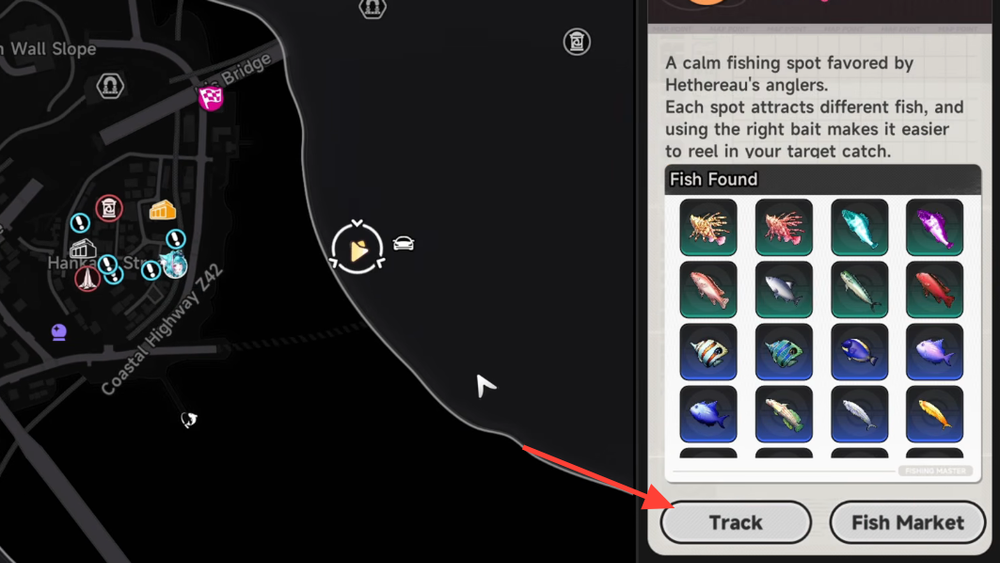
Fish Market, Scale Points, and stamina
Caught fish sell at the Fishing Master for both Fons and Scale Points, with values set by species. Each day a rotating set of fish becomes in-demand at the Fish Market and pays 300% of base value in Scale Points, but only the first two of each in-demand species per day get the bonus price.
Inside the Fish Market menu, the Go to Daily Rec. Fishing Spot button drops a marker on the location best suited to that day’s in-demand list. Pair it with the matching specialty bait to maximize Scale Point income.
Stamina behaves differently for fishing and selling. Casting and catching does not consume City Stamina, so you can fish as long as your bait holds out. Selling fish costs 1 City Stamina per 1,000 Fons earned, which is the real bottleneck on cashing out big hauls.
Leveling Fishing efficiently
Catching fish is the only source of Fishing Experience, and selling is not required to gain XP. Higher Fishing Levels open access to better rods and higher-value species at the shop and in the wild.
A practical daily routine is to buy out the Fons-priced Universal Bait, use the suggested daily fishing spot for in-demand species when their bait is affordable, and fall back on Universal Bait for everything else. Reach Tier 2 rod first, then push level before considering Tier 3 or Tier 4.
Common reasons a catch fails
- Fishing Line durability runs out before Fish Stamina, usually from using a Tier 1 rod on a fish that needs 12–15 durability.
- Indicator drifts off the green bar for long stretches, so Fish Stamina never depletes in time.
- Wrong bait for the target species, leading to repeated bites from low-value fish and wasted line durability.
- Pressing F too late on the bite cue, which can end the attempt before the reel-in begins.
Once Tier 2 is equipped and Universal Bait is the default, most failed catches come down to bar tracking rather than gear. Keep an eye on Fishing Line first; if it falls below half while Fish Stamina is still high, tighten alignment immediately or accept the loss and reset rather than burning more bait on the next cast.