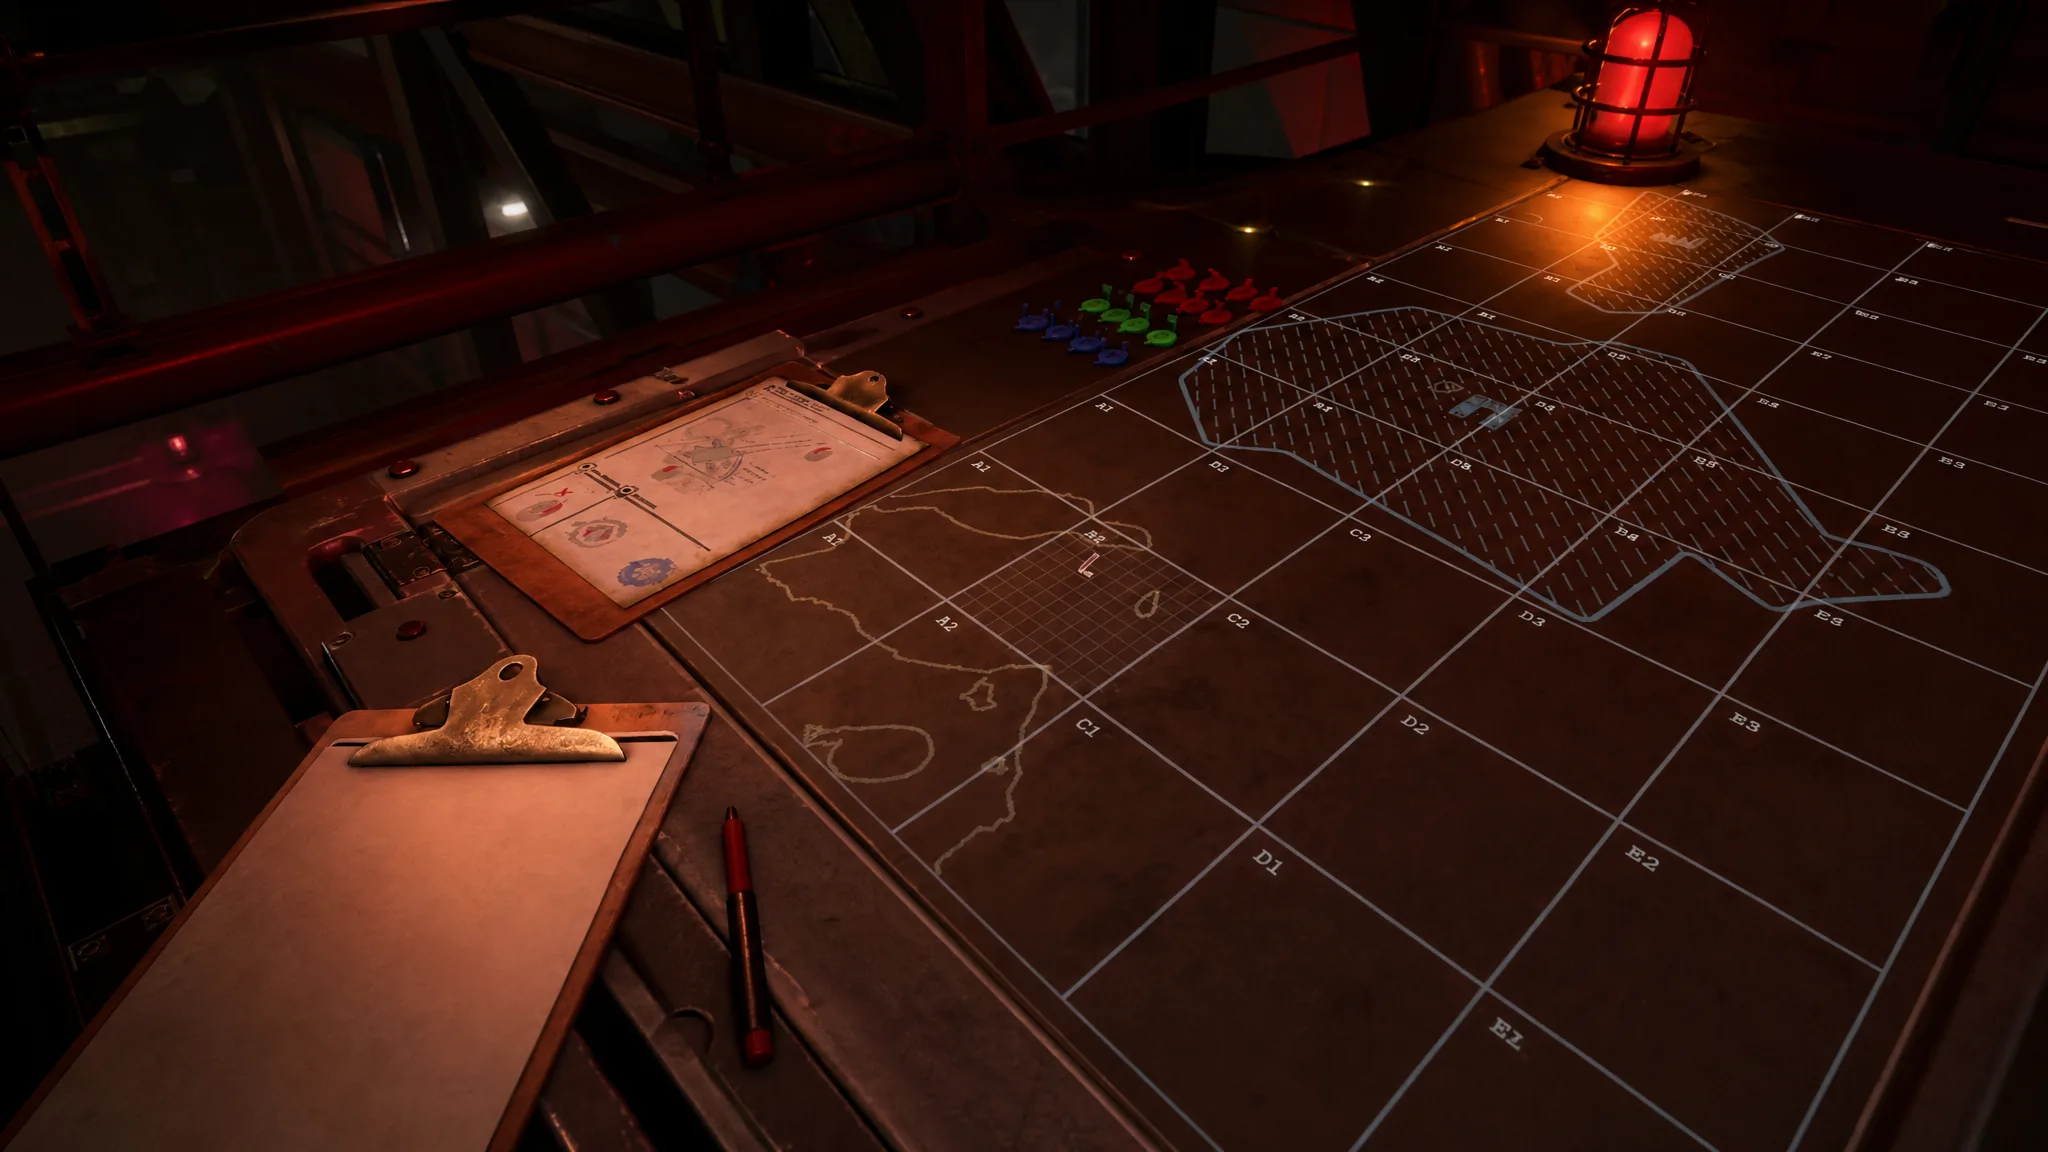
The Tactical Map is the heart of every mission in Iron Nest, the dieselpunk heavy-artillery simulator where you operate a 5,000-ton turret for High Command. You are rarely handed a target outright. Instead, you read coordinates and field reports, mark what you know, then use bearings and distances to triangulate where the enemy is hiding before sending a shell downrange.
Quick answer: Place your Iron Nest, Spotters, and Reference Points first, copy each bearing or distance clue to the Clipboard, then draw two bearing lines (or two distance circles) from those known points. Where they cross is the target. Drop a Red Number Token there, draw one final line from the Iron Nest to the target, and read off the Bearing and Range it gives you.
How the Iron Nest map grid works
The map is built on a large 20×10 grid. Columns run left to right with the letters A through T, and rows run bottom to top with the numbers 1 through 10. Row 1 sits at the bottom, which matters when you read a coordinate. Each large square is named by its column letter and row number, just like a spreadsheet cell, so K5 is column K, row 5, and R8 is column R, row 8.
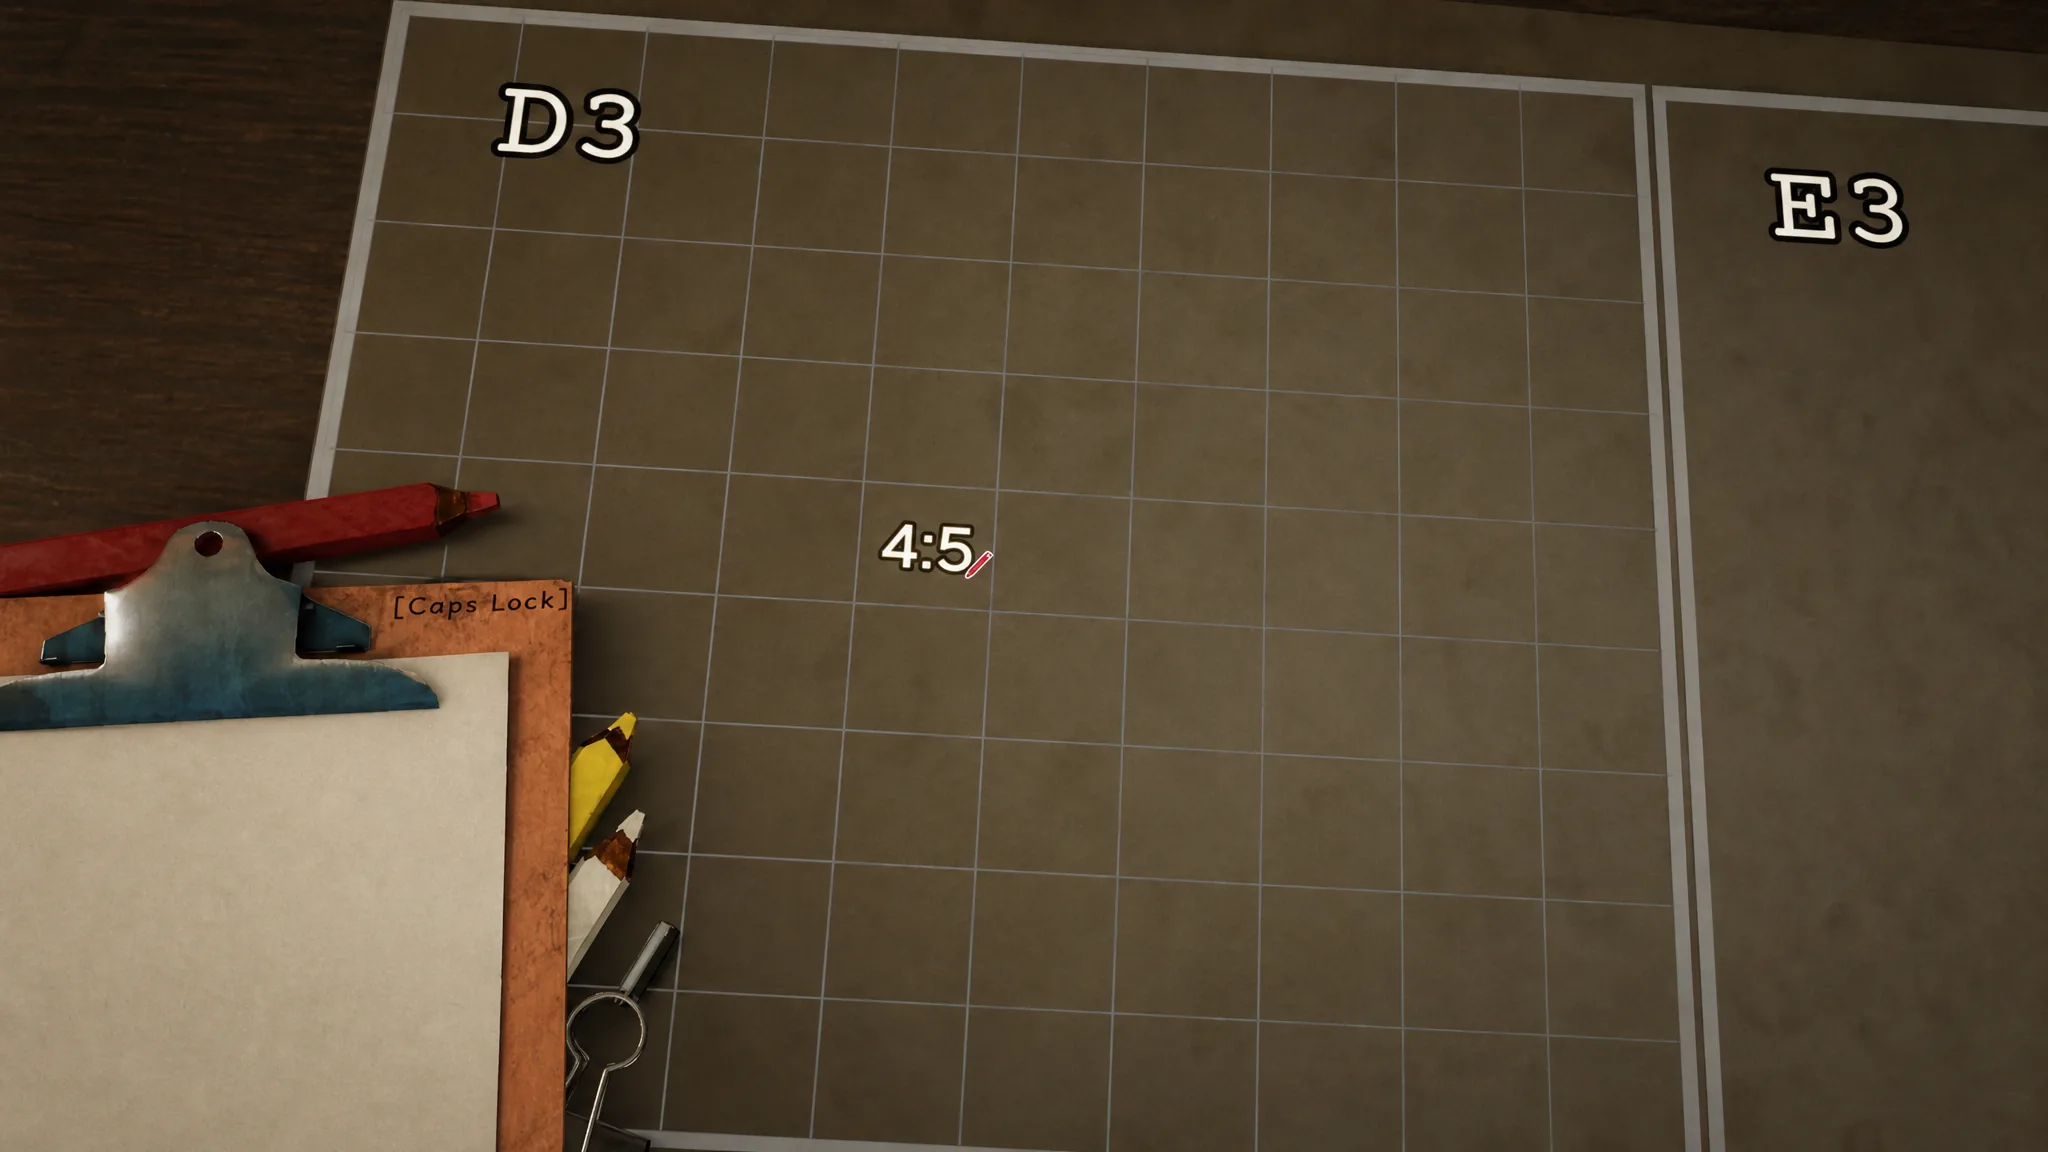
Each large cell is then split into its own 10×10 sub-grid. These sub-cell numbers start at 0 rather than 1, so 0,0 is the bottom-left corner and 9,9 is the top-right. When the game hands you a precise location, it stacks both layers together. F10 8:0 means cell F10, sub-cell 8:0, while I7 2:4 points to cell I7, sub-cell 2:4. Scale-wise, each full grid square covers 1000×1000 meters and each sub-cell is 100×100 meters, so small placement errors add up fast.
Tip: Always drop tokens as close to the correct sub-cell as you can. A few meters off at the start will throw your bearing lines and distance measurements off later.
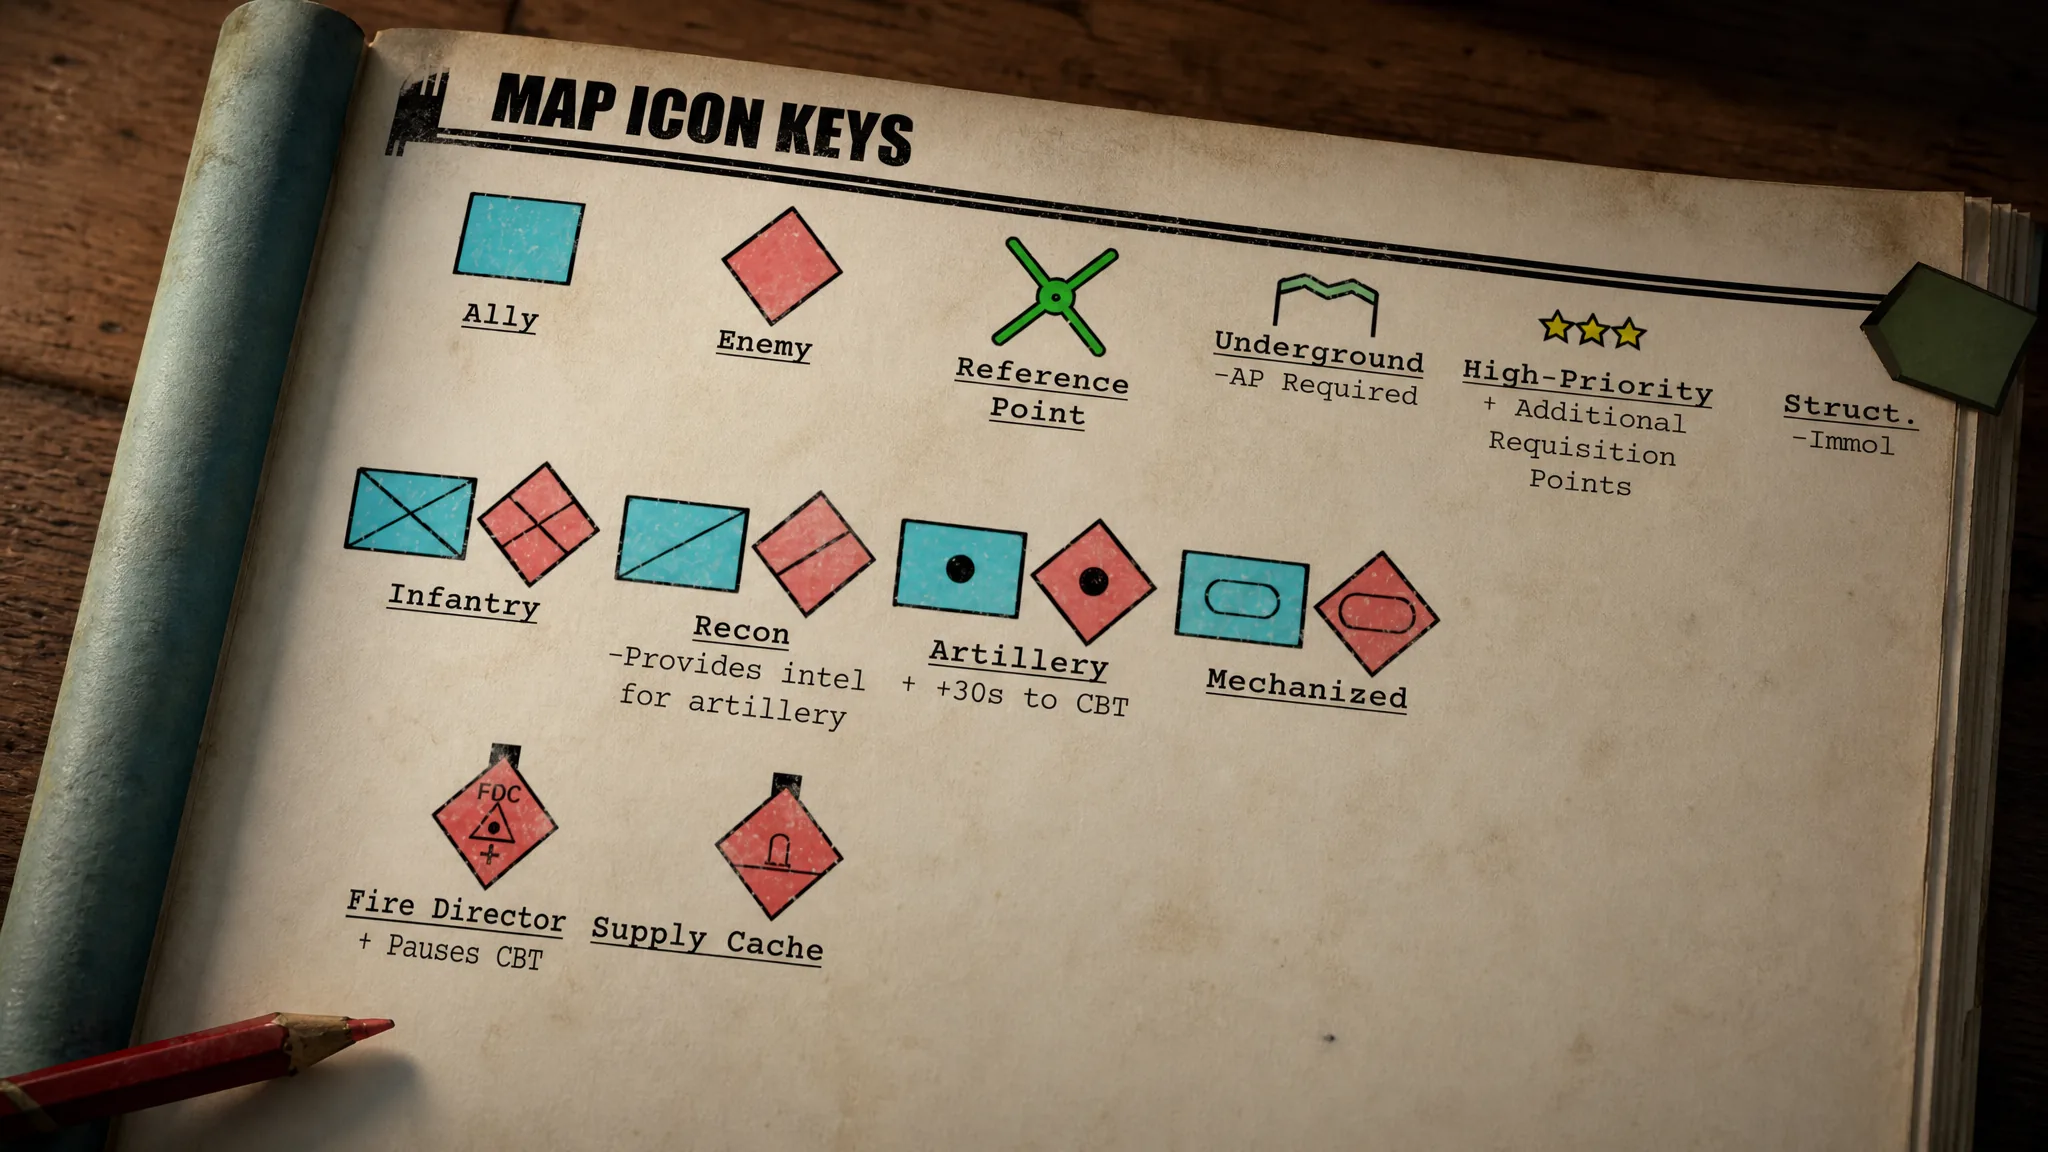
Iron Nest map tokens and what they mean
Coordinates tell you where something belongs, but tokens keep everything readable on the table. You place them by clicking and dragging the right marker onto the location. These are the markers you will work with most.
| Token | Use |
|---|---|
| Iron Nest Token | Marks your turret’s position. Usually the first token you place each mission. |
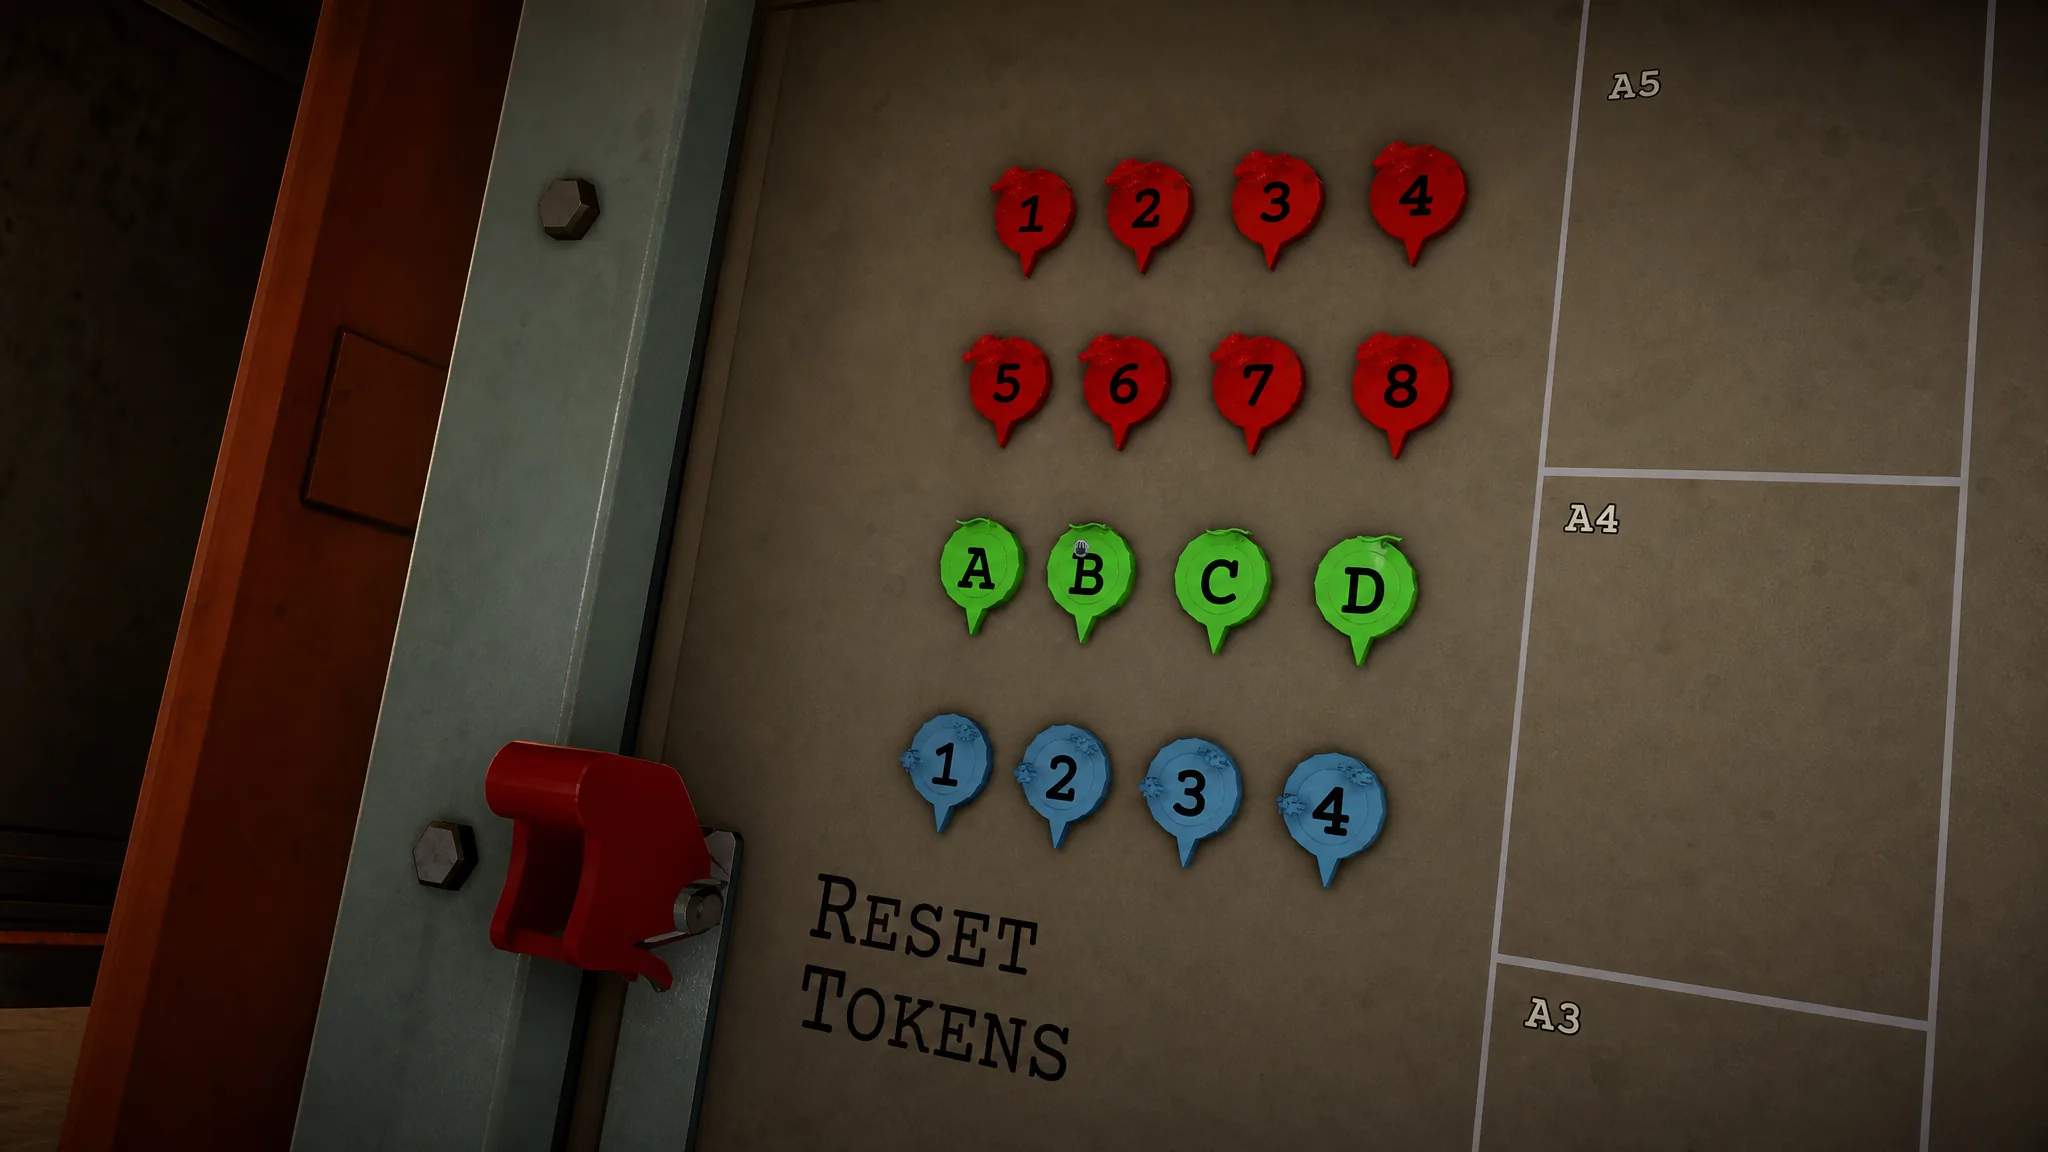
| Blue Number Tokens (1-4) | Mark your observation assets, the Spotters. |
| Green Letter Tokens (A-C) | Mark Reference Points named in the brief or field reports. |
| Red Number Tokens (1-8) | Mark enemy Targets once you have worked out their position. |
After you fire, Skull tokens appear over target locations. A red Skull confirms you destroyed an enemy. A blue Skull means the shot also caught a friendly unit. You will also find loose nuts and bolts on the map that can be dragged around freely and used as improvised markers for anything that does not fit the standard categories.
One important constraint: the Iron Nest cannot move, but its token can. Keep that token planted on your real position, because moving it makes every firing solution harder to calculate.
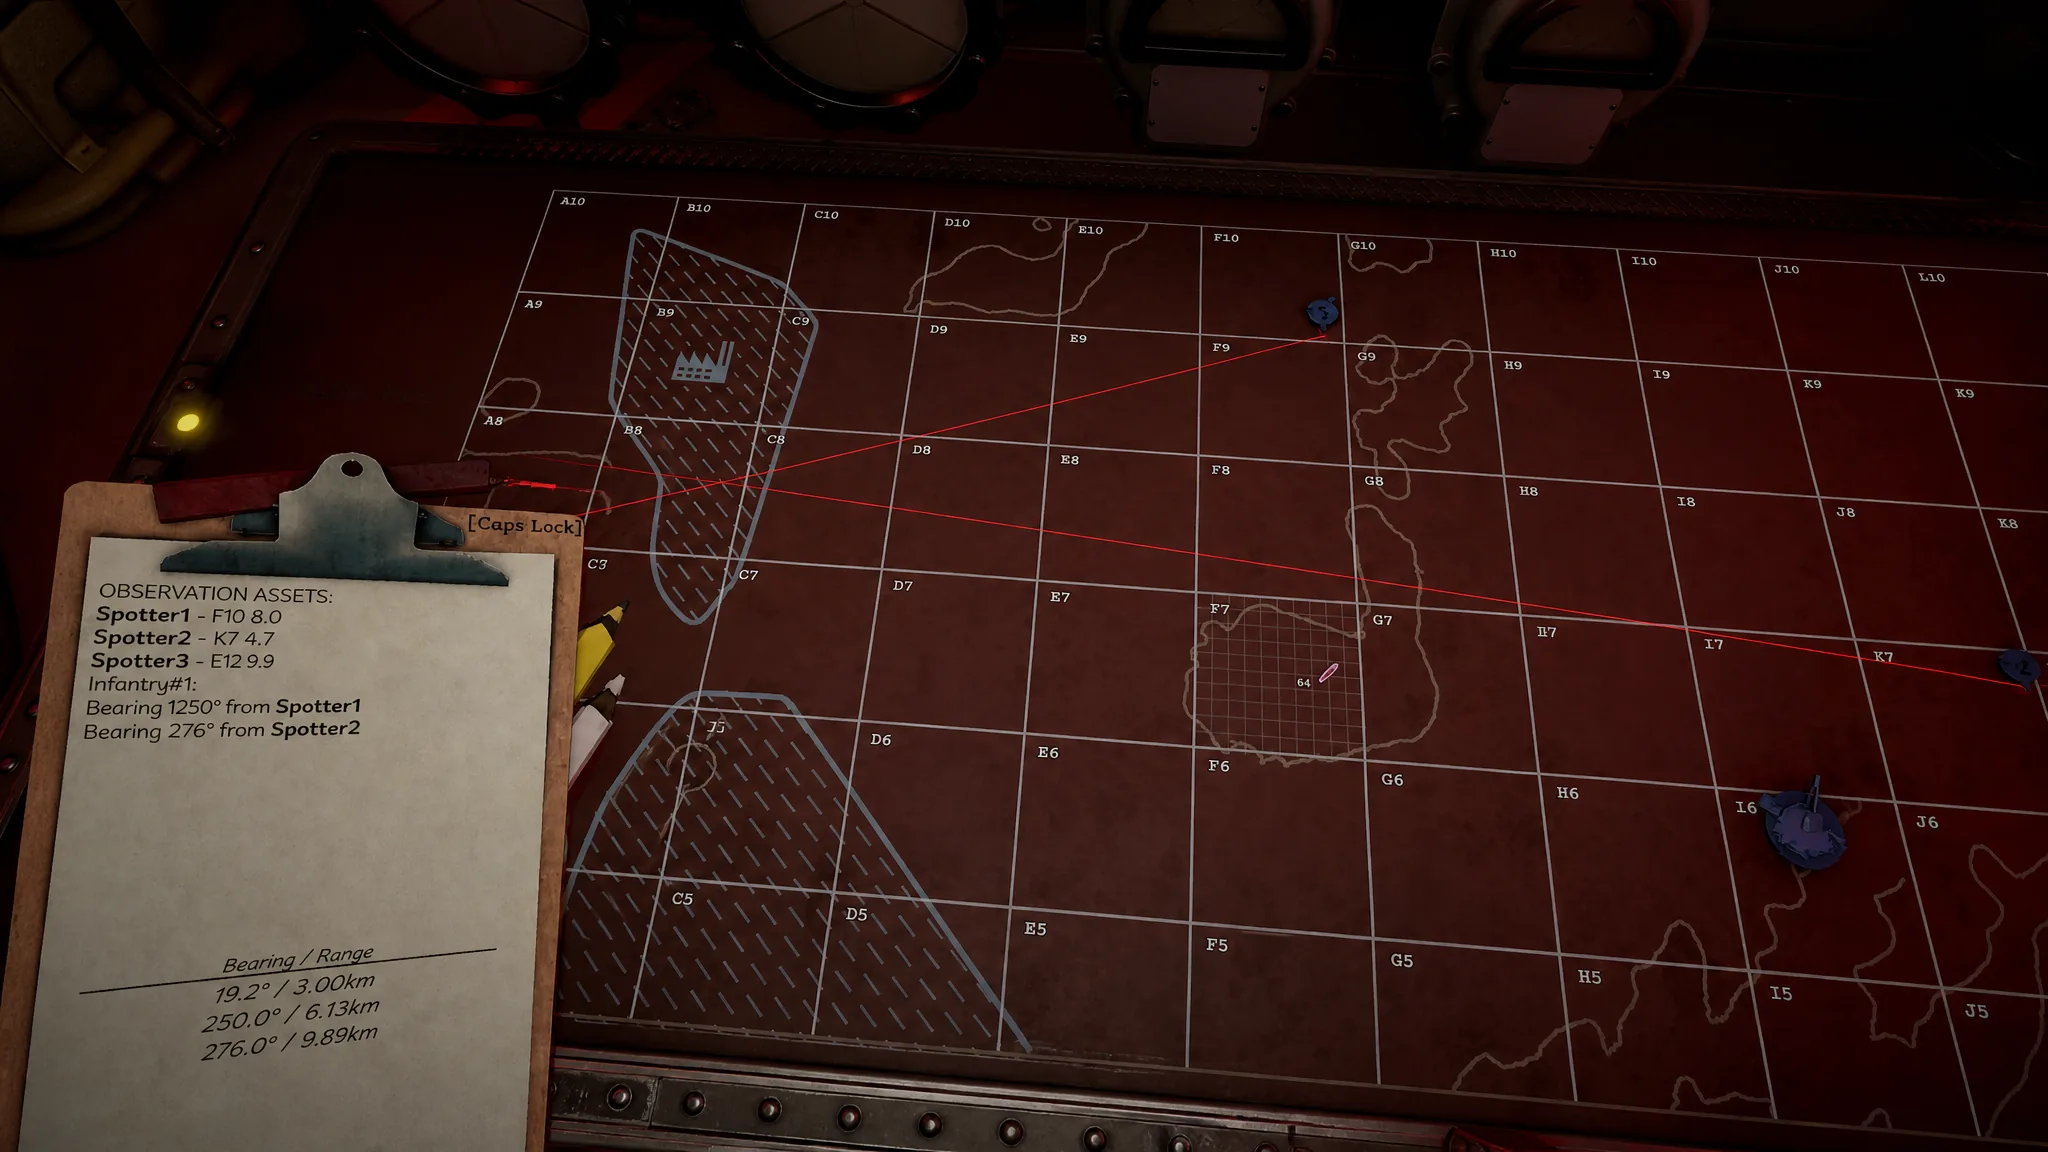
Step 1: Place every known position first
Step 2: Copy useful clues to the Clipboard
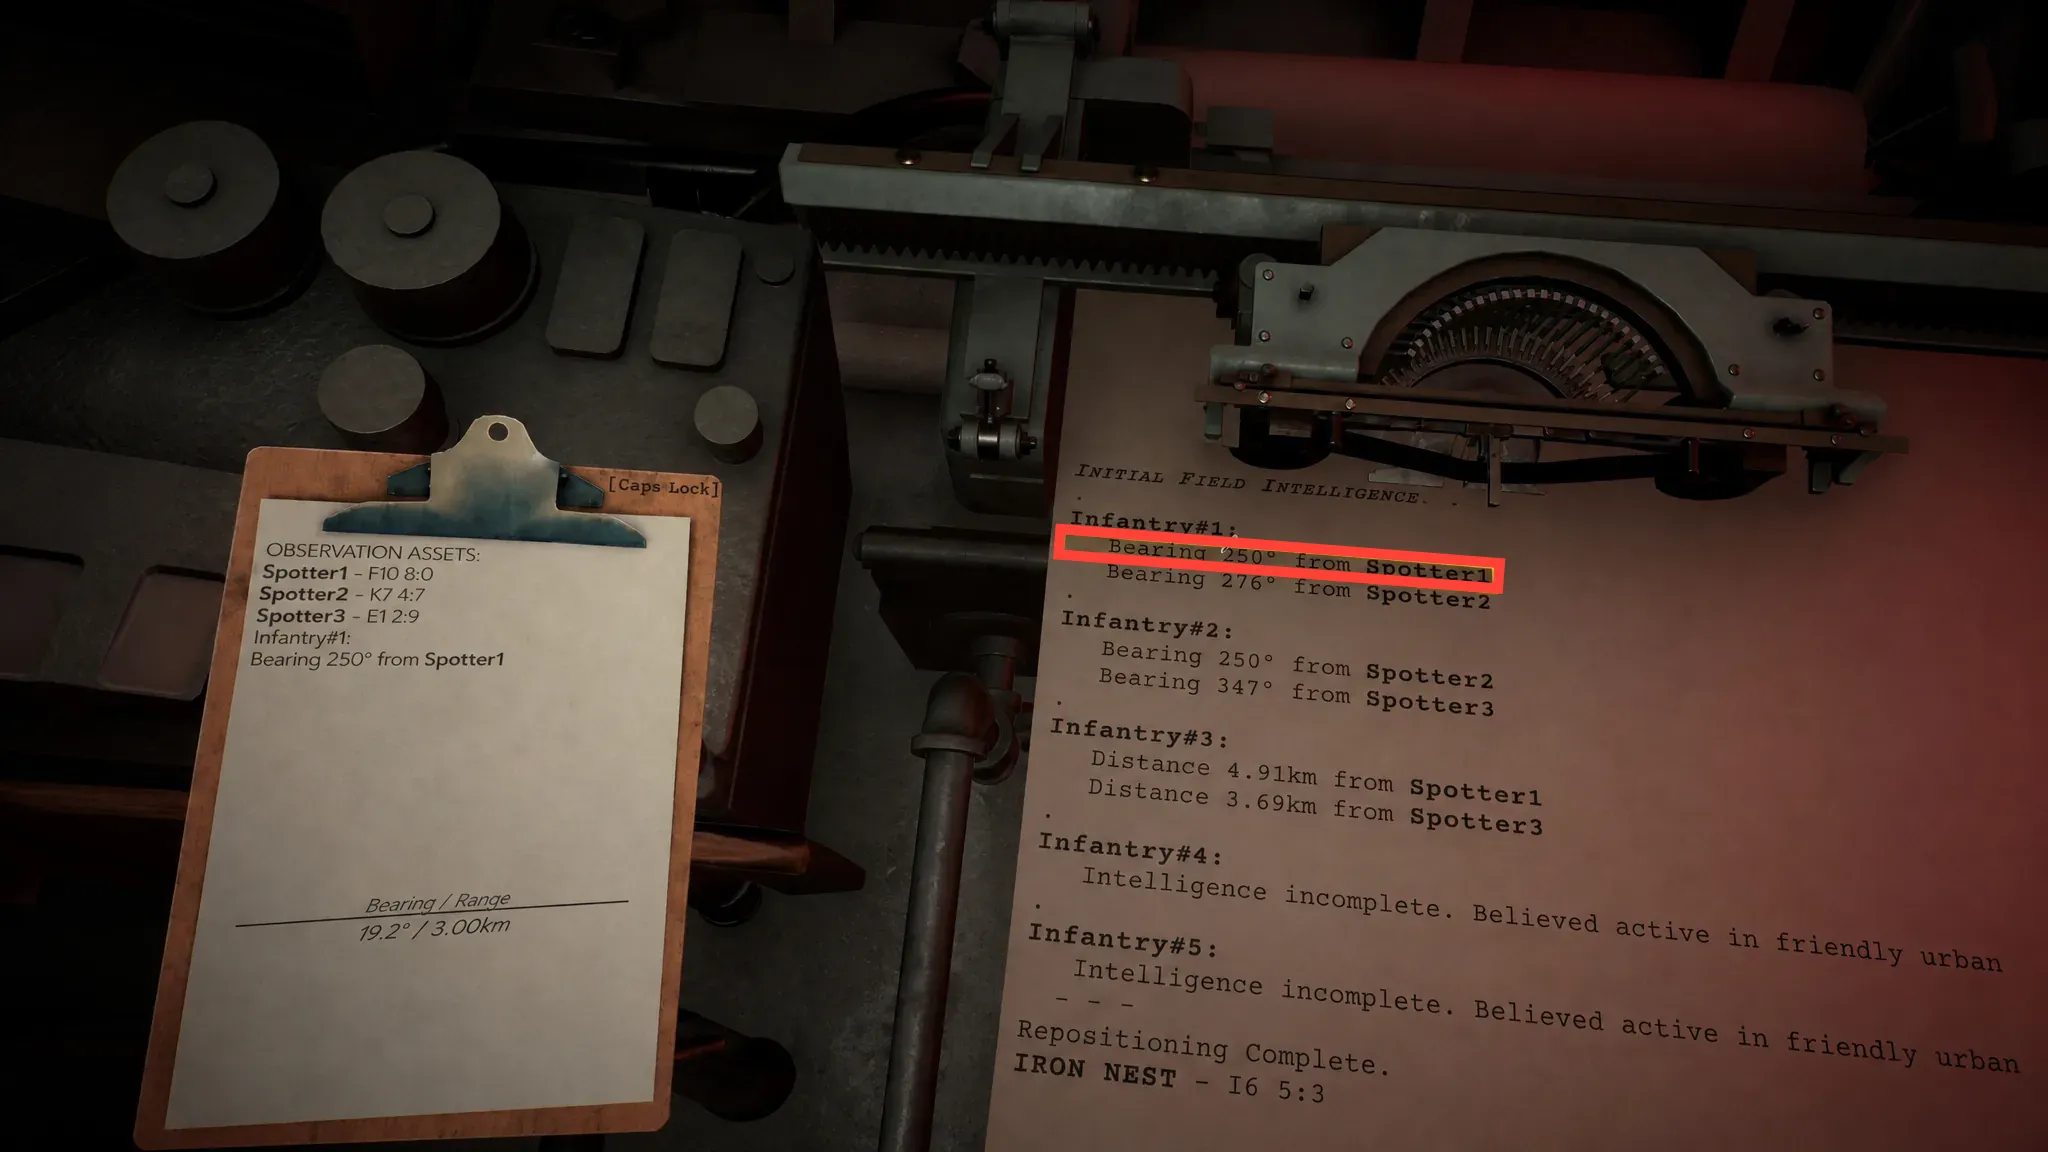
With your known positions marked, open the Clipboard and clear out any stale notes. Then check both the High Command and Field Reports teleprinters for anything that helps you place the enemy. The two clue types that matter most are bearings and distances.
| Data | What it gives you |
|---|---|
| Bearing | The direction of a target from a known point such as a Spotter, Reference Point, or the Iron Nest. |
| Distance | How far the target sits from a known point such as a Spotter, Reference Point, or the Iron Nest. |
A typical report reads like this.
Target #1
- Bearing 186° from Spotter#1
- Bearing 111° from Spotter#2

Target #2
- Distance 7.45km from Spotter#3
- Distance 3.56km from Spotter#1
Not every clue is a clean number. Sometimes you get descriptive hints, such as a target sitting across the river or near a particular landmark. In those cases, combine whatever measurements you have with a rough visual estimate from the terrain.
Note: Outside of enemy artillery, find and engage targets one at a time so the map stays readable. Artillery is the exception. Your first shell starts the counter-battery timer, so identify and mark every artillery position before you open fire.
Step 3: Use lines and circles to pinpoint the target
Interacting with the map and opening the Clipboard reveals your measurement tools: three colored wooden pencils in red, yellow, and white, plus a drawing compass. The pencils do the same basic job, and the colors simply keep overlapping lines apart. Red copies its bearing and range to the Clipboard, yellow shows the same values without copying them, and white draws a plain line with no data. The compass draws circles for distance-based clues.
Finding a target from two bearings
Finding a target from distance data
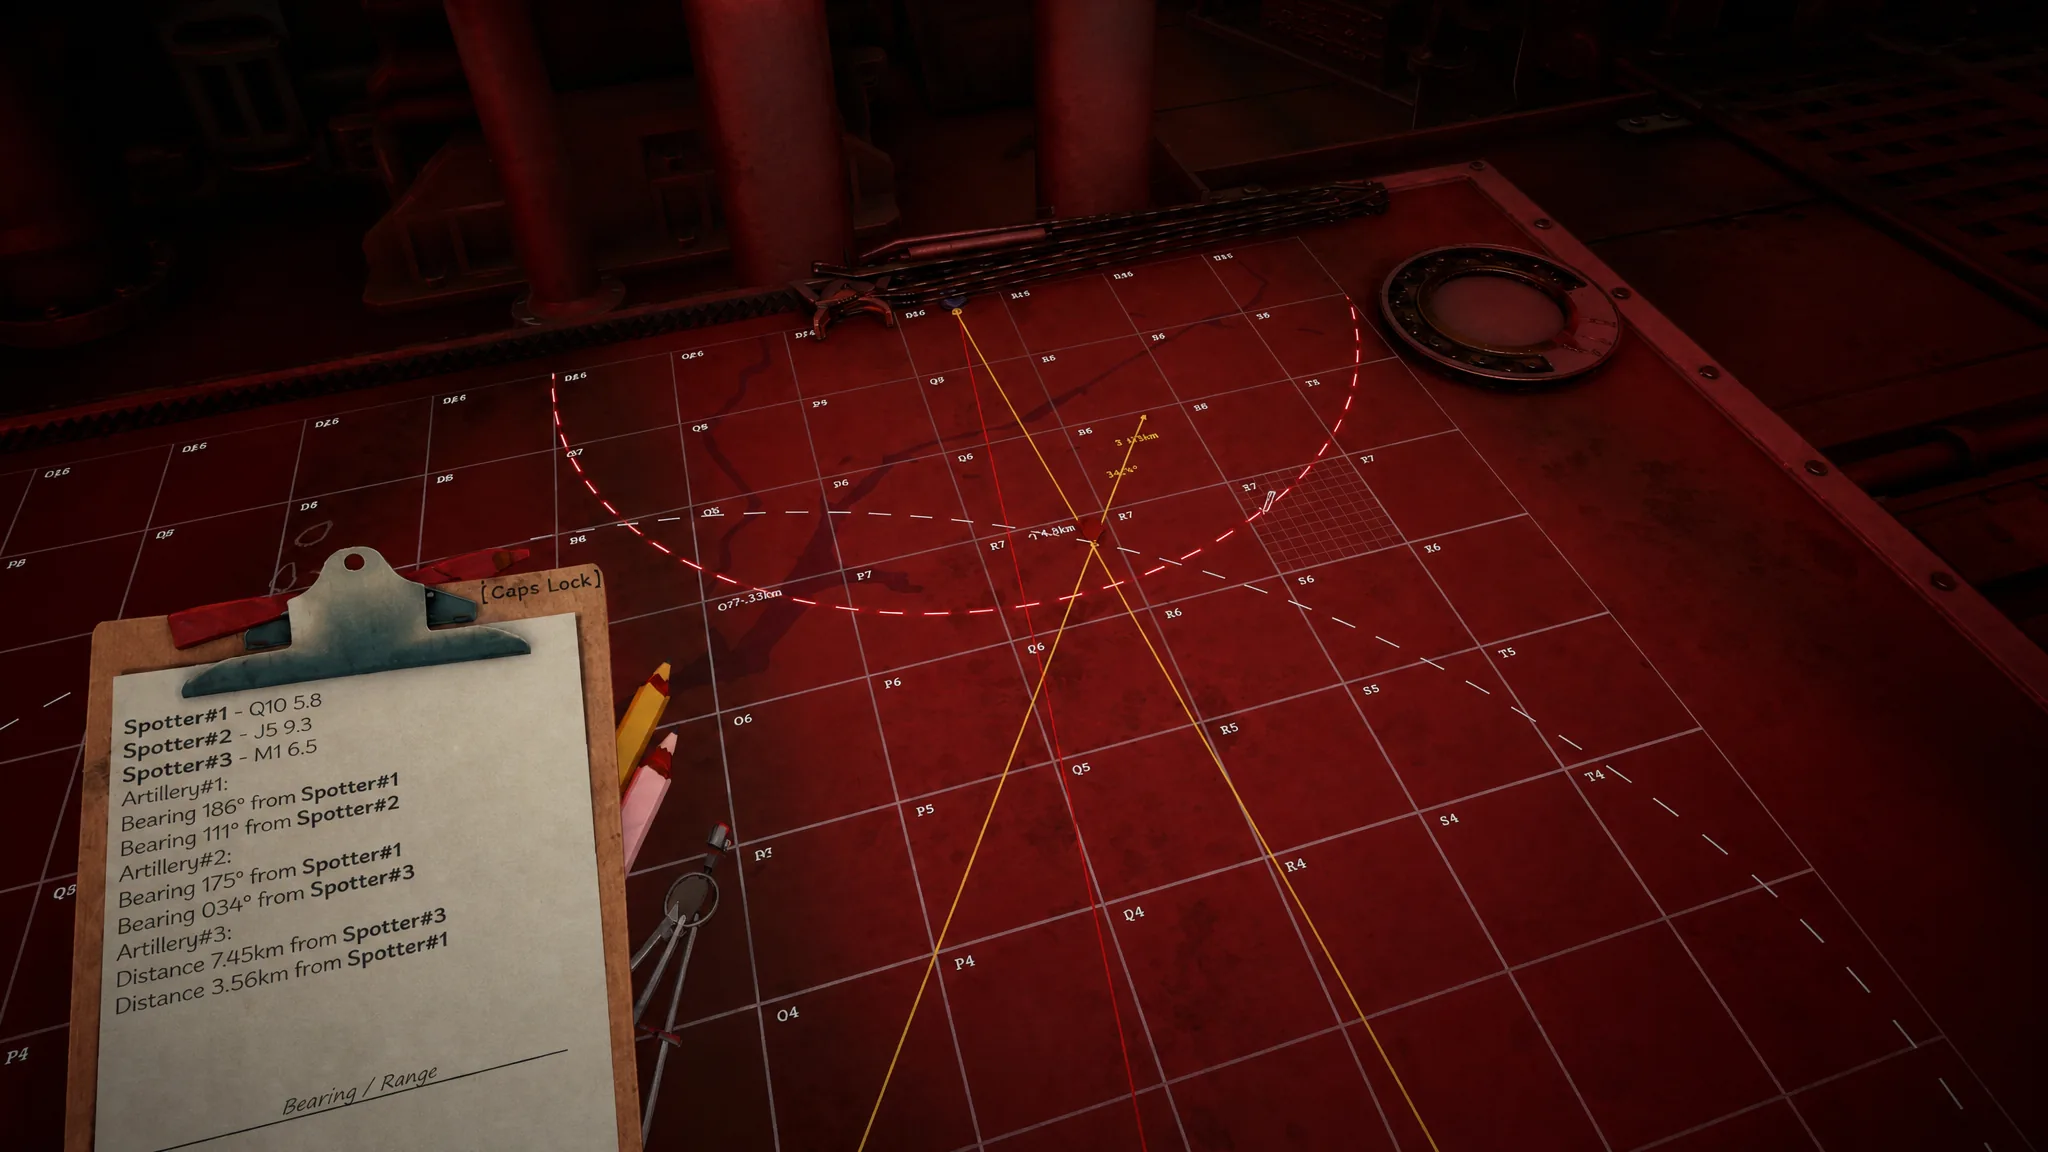
Distance clues work differently. A line like Distance 7.45km from Spotter#3 means the target could be anywhere along a circle at that radius. Use the drawing compass with the Spotter as the center and mark out the distance. With a second distance clue, such as 3.56km from Spotter#1, repeat the circle from that point. The target lands where the two circles overlap.
Spotters carry an error of roughly half a kilometer and half a degree, so an intersection is an estimate, not a guarantee. If the clues are incomplete or descriptive, take the best overlap and lean on nearby terrain features to refine the guess. The only way to confirm a position outright is to fire a star shell over it or send a recon plane across that area to reveal it.
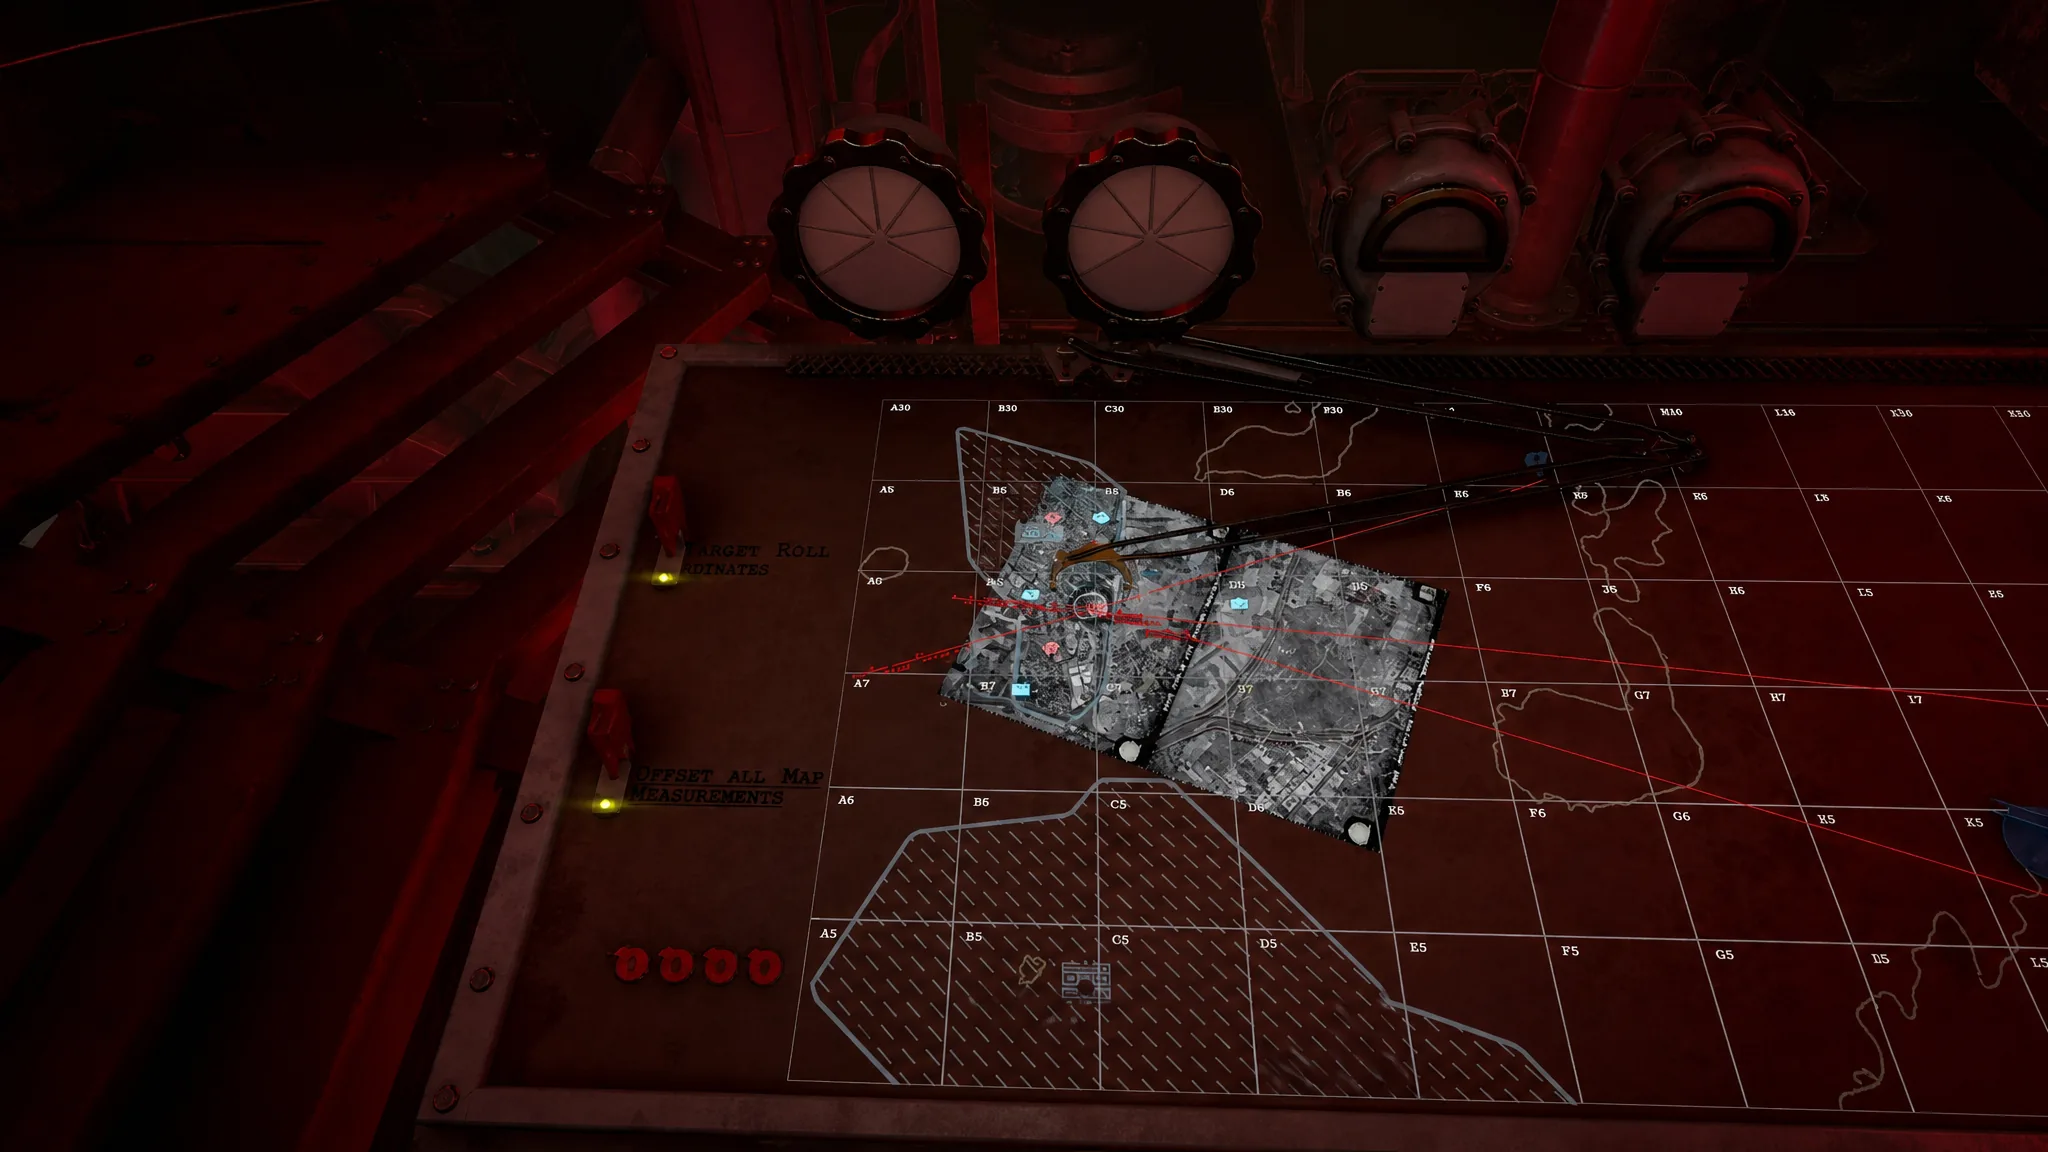
Step 4: Read the final bearing and range
Marking the target is only half the work. To actually fire, draw one line with the red pencil from the sub-cell holding the Iron Nest to the sub-cell where you marked the target. Draw it only from the spike at the bottom of the turret model, because starting anywhere else skews the solution and you will miss.
That red line gives you the two values you need, Bearing and Range, and copies them straight to the Clipboard. These are the only firing numbers that matter. Every earlier bearing and distance was just scaffolding to find the target, so delete those extra notes to avoid mixing them up with your real shot data. You will know you read the map correctly when the strike lands and aerial imagery of the area appears, confirming the hit with a red Skull token over the target.
Keep the table clean as you go. Switch pencil colors when lines start to crowd, remove outdated Clipboard entries, and avoid dropping more target tokens than the mission needs. A readable map is usually the difference between a clean first shell and burning time on a blind shot. Work the grid carefully, trust your intersections, and the Iron Nest turret will do the rest.