
Applying a new theme in Windows 11 can instantly update your system’s appearance, including the desktop wallpaper, colors, sounds, and even desktop icons. While these changes can refresh your workspace, they may also overwrite your carefully arranged or customized desktop icons. Managing whether themes are allowed to change desktop icons helps maintain a consistent look and prevents unwanted icon changes each time you switch themes.
Change Theme Icon Behavior Using Desktop Icon Settings
Step 1: Open the Windows 11 Settings app by pressing Win+I. This shortcut brings up the main configuration window for your system.
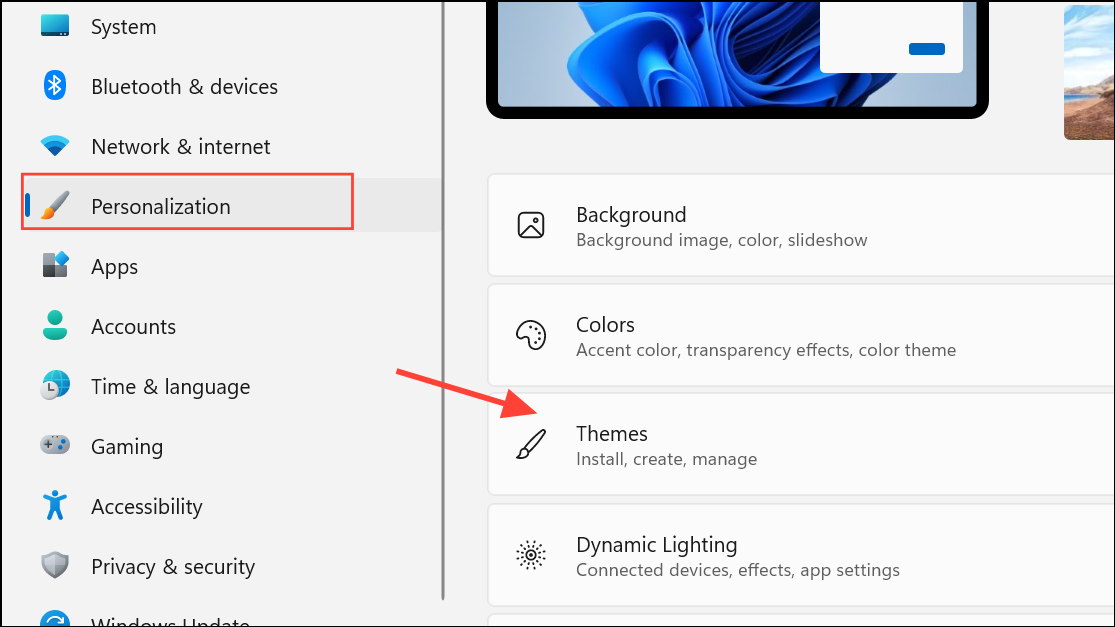
Step 2: In the left sidebar, select Personalization, then click Themes on the right. This section contains options for managing your system’s themes and related settings.
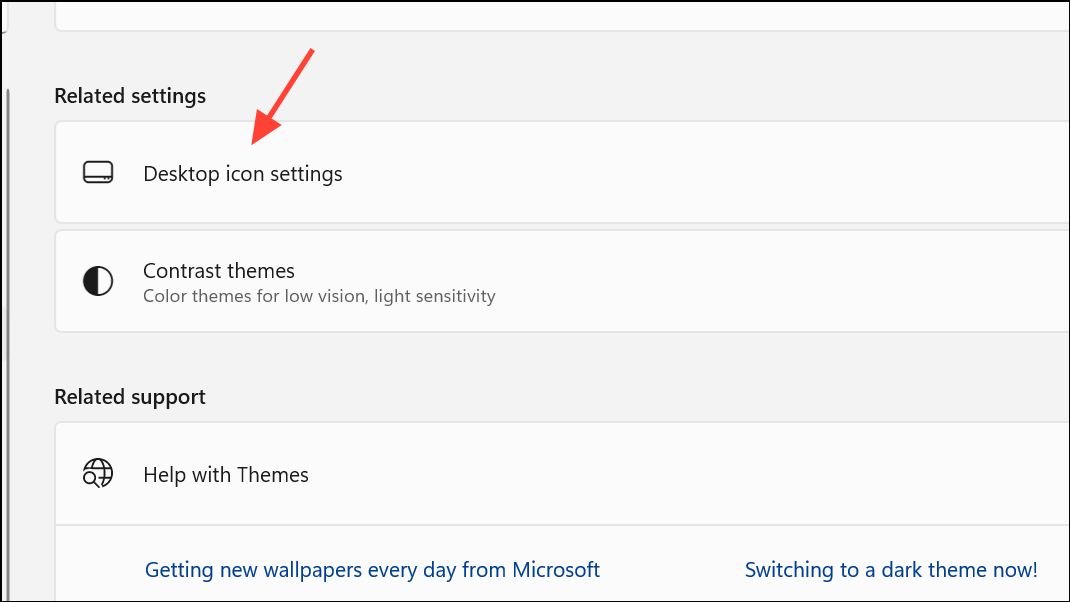
Step 3: Scroll down to the Related Settings area and click Desktop icon settings. If you want to open this window directly, press Win+R, type rundll32.exe shell32.dll,Control_RunDLL desk.cpl,,0, and press OK.
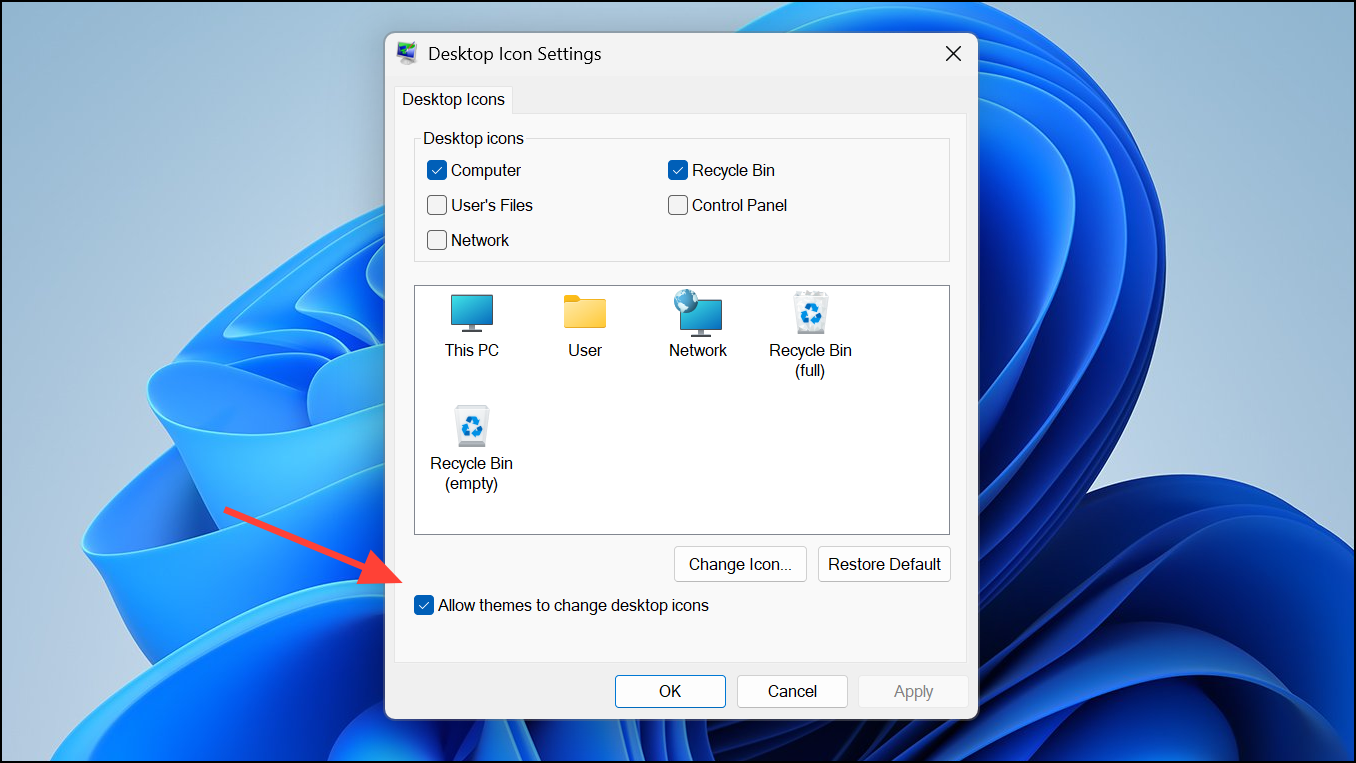
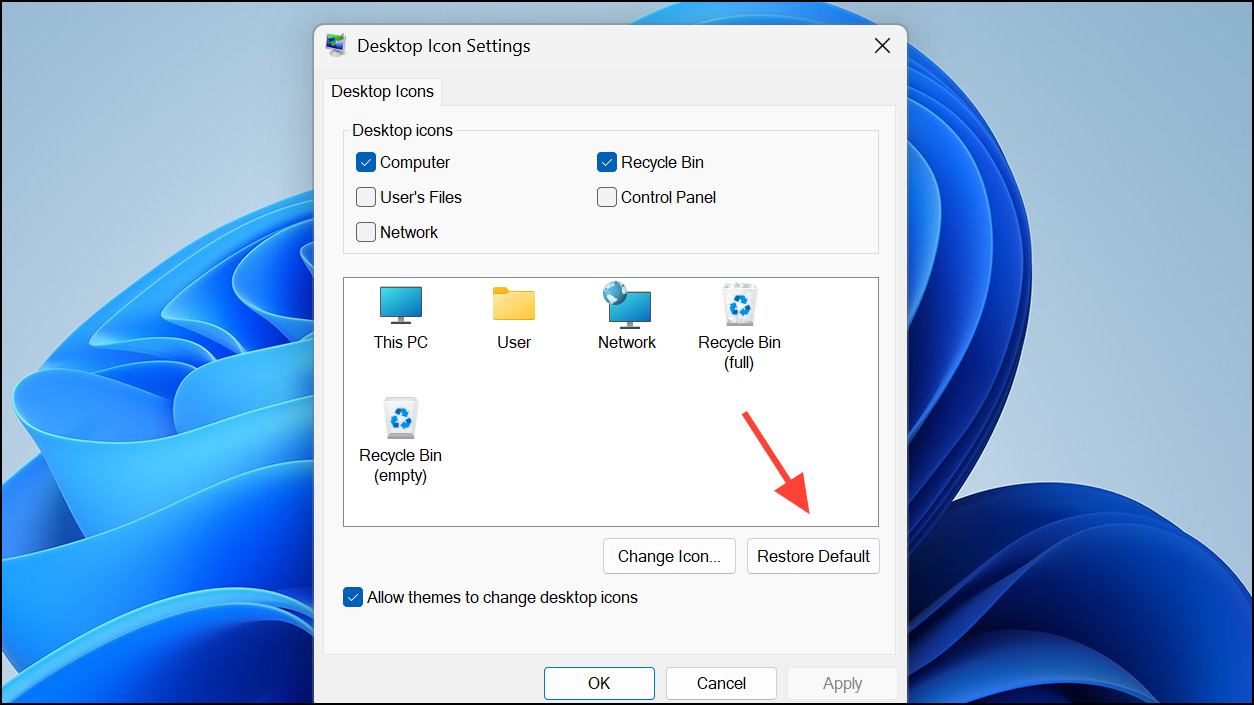
Step 4: In the Desktop Icon Settings dialog, locate the checkbox labeled Allow themes to change desktop icons. To permit themes to update your icons, check this box. To keep your chosen icons unchanged when switching themes, uncheck it. Click OK to confirm your choice.
Step 5: Close the Settings window. Your preference will now apply whenever you change or apply a new theme.
Control Icon Changes With the Windows Registry
For advanced users or administrators, modifying the Windows Registry allows for more direct control over theme behavior. Adjusting a specific registry value can enforce your preference for whether themes can change desktop icons.
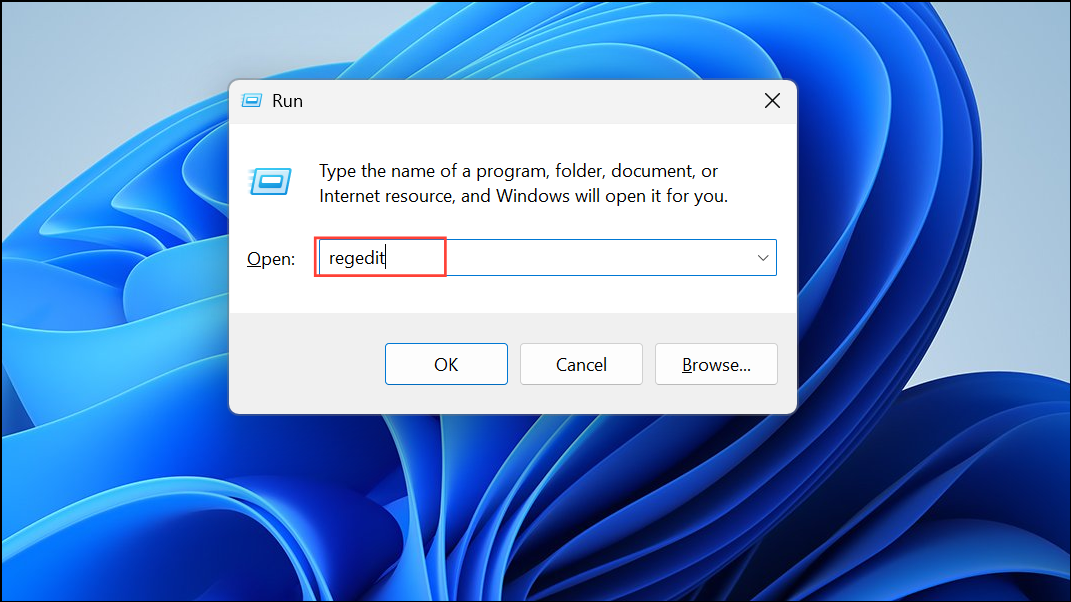
Step 1: Press Win+R, type regedit, and press Enter to open the Registry Editor. Accept any User Account Control prompts.
Step 2: Navigate to the following key:
HKEY_CURRENT_USER\Software\Microsoft\Windows\CurrentVersion\Themes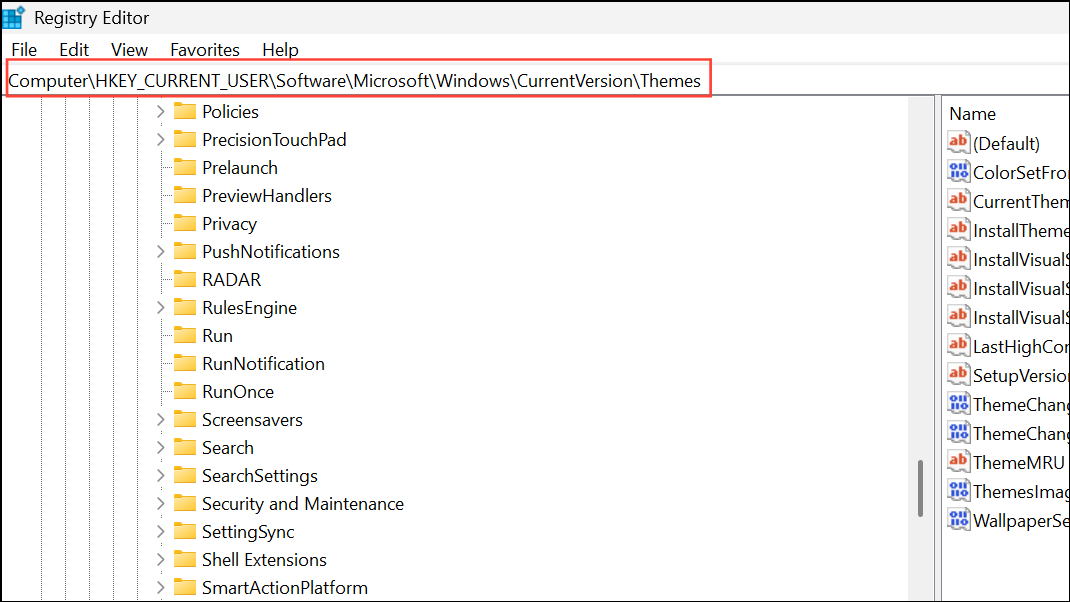
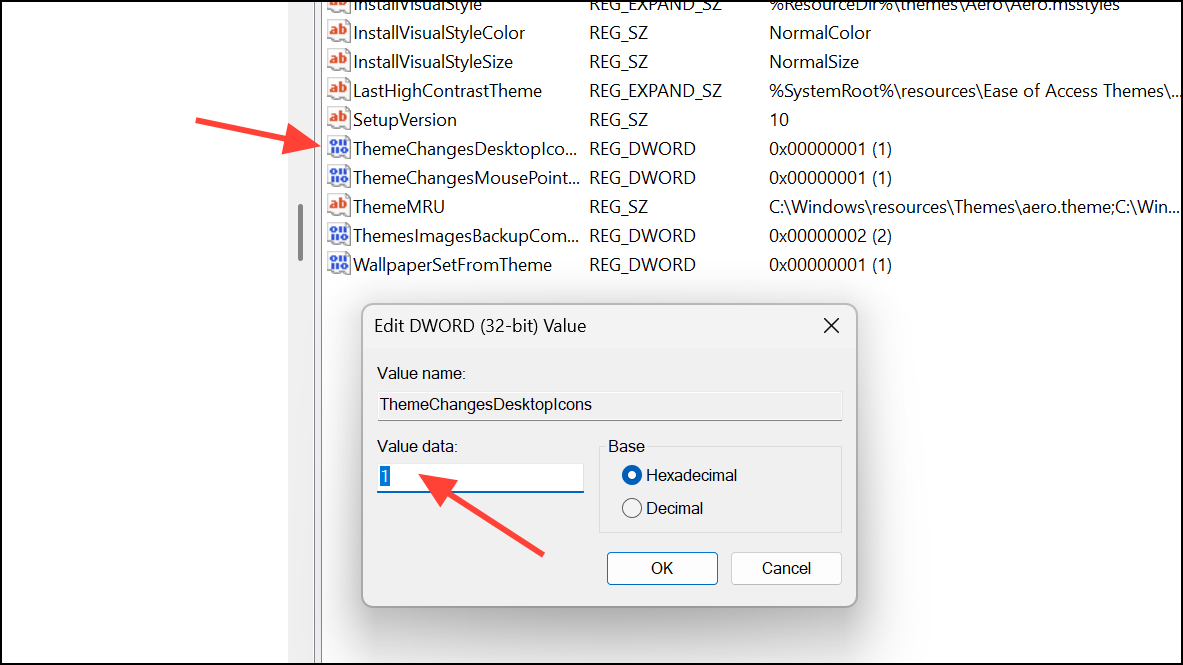
Step 3: In the right pane, locate the ThemeChangesDesktopIcons value. If it does not exist, right-click, select New > DWORD (32-bit) Value, and name it ThemeChangesDesktopIcons.
Step 4: Double-click ThemeChangesDesktopIcons and set its value data:
1– Themes are allowed to change desktop icons.0– Themes are prevented from changing desktop icons.
Click OK after entering the desired value.
Step 5: Close the Registry Editor and restart your computer to apply the change.
Restrict Icon and Theme Changes for All Users (Group Policy)
In environments where multiple users access the same computer, system administrators can use the Local Group Policy Editor to prevent changes to desktop icons or themes across all user accounts.
Step 1: Open the Local Group Policy Editor by pressing Win+R, typing gpedit.msc, and pressing Enter.

Step 2: In the editor, navigate to:
User Configuration > Administrative Templates > Control Panel > Personalization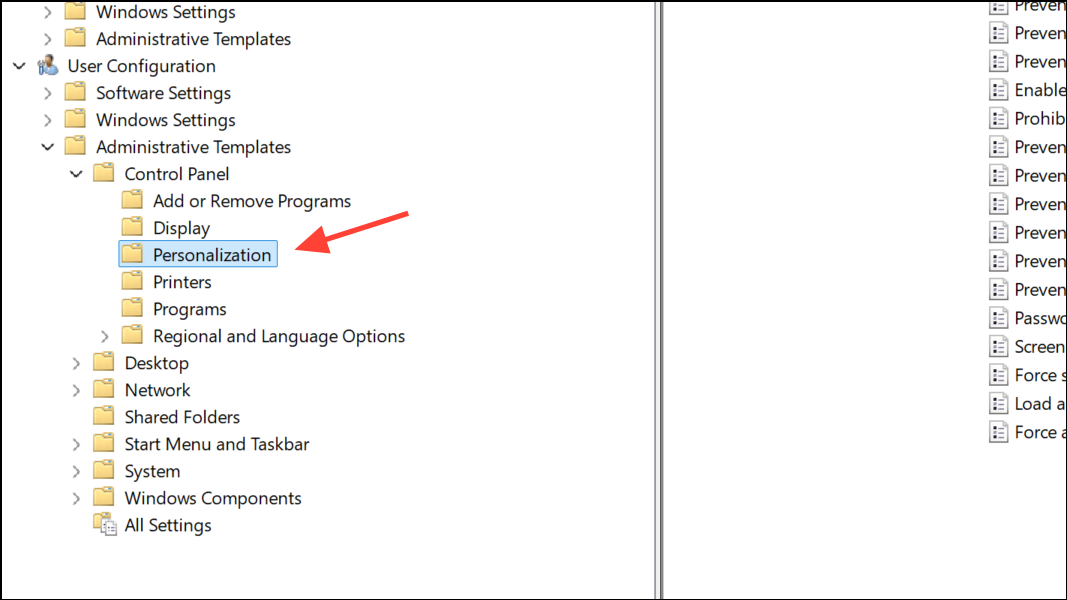
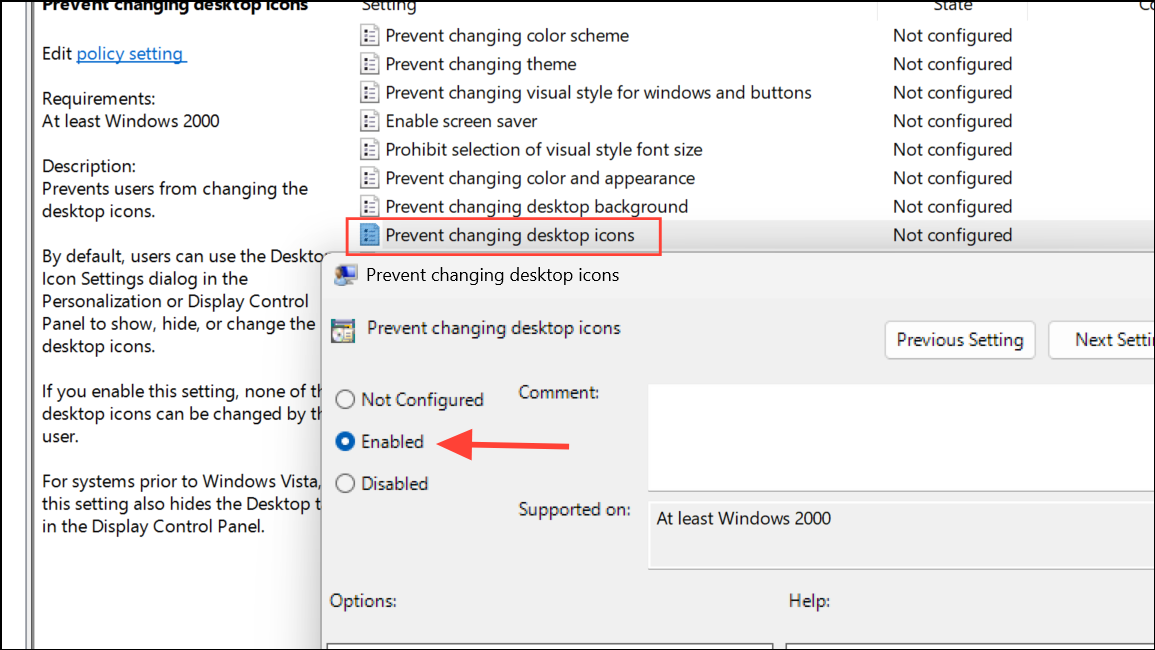
Step 3: To prevent changes to desktop icons, double-click Prevent changing desktop icons, set it to Enabled, and click OK. To restrict theme changes, double-click Prevent changing theme, set it to Enabled, and click OK.
Step 4: Restart the computer for the policy to take effect. These settings will gray out the relevant options in the user interface, blocking changes for all affected users.
Restore Default Desktop Icons
If a theme has already altered your desktop icons and you want to revert to the standard set, you can quickly restore them using the Desktop Icon Settings dialog.
Step 1: Go to Settings > Personalization > Themes, then click Desktop icon settings under Related Settings.
Step 2: In the Desktop Icon Settings window, click Restore Default. This will reset icons such as This PC, Recycle Bin, and Network to their original images.
Step 3: Click Apply and then OK to save your changes.
Managing whether Windows 11 themes can change your desktop icons gives you direct control over your workspace’s appearance. By applying these settings, you can maintain your preferred icon layout or let themes update them automatically, depending on your needs.