
Organizations that depend on diagnostic data for troubleshooting and auditing can run into issues if users are able to delete this data from their Windows 11 devices. When users remove locally stored diagnostic data, it may disrupt IT teams' ability to analyze system issues, track device health, or meet compliance requirements. Windows 11 provides clear administrative controls to either prevent or allow users from deleting this data, primarily through Group Policy and Registry modifications. These settings are especially relevant for IT administrators managing multiple devices or enforcing strict data retention policies.
Prevent or Allow Deletion of Diagnostic Data Using Group Policy
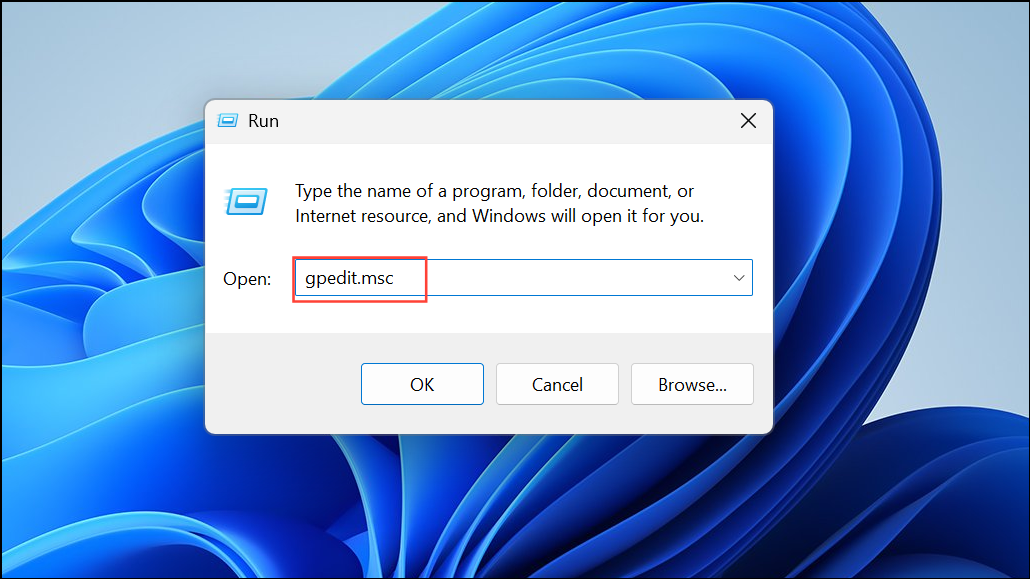
Step 1: Open the Local Group Policy Editor by pressing Win + R, typing gpedit.msc, and pressing Enter. This tool is available on Windows 11 Pro, Enterprise, and Education editions.
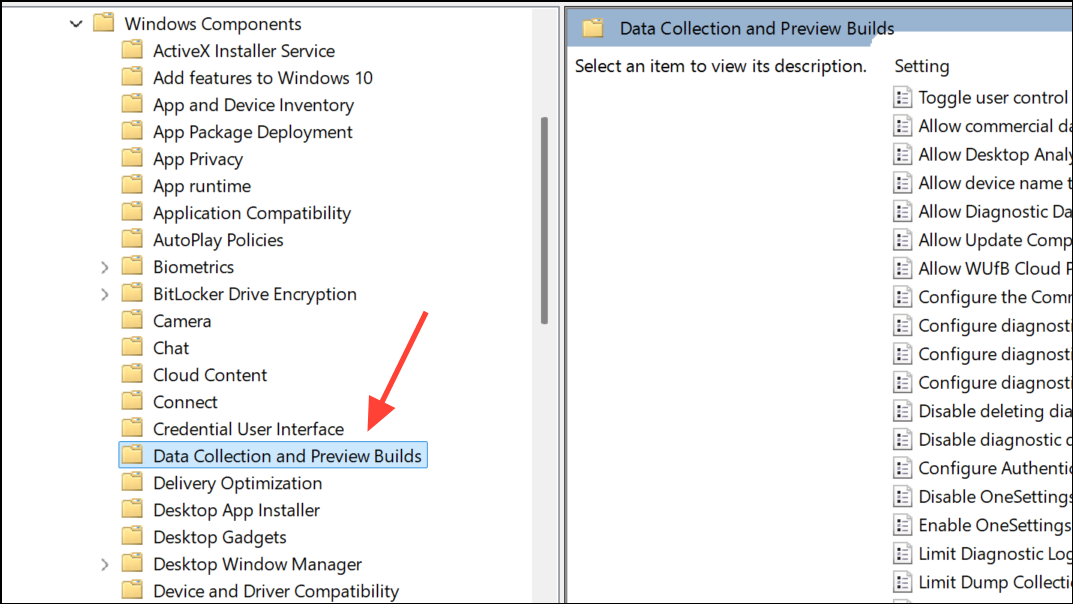
Step 2: In the left pane, navigate to Computer Configuration > Administrative Templates > Windows Components > Data Collection and Preview Builds.
Step 3: In the right pane, double-click Disable deleting diagnostic data.
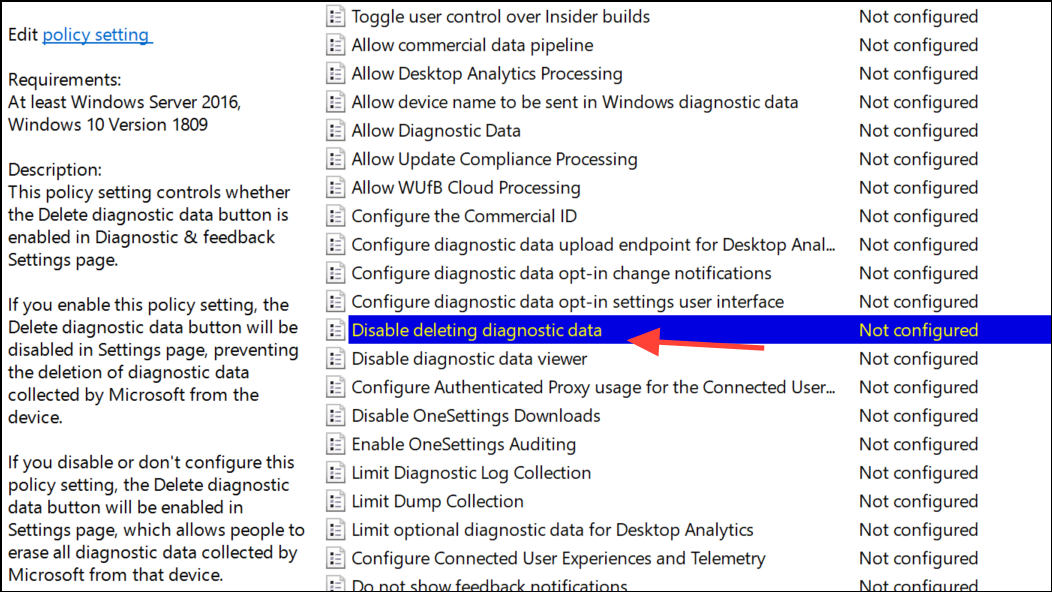
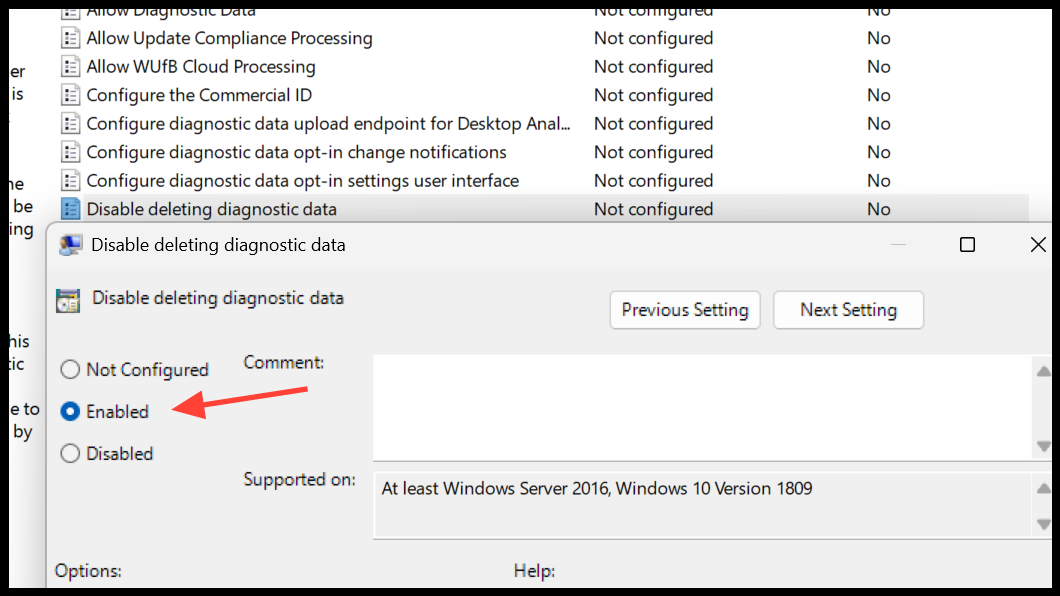
Step 4: To prevent users from deleting diagnostic data, select Enabled. This will gray out or remove the "Delete diagnostic data" option in the Windows Settings app under Privacy > Diagnostics & feedback, making it unavailable to users.
Step 5: To allow users to delete diagnostic data, set the policy to Not Configured or Disabled. This restores the option for users to manually remove diagnostic data from their device.
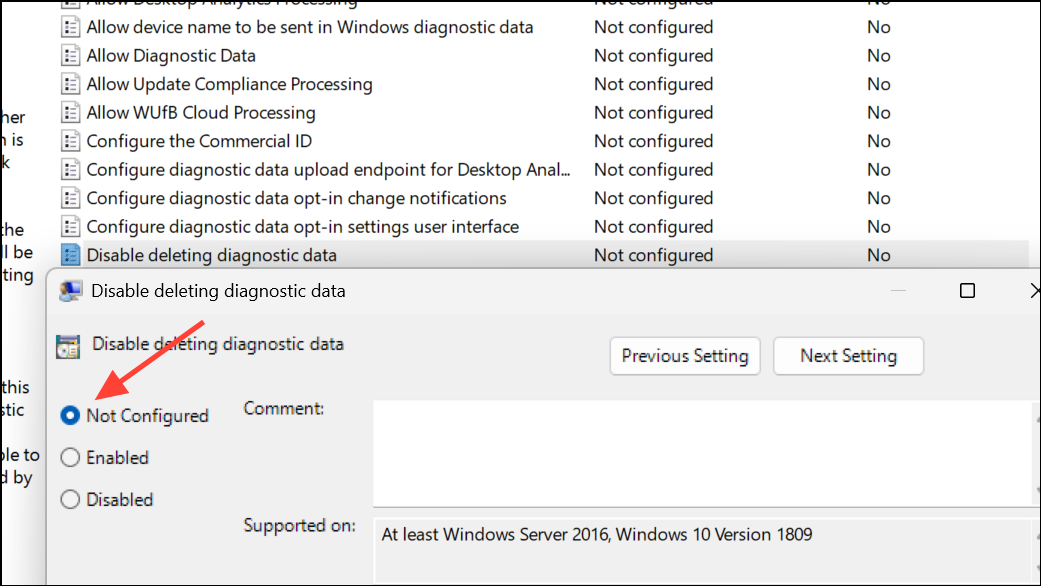
Step 6: Click OK to save your changes. The setting takes effect after a restart or a policy refresh.
Using Group Policy ensures a consistent configuration across all targeted devices, simplifying management for IT teams and reducing the risk of accidental or unauthorized data deletion.
Block or Permit Diagnostic Data Deletion via Windows Registry
For devices that do not have access to the Group Policy Editor (such as Windows 11 Home), or for administrators who prefer direct configuration, the Windows Registry offers another method.
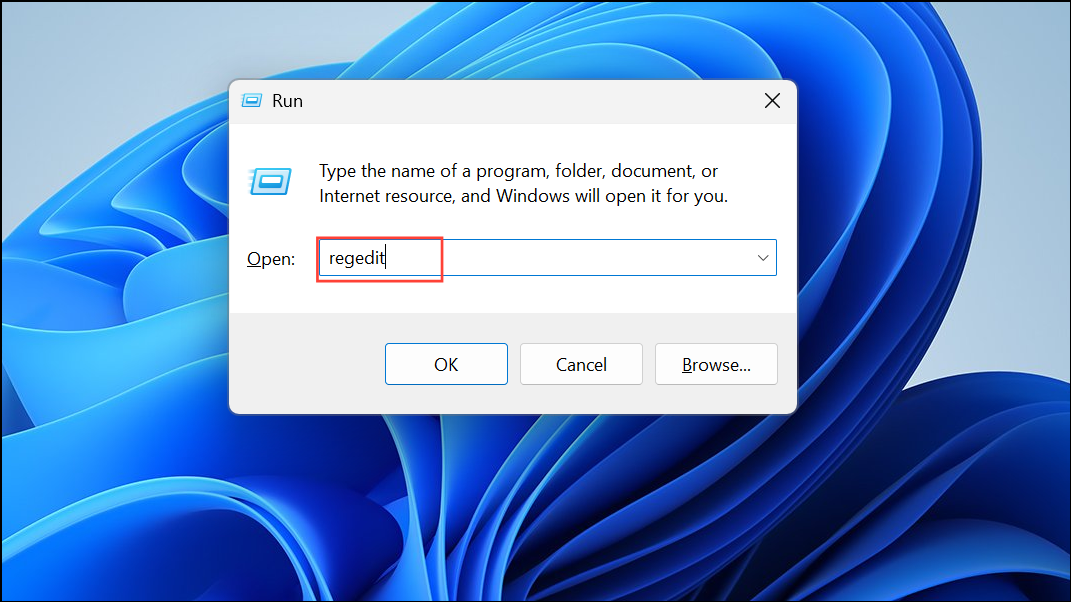
Step 1: Press Win + R, type regedit, and press Enter to open the Registry Editor. Approve any User Account Control prompts.
Step 2: Navigate to the following path:
HKEY_LOCAL_MACHINE\SOFTWARE\Policies\Microsoft\Windows\DataCollection
Step 3: If the DataCollection key does not exist, right-click the Windows folder, select New > Key, and name it DataCollection.
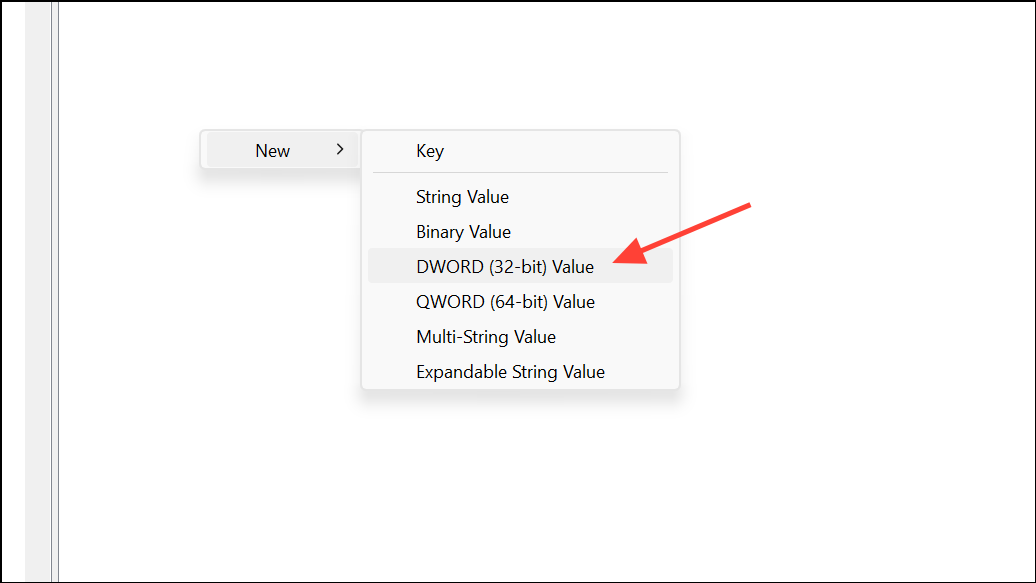
Step 4: In the DataCollection key, right-click in the right pane and choose New > DWORD (32-bit) Value. Name the new value DisableDeviceDelete.
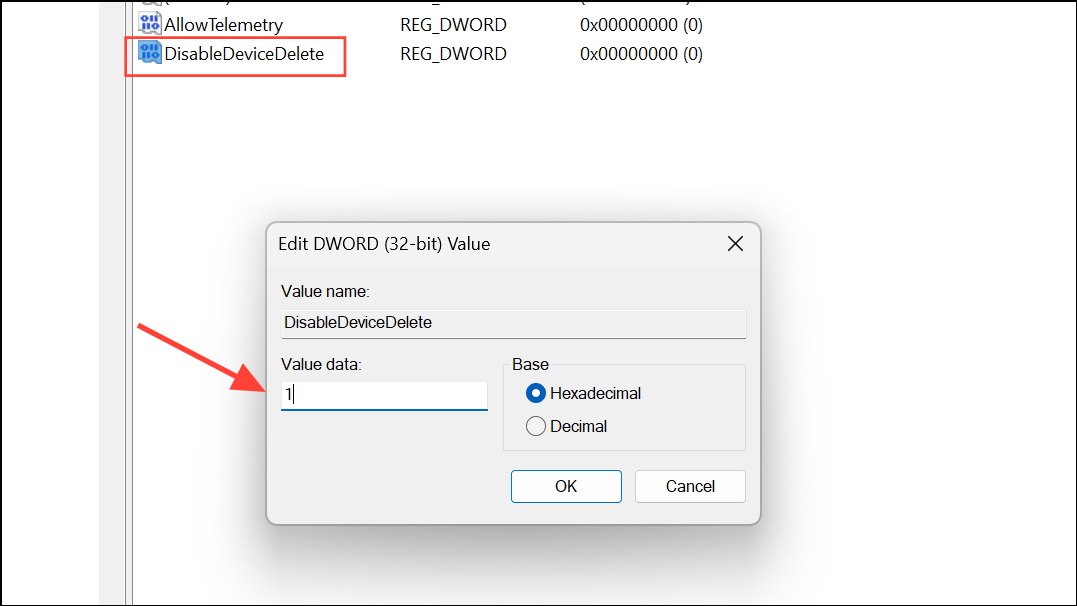
Step 5: To block users from deleting diagnostic data, double-click DisableDeviceDelete and set its value to 1. To permit deletion, set the value to 0 or delete the DisableDeviceDelete entry entirely.
Step 6: Click OK and close the Registry Editor. Restart the device for the change to take effect.
Registry changes provide granular control but require careful handling. Always back up the registry before making modifications to avoid unintended system issues.
Considerations and Limitations
While these methods prevent users from deleting diagnostic data stored locally on Windows 11 devices, users with Microsoft accounts may still be able to remove data associated with their account via the Microsoft privacy dashboard online. For organizations relying on strict local data retention, using local (non-Microsoft) accounts and enforcing policy across all endpoints is recommended.
IT administrators should periodically review policy effectiveness and educate users about the role diagnostic data plays in system support and compliance. Regular audits can help verify that data retention settings remain in place and that diagnostic data is available when needed for troubleshooting or reporting.
Controlling user access to diagnostic data deletion in Windows 11 strengthens system reliability and supports organizational compliance. Consistent policy or registry configuration ensures that valuable data remains available to support IT operations and incident response.