
DHCP servers on Windows networks fail to authorize when the user account lacks the necessary Active Directory permissions, resulting in clients not receiving IP addresses and network connectivity disruptions. Authorization ensures only trusted DHCP servers operate in an Active Directory environment, preventing IP conflicts and rogue servers.
Granting Permissions to Authorize DHCP Server in Active Directory
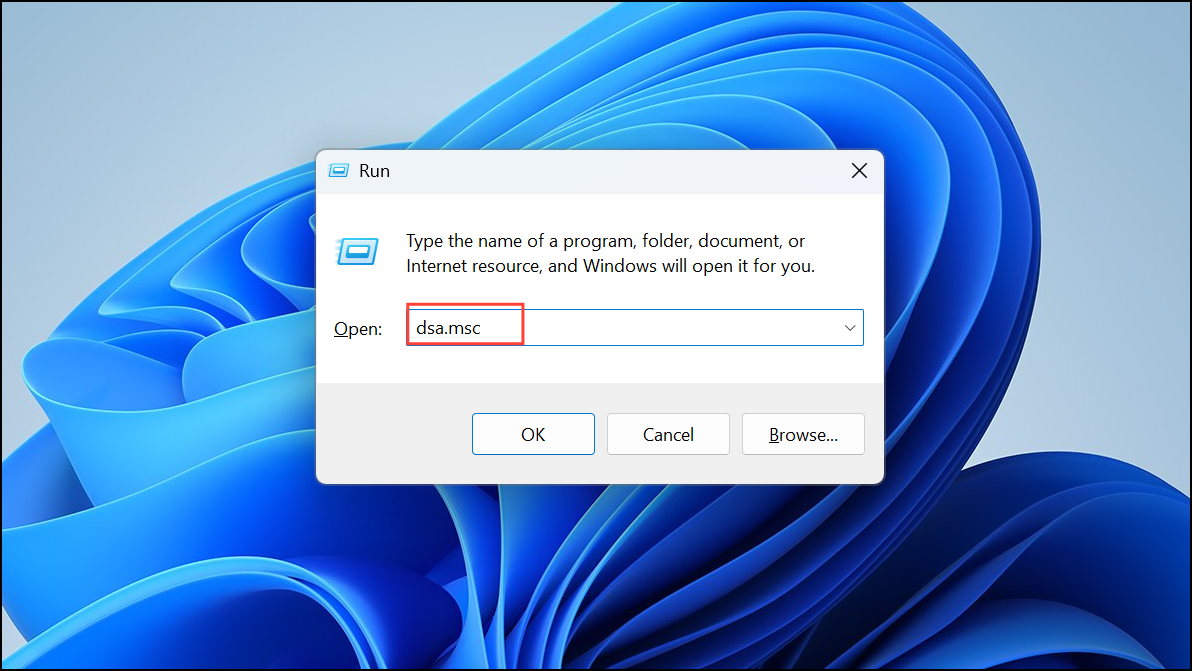
Step 1: Open the Active Directory Users and Computers console on a domain controller. This tool allows you to manage users, groups, and permissions within your domain. You can access it by pressing Windows + R, typing dsa.msc, and pressing Enter.
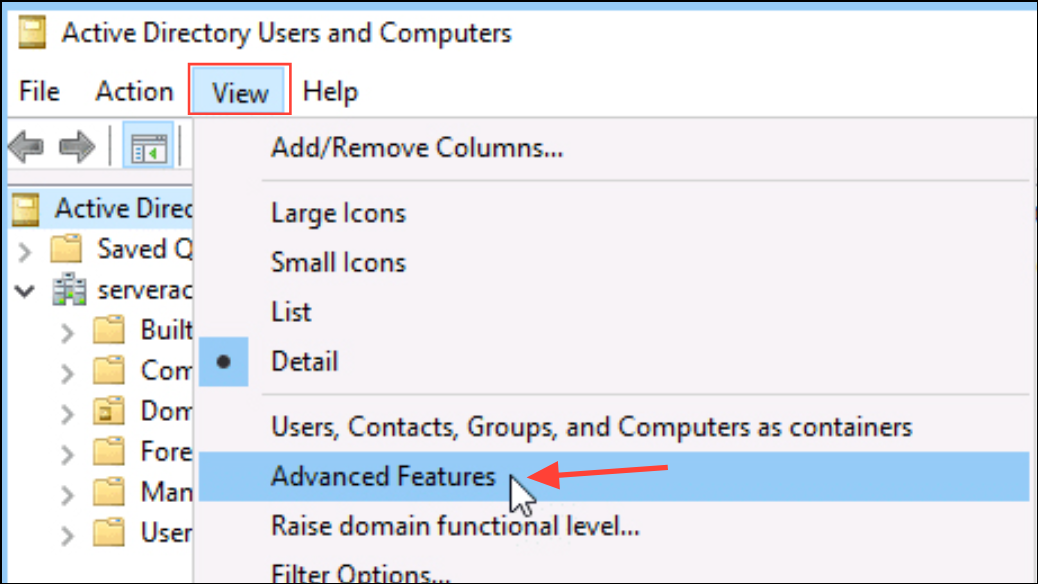
Step 2: In the console, enable the "Advanced Features" view from the View menu. This option displays additional configuration tabs and security settings required for permission changes.
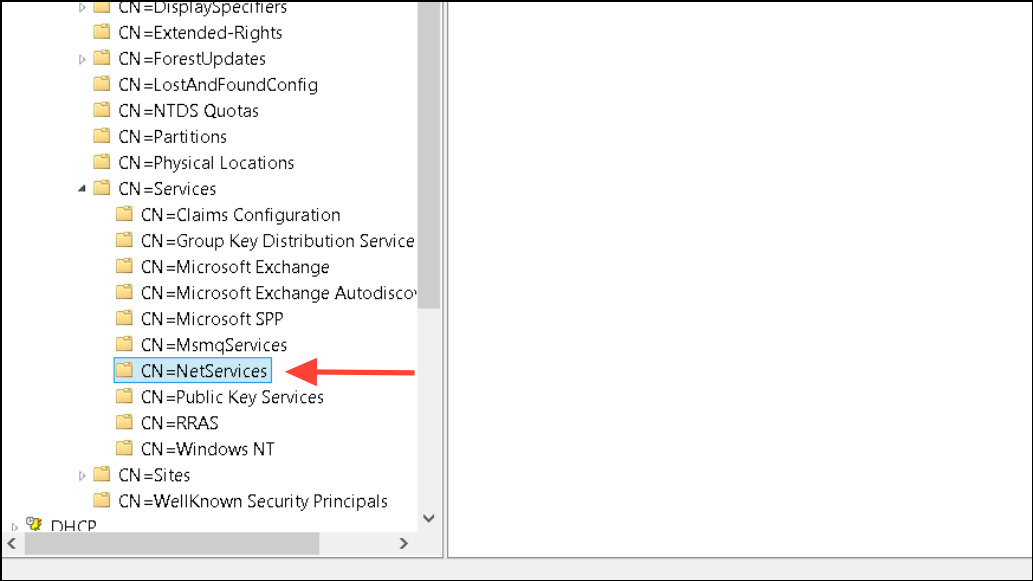
Step 3: Navigate to the NetServices container. Expand your domain, then open the System container, and select NetServices. This container stores DHCP server authorization data.
Step 4: Right-click the NetServices container and select Properties. Go to the Security tab. Here, you can grant or modify permissions for user accounts or groups.
Step 5: Click Add, enter the name of the user or group (such as the account running the DHCP server service), and click OK. Grant the Full Control or at minimum the Write permission. This allows the account to authorize and de-authorize DHCP servers in the domain.
Step 6: Click Apply and OK to save the changes. Close the console. The account should now have the correct permissions to authorize the DHCP server.
Authorizing the DHCP Server Using DHCP Management Console
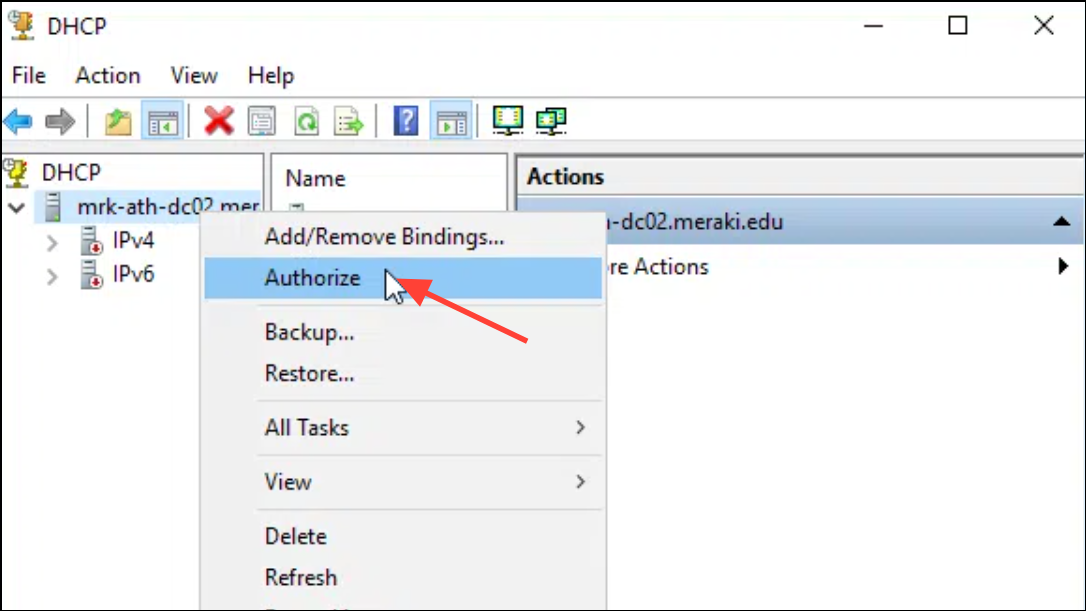
Step 1: Open the DHCP Management Console on the server you want to authorize. You can access it via Server Manager > Tools > DHCP or by running dhcpmgmt.msc from the Run dialog.

Step 2: In the DHCP console, right-click on the server node and select Authorize. The server will attempt to register itself in Active Directory. If you receive a permissions error, verify that the account you are using has the necessary rights in the NetServices container (as described above).
Step 3: Refresh the view or reopen the console. Once authorized, the server icon should display without a red arrow or warning symbol, indicating successful authorization.
Using ADSI Edit for Advanced Permission Troubleshooting
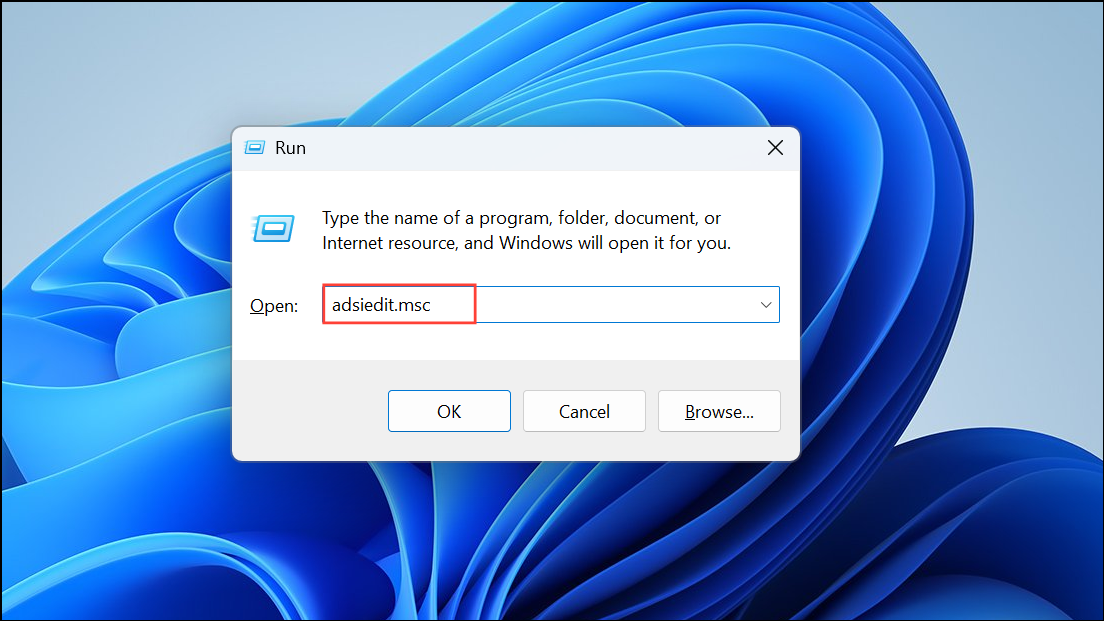
Step 1: Launch the ADSI Edit utility by running adsiedit.msc from the Run dialog. ADSI Edit provides low-level access to Active Directory objects and permissions.
Step 2: Connect to the Default naming context. Expand the domain structure, then navigate to CN=NetServices,CN=System,DC=yourdomain,DC=com.
Step 3: Right-click on CN=NetServices and select Properties. Under the Security tab, review the list of users and groups. Confirm that the account running the DHCP service has Write or Full Control permissions. Make adjustments as necessary.
Step 4: Apply changes and exit ADSI Edit. This method is useful for resolving persistent authorization errors when standard tools do not display the required permissions options.
Verifying DHCP Server Authorization Status
Step 1: Open a Command Prompt with administrative privileges on the DHCP server.
Step 2: Run the following command to check the DHCP server authorization status:
netsh dhcp show server
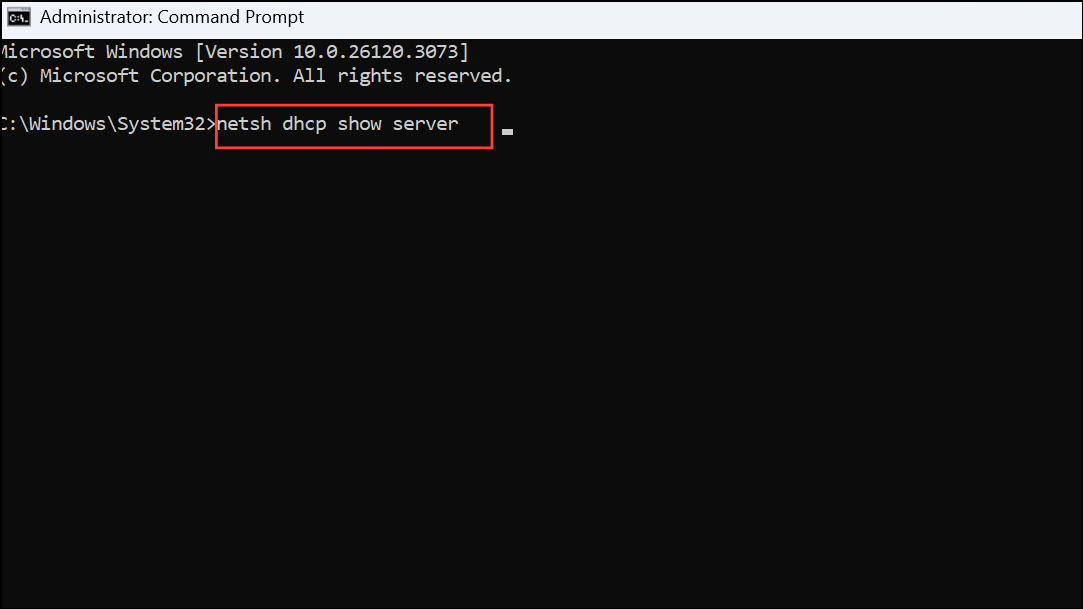
This command lists all authorized DHCP servers in the domain. Confirm that your server appears in the list. If not, repeat the authorization process using an account with sufficient rights.
Resolving DHCP server authorization permissions issues ensures reliable IP address assignment and stable network operation. Regularly review permissions and authorization status after changes to domain accounts or group policies to avoid unexpected disruptions.