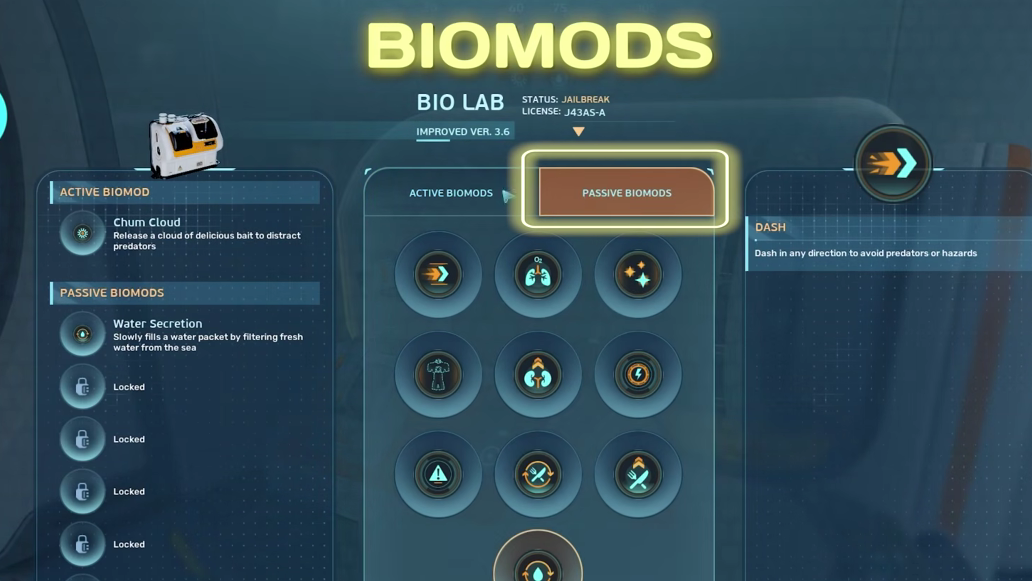
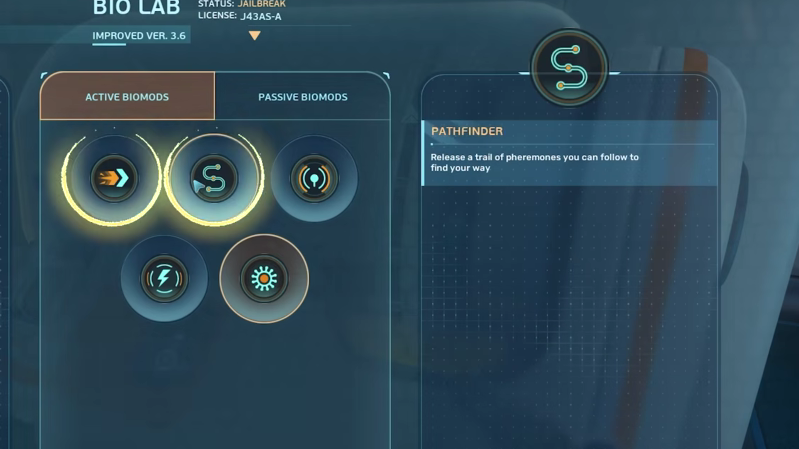
Biomods are character upgrades you slot at the Biolab inside the Welcome Center, split into Active and Passive types. You begin with Dash and Pathfinder on the active side, Sea Skimmer and Oxygen Control on the passive side. Everything beyond those four requires a single upgraded tool: the Bioscanner.
What the Bioscanner does
The Bioscanner is an attachment for the standard Scanner. Once equipped, scanning fauna and flora registers as a Bio Scan, which is the only input the Biolab accepts to unlock new Biomods. Scans performed with the plain Scanner do not count, so any creatures you cataloged earlier in the playthrough need to be scanned again after the upgrade.
The same tool also lets you scan alien technology, which gates a chunk of mid- and late-game progression in the second major region.
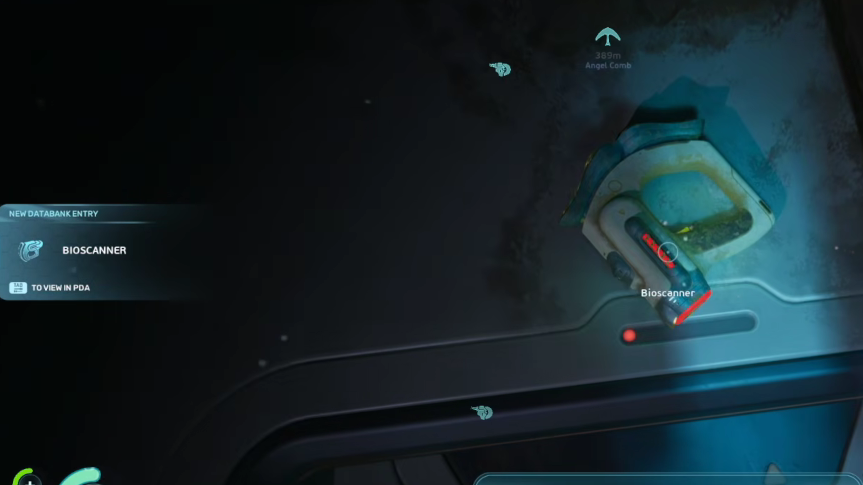
Where to find the degraded Bioscanner
There is only one degraded Bioscanner in the world, and it sits inside a wreck tied to the Blackbox Iso Signal. The game eventually surfaces that signal as you progress, but you can reach the spot earlier if you know where to look.
The wreck is in the second large biome, where the water turns darker and greener, and alien structures appear. From the Lifepod, head roughly 1,800 meters east. From the Alien Ruins Signal, it’s about 600 meters southeast.
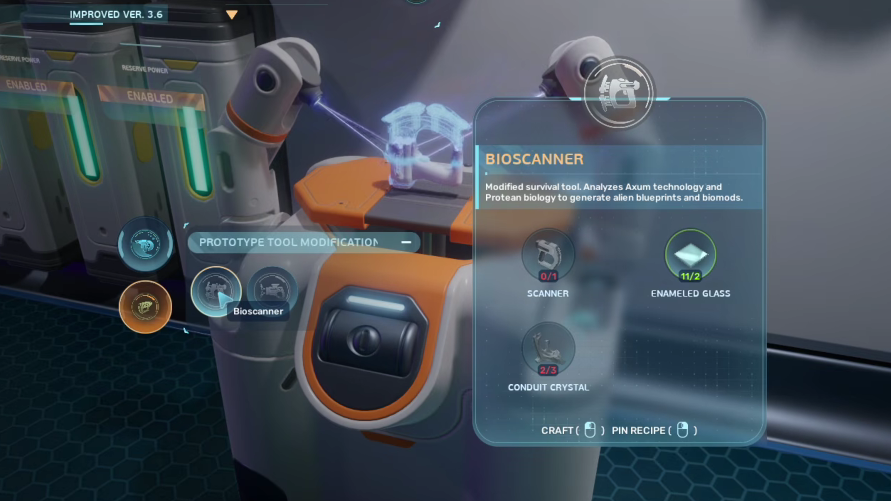
Crafting the Bioscanner
The Bioscanner is built at a Modification Station, not the standard Fabricator. You’ll need to have located and constructed a Modification Station first, which is itself a mid-game unlock tied to the second biome.
| Material | Quantity |
|---|---|
| Scanner | 1 |
| Enamelled Glass | 2 |
| Conduit Crystal | 3 |
The recipe consumes your existing Scanner, so the Bioscanner replaces it rather than sitting alongside it in your inventory.
How unlocking works at the Biolab
With the Bioscanner equipped, every locked Biomod in the Biolab shows its scan requirements upfront. Some need a single species; a few require two different creatures before they become available. Once you complete the listed Bio Scans, the Biomod becomes installable in its slot.
You’ll know an unlock has registered when the Biomod entry switches from showing requirements to showing the install option in either the Active Biomods or Passive Biomods tab.
All Active Biomods and their scan requirements
| Biomod | Scan requirement | Effect |
|---|---|---|
| Dash | Unlocked by default | Quick directional dash to escape predators or hazards |
| Pathfinder | Unlocked by default | Drops a pheromone trail you can follow back |
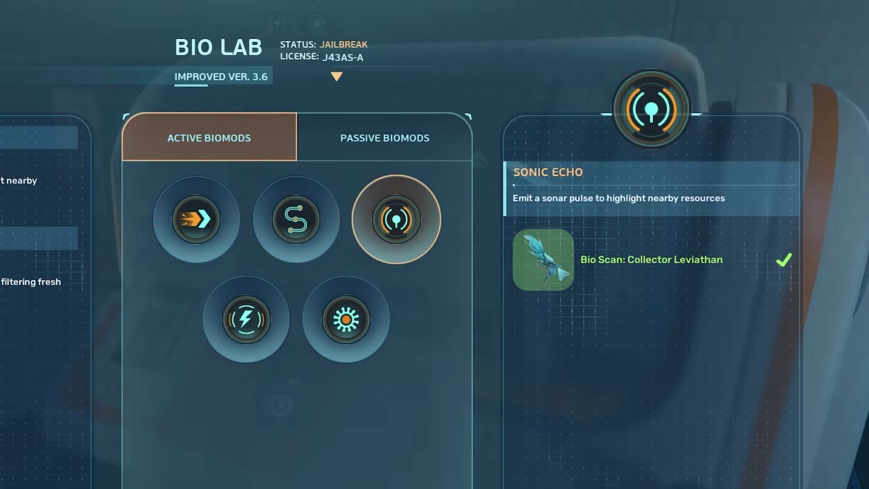
| Sonic Echo | Collector Leviathan | Sonar pulse that highlights nearby resources |
| Electric Discharge | Electric Geordie | 800-volt shock that deters medium and large predators |
| Chum Cloud | Toxic Sponge + Houndgar | Bait cloud that distracts predators |
Sonic Echo is the hardest of the active set. The Collector Leviathan lives in the trench between the early and late-game zones, and scanning it from above tends to be safer than approaching at depth.
All Passive Biomods and their scan requirements
| Biomod | Scan requirement | Effect |
|---|---|---|
| Sea Skimmer | Unlocked by default | Faster swim speed near surfaces and the seafloor |
| Oxygen Control | Unlocked by default | Slower oxygen drain while stationary |
| Bioluminescence | Sandspear + Electric Geordie | Player glows in dark areas |
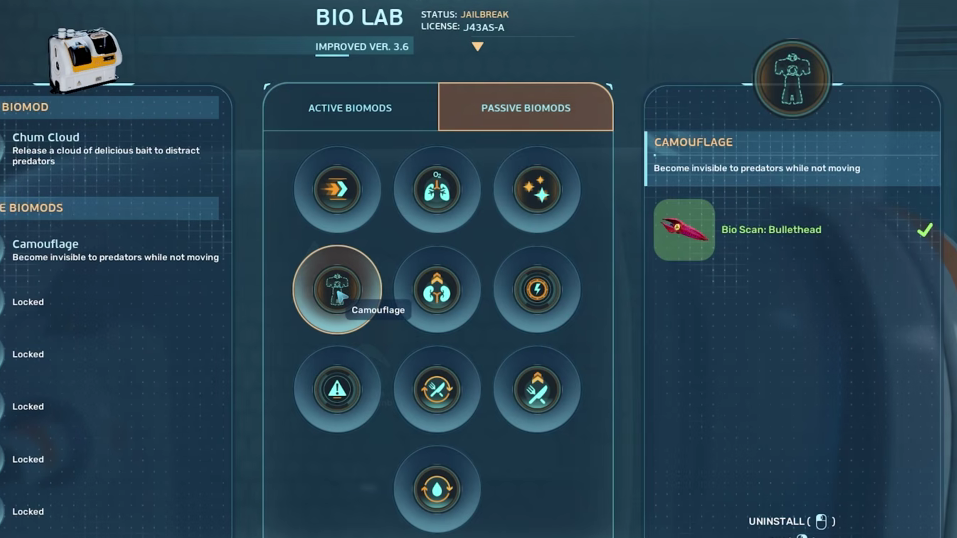
| Camouflage | Bullethead | Invisible to predators while stationary |
| Water Retention | Coral Crab | Yields more water from every source |
| Homing Sense | Surge Jelly + Hammerhead | Detects nearby powered bases |
| Threat Sense | Hoverthorn | Detects nearby threats |
| Dermal Garden | Needler Mango | Grows edible algae on your skin over time |
| Slow Metabolism | Nibbler Mango | Slows food consumption |
| Water Secretion | Water Slug | Slowly fills a water packet from seawater |
Priority scans for early payoff
If you want fast returns, target the Water Slug first. It’s a low-risk scan, and Water Secretion removes one of the most repetitive resource loops in the game. Oxygen Control is already free, so pairing it with Water Secretion gives you a strong baseline passive setup without much fieldwork.
On the active side, Electric Discharge is the highest-impact unlock you can realistically chase in the mid-game. The Electric Geordie spawns near the Alien Ruins in deeper parts of the second biome, and the 800-volt shock handles most aggressive medium and large fauna without needing a weapon swap.
Camouflage is the standout late-pick passive for cautious players. Staying still already reduces predator aggression, and turning that into outright invisibility makes deep exploration considerably safer.
Common reasons a Biomod won’t unlock
- The scan was performed with the standard Scanner before the Bioscanner was crafted.
- Only one of two required species was scanned for Biomods that list two targets (Chum Cloud, Bioluminescence, Homing Sense).
- The Bioscanner attachment isn’t equipped on the Scanner at the moment of scanning.
Re-scanning with the Bioscanner active resolves the first and third cases. For dual-requirement Biomods, check the Biolab entry to confirm which species is still missing.