Blueprints in Subnautica 2 gate nearly every tool, vehicle part, and base component on Proteus. Most unlock automatically the first time you pick up the required ingredients, while the more advanced gear demands that you scan fragments scattered through wrecks, colonist camps, and alien ruins, or that you find a Recipe Data Card.
How blueprints unlock in Subnautica 2
Three mechanics drive every unlock in the Early Access build. Pick up each ingredient for a recipe at least once, and the blueprint appears on its own. Scan fragments of an existing object with the Scanner, and you’ll fill a progress bar that takes one to three distinct scans to complete. Grab a Recipe Data Card from a point of interest, and the item unlocks immediately.
Scanning a duplicate fragment after a blueprint is already complete refunds one Titanium, so it’s worth sweeping wrecks even after a recipe is finished. The Survival Multitool, Scanner, Basic Battery, Basic Fins, Air Bladder, and Distraction Flare are all available in the Fabricator from the start.
Personal equipment
| Blueprint | Recipe | Unlock |
|---|---|---|
| Rebreather | Fiber Mesh x2, System Chip x1 | Scan wreckage |
| Basic Fins | Rubber x2, Fiber x2 | Default |
| Improved Fins | Basic Fins x1, Fiber Mesh x2, Conduit Crystal x2 | Ingredient pickup |
| Standard Air Tank | Titanium x2, Rubber x1, Silver x2 | Ingredient pickup |
| High Capacity Air Tank | Standard Air Tank x1, Plasteel Ingot x1 | Blueprint cache at -351319, 457445, -8868 |
| Ultra High Capacity Air Tank | High Capacity Air Tank x1, Troilite x3, Atacamite x3 | Not obtainable in current Early Access survival |
Tools
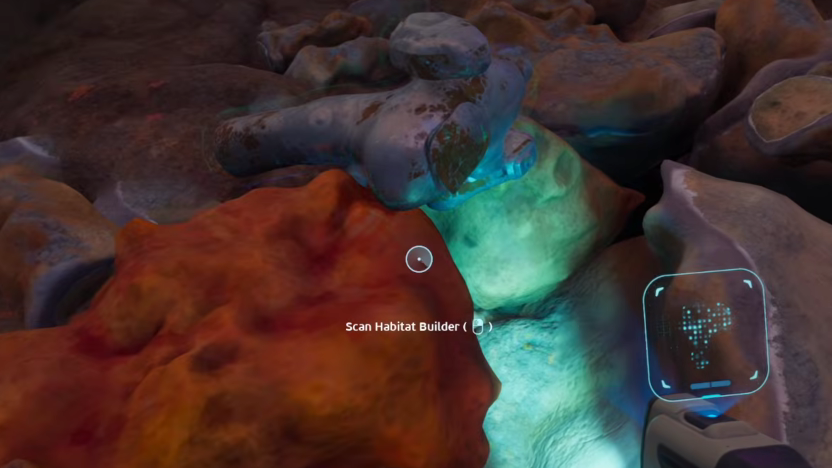
Tool fragments cluster around the Welcome Center and the wrecks within a few hundred meters of the Lifepod. The Habitat Builder is the single most important early scan because it gates every base piece, including the Fabricator and Corridor blueprints, which both unlock automatically once two Habitat Builder fragments are scanned.
| Tool | Recipe | Where to scan |
|---|---|---|
| Survival Multitool | Titanium x3 | Default in Fabricator |
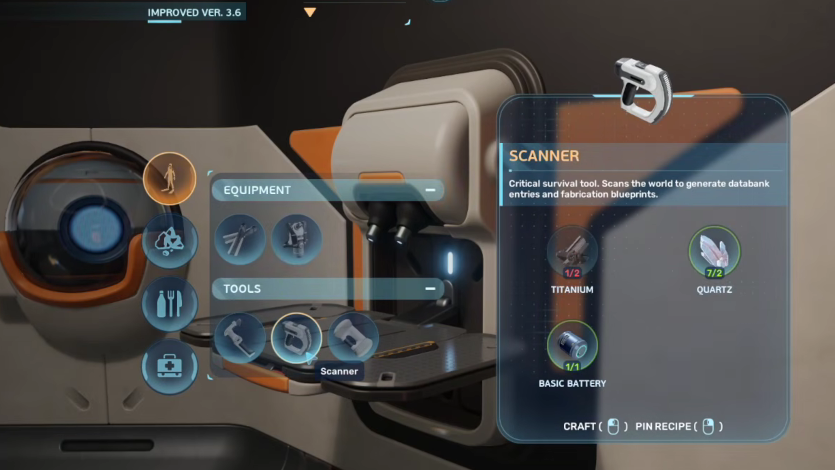
| Scanner | Titanium x2, Quartz x2, Basic Battery x1 | Default in Fabricator |
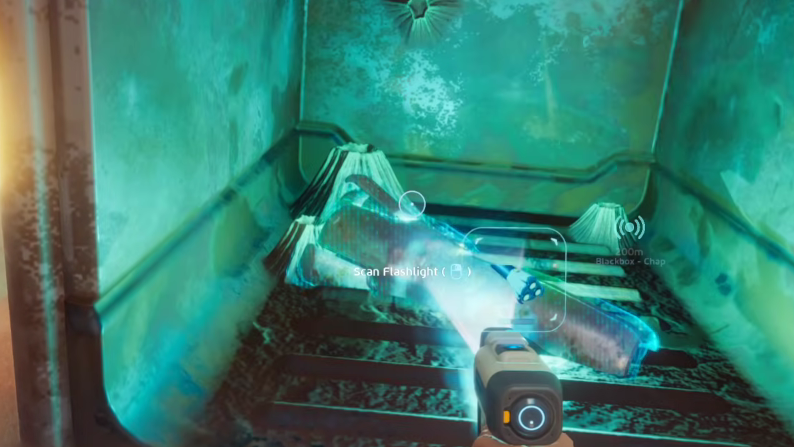
| Flashlight | Titanium x2, Quartz x1, Basic Battery x1 | Small cave under the Lifepod; debris 32m east of Lifepod |
| Habitat Builder | Titanium x2, Glass x1, Basic Battery x1, Copper Wire x1 | Crate near Welcome Center sign; beneath the Welcome Center floor |
| Repair Tool | Titanium Ingot x1, Wiring Kit x1, Basic Battery x1, Sulfur x1 | Wreckage scan |
| Sonic Resonator | Basic Battery x1, Titanium Ingot x2, Lead x2, Wiring Kit x1 | Old Habitat, ~400m north of Lifepod (two scans inside) |
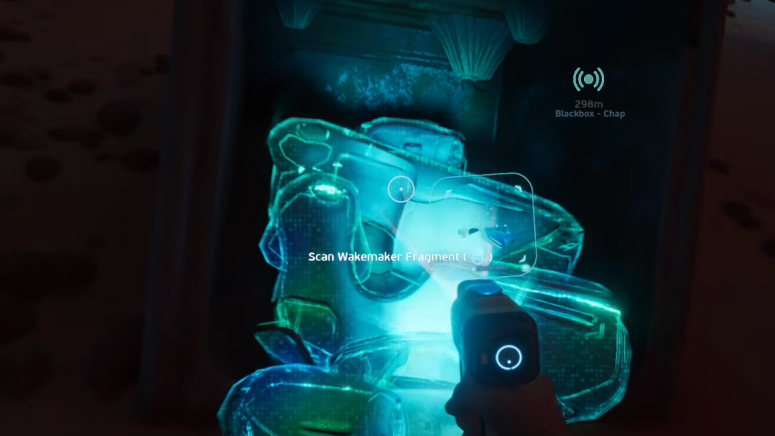
| Wakemaker | Silver x1, Wiring Kit x1, Grease x1, Basic Battery x1 | Northeast of Lifepod in crates and small caves (~120–200m) |
| Air Bladder | Titanium x2, Rubber x1 | Default |
| Feedback Resonator | Sonic Resonator x1, Enameled Glass x2, Conduit Crystal x2, Strontium x2 | Cicada Wreck Therapy Room, ~2,042m east of Lifepod |
Basic materials and electronics
Most resource recipes are automatic. Carry one of each ingredient back to a Fabricator and the blueprint pops. A handful of these recipes have alternate versions at the Processor that are usually more efficient once you’ve built one.
| Material | Fabricator recipe |
|---|---|
| Mild Acid | Acidic Raion Pouch x2, Copper x1 |
| Salvaged Titanium | Metal Salvage x1 (yields 4) |
| Glass | Quartz x2 |
| Enameled Glass | Glass x1, Creature Enamel x1 |
| Fiber | Fibrous Pulp x2 |
| Fiber Mesh | Fiber x2, Strong Acid x1 |
| Rubber | Lucifer Rotsac x2 |
| Grease | Lucifer Rotsac x1 |
| Basic Battery | Copper x2, Acidic Raion Pouch x1 |
| Advanced Battery | Conduit Crystal x1, Strong Acid x1, Silver Ingot x1 |
| Copper Wire | Copper x2 |
| Power Cell | Basic Battery x2, Strong Acid x1, Salt x1 |
| Entangled Power Cell | Conduit Crystal x1, Strong Acid x1, Gold Ingot x1, Troilite x1 |
| Wiring Kit | Silver x1, Copper Wire x1 |
| Advanced Wiring Kit | Wiring Kit x1, Gold x1, Sulfur x1 |
| System Chip | Wiring Kit x1, Quartz x2 |
| Dedicated Core | Advanced Wiring Kit x1, Quartz x2, Strong Acid x1 |
Food, water, and consumables
Cooked fish recipes unlock the first time you fabricate them, and Prepared Meals offer larger food, water, and health bonuses at the cost of multi-ingredient recipes. The two first aid kits are the only healing items in the build.
| Item | Effect | Recipe |
|---|---|---|
| Water | +40 Water | Water Slug x1 |
| Isotonic Water | +55 Water | Flash Slug x1, Salt x1 |
| Sugar of Saturn | +10 Food | Lead x1, Salt x1 |
| Halfmoon Jerky | +40 Food | Halfmoon x2, Salt x1 |
| Hoverthorn Souvlaki | +40 Food | Hoverthorn x3, Salt x1 |
| Cherimoya Chutney | +40 Food | Cherimoya Rotsac x2, Sugar of Saturn x1 |
| Threemoon Temaki | +60 Food, +15 Health | Halfmoon x1, Harvestmoon x1, Bluemoon x1, Fibrous Pulp x1 |
| Pavlova | +80 Food, +70 Water, +10 Health | Deepwing Egg Clump x1, Sugar of Saturn x1, Cherimoya Rotsac x1 |
| Nutrient Block | +40 Food | Biofuel Block x1, Salt x1 |
| Coral Mash | +65 Food | Coral Shavings x3, Sugar of Saturn x1 |
| Basic First Aid Kit | +50 Health | Fiber x1 |
| Enhanced First Aid Kit | +100 Health | Fiber x1, Medical Gel Sac x1 |
| Distraction Flare | Lures creatures | Titanium x1, Quartz x1 |
Cooked Halfmoon, Harvestmoon, Bluemoon, Quadrate, Geordie, Electric Geordie, Hoverthorn, Black Hoverthorn, and Pneuma each take one of the matching fish and produce a single cooked ration worth +25 to +40 Food. Oily Salad takes Fibrous Pulp x2 for +20 Food.
Processor recipes
The Processor unlocks at the same time as the Fabricator’s base blueprint chain. It handles ingots, refined elements, biofuel, and alternate recipes for items you can already make at the Fabricator, usually with better yield.
| Output | Input | Time |
|---|---|---|
| Titanium Ingot | Titanium x3 | 0:30 |
| Copper Ingot | Copper x3 | 0:30 |
| Silver Ingot | Silver x3 | 1:00 |
| Gold Ingot | Gold x3 | 1:00 |
| Plasteel Ingot | Titanium Ingot x2, Lithium x1 | 2:00 |
| Mangalloy Ingot | Three-ingredient Axum alloy | 0:30 |
| Germanium (from Silver) | Argentine Silver Ore x2 | 2:00 |
| Germanium (from Lead) | Galena Lead Ore x2 | 2:00 |
| Strontium | Celestine x2 | 0:30 |
| Strong Acid | Sulfur x2 (or Sulfur x1 + Gold x1) | 0:30–1:00 |
| Biofuel Block (Fibrous Pulp) | Fibrous Pulp x5 | 2:00 |
| Biofuel Block (Pents) | Pents x3 | 2:00 |
| Biofuel Block (Crab Feces) | Crab Feces x2 | 2:00 |
| Glass (from Salt) | Salt x2 | 2:00 |
| Water (from Fibrous Pulp) | Fibrous Pulp x3 | 0:30 |
| Grease (from Halfmoons) | Halfmoon x2 | 2:00 |
| First Aid (from Medical Gel) | Medical Gel x1 | 0:30 |
| Mild Acid (at Processor) | Acidic Raion x2 | 0:30 |

Habitat Builder: base pieces and interiors
The Habitat Builder menu splits into Standard Elements, Interior Facilities, Exterior Facilities, Utility, Cultivation, and Furniture & Decor. The opening loop of base building only needs Titanium, Quartz, and Copper, with Copper Wire and Glass for the more advanced pieces.
| Structure | Recipe | Notes |
|---|---|---|
| Corridor | Titanium x2 | Auto-unlocks with Habitat Builder |
| Room | Titanium x5 | Expandable horizontally |
| Half Round Room | Titanium x5, Glass x5 | Observation/recreation |
| Moonpool | Titanium x5 | Required for Tadpole docking |
| Hatch | Titanium x1, Quartz x1 | Required entry point |
| Window | Glass x1 | Quartz glass panel |
| Nook | Titanium x3, Glass x2 | Upward-viewing window |
| Interior Wall | Titanium x2 | Cosmetic divider |
| Interior Arch | Titanium x1 | Cosmetic divider |
| Interior Door | Titanium x3, Glass x1, Copper Wire x1 | Draws 1 energy/sec |
| Ladder | Titanium x2 | Stack rooms vertically first |
| Fabricator | Titanium x1, Copper x1, Quartz x1 | Interior Facilities tab |
| Processor | Titanium x2, Mild Acid x1, Copper Wire x1 | Interior Facilities tab |
| Biolab | Titanium x3, Copper Wire x1, Mild Acid x1 | Active/Passive Biomod selection |
| Biobed | Titanium x3, Glass x1, Copper Wire x1 | Respawn point |
| Modification Station | Titanium x2, Celestine x2, Copper x2 | Tadpole upgrades |
| Battery Terminal | Titanium x2, Quartz x2, Copper Wire x1 | Recharges Basic/Advanced Batteries |
| Power Cell Terminal | Titanium x3, Copper x3, Wiring Kit x1 | Recharges Power Cells |
| Wall Locker | Titanium x2 | 20 slots |
| Floor Locker | Titanium x3, Quartz x1 | 30 slots |
| Tailing Chest | Titanium x3 | Decorative storage |
| Wall Rack | Titanium x1, Copper x1 | Tool/decor mount |
Power generation
Power is the only mechanic that will reliably shut your base down. If the meter in the upper-left ticks below your draw, oxygen replenishment and every powered system goes offline. Each generator has a different placement rule.
| Generator | Recipe | Output | Placement |
|---|---|---|---|
| Solar Panel | Titanium x1, Quartz x2 | +1 to +8 e/sec | Base exterior, shallow depth |
| Hydroelectric Turbine | Titanium x3, Copper x3, Silver x3 | +12 e/sec | Inside natural underwater currents |
| Thermal Plant | Titanium x3, Copper x3, Gold x3 | +1 to +16 e/sec | Near heat sources (Zezuran Desert, vents) |
| Bioreactor | Titanium Ingot x2, Copper Ingot x2 | +1 to +20 e/sec | Base interior, fed with biofuel |
| Power Transmitter | Titanium x1, Copper x1 | Relay only | Chains remote generators to the base |
| Power Storage | Germanium Ingot x1, Titanium x3 | Battery buffer | Found at Rosetta Stone tower and Hot Base |
Hydroelectric Turbines are the most consistent mid-game option because a current’s full effect radius pays out the maximum rate, and multiple turbines can sit inside the same current.
Vehicles and Tadpole modules
The Tadpole submersible is the only mobile vehicle in the current build. The Core Module is the actual craftable hull; the Dock and Vehicle Fabricator attach to a Moonpool.
| Component | Recipe |
|---|---|
| Tadpole Core Module | Titanium Ingot x2, Glass x1, System Chip x1, Power Cell x1 |
| Tadpole Dock | Titanium Ingot x2, Silver Ingot x1, Copper Wire x2 |
| Vehicle Fabricator | Titanium Ingot x2, Copper Ingot x1, Glass x2 |
| Engine Efficiency Upgrade | Recipe Data Card at Alien Ruins Research Outpost |
| Cavitation Muffler Upgrade | Reduces sound signature; unlocked via wreckage scan |
Blueprint coordinates worth knowing
Most early-game blueprints sit within 500 meters of the Lifepod, with mid-game alien tech clustered around the Karakorum region roughly 1,000–2,000 meters east. Coordinates are listed as X, Y, Z in-game and remain stable across saves.
| Blueprint | Location | Coordinates |
|---|---|---|
| Flashlight | Cave under Lifepod | -337995, 433485, -3343 |
| Habitat Builder | Welcome Center sign crate | -332634, 441264, -913 |
| Sonic Resonator | Old Habitat entrance | -337470, 393080, -5580 |
| Beacon | Old Habitat interior | -337912, 395675, -5415 |
| Biobed | Camp One | -323736, 409359, -1684 |
| Bioreactor | Cicada Wreck Lander Garage | -309234, 408373, -6540 |
| Hydroelectric Turbine | Abandoned outpost roof | 320646, 402318, -2952 |
| Thermal Plant | Cavern near Blackbox – Zip | -303294, 451415, -30764 |
| Power Storage | Rosetta Stone tower | -213905, 449890, -13244 |
| Floor Locker | Colonist Bunker (Quaker’s Meetinghouse) | -321933, 448937, -4267 |
| Lab Chair | Needler Nest | -203476, 447174, -20868 |
| Modification Station | Cicada Wreck, behind Feedback Resonator | -133592, 450448, -20856 |
| Feedback Resonator | Cicada Wreck (Therapy Room) | -134712, 449873, -20629 |
| High Capacity Air Tank cache | Deep wreckage | -351319, 457445, -8868 |

Furniture, decor, and posters
Decor items are almost entirely Titanium-only and unlock from a single scan inside colonist camps, Tailings Village, the Tadpole Pens, and the Alien Ruins Research Outpost. The most common pieces include Dining Chair, Dining Table, Single Bed (Titanium x2, Fiber x3), Stool (Titanium x1, Rubber x1), Lab Chair (Titanium x2), and Pioneer Program Poster (Titanium x1, found inside the large plateaus wreck north of the Lifepod).
Axum and Tailing variants come from alien and colonist sites respectively. Axum Wall Lamp (Celestine x1, Titanium x1) and the Axum jars in three sizes use Glass plus 1–3 Copper. Coral Jar (Coral Shavings x2) and Small Coral Jar (Coral Shavings x1) come from the Tailings Village.
Verifying an unlock
An unlocked blueprint shows up as fully colored in the PDA’s Blueprints tab and appears in the matching Fabricator, Processor, or Habitat Builder menu. Partially scanned blueprints display a progress fraction, such as 1/2 or 2/3 with a hologram preview. If a recipe still won’t appear after picking up every ingredient, drop and re-pick a single unit at the Fabricator to force the unlock check.
Recipe Data Cards trigger an immediate unlock notification when collected. Look for a horizontal white container with a chip hologram floating above it inside alien outposts and wrecks.
Common reasons a blueprint won’t unlock
- You scanned the same fragment twice. Each blueprint needs distinct fragments, not repeat scans of one object.
- The ingredient was consumed before reaching a Fabricator. Auto-unlock checks happen at pickup; if you already had it stored, the unlock should be retroactive once you return to your inventory.
- The item is gated behind a Recipe Data Card and has no scannable fragments in the world.
- The blueprint is listed as N/A in survival for the current Early Access build, like the Ultra High Capacity Air Tank.
Subnautica 2 is in Early Access on the Epic Games Store, so recipes, ingredient counts, and fragment placements can shift between patches. When something looks off in your PDA, a quick check against the current Habitat Builder menu will usually confirm whether the recipe moved tabs or temporarily left the build.