
Windows 11 search can pull results not just from files and apps on your local device, but also from cloud sources linked to your Microsoft, work, or school accounts. This integrated search streamlines file retrieval, but it also means cloud-stored documents and emails may appear in your results. Some users prefer this for convenience, while others want to limit search to local files for privacy, security, or compliance reasons. Adjusting the cloud content search setting allows you to choose which accounts contribute results to your searches, or to disable cloud search entirely.
Turn Cloud Content Search On or Off Using Windows Settings
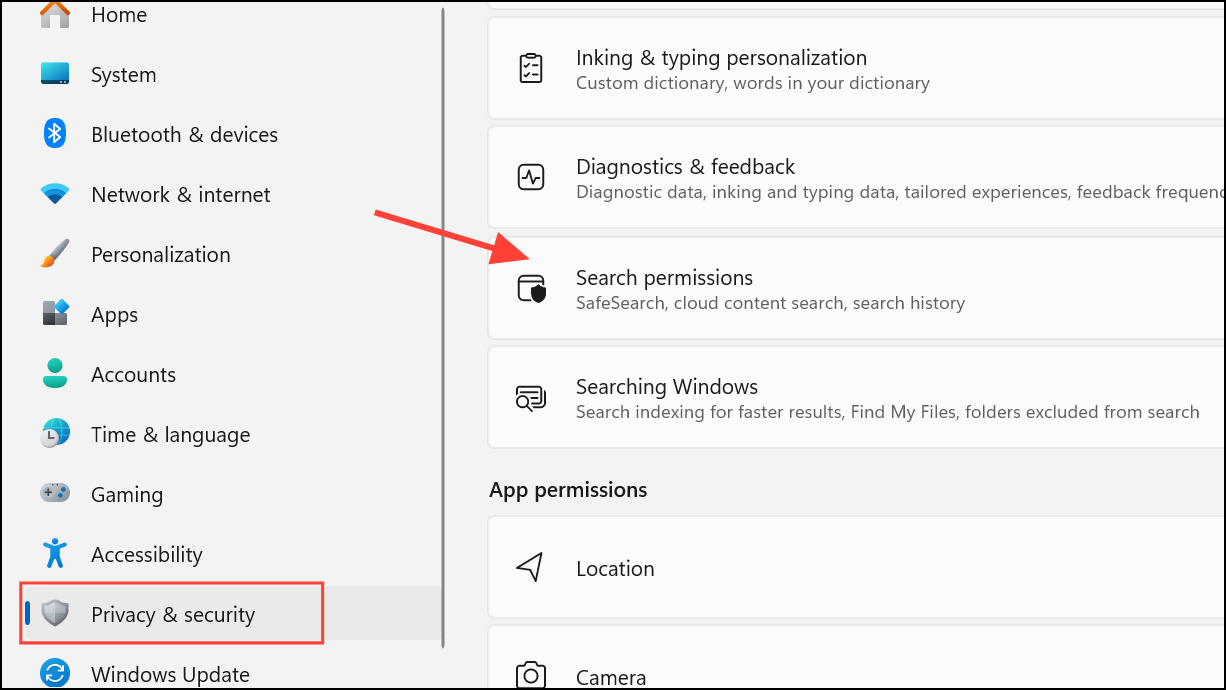
Step 1: Open Windows Settings by pressing Win + I on your keyboard. This shortcut quickly launches the Settings app.
Step 2: In the left sidebar, select Privacy & security. Then, on the right, click Search permissions. This section controls what sources Windows Search can access.
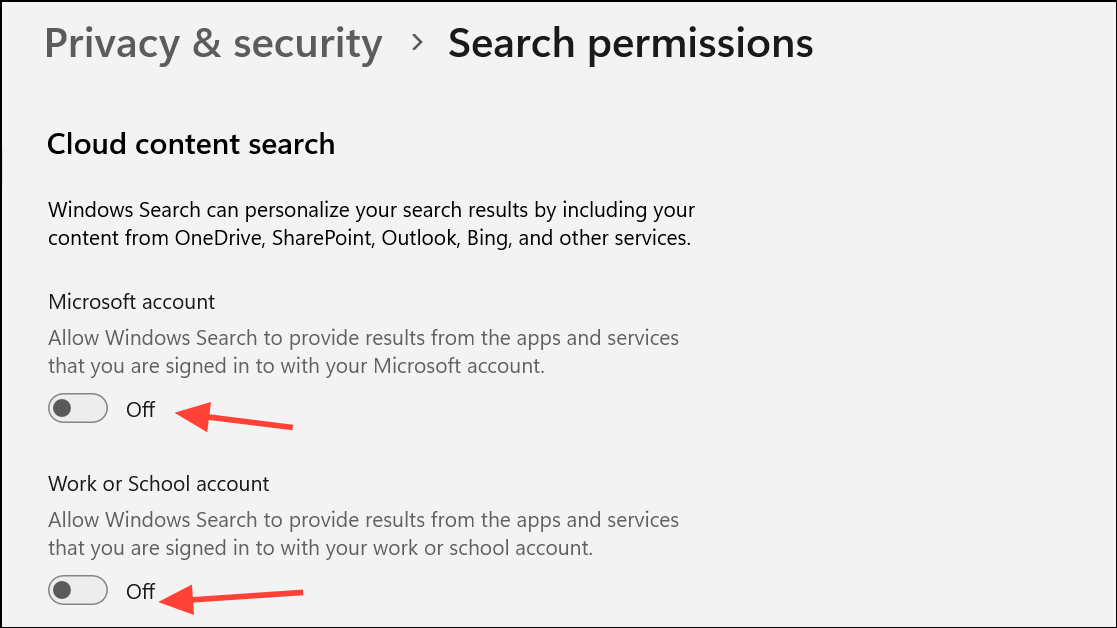
Step 3: Scroll to the Cloud content search section. Here, you’ll see toggles for Microsoft account and Work or School account. Turn these switches on to allow Windows Search to display results from your connected cloud services, such as OneDrive, Outlook, and SharePoint. Switch them off to restrict search results to local files and apps only.
Step 4: Close the Settings window. Your changes take effect immediately, but you may need to sign out and back in or restart your computer if search results do not update as expected.
Enable or Disable Cloud Content Search with Group Policy Editor (For Administrators)
Group Policy provides IT administrators with centralized control over search settings for all users on a device. This method is available in Windows 11 Pro, Enterprise, and Education editions.
Step 1: Press Win + R to open the Run dialog, type gpedit.msc, and press Enter. This launches the Local Group Policy Editor.

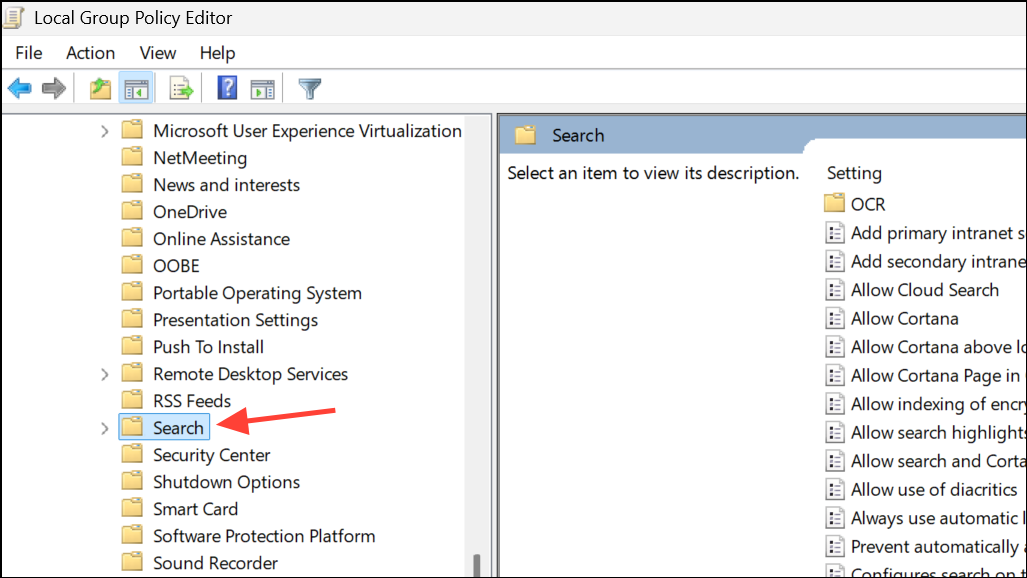
Step 2: In the left pane, navigate to Computer Configuration > Administrative Templates > Windows Components > Search.
Step 3: Double-click Allow Cloud Search in the right pane. This policy controls whether cloud content appears in search results for all users.
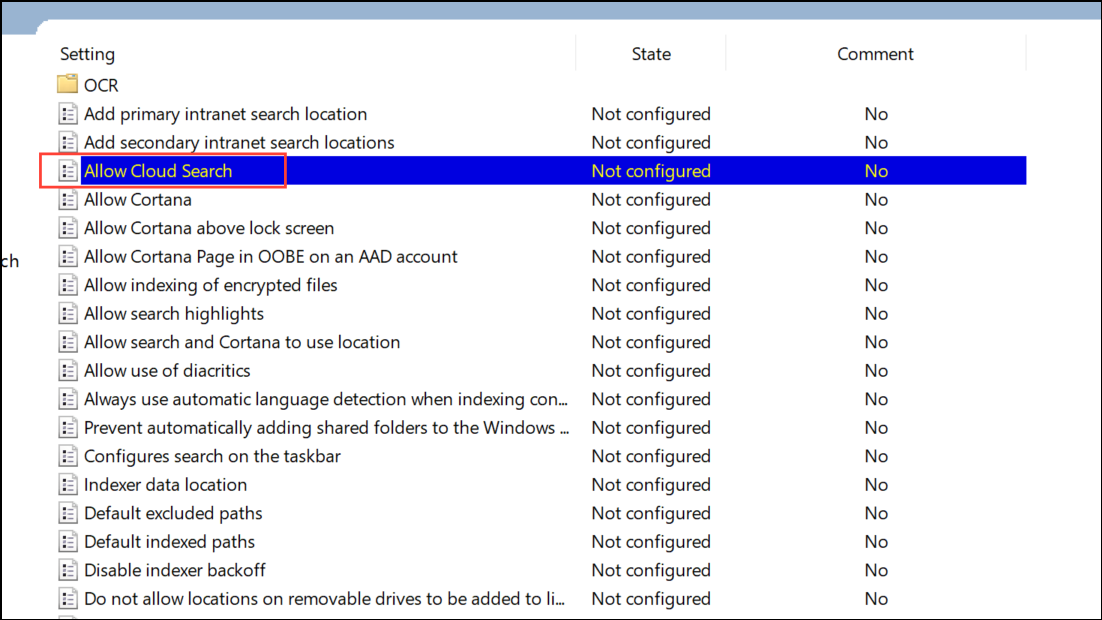
Step 4: Choose one of the following options:
- Enabled (then select Enable Cloud Search from the dropdown): Forces cloud content search on for all users.
- Enabled (then select Disable Cloud Search): Forces cloud content search off for all users.
- Not Configured: Allows users to control the setting individually in their own Windows Settings.
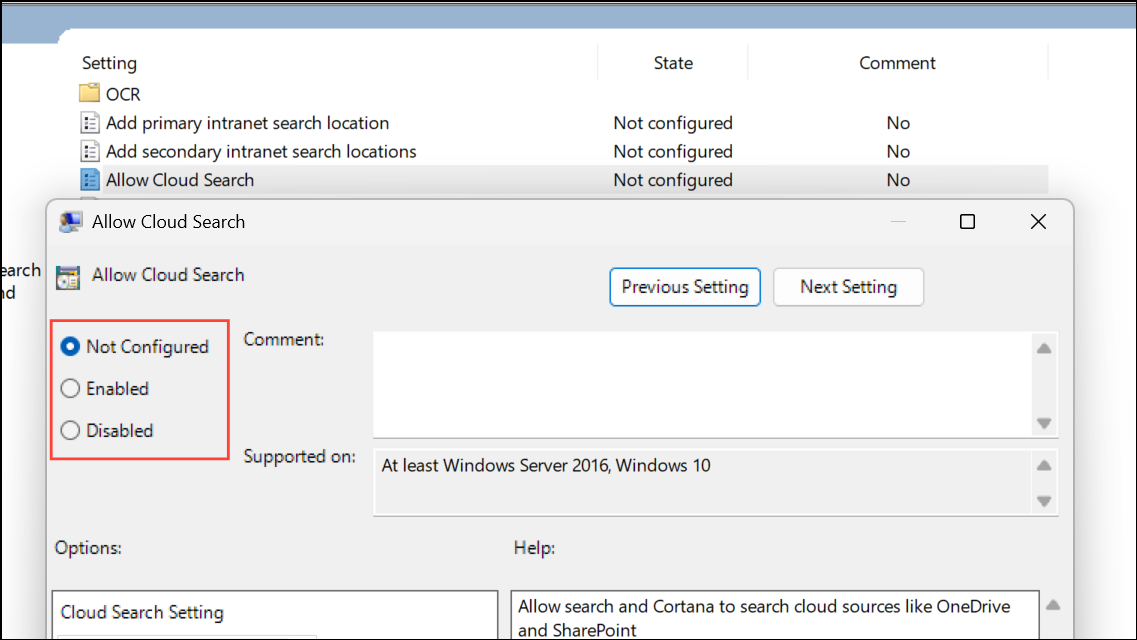
Step 5: Click Apply and then OK. Close the Group Policy Editor. A restart or sign-out may be required for changes to take effect across all accounts.
Control Cloud Content Search via Registry Editor
Advanced users and IT admins can manage cloud content search settings directly in the Windows Registry. Editing the registry allows for precise control, but always back up your registry before making changes to avoid system issues.
For the Current User (Microsoft Account or Work/School Account)
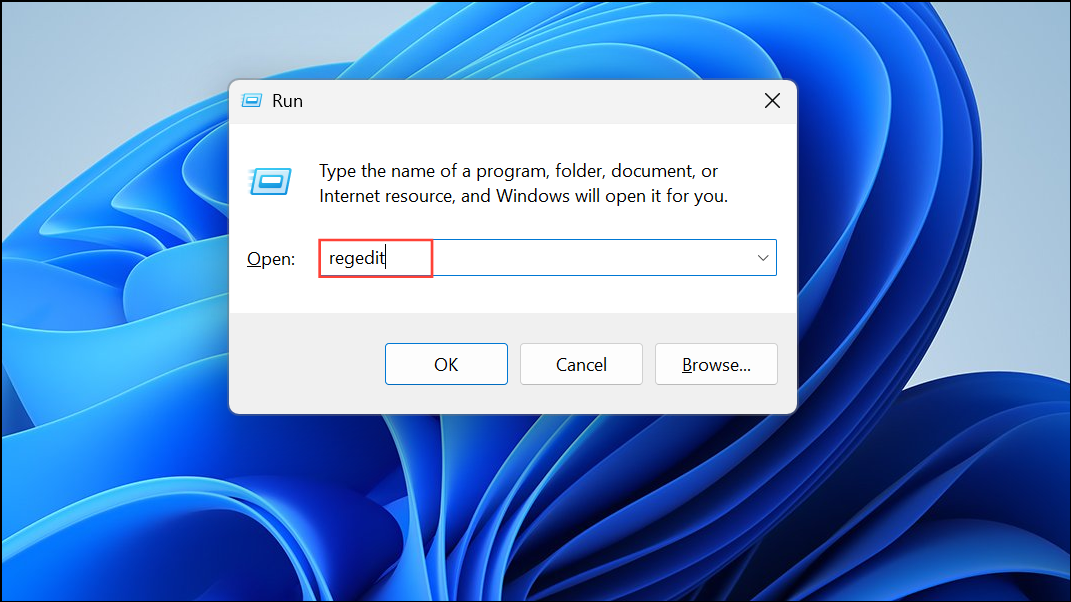
Step 1: Press Win + R, type regedit, and press Enter to open the Registry Editor. Approve any User Account Control prompts.
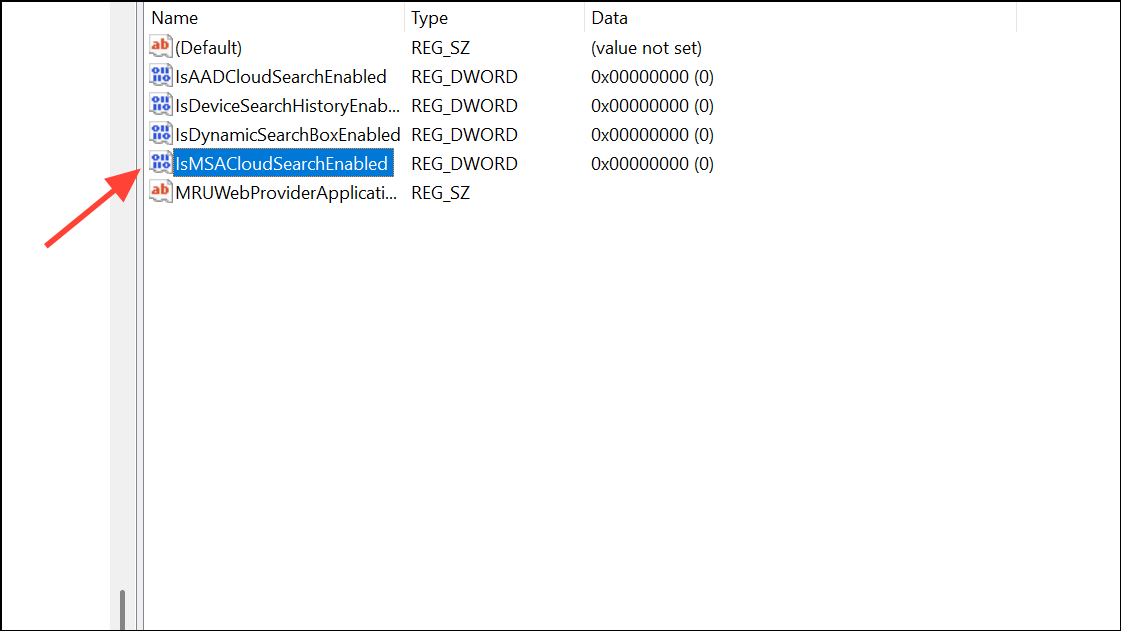
Step 2: Navigate to HKEY_CURRENT_USER\Software\Microsoft\Windows\CurrentVersion\SearchSettings.
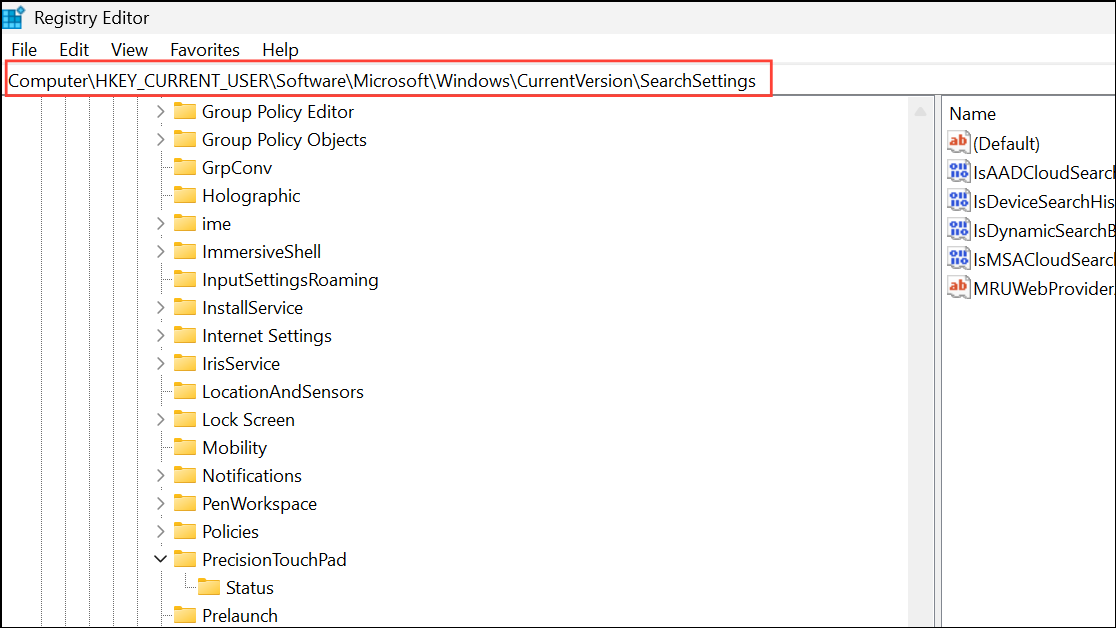
Step 3: To control cloud search for your Microsoft account, locate or create a DWORD value named IsMSACloudSearchEnabled. Set its value to 1 to enable or 0 to disable.
Step 4: For work or school accounts, use the DWORD IsAADCloudSearchEnabled in the same key. Set to 1 (enable) or 0 (disable).
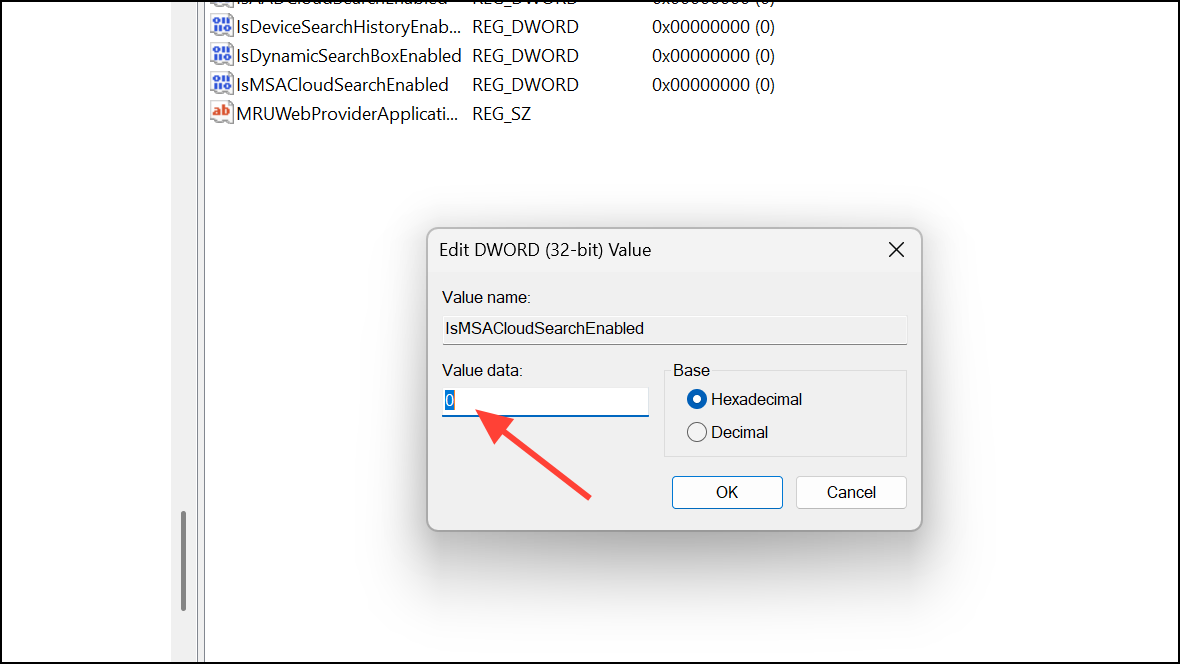
Step 5: Close the Registry Editor and restart your computer for the changes to take effect.
For All Users (Machine-Wide Setting)
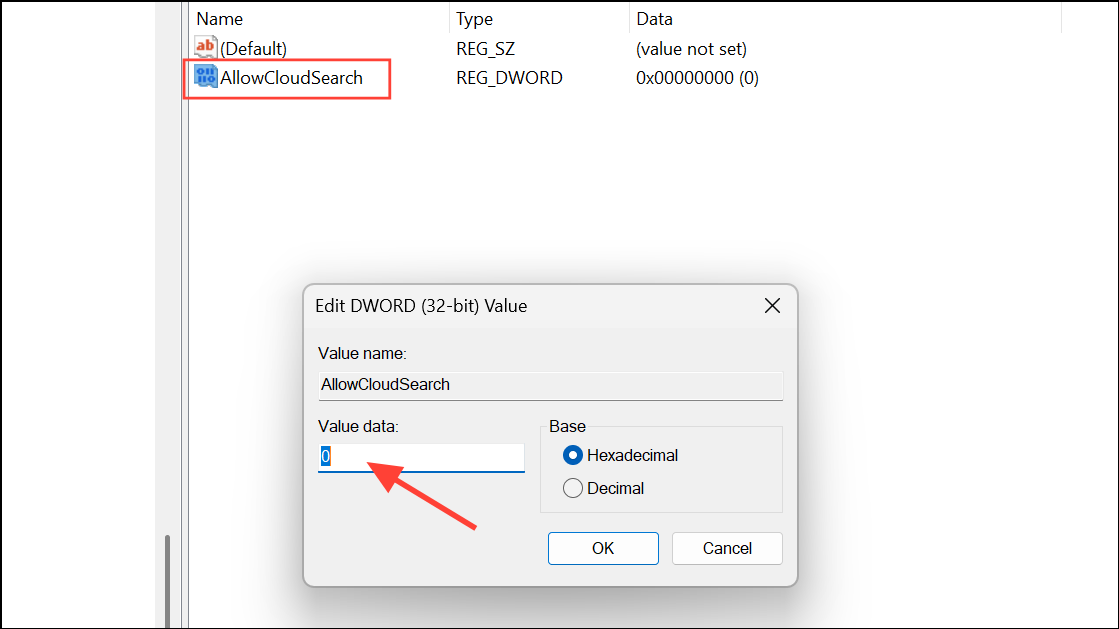
Step 1: In Registry Editor, navigate to HKEY_LOCAL_MACHINE\SOFTWARE\Policies\Microsoft\Windows\Windows Search.
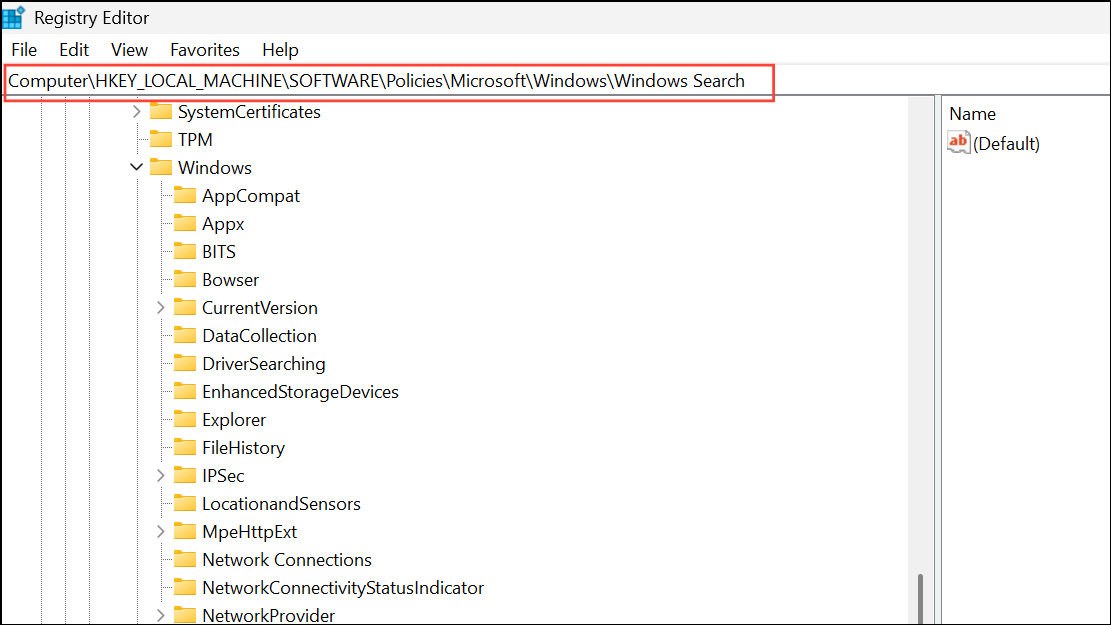
Step 2: Create or modify the DWORD value AllowCloudSearch:
- Set to
1to force cloud content search on for all users. - Set to
0to force cloud content search off for all users. - Delete the value or set it to
-(empty) to allow users to control the setting individually.
Managing Search Cloud Content from Apps (Windows 11 Copilot+ PCs and Newer Builds)
On newer builds, especially on Copilot+ PCs, Windows 11 allows you to fine-tune which apps can contribute cloud content to search results.
Step 1: Open Settings (Win + I), go to Privacy & security, and select Search permissions.
Step 2: Under Search Apps, toggle Enable deep content search of cloud content on or off for each app (such as OneDrive) as needed. This allows you to control which cloud-connected apps provide results in Windows Search.
Step 3: For advanced control, use Registry Editor to navigate to HKEY_CURRENT_USER\Software\Microsoft\Windows\CurrentVersion\SearchSettings\FileSearchProviders. Each app will have its own subkey; set the IsFileProviderEnabled DWORD to 1 (on) or 0 (off).
Why Turn Cloud Content Search On or Off?
Enabling cloud content search improves productivity by displaying cloud-stored files and emails alongside local results, streamlining access and reducing the need to open multiple apps or browsers. This is especially useful for users who frequently switch devices or collaborate using shared cloud documents.
Disabling cloud content search can improve privacy and security by preventing cloud-stored documents from appearing in search results on shared or public devices. It also reduces search clutter and may speed up local searches, particularly in environments with limited internet connectivity or strict data compliance requirements.
Customizing cloud content search in Windows 11 gives you direct control over what appears in your search results, whether you want maximum convenience or tighter privacy. Adjust these settings as your workflow or security needs change.