Managing the deployment of Windows 11 within an organization demands precision and the appropriate administrative tools to ensure a smooth transition. ADMX Templates play a crucial role in this process by enabling administrators to define Group Policy settings for user and computer configurations across the network.
ADMX files are administrative templates that provide a structured way to implement policies in an Active Directory environment. Unlike ADML files, which are language-specific, ADMX files are the core templates used to manage the settings. Before proceeding, ensure you have the necessary permissions to run the Group Policy Management Editor (gpme.msc) or the Group Policy Object Editor (gpedit.msc).
Downloading ADMX Templates
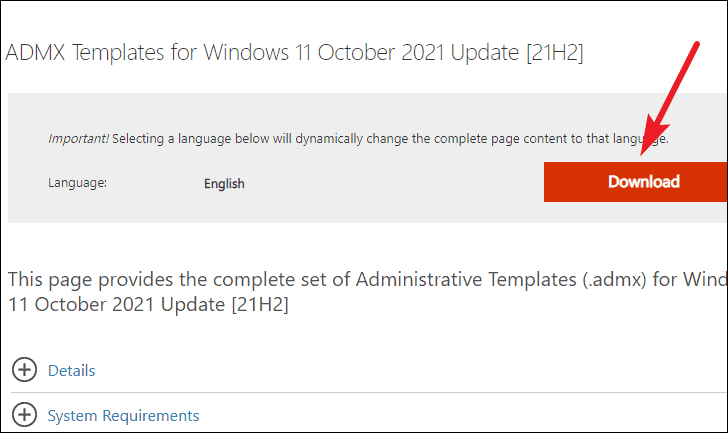
To get started, download the ADMX templates for the Windows 11 October release from Microsoft's official download page. Click the 'Download' button to obtain the .msi file containing the ADMX files.

The ADMX templates are compatible with a range of operating systems, including Windows 11, Windows 10, Windows 8, Windows 8.1, Windows 7, and various versions of Windows Server such as 2022, 2019, 2016, 2012, and 2008 R2.
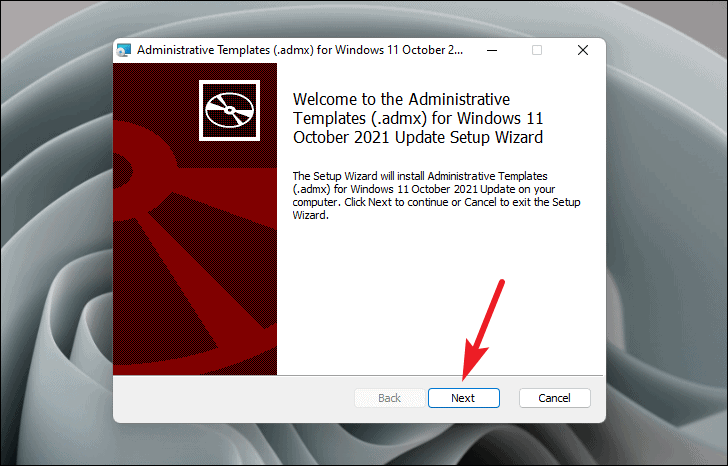
- After downloading, run the .msi file from your Downloads folder. This will open the Administrative Templates installer. Click 'Next' to proceed.

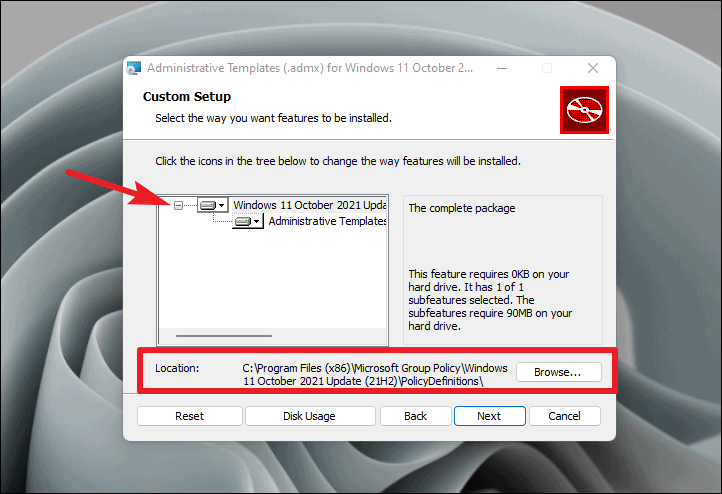
- Choose the installation options as desired. If you prefer the default settings, simply click 'Next'. The necessary sub-features are already selected, and the default installation path is appropriate. It's generally recommended to leave these settings unchanged.

- Wait for the installation to complete. Once finished, click 'Finish' to exit the installer.
Copying Administrative Templates to the Central Store
With the ADMX templates installed, the next step is to copy them to the Central Store within your Active Directory domain. The Central Store is a centralized repository for ADMX files that all domain controllers replicate, ensuring consistency across the network.
- If you haven't set up a Central Store yet, create a new folder named
PolicyDefinitionsin the following path on your domain controller:
\\<domainname.com>\SYSVOL\<domainname.com>\policies\- If a Central Store already exists, you can access it at:
\\<domainname.com>\SYSVOL\<domainname.com>\policies\PolicyDefinitionsIf an existing Central Store is present, consider creating a backup of the current PolicyDefinitions folder before proceeding. Alternatively, you can create a version-specific folder, such as PolicyDefinitions-21H2, to store the new templates without overwriting the existing ones:
\\<domainname.com>\SYSVOL\<domainname.com>\policies\PolicyDefinitions-21H2- On the source computer where you installed the ADMX templates, navigate to the
PolicyDefinitionsfolder located at:
C:\Program Files (x86)\Microsoft Group Policy\Windows 11 October 2021 Update (21H2)\PolicyDefinitions- Copy all the files from this folder to the Central Store folder you created or identified in your domain controller.
- If you used a version-specific folder, you may choose to rename the existing
PolicyDefinitionsfolder to reflect its version, then rename the new folder toPolicyDefinitions. This approach allows you to revert to the previous version if necessary.
This method provides a safeguard, enabling you to restore the old templates should any issues arise with the new ones. If everything operates smoothly, you can archive the older templates to a secure location outside of the sysvol folder.
With the ADMX templates successfully copied to the Central Store, you can now utilize the new Group Policy settings through the Group Policy Management Editor (gpme.msc) or the Group Policy Object Editor (gpedit.msc) to deploy Windows 11 throughout your domain.

