Superfetch, called SysMain on Windows 10, is an important system process that increases the speed of Windows. It preloads the apps and software you frequently use from the hard disk to the RAM, thus considerably reducing the time of loading.
Superfetch also keeps a track of apps which you use on certain days or if there is systematic usage. In case, you use a different set of apps each day of the week, Superfetch will work accordingly and load the distinct set of apps each day. It is beneficial for those obsessed with speed and who do not want to waste time on the loading of apps and software.
The background apps continue to function when the system is idle but as soon as they are finished, it again loads the frequently used apps. This ensures a lower loading time of apps when working on the system.
Since Superfetch always works in the background, it can also cause multiple issues to a system, namely overheating and constant excessive utilization of disk space.
Enabling or Disabling SuperFetch
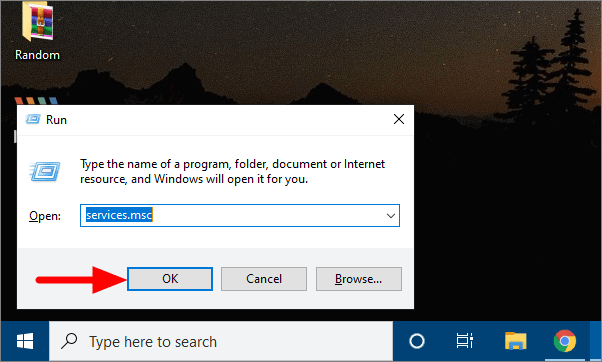
Search for ‘Run’ in the search menu and then click on it or press WINDOWS + R. Type ‘services.msc’ into Run and press Enter or click on ‘OK’.
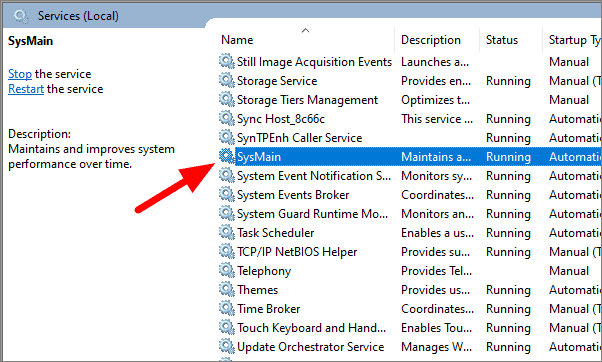
In the Services window, scroll down and search for ‘SysMain’. After you find SysMain, double click on it.
To stop SysMain, click on ‘Stop’ under in the General Tab.
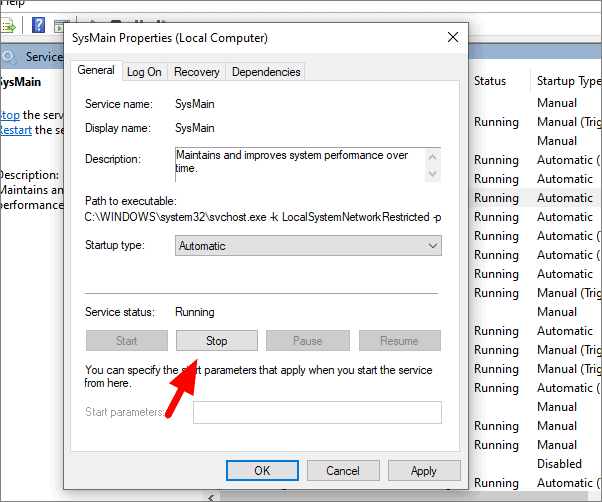
After you click on Stop, SysMain will stop functioning for now, but it will automatically start once you restart the system. To disable it, click on the box next to ‘Startup type’ and select ‘Disabled’. After selecting ‘Disabled’ from the dropdown menu, click on ‘OK’ at the bottom of the screen.
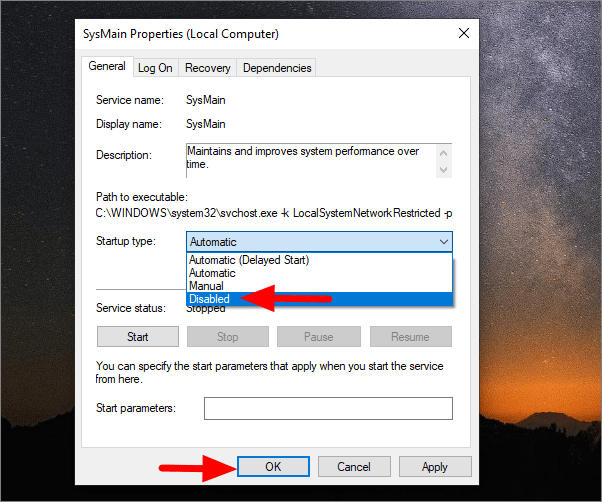
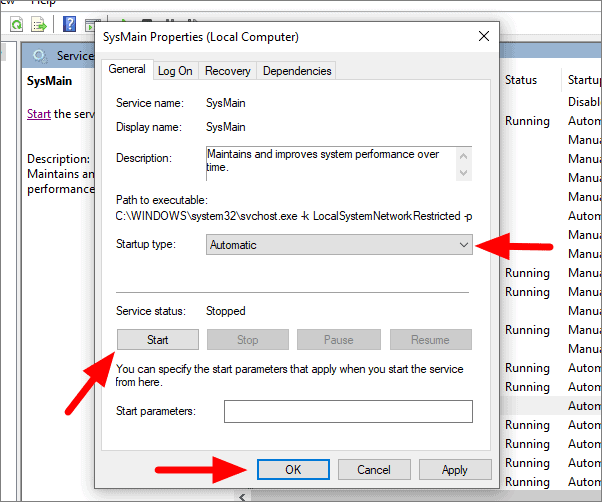
SuperFetch has now been disabled on your system. To enable it, follow the above steps to open SysMain properties and click on ‘Start’. Also, change the Startup type from Disabled to Automatic and then click on ‘OK’.
