
DPI or Dots Per Inch is used to measure the speed of the cursor on the screen. It determines how many pixels the cursor displaces on the screen when the mouse is moved by an inch. Say, you have a mouse with 1000 DPI, so when you move it by an inch, the cursor will shift by 1000 pixels in the same direction on the screen.
DPI plays a critical role for users concerned with mouse sensitivity. Gamers and designers are particularly obsessed with DPI and want to have the perfect setting for optimal results. You can easily check and change mouse DPI in Windows 10.
If your mouse doesn’t have dedicated DPI settings button or it doesn’t allow changing DPI settings, then changing the pointer speed from Windows settings is the way to change DPI settings for your mice.
Changing Mouse DPI in Windows Settings
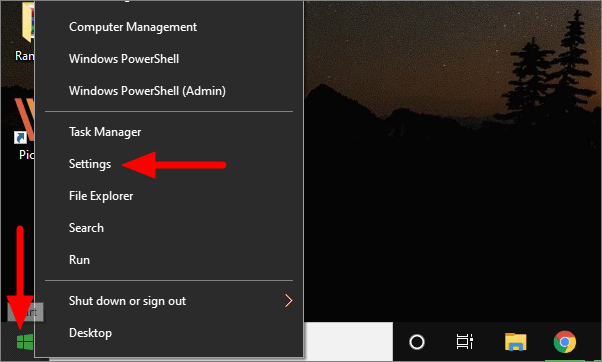
Right-click on the Windows icon on the left of the Taskbar and then select ‘Settings’.
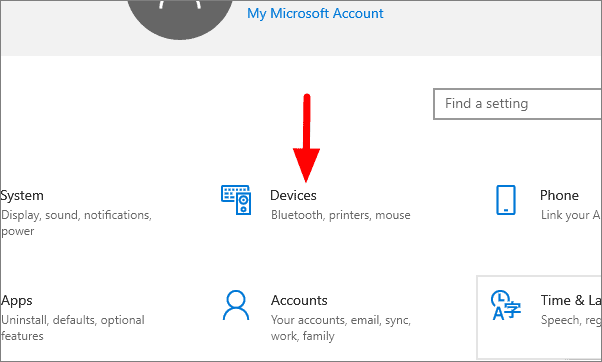
In the Settings window, click on ‘Devices’.
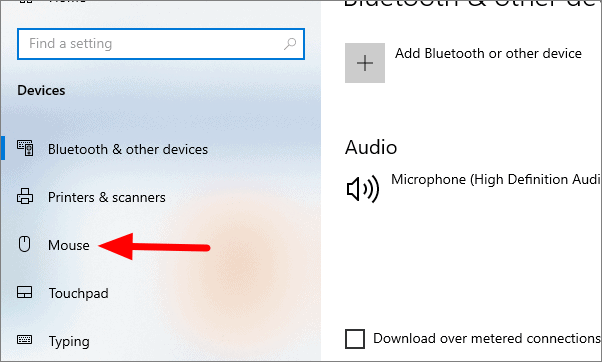
Click on ‘Mouse’ on the left, in the next window.
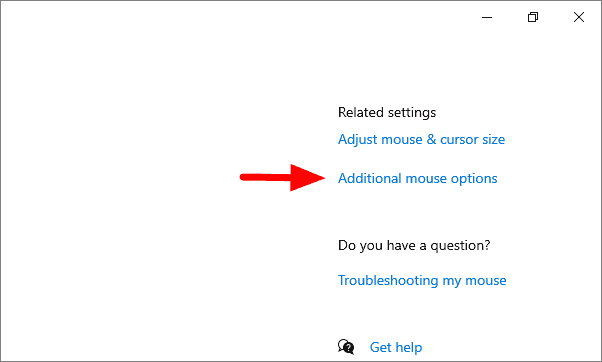
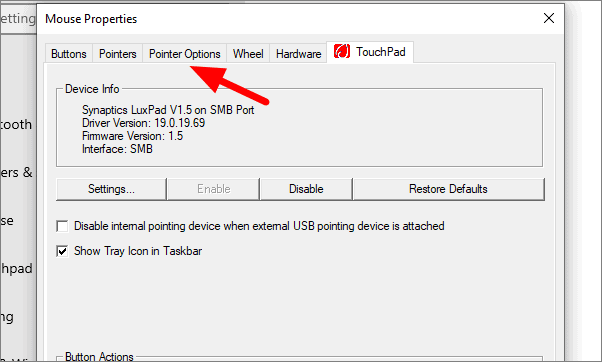
In the Mouse Settings, click on ‘Additional mouse options’ near the top right corner of the screen.
Go to the ‘Pointer Options’ tab in Mouse Properties.
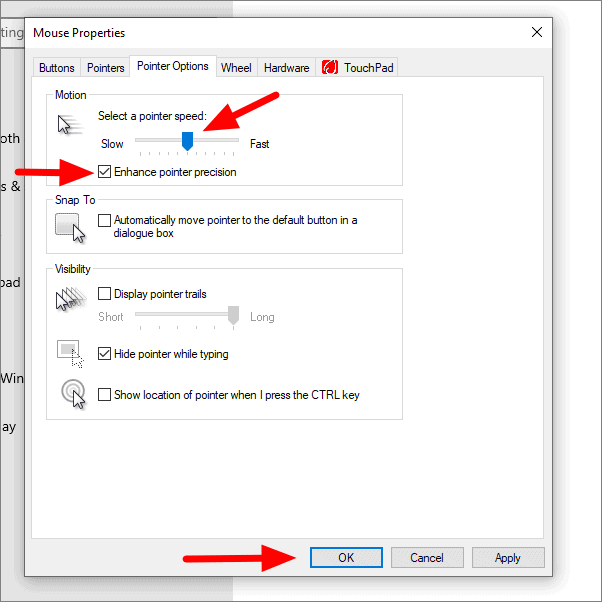
You can now change the DPI by moving the adjusting the slider. To increase the DPI, move the slider to the right while to decrease it, move the slider to the left. Move the cursor after adjusting the slider to check if you have obtained the right settings, and then click on ‘OK’.
Now that you have learned to adjust the mouse DPI, you can alter it for different needs and revert to the default setting when required.


