If you've noticed the VmmemWSA process consuming excessive memory on your Windows 11 PC, you're not alone. VmmemWSA is a legitimate process associated with the Windows Subsystem for Android (WSA), which enables you to run Android apps on your computer. However, it can sometimes use more memory than expected, affecting your system's performance. Here’s how you can manage and reduce the memory usage of VmmemWSA.
What is the VmmemWSA Process?
The VmmemWSA process represents the memory and resource usage of the Windows Subsystem for Android on your Windows 11 system. WSA allows you to run Android apps on your PC through the Amazon Appstore or sideloaded applications. VmmemWSA manages the memory allocation for these Android apps, reflecting the resources used by the entire virtual environment rather than individual apps.
While VmmemWSA is crucial for running Android apps, it can sometimes consume more memory than necessary, even when no apps are running. This can slow down your system and impact overall performance. Here are some methods to manage and reduce the memory usage of VmmemWSA.
How to Reduce VmmemWSA Memory Usage
Change WSA Resource Allocation
By default, WSA might be configured to continuously consume resources, even when no Android apps are running. Changing this setting can help free up memory when WSA is not in use.
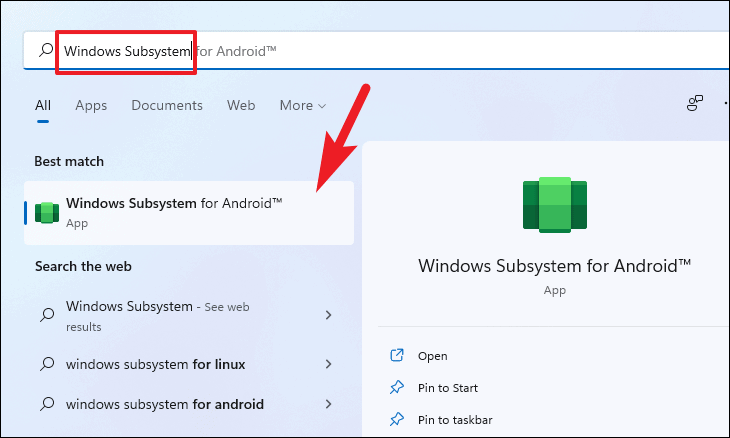
Step 1: Open the Windows Subsystem for Android app on your Windows 11 PC. You can find it in the Start menu or by searching for it using Windows Search.
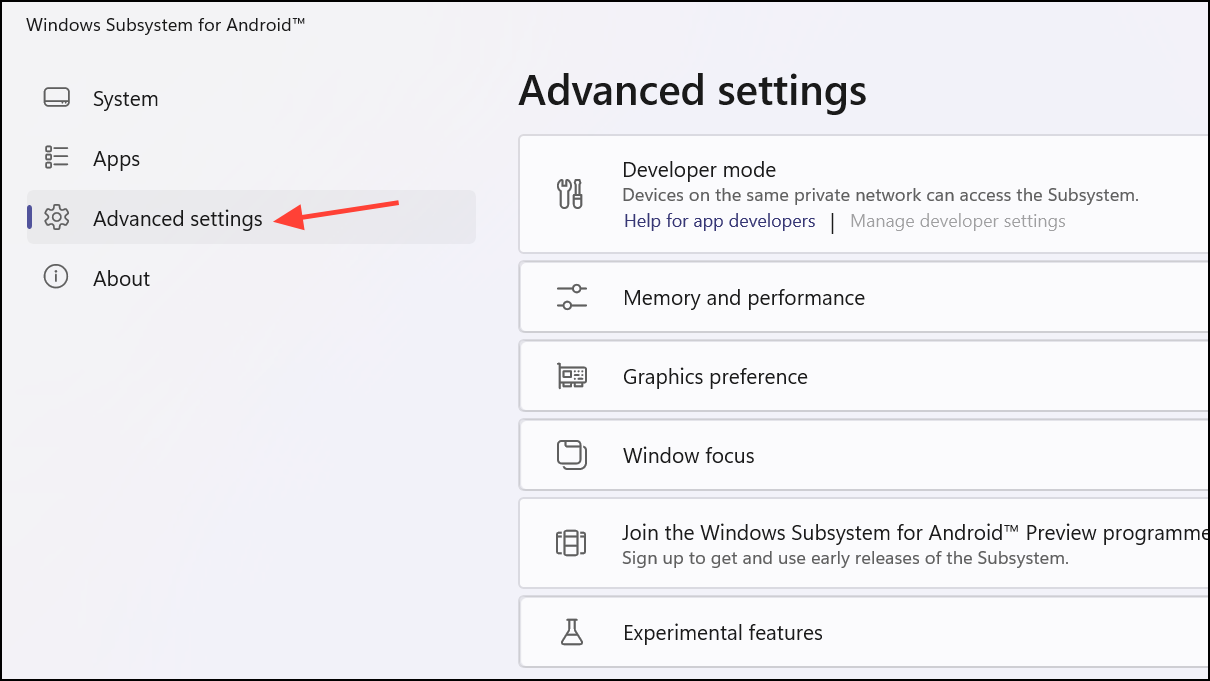
Step 2: In the WSA app, navigate to the 'Advanced settings' from the left sidebar.
Step 3: Expand the 'Memory and performance' section. Select the radio button for 'As needed' to configure WSA to consume resources only when necessary.
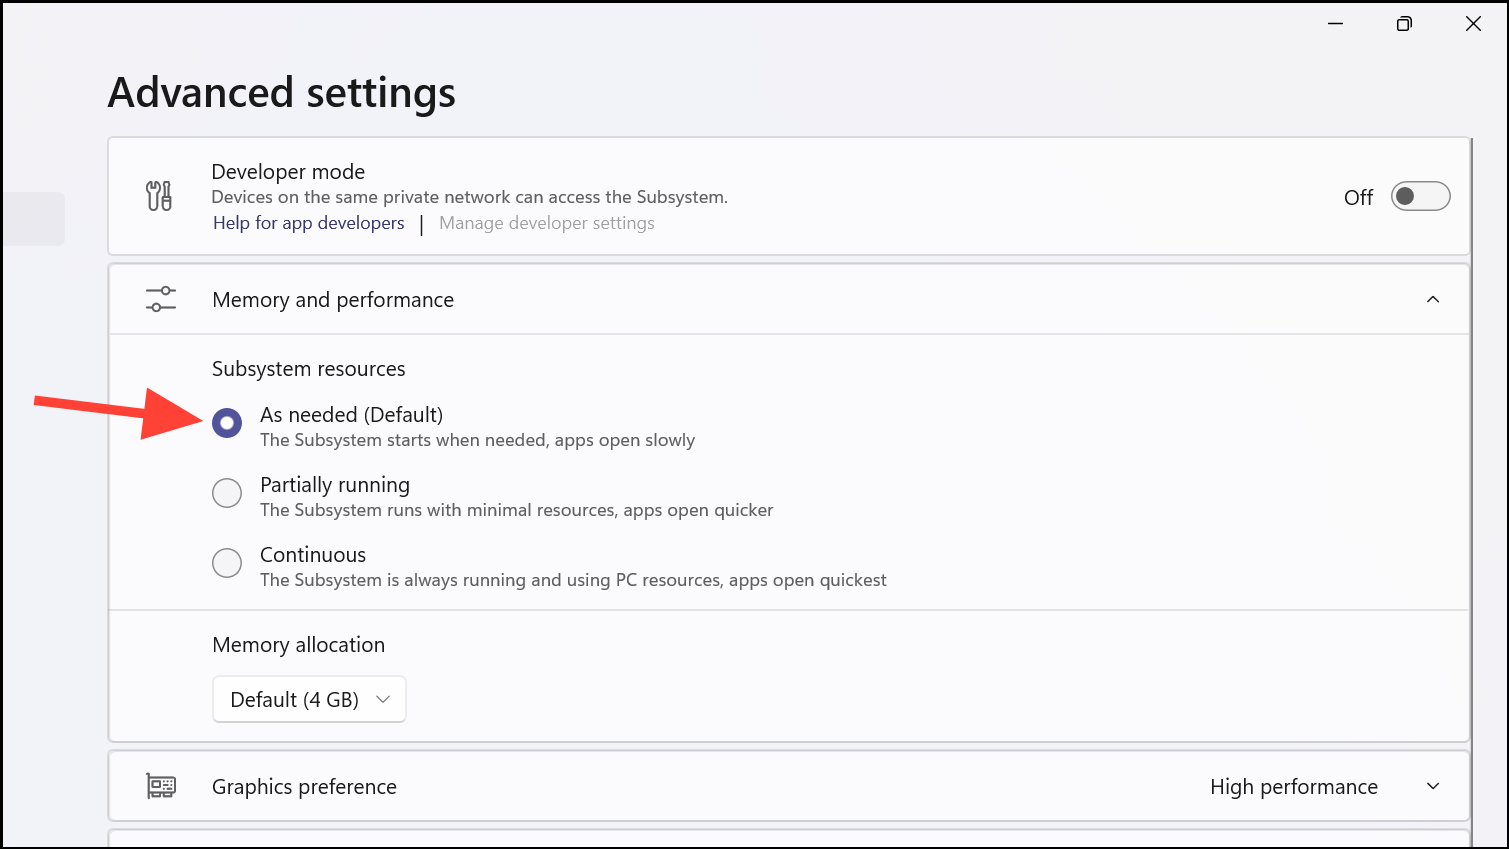
After making this change, WSA will shut down after a period of inactivity, freeing up memory. Keep in mind that the memory usage might not drop immediately after closing Android apps. It may take a few minutes (usually around 10 minutes) for WSA to release the used resources.
Restart Windows Subsystem for Android
If VmmemWSA continues to use excessive memory even after changing the resource allocation settings, restarting WSA can help resolve the issue.
Step 1: Open the Windows Subsystem for Android app from the Start menu or by searching for it.
Step 2: In the WSA app, click on the 'Turn off' button next to the 'Turn off Windows Subsystem for Android' option.
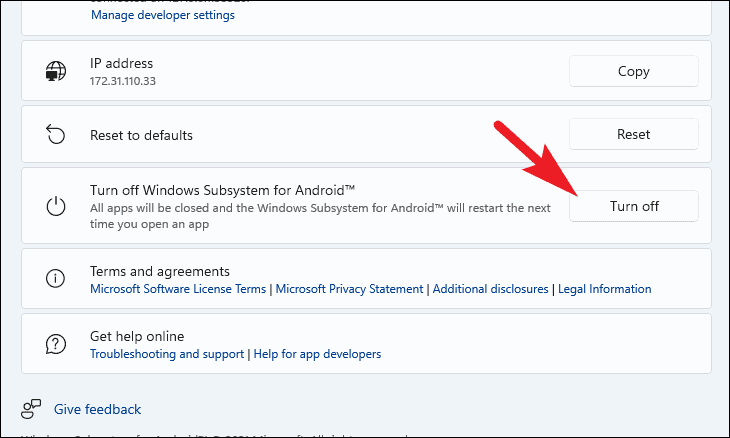
Step 3: Once WSA has been turned off, you can restart it by opening any Android app or relaunching the WSA app itself.
Close Unnecessary Android Apps
Running multiple or resource-intensive Android apps can increase the memory consumption of VmmemWSA. Closing any Android apps you're not actively using can help reduce memory usage.
Step 1: Close any open Android apps running on your PC. Make sure to exit the apps completely rather than minimizing them.
This will free up the memory that the apps were using. Remember that VmmemWSA shows the memory used by the entire WSA environment, so even one active app can keep the memory consumption high.
Update Windows Subsystem for Android
Keeping WSA updated ensures that you have the latest improvements and bug fixes, which might help with memory usage issues.
Step 1: Open the Microsoft Store on your Windows 11 PC.
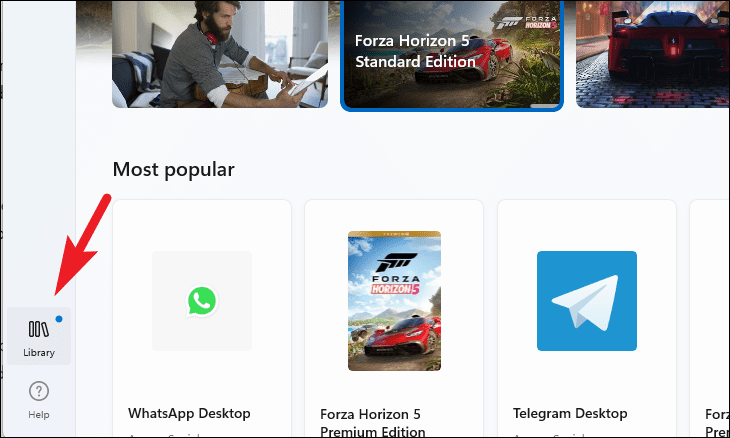
Step 2: In the Microsoft Store, click on the 'Library' option in the left sidebar to view installed apps and updates.
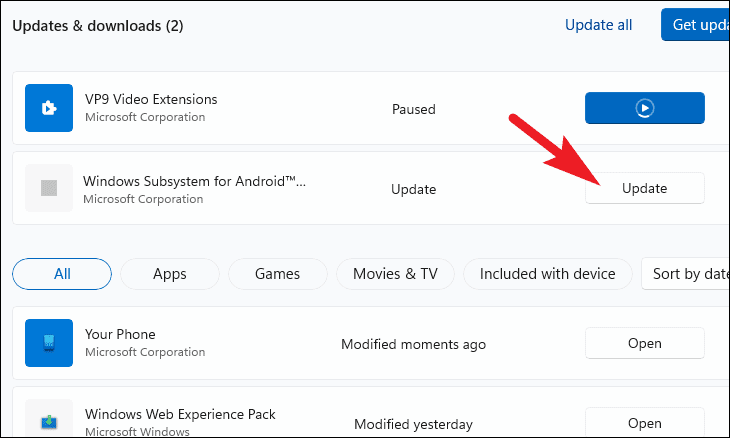
Step 3: Look for 'Windows Subsystem for Android' in the list of apps. If an update is available, click on 'Update' to install it.
Managing the memory usage of VmmemWSA ensures that your Windows 11 system runs smoothly while using Android apps. By adjusting WSA settings, closing unnecessary apps, and keeping your system updated, you can mitigate excessive memory consumption. As Microsoft phases out support for WSA, consider limiting your reliance on it to avoid potential issues in the future.

