Modules in Neverness to Everness are the small puzzle-shaped pieces that slot into a character’s Console alongside Cartridges to push stats and trigger Cartridge passives. They are not world drops or boss rewards. The only way to obtain them is through the Rewind system, a controlled gacha fed by Carrota coins farmed in the Rabbit Hole Anomaly Zone.
Quick answer: Farm Bronze, Silver, and Gold Carrota in the Rabbit Hole Anomaly Zone in New Herland District (unlocks at Hunter Level 10), then open Character Menu → Console → Rewind (bottom-left) and pull on Easy, Normal, or Hard for B, A, or S Modules.
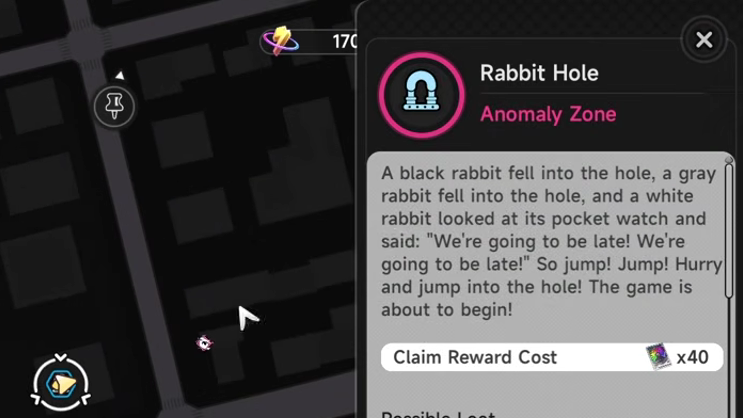
Unlock the Rabbit Hole Anomaly Zone
The Rabbit Hole sits on top of a high-rise in Cape Square, inside the New Herland District. You need to be Hunter Level 10 to enter the first difficulty. There is no faster shortcut. Push the main Episode quests and clear side content until you hit that level, then teleport to the Rabbit Hole point on the map.
Higher difficulties open at later Hunter Levels and produce better Carrota tiers, which is what determines the rarity of the Modules you can pull later.
| Rabbit Hole difficulty | Hunter Level required | Main Carrota drop |
|---|---|---|
| I (Easy) | 10 | Bronze Carrota |
| II (Normal) | 20 | Silver Carrota |
| III (Hard) | 30 | Gold Carrota |
Farm Carrota coins
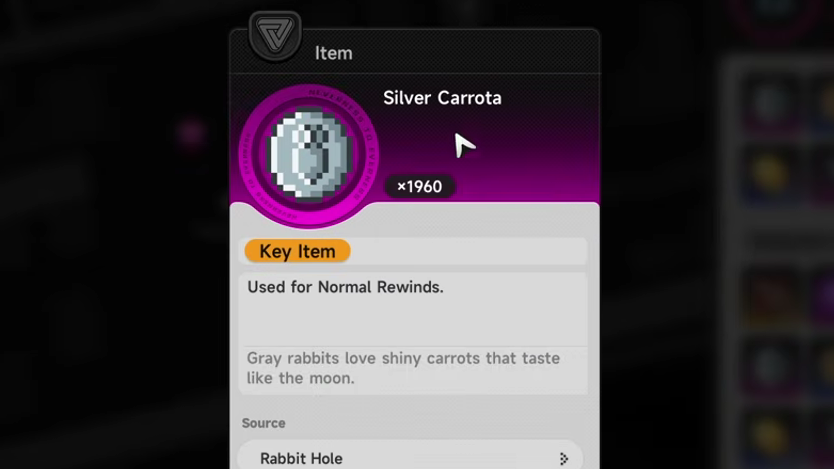
Carrotas are the only currency the Rewind console accepts, and they only drop inside the Rabbit Hole. Each run costs Character Pixels (roughly 40–80 per attempt) and gives a mix of Hunter EXP, Cartridges, Manhole upgrade materials, and Carrota coins.
Pick any of the available nodes inside the zone, such as Clock Tricks, Sculpture Gallery, Latitude Loom, Defend the Radish, Mental Map, or Night of the Rails. Different nodes drop different Cartridge sets, but Bronze, Silver, and Gold Carrota can roll across these stages depending on the difficulty you run. After clearing the dungeon, talk to the NPC at the entrance to claim your coins.
Open the Rewind console and pull Modules

Module rarity and difficulty mapping
| Rewind mode | Carrota required | Module rank | Hunter Level to unlock |
|---|---|---|---|
| Easy | Bronze | B (blue) | 0 |
| Normal | Silver | A (purple) | 20 |
| Hard | Gold | S (orange) | 30 |
S-rank Modules are the endgame target and only become available once you can run the highest Rabbit Hole tier for Gold Carrota. Until then, Normal-mode pulls are the strongest realistic source of usable gear.
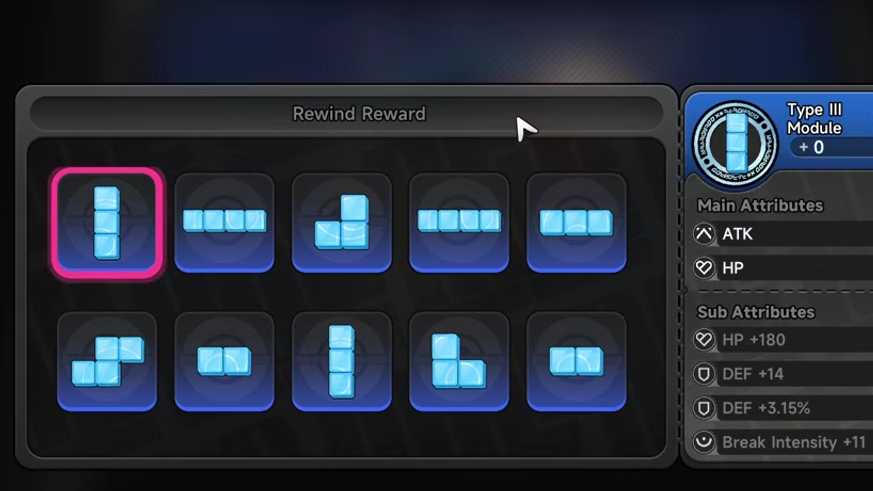
Targeting specific Module shapes
Modules come in Tetris-like shapes labeled Type II, Type III, and Type IV (referring to the number of cells they occupy). Cartridge passives unlock based on how many of a specific shape you fit into the Console, so shape matters as much as stats.
On Normal and Hard mode, Rewind lets you set up to eight pieces in a Module Selection list. Doing a 10-pull guarantees at least one piece from that selection. You can stack the same shape multiple times to bias the pool toward what you need, but each duplicate raises the pull cost by 5 Carrota per added copy. Be selective so you do not bleed currency.
How to know it worked
After a Rewind pull, the new Modules appear in your Module inventory inside the Console screen. Open a character’s Console layout, and you can drag them into the slots manually or use the auto-equip option. Cartridge passives that require a set number of matching Module shapes will activate once you place the right count, with the passive description showing as active on the Cartridge tooltip.
If a pull does not go through, the usual reasons are not enough Carrota of the required tier, the difficulty mode being locked behind a Hunter Level you have not reached, or the Rabbit Hole zone itself not yet unlocked at Hunter Level 10.
Module farming in NTE is a steady loop rather than a one-time unlock. Run Rabbit Hole at the highest difficulty you can clear, hoard Gold Carrota for S-rank Hard pulls once you hit Hunter Level 30, and use Module Selection to lock in the shapes your active Cartridge actually rewards. Everything else feeds back into the same Rewind console.