
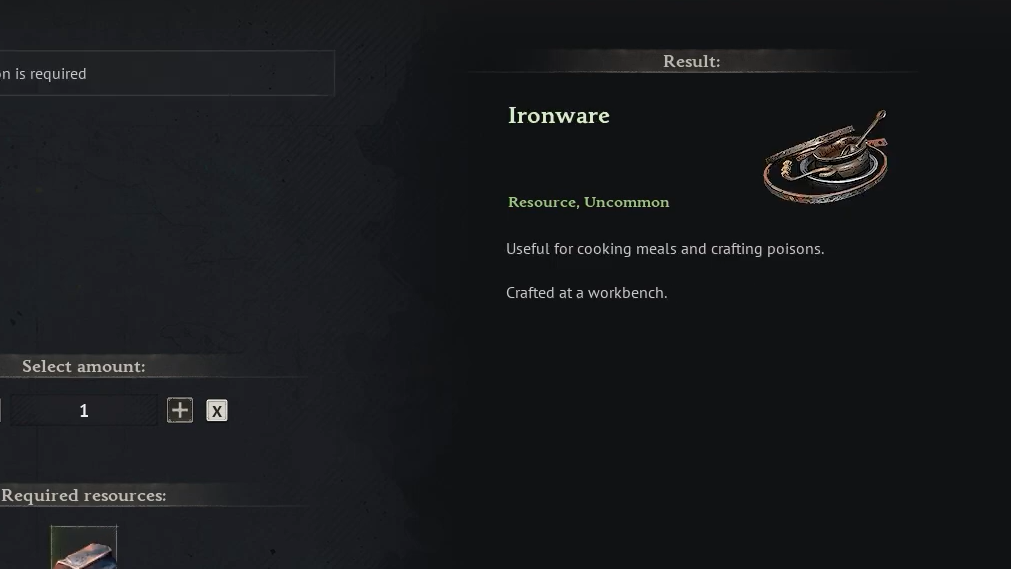
Ironware is a processed metal component in Windrose used for cooking meals, crafting poisons, building upgraded structures, and forging better tools. It doesn’t appear in your recipe list automatically — you need to hit two separate progression milestones before the Workbench will even show the option to craft it.
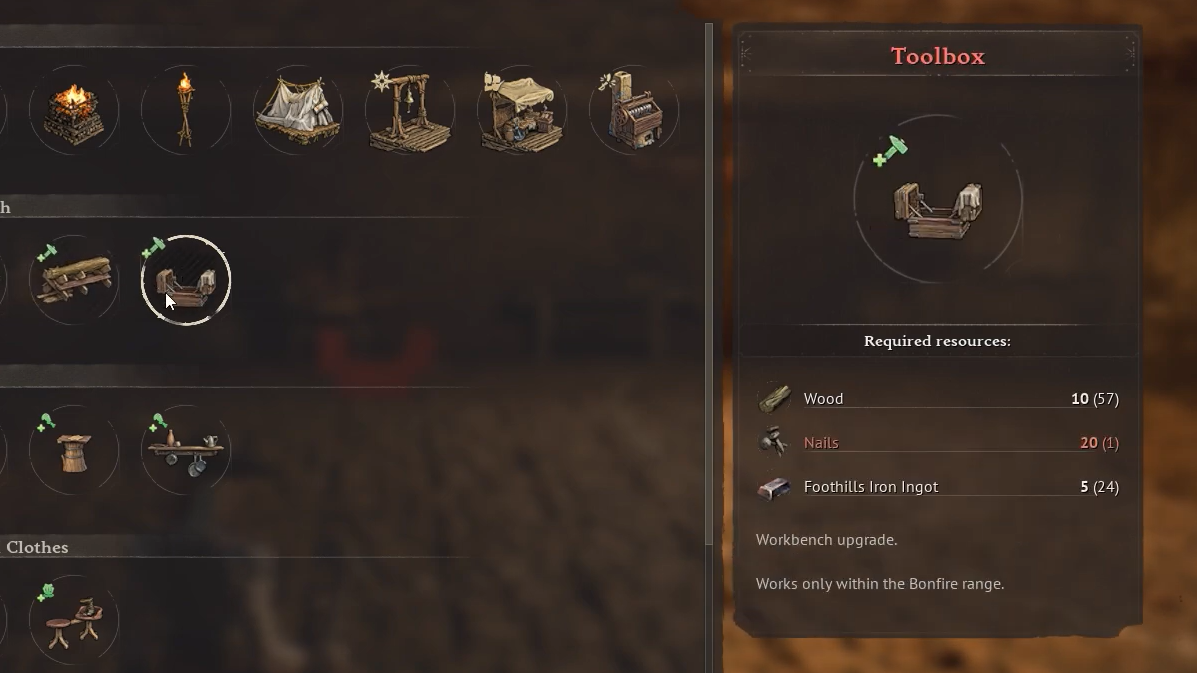
Quick answer: Upgrade your Workbench to Level 3 (by placing a Sawhorse and Toolbox nearby) and discover Foothills Iron Ore by mining it with a Copper Pickaxe in the Foothills biome. Once both conditions are met, the Ironware recipe unlocks at the Workbench and costs Iron Ingots to craft.
Why the Ironware recipe isn’t showing up
Two gates block the recipe. The first is your Workbench level. Ironware is tied to Workbench Level 3, which requires you to build and place both a Sawhorse and a Toolbox near your Workbench. These two additions raise the bench’s crafting tier automatically once they’re in range.
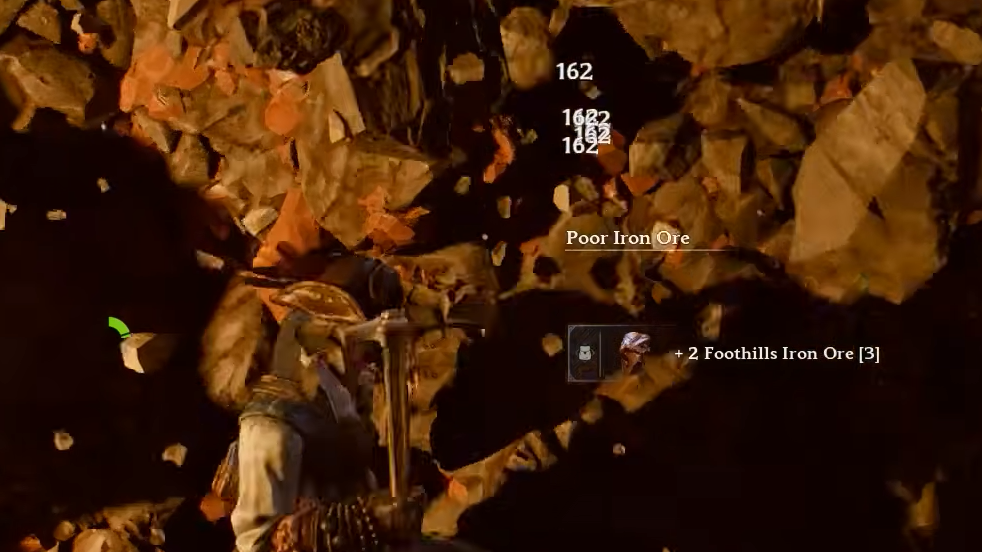
The second gate is a discovery requirement. Windrose locks many recipes behind first-time resource pickups. Until you physically mine Foothills Iron Ore at least once, the game won’t reveal any recipes that depend on Iron Ingots — including Ironware. A Stone Pickaxe cannot break iron deposits; you need at minimum a Copper Pickaxe.
Full resource chain from ore to Ironware
Ironware sits at the end of a small production pipeline. Every step feeds into the next, so it helps to gather materials in bulk before you start crafting.
Step 1: Mine Foothills Iron Ore
Travel to the Foothills biome and look for natural ore deposits — they show up on the map with a pickaxe icon. Equip a Copper Pickaxe and mine the nodes. Foothills Iron Ore is one of the earliest mid-game resources you’ll encounter, and you’ll want a healthy stockpile because the conversion ratio eats through it quickly.
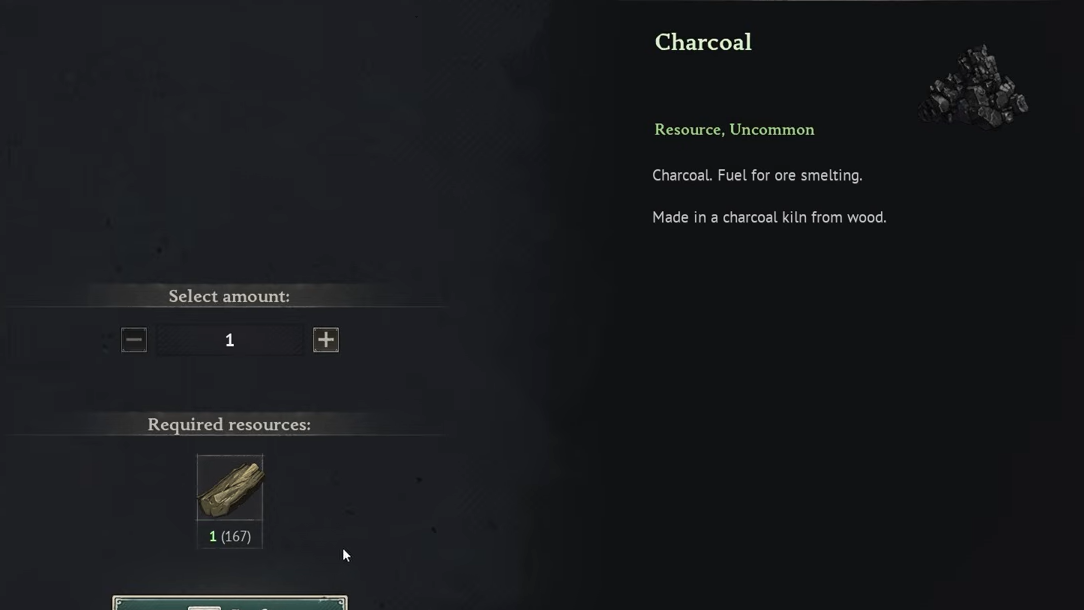
Step 2: Harvest Hardwood for Charcoal
Locate Divi-Divi trees on mid-tier islands and chop them with an Axe to collect Hardwood. Hardwood is the fuel source for Charcoal, which is a required ingredient for smelting Iron Ingots.

Step 3: Build a Charcoal Kiln and Smelting Furnace
If you haven’t already, construct a Charcoal Kiln (25 Wood, 20 Clay) and a Smelting Furnace (15 Clay, 30 Stone). Both stations are essential for the iron pipeline and will remain useful well into late-game crafting.
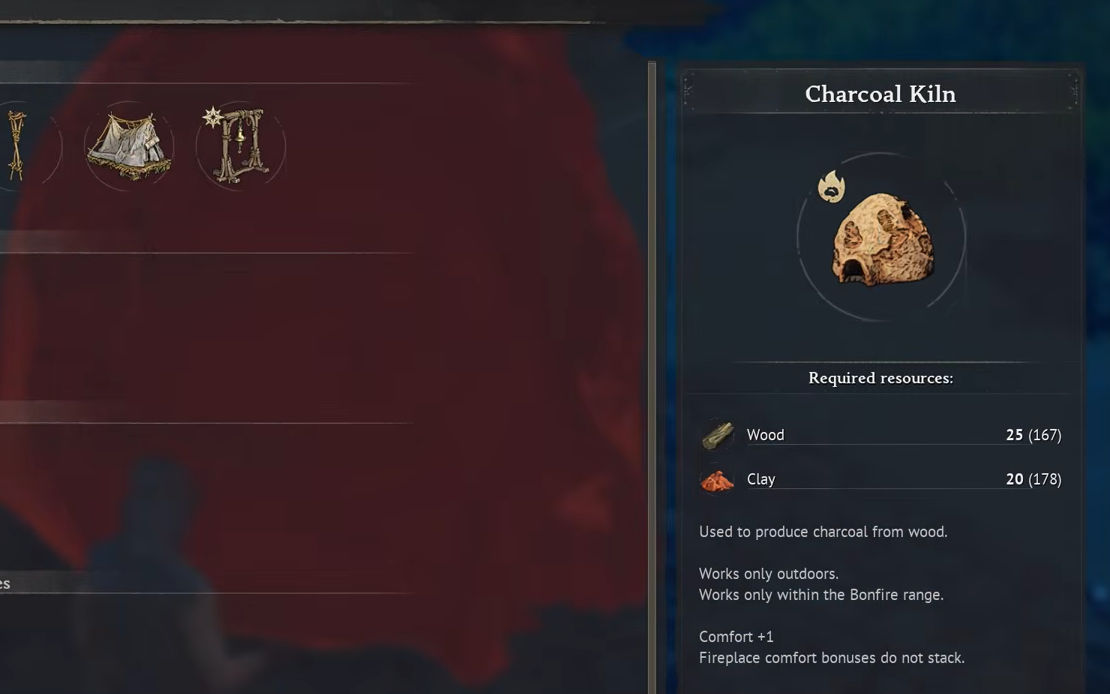
Step 4: Produce Charcoal
Place Hardwood into the Charcoal Kiln. The kiln converts it at a 1:2 ratio — one Hardwood yields two Charcoal. Stock up, because every Iron Ingot requires one Charcoal.
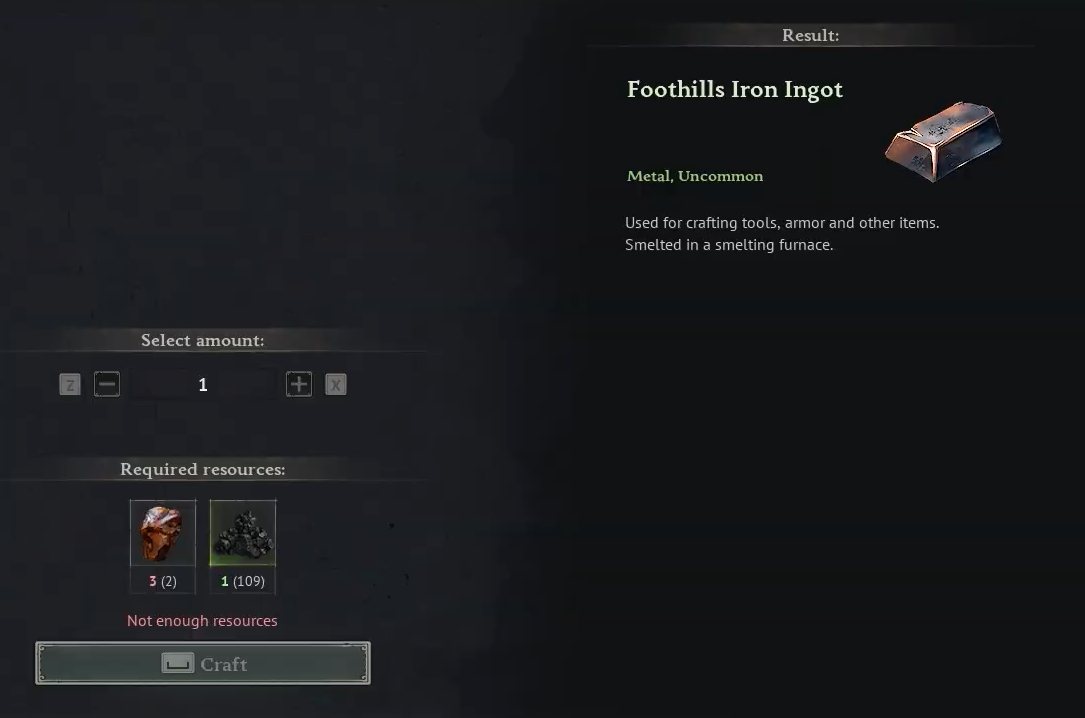
Step 5: Smelt Iron Ingots
Load the Smelting Furnace with 3 Foothills Iron Ore and 1 Charcoal. After roughly 30 seconds, you’ll receive one Iron Ingot. Repeat as needed — Ironware and many other mid-game recipes consume multiple ingots.
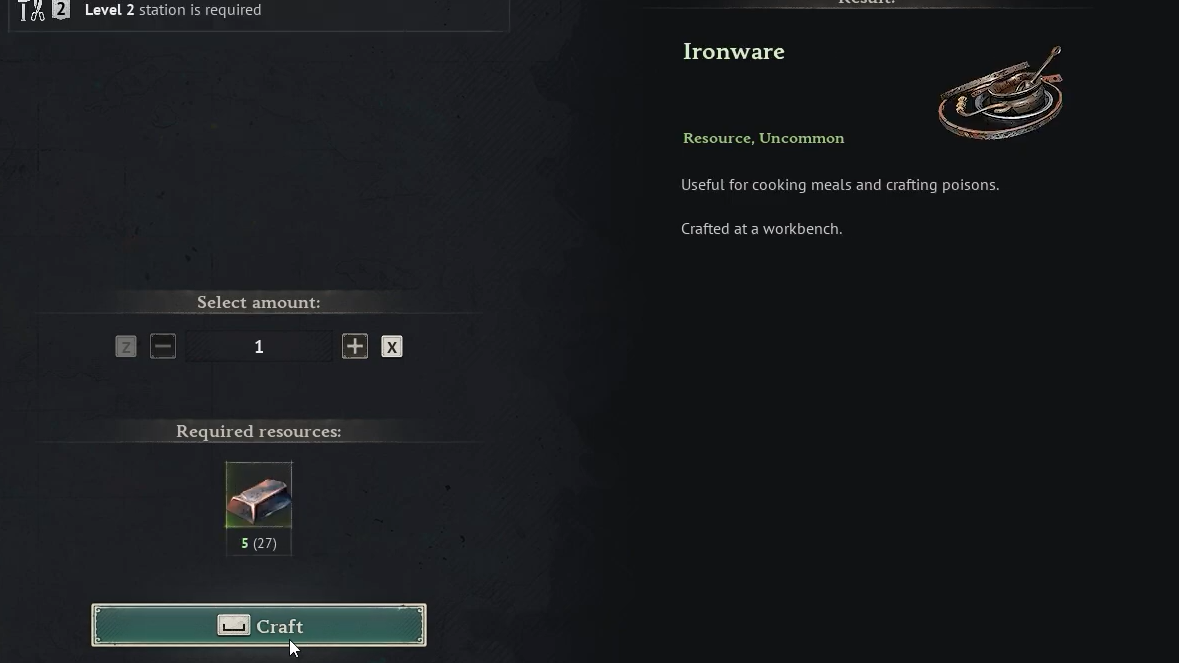
Step 6: Craft Ironware at the Workbench
Open your Level 3 Workbench and select the Ironware recipe. The crafting cost is paid in Iron Ingots. Once complete, Ironware appears in your inventory, ready for use in downstream recipes.
Crafting cost summary
| Station | Input | Output |
|---|---|---|
| Charcoal Kiln | 1 Hardwood | 2 Charcoal |
| Smelting Furnace | 3 Foothills Iron Ore + 1 Charcoal | 1 Iron Ingot |
| Workbench (Lv 3) | Iron Ingot(s) | Ironware |
What Ironware is used for
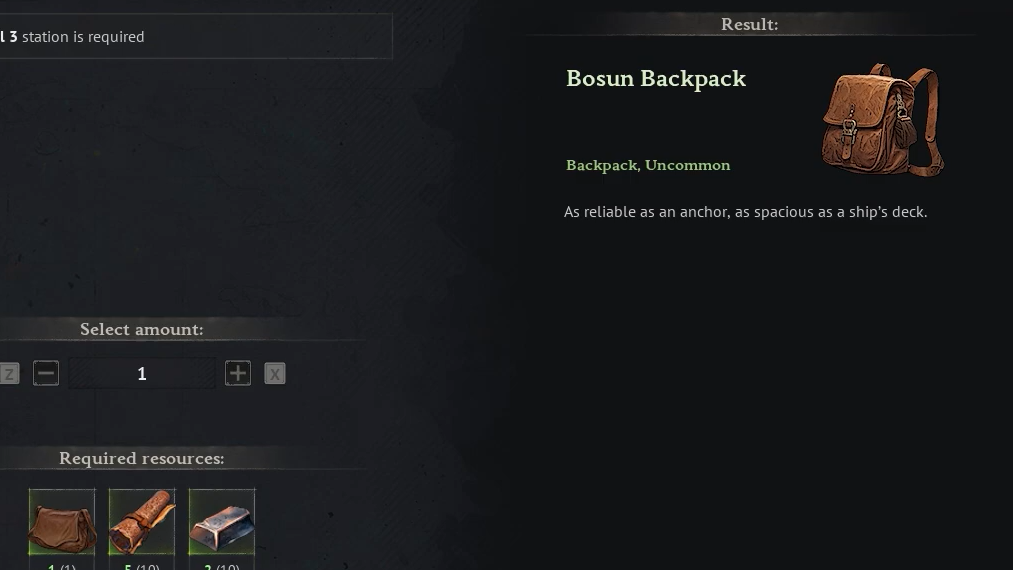
Ironware feeds into several important crafting paths. Its in-game description flags it as useful for cooking meals and crafting poisons, but it also appears in structural and tool recipes. Iron Ingots themselves unlock additional items like Nails, the Bosun Backpack, the Iron Axe, and buildings such as the Toolbox, Jewellery Table, and Large Smelting Furnace — so maintaining a steady supply of both ingots and Ironware keeps your progression moving.
Common issues and how to fix them
| Problem | Cause | Fix |
|---|---|---|
| Ironware recipe missing from Workbench | Workbench is below Level 3, or you haven’t discovered Iron Ore yet | Build a Sawhorse and Toolbox near the Workbench; mine Foothills Iron Ore at least once with a Copper Pickaxe |
| Can’t mine Iron Ore deposits | Using a Stone Pickaxe | Upgrade to a Copper Pickaxe first |
| No Charcoal available | Charcoal Kiln not built, or using regular Wood instead of Hardwood | Build a Charcoal Kiln and feed it Hardwood from Divi-Divi trees |
Once you’ve set up the Charcoal Kiln and Smelting Furnace, the entire Ironware pipeline runs smoothly and scales well. Stockpile Foothills Iron Ore on each trip to the Foothills biome, keep your Charcoal Kiln fed, and you’ll have a reliable supply of Ironware for every mid-game recipe that calls for it.