Attending meetings or classes from the confines of your home is the new normal these days. And Zoom has played a huge part in helping people adapt. It’s easy to use, and even newbies have no trouble figuring it out. It’s a no brainer that it’s ahead in the race among the video conferencing apps.
But sometimes it can cause much distress to the users. And the problem reaches the point where people are even unable to join the meeting. What are we talking about? The CPU usage issue in Zoom that has become the bane of many users’ existence.
What is CPU Usage on Zoom
Zoom doesn’t normally hog many resources on your computer. It’s one of the reasons it fares so much better than it’s competitors. But some users have been experiencing really bad CPU usage where Zoom sometimes ends up using 100% of the CPU. For others, it displays the warning that says, “Your CPU usage is affecting meeting quality.”
The latter problem is mostly predominant when users are using a Chromebook or an M3 slate from Pixel. The problem intensifies especially when the user is speaking – the video stream is slowed down or starts glitching for everyone in the meeting, and the warning message appears.
But the issue isn’t limited to just Chromebook users. Many Windows, Mac, and Ubuntu users have also experienced the CPU usage issue to the point where either they cannot use their laptop to perform any other tasks, or their laptop becomes completely unresponsive.
How to Fix the Zoom CPU usage issue
The CPU usage issue is a serious one, something that makes having orderly video meetings very challenging. Now the CPU usage issue is a tricky one, but there are some things you can try to fix it.
Special Tips for Chromebook Users
Chromebook users should first try these solutions when faced with the CPU usage warning message before moving on to others.
Use the Tablet in Desktop mode
Chromebook users mostly experience the problem when they have the keyboard turned off and are using it in the tablet mode. So when you’re having Zoom meetings, try to use your Chromebook in the desktop mode as much as you can.
Now, this is far from the perfect solution, given that not everyone has the keyboard as it’s quite an investment. But for users who do own a keyboard for their Chromebook, this is your best bet to avoid this issue.
Use the Android app instead of the Chrome web extension
Chromebook users have long struggled between choosing the web version or Android version of any app, as both can prove quite unstable due to the lack of maintenance there is for Chromebook apps.
But in this particular instance, the Android app is a lot more stable than the chrome extension, and it can help solve the issue of CPU usage for Zoom on your Chromebook.
Reduce Usage of Other Apps
Now it might seem very obvious and not quite “solution-like” but it can be helpful nonetheless. It’s also possible that it isn’t Zoom, but some other app that’s gobbling up your computer’s resources and creating the troubles in your Zoom meeting. When faced with the CPU usage warning, or you generally feel your computer overheating and the fans overworking, reducing the load on the computer will help you get through the meeting.
Open the Task Manager for Windows (or Activity Monitor app for Mac), and go to the CPU list, and sort the list in descending order. See what apps are using the most CPU and if you don’t need them during the meeting, shut them down.
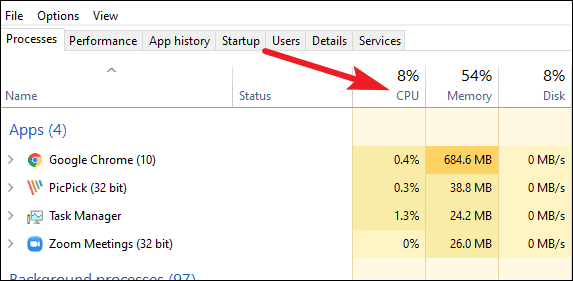
You should also avoid other high-bandwidth activities like uploading and downloading large files, streaming video, or synchronizing cloud storage during your Zoom call if possible.
Try these Optimization Tips
When it’s not feasible to close other apps or avoid other activities while attending the Zoom meeting, you can try some of these tips to optimize Zoom instead. They can help you achieve around 30-40% reduction in CPU usage.
Video settings optimization
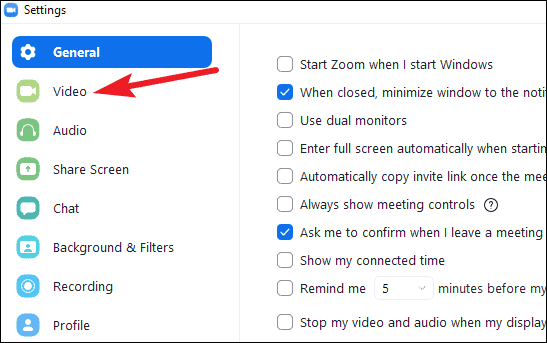
Use these video settings whenever possible to reduce Zoom’s CPU usage. Open Zoom settings and go to ‘Video’ from the navigation menu on the left.
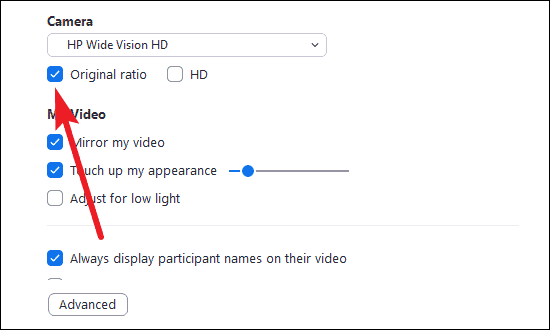
Then, click the box for the ‘Original ratio’ to use it. If your settings display 16:9 as the selected aspect ratio, even then change it to the ‘Original ratio’ setting.
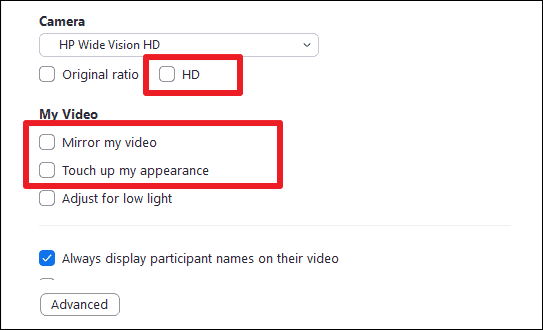
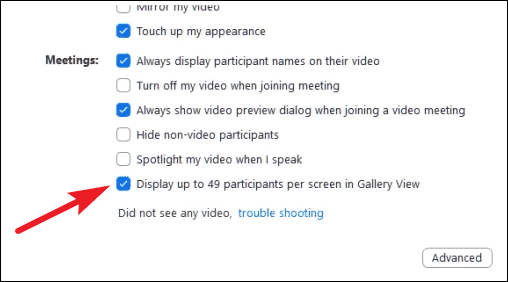
Now, uncheck all of these settings if you were using the previously:
- Disable ‘HD’
- Disable ‘Mirror my video’
- Disable ‘Touch up my Appearance’
Also, if there are a lot of participants in the meeting, disable the ‘Display up to 49 participants per screen in Gallery view’ as it can be very taxing on the system.
Virtual Background
Virtual background can be really fun to have, but it can also contribute to increased CPU usage. Turning off the Virtual background can help control it. There are times when you need the virtual background for good reason, but if it comes down to the choice between having a virtual background, or being in the meeting at all, the choice seems obvious.
Go to ‘Background & Filters’ from the navigation menu on the left in Zoom settings.
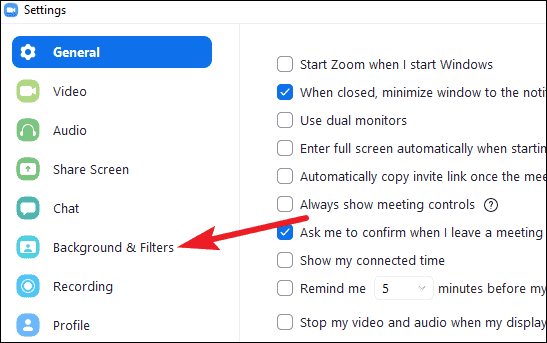
Then, select ‘None’ under the Virtual Background category.

Use Speaker View
When you’re in the call and trying to reduce the CPU usage, always use speaker view instead of the Gallery view, and you’ll notice a considerable improvement in your PC’s performance.
Screen Sharing optimization
Being able to share your screen when meeting remotely is a blessing. But when your CPU usage is already high, a screen sharing session can be too heavy. So, to reduce the load on your CPU, open the settings and go to ‘Share screen’ from the navigation menu on the left.
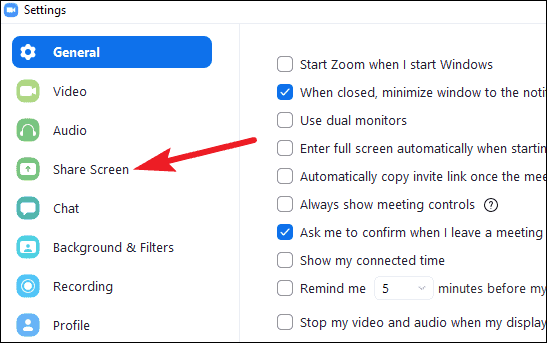
Then, go to ‘Advanced’ settings.
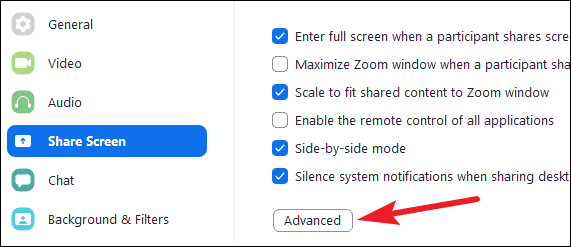
Check the box for ‘Limit your screen to 10 frames per second’, then click on ’10’ and select ‘4’ from the drop-down menu.
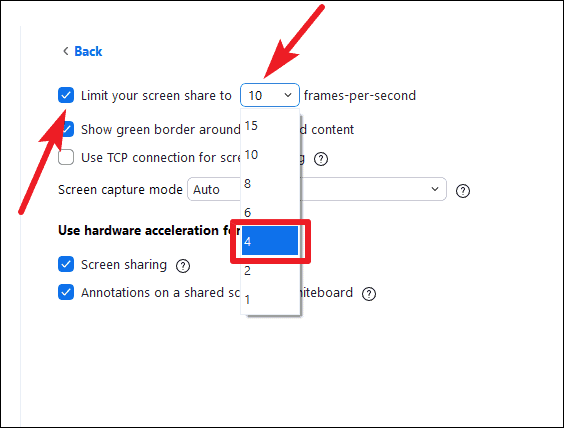
4 fps might seem too low, but it’s more than enough for any demo.
The issue of high CPU usage can be very problematic, to the point where it even makes having meetings nearly impossible. But these fixes are bound to provide some relief to you, even if they can’t fix the problem entirely.

