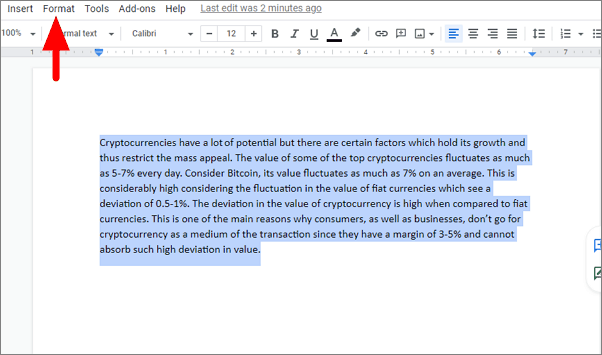
A hanging indent is essential for formatting bibliographies, citations, and reference lists in your documents. It aligns the first line of a paragraph to the left margin while indenting the subsequent lines, enhancing the document’s readability and professionalism.
Using the format menu
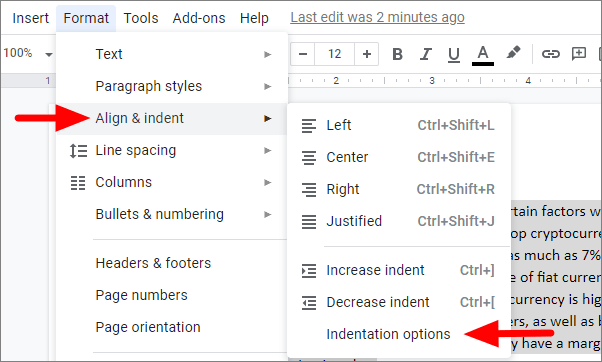
Indentation options dialog box, find the Special indent section. Click the drop-down menu labeled None and choose Hanging.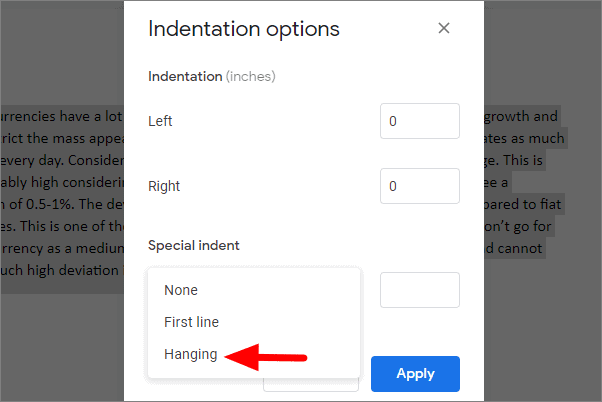
By field. The default is 0.5 inches, but you can adjust it according to your preference.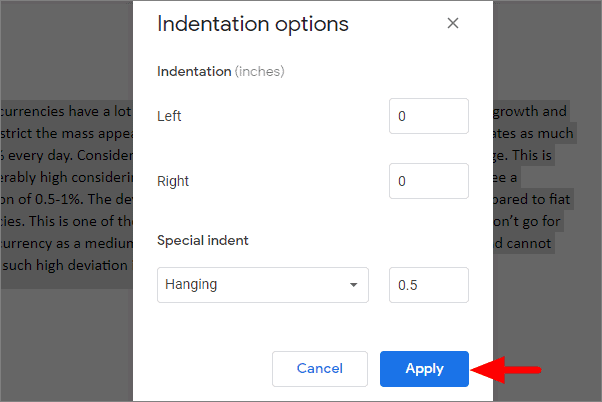
The selected paragraph now has a hanging indent, with all lines except the first indented by your specified amount.
Using indent markers
View in the menu bar and ensure that Show ruler is checked.First Line Indent marker, and the downward-pointing triangle below it is the Left Indent marker.Left Indent marker (the triangle) to the right, setting the desired indent for all lines.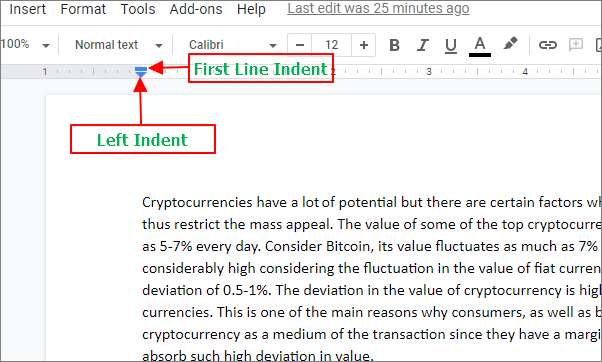
First Line Indent marker (the rectangle) back to the left margin. This will move only the first line back, creating a hanging indent.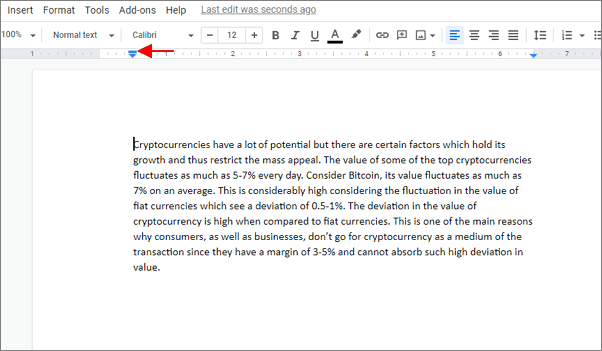
The paragraph now has a hanging indent, with the first line aligned to the left margin and the subsequent lines indented.
Applying hanging indents in Google Docs enhances the formatting of your documents, especially when dealing with citations and bibliographies. Both methods provide quick and easy ways to apply this formatting style, allowing your documents to meet professional and academic standards.