Sharing your screen during a Microsoft Teams meeting enhances collaboration by allowing you to present documents, demonstrate software, or guide participants through a presentation in real-time. In this guide, we’ll walk you through the steps to set up a meeting and effectively share your screen in Microsoft Teams.
Setting up a meeting in Microsoft Teams
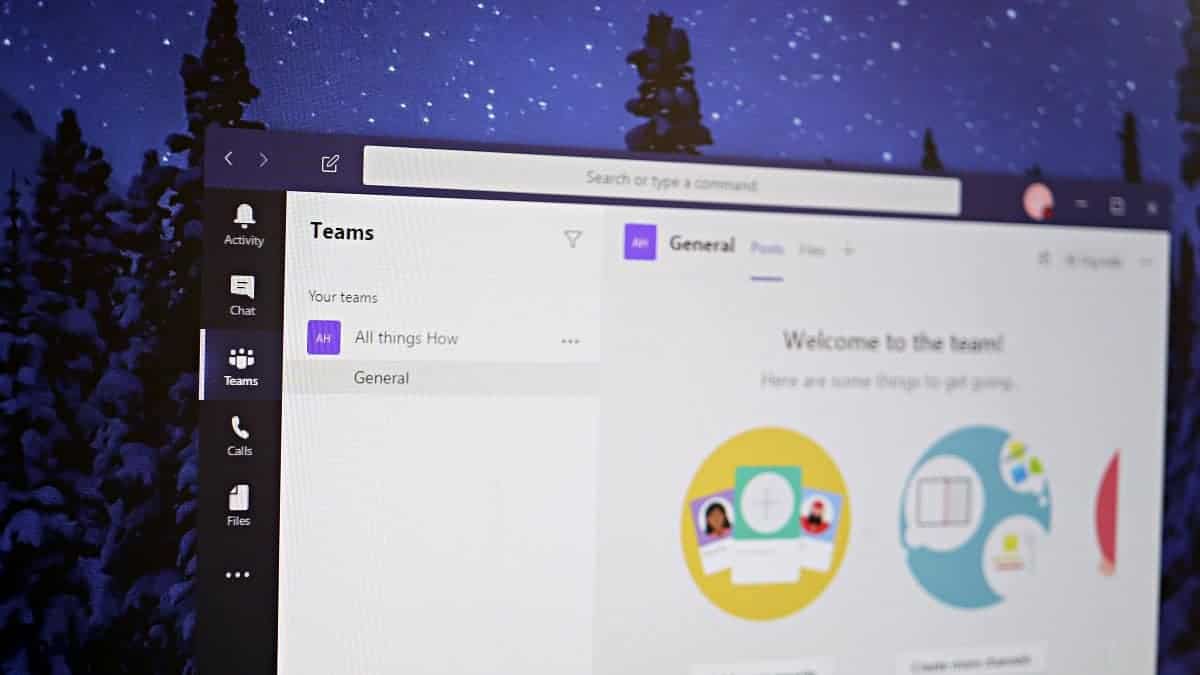
To begin, launch the Microsoft Teams application on your computer, or open your web browser and navigate to teams.microsoft.com. Sign in with your Microsoft account credentials.
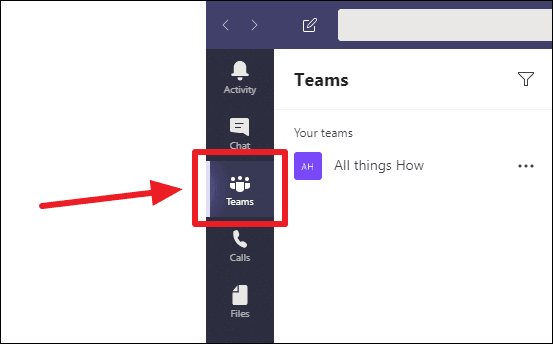
Once you’re signed in, locate and click on the ‘Teams’ option in the navigation panel on the left side of the screen.
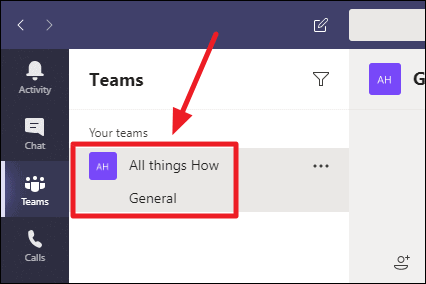
Next, from the ‘Your teams’ section, select the team with which you want to hold the meeting. If you only have one team, it will be automatically selected when you open the ‘Teams’ menu.
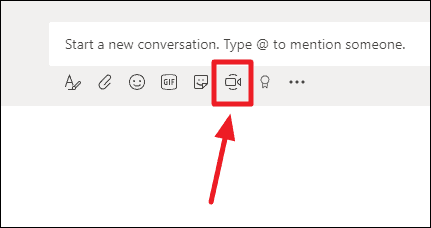
To start a meeting with your selected team, click on the ‘Meet now’ button located at the bottom of the screen in the right pane. This button is situated next to the media controls below the ‘Start a new conversation…’ input box.
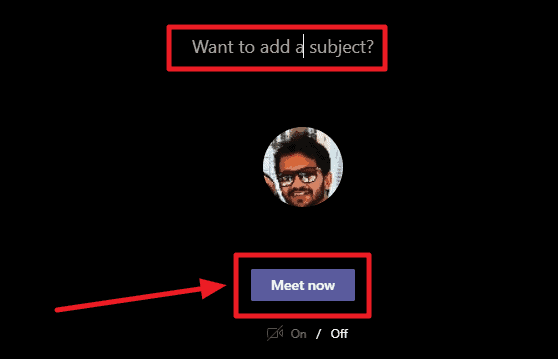
In the window that appears, enter a subject for your meeting to inform participants about the purpose, and then click the ‘Meet now’ button to initiate the meeting.
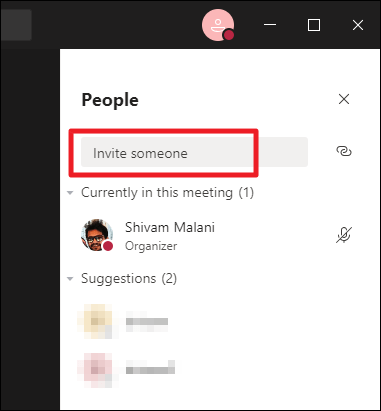
Once the meeting has started, you can invite participants by selecting them from the panel on the right side of the screen.
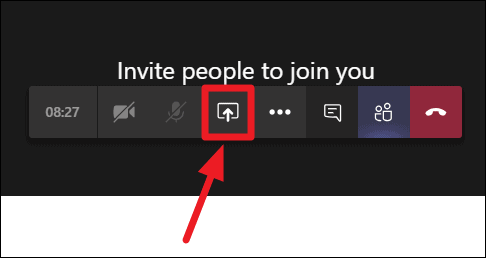
After your team members have joined and you’ve introduced the purpose of the meeting, you’re ready to share your screen to collaborate more effectively or conduct a training session.
Sharing your screen in a Microsoft Teams meeting
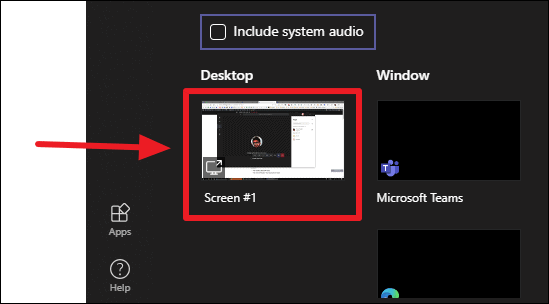
Choosing the ‘Desktop’ option allows you to share your entire screen with the participants. If you have multiple monitors connected, they will be labeled as ‘Screen #1’, ‘Screen #2’, etc. Select the specific screen you wish to share.
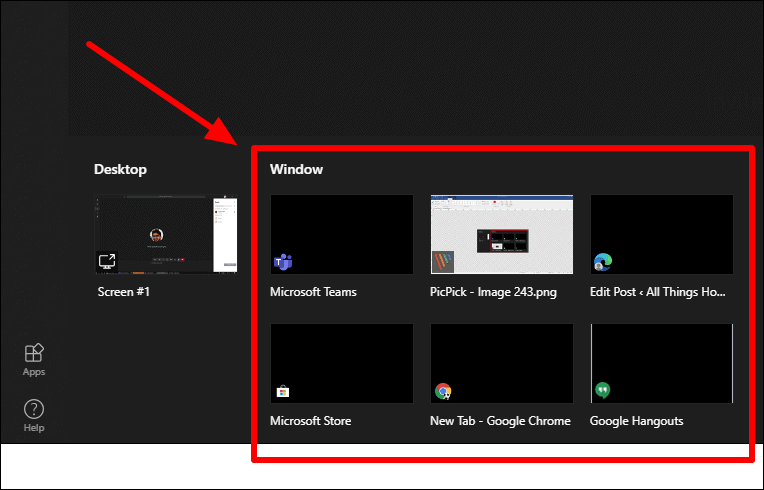
Note: If you open a new application or browser tab after accessing the ‘Share’ menu, you will need to close and reopen the sharing menu to refresh the list of available windows.
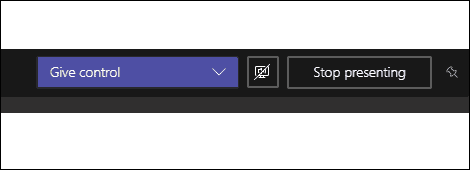
When you select a window to share, it will open and be outlined with a red border, indicating that it is currently being shared with the meeting participants. The content you’re sharing will replace your video feed, so participants will see your shared screen instead of your webcam video.
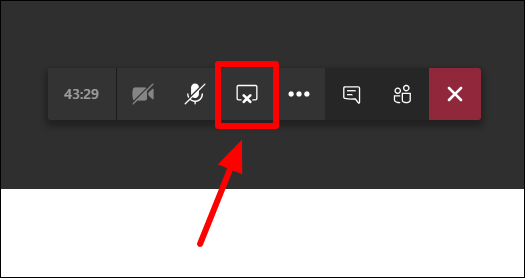
Note that this toolbar is only available when using the Microsoft Teams desktop application. If you’re using Teams in a web browser, this feature is not accessible.
Although Microsoft Teams may initially seem complex compared to other meeting platforms, once you become familiar with its features, sharing your screen becomes a seamless and integral part of your online meetings and collaboration efforts.