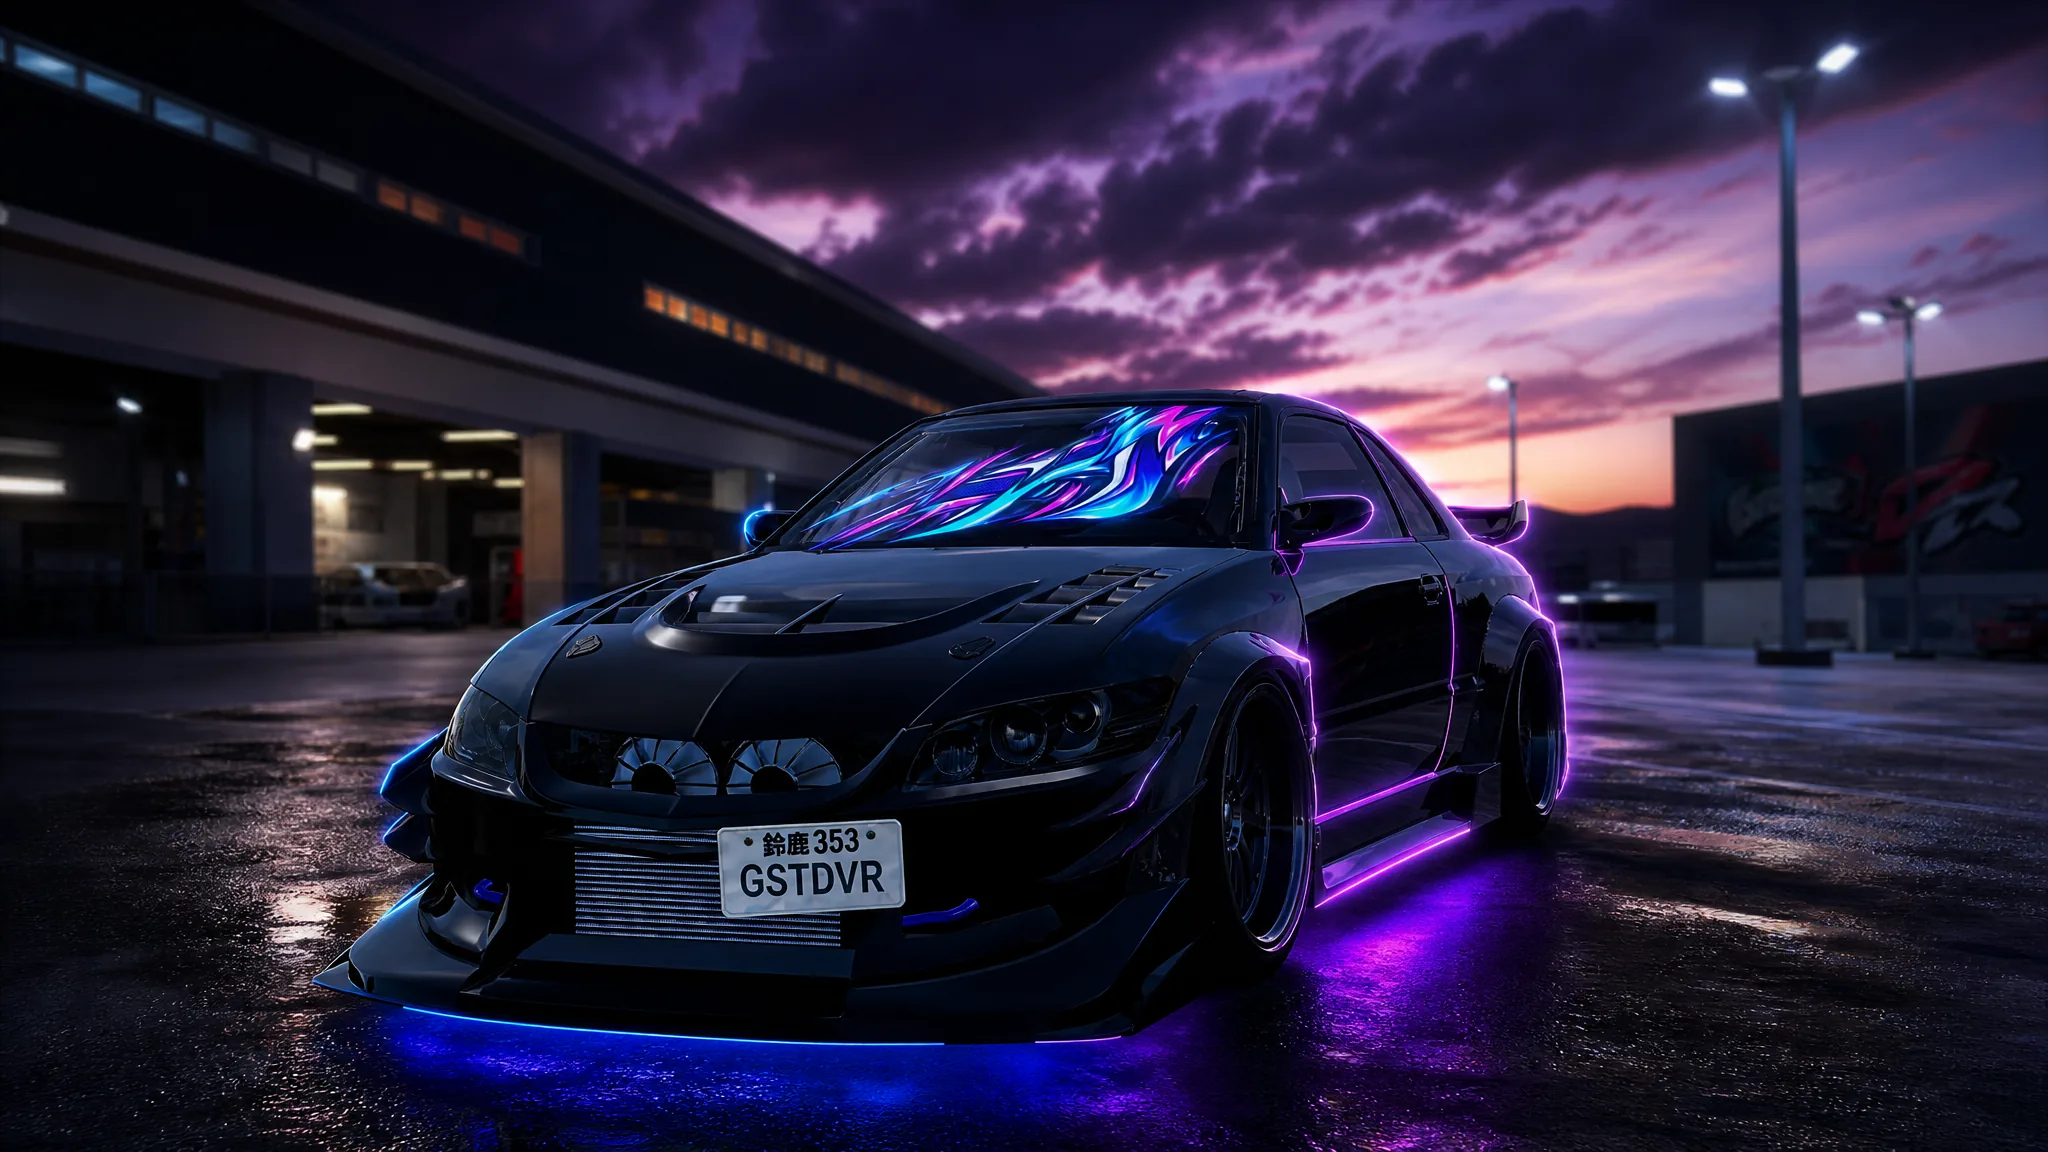
Decals in Ghost Driver are not unlocked, bought, or earned. They are images you bring in yourself, using a Roblox Asset ID that the game reads and paints onto a specific pane of glass on your car. Any image already sitting in your Roblox creations can be used, and so can any public decal ID a friend hands you.
Quick answer: Upload a PNG to the Roblox Creator Dashboard under Creations > Development Items > Decals, copy the Asset ID from the asset’s three-dot menu, then in Ghost Driver open Customization > Cosmetic > Window Decals, paste the ID into a window slot, and hit Save Settings.
What the image file needs before you upload it
The game does not edit your artwork. Whatever you upload is what stretches across the window, so the file itself decides whether the result looks like a sponsor sticker or a smeared square. You can draw it yourself, export it from any image editor, or generate one with an AI image tool — a prompt as blunt as “make a vehicle car decal for my Roblox car make it look cool” is enough to get something usable.
| Requirement | Detail |
|---|---|
| File types | .png, .jpg, .tga, .bmp |
| Maximum file size | 20 MB |
| Background | PNG with transparency, or the whole rectangle shows on the glass |
| Resolution | 512×512 or higher, otherwise the decal looks blurry when scaled up |
| Framing | Subject centred, bold lines, high contrast against tinted glass |
| Content | Must pass Roblox moderation and follow the Community Standards |
Upload the image and copy the Asset ID
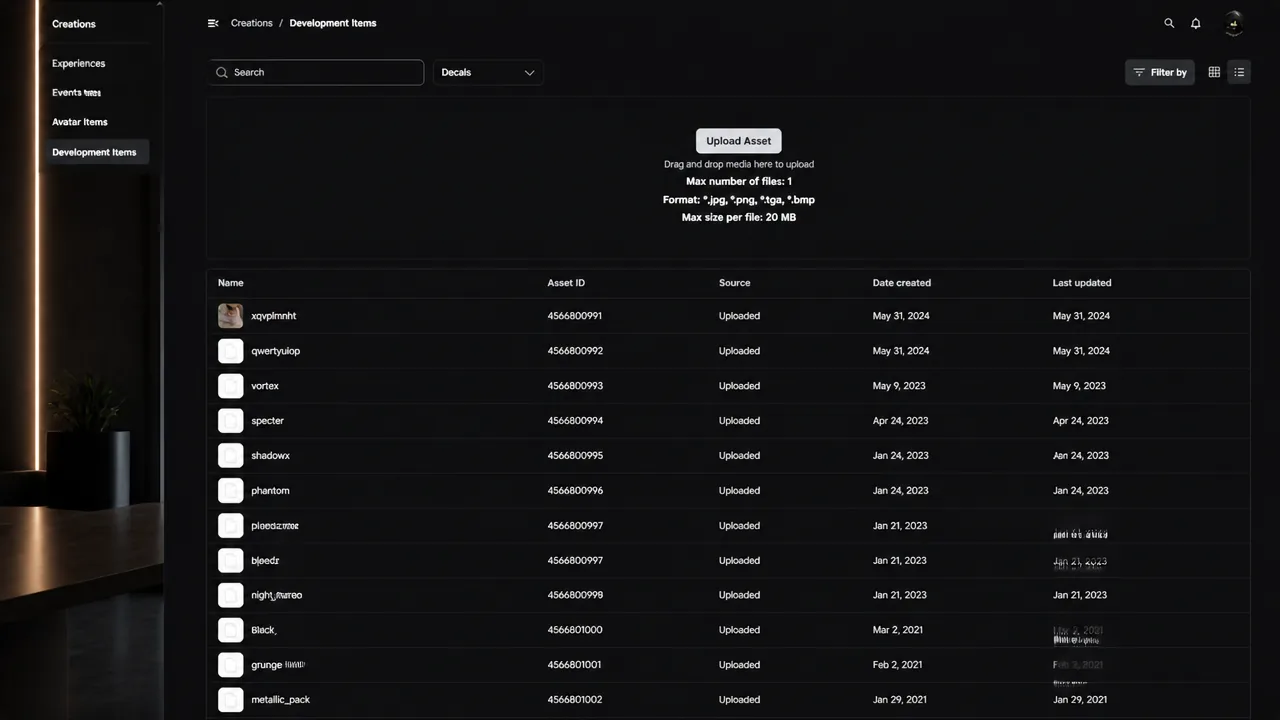
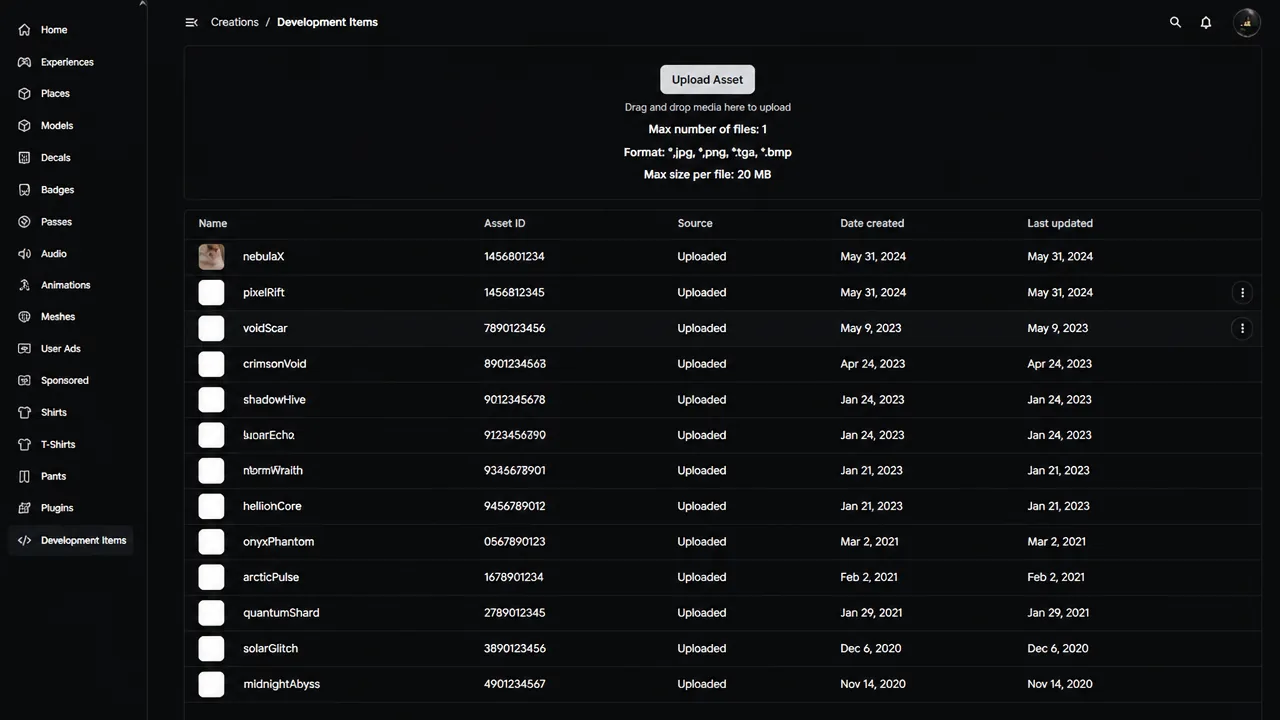
Tip: If someone shares a decal ID publicly and the asset is set to public, you can skip the upload entirely and paste their number straight into the game.
Paste the ID into the Window Decals menu in Ghost Driver
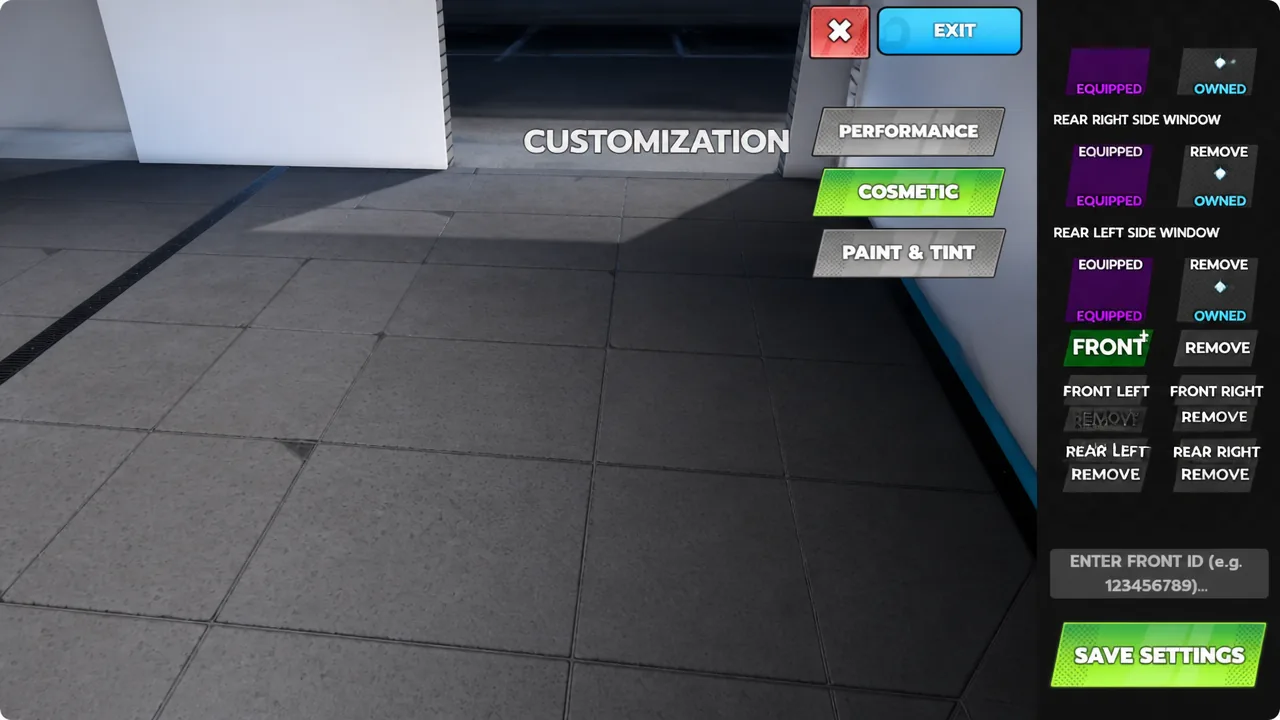
Window decal slots and adjustment options
Decals in Ghost Driver are restricted to glass. There is no body-panel slot, so a livery-style graphic has to live on a window. Six panes can each carry a different ID at the same time.
| Slot | Menu label |
|---|---|
| Front | FRONT WINDSHIELD DECAL |
| Rear | REAR WINDOW DECAL |
| Front left | FRONT LEFT SIDE WINDOW DECAL |
| Front right | FRONT RIGHT SIDE WINDOW DECAL |
| Rear left | REAR LEFT SIDE WINDOW DECAL |
| Rear right | REAR RIGHT SIDE WINDOW DECAL |
Each slot carries its own set of controls, so a decal that looks stretched on the rear glass can be fixed without disturbing the windshield.
| Control | What it changes |
|---|---|
| Rotation | Spins the image on the glass |
| Transparency | Fades the decal so the interior stays visible |
| X / Y Position Offset | Slides the image sideways or up and down |
| X / Y Size Offset | Stretches or shrinks the image on each axis |
| Color | Tints the decal |
| Color Brightness | Lightens or darkens that tint |
How to confirm the decal actually applied
The slot flips to EQUIPPED once a valid ID is loaded, and the image appears on the car in the preview immediately. If you clear the field, the label switches to REMOVED. Press Save Settings and then drive out of the garage — the decal should still be on the glass in the open world, which is the real test that it stuck.
Weather and lighting can hide a dark decal on tinted glass. Switching the weather to clear daytime in Settings makes it far easier to check alignment and colour before you commit to a design.
Why a decal ID does not show up
| Symptom | Cause and fix |
|---|---|
| Nothing appears on the window | The page URL was copied instead of the Asset ID, or the upload is still awaiting moderation. Re-copy the ID from the three-dot menu and wait for approval. |
| A solid rectangle covers the glass | The file has no transparency. Re-export as a PNG with the alpha channel enabled. |
| The image is blurry | The source resolution is too low for the area it is stretched across. Upload a larger version. |
| The decal is oversized or off-centre | Use the size and position offset sliders, or resize and re-upload the image. |
| Someone else’s ID refuses to load | The asset is not set to public. |
Because every slot is independent, the fastest way to settle on a look is to test one design on the rear window first, adjust the offsets there, and only then copy the same ID across to the side glass. Different car models have different window shapes, so a graphic that fits a sedan’s rear pane may need fresh offsets on a coupe.