

Rockstar has rebuilt the heads-up display for GTA 6 from the corners inward. The bottom-left arc that tracked health and armor in GTA 5 is gone, replaced by slim horizontal bars in the opposite corner, and most of the screen stays empty until the game decides you need information. Everything described here comes from pre-release footage captured on PS5, so positions and labels could still shift before launch.
Quick answer: Health and Focus bars live in the top-left, ammo and wanted stars in the top-right, and the minimap in the bottom-left. Everything else — button prompts, warning icons, notifications — fades in only when the situation calls for it and disappears again.
GTA 6 HUD layout: What sits in each corner
The screen is divided into four zones, and each one owns a specific job. Learning which corner to glance at matters more than memorizing individual icons, because the same corner always carries the same category of information.
| Screen position | What appears there |
|---|---|
| Top-left | Health, Focus and stamina meters, plus oxygen while swimming or diving |
| Top-right | Ammo count, current weapon icon, wanted stars and police response icons |
| Bottom-left | Minimap with GPS route and distance readout |
| Bottom-center and right edge | Contextual button prompts and stacked action verbs |
Health, Focus and stamina bars in the top-left
The meters stack as thin horizontal bars rather than the curved segments of the last game. The pink bar with a heart icon is health, and it carries a small divider partway along it. Below that sits a purple bar marked with an eye icon, which is Focus — a resource tied to heightened awareness and precision, topped up through side activities.
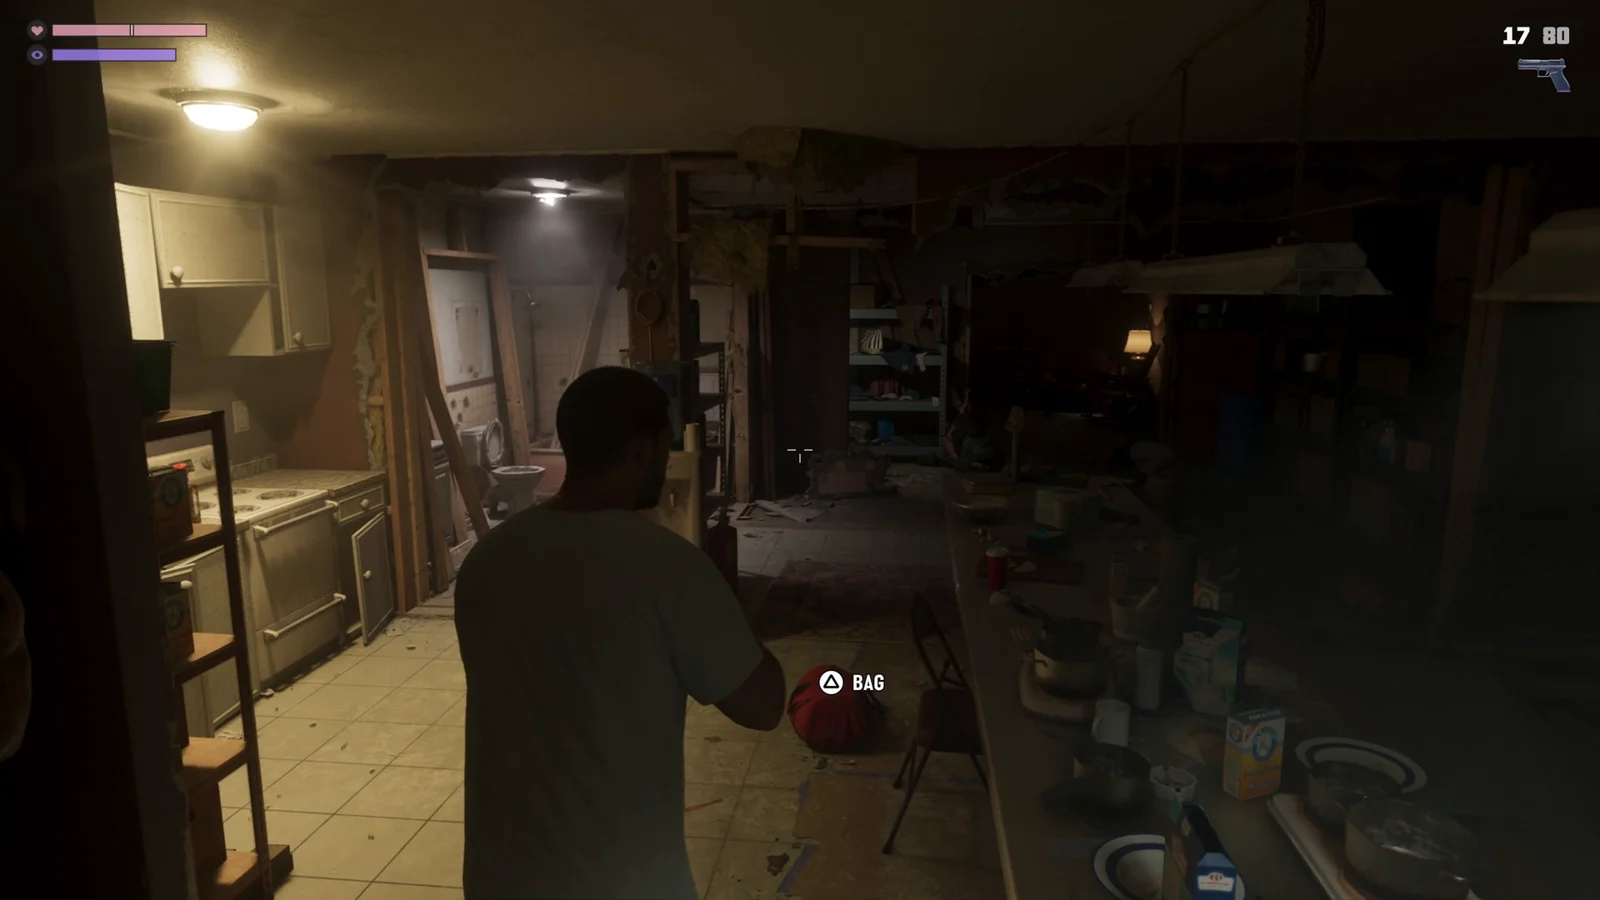
A third bar with a bolt icon shows up in some scenes and tracks stamina, draining as you sprint, swim or otherwise exert yourself. Water changes the stack again. Swimming and diving add green oxygen meters, one marked with lungs for breath-holding and a separate O2 gauge while scuba diving.
None of these bars are permanently on screen. Cruise around with no threat nearby and the meters vanish entirely, leaving just the minimap.
Ammo counter and weapon icon
Your loaded rounds and reserve ammo sit in the top-right above a silhouette of the equipped weapon — 17/80 next to a pistol, 10/300 next to a rifle. The aiming reticle is a simple set of white brackets, and a red X flashes over a target to confirm a hit landed. The weapon wheel itself is flagged by an eight-box icon and pulls up your full loadout without dropping you out of the action.
Wanted stars and the police response icons
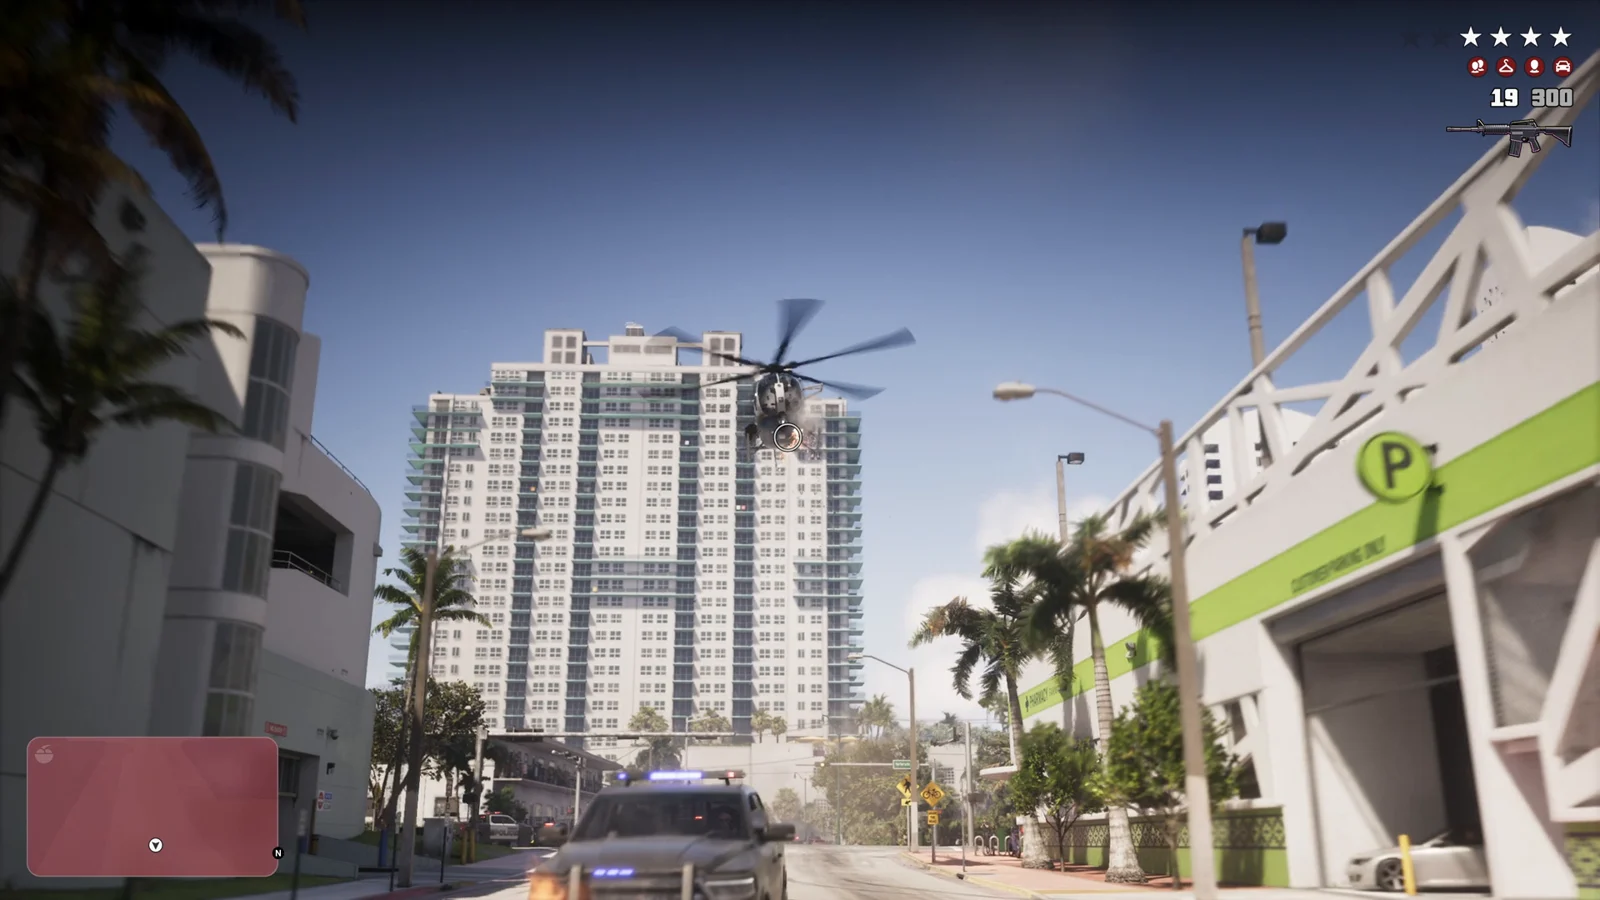
The wanted level is a row of stars in the top-right, and more lit stars still means a harder police response. The genuinely new part sits directly underneath. A small strip of icons shows which units are actively hunting you, filling in with an officer, a car and a helicopter as the response escalates. During a four-star freeway chase, those unit icons appear alongside the stars while a chopper holds position between buildings overhead.
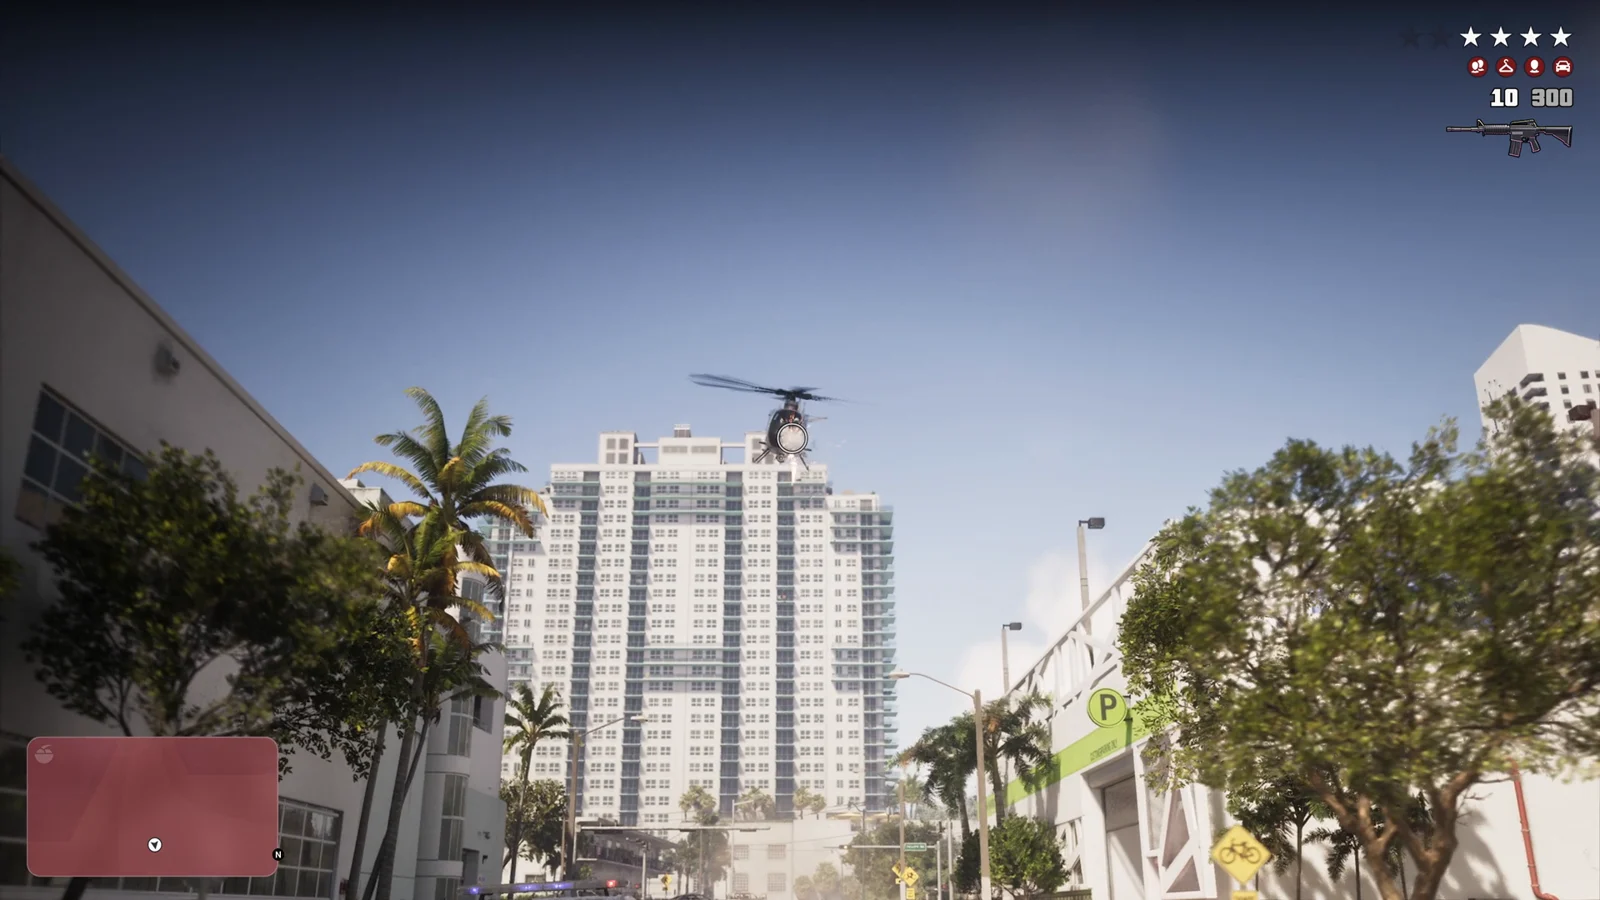
The minimap reacts to a manhunt too. While police are searching for you, the whole map tints red-pink to mark the boundaries of the search perimeter, so you can see how far you need to travel to break out of it.
Red circle icons: What the police know about you
A separate set of icons in red circles tells you which pieces of evidence law enforcement has locked onto. Each one points to a specific thing you can change to shake them off.
| Icon | What it means |
|---|---|
| CCTV camera | A security camera caught you |
| Single person | Police have identified you specifically |
| Two people | Both Jason and Lucia are identified during the chase |
| Clothes hanger | Your current outfit is on record — change clothes to clear it |
| Gun | Police have logged the weapon you are carrying |
| Car | Your vehicle is flagged — ditch it as soon as you can |
Minimap and GPS route in the bottom-left
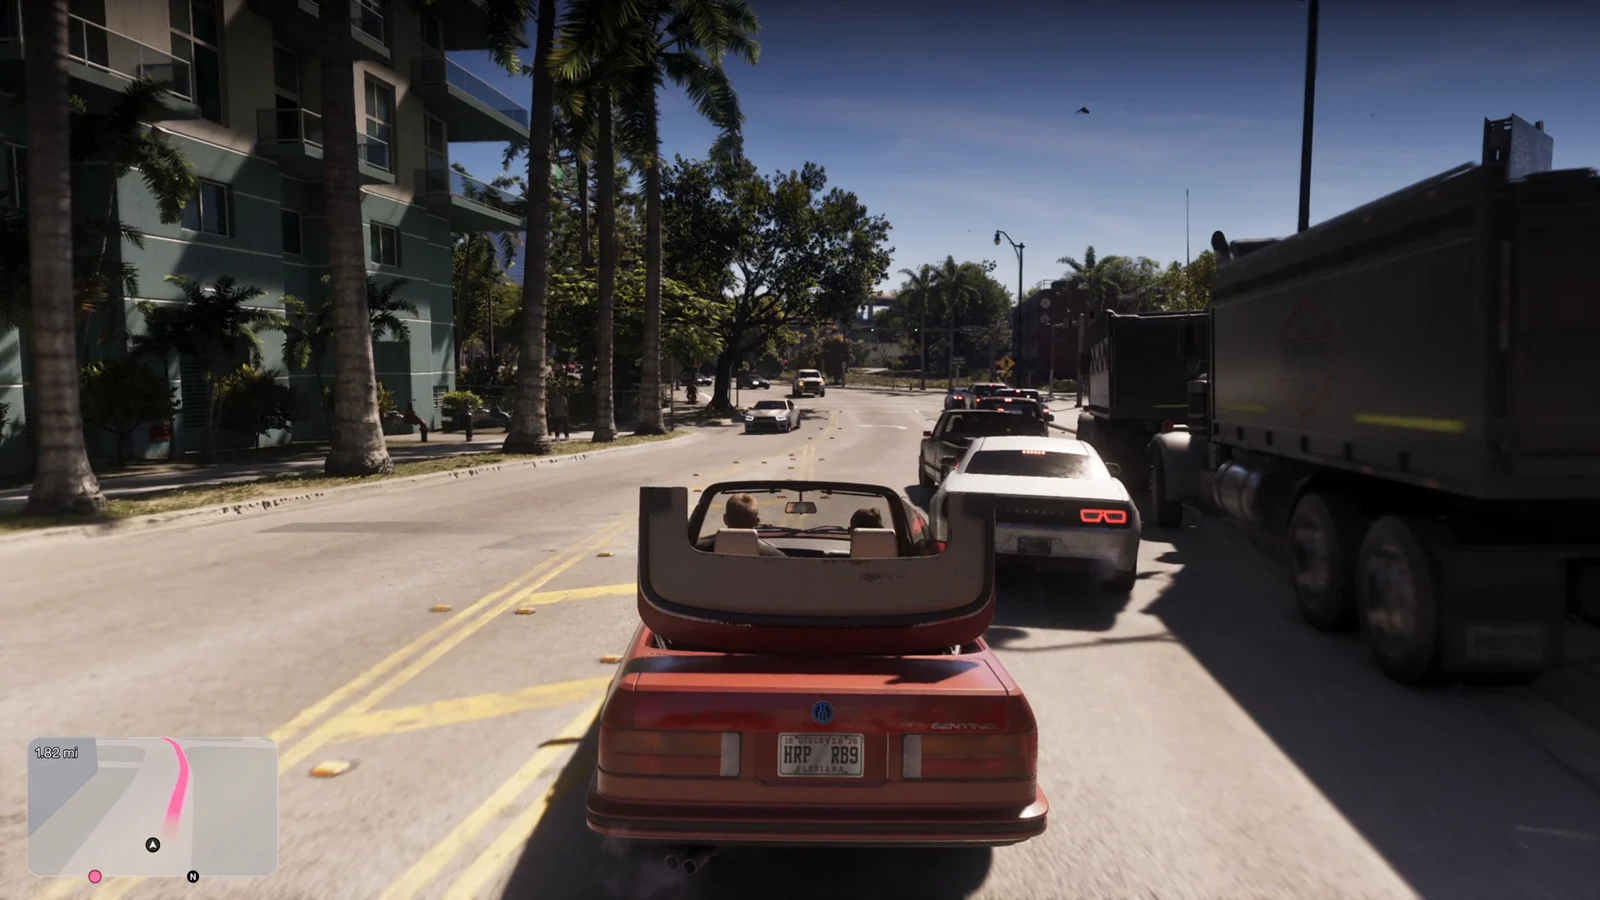
Behind the wheel, the minimap takes the shape of a rounded rectangle rather than a circle. Your route to a waypoint is drawn as a pink line, and a live distance readout ticks down as you drive, dropping from something like 1.62 mi to 0.80 mi as you close in. A small arrow inside a black circle marks where you currently are on the map.
Button prompts and contextual actions
Prompts are plain white text paired with PlayStation glyphs, and they turn up in three different places depending on what you are doing. Some float at the point of interaction itself, like KNOCK on a door or BAG on an item. Vehicle entry prompts sit at the bottom-center. Context verbs such as SCOLD, PET and STUDY stack along the right edge of the screen.
The face-button and trigger glyphs — circle, triangle, R1, L2 — are all context-sensitive, and the same button does completely different things depending on what you are standing next to. A few extra symbols show up around objects and menus. Three vertical dots mean an object has actions available, a row of white dots marks options you have not picked yet, and colored stat icons preview which meters a consumable will refill. A pink curved gauge tracks Slim Jim progress while you work a locked car door.
Money, karma and character switching icons
Cash is split into two readouts. A purple B inside a circle is your bank balance, which stays safe no matter what happens to you. A green card icon is the physical cash on you right now, and it is at risk if you die or get arrested — depositing it requires a physical ATM rather than your phone.
An angel icon means your recent choices have leaned honorable, while an evil icon signals the opposite side of the same honor system. Character switching uses a square containing portraits of Jason and Lucia, and a pink heart between the two faces confirms the pair are romantically involved. Side activities get their own marker as well, such as a basketball icon while you are playing.
Livestream overlays and text notifications
Social media pushes into the HUD directly. One sequence layers a full social feed over the screen with a LIVE 53k viewer badge, a scrolling chat column of handles and emoji, and a VIEW LIVESTREAM R3 prompt in the bottom-right corner — pressing R3 opens another character’s stream from wherever you are.
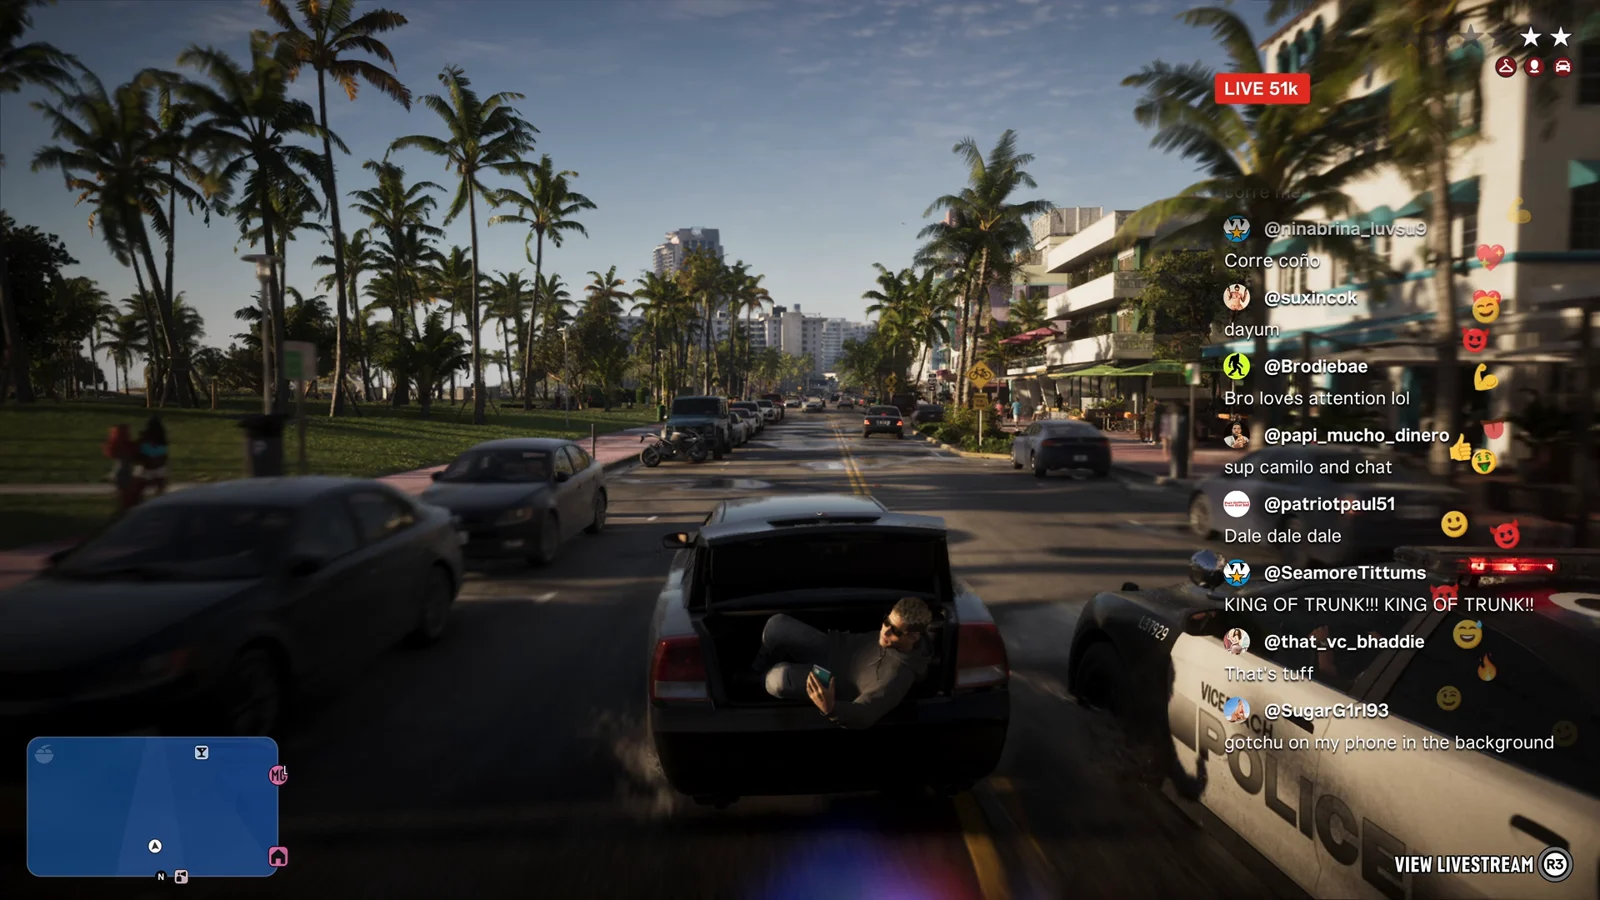
Text messages behave the same way. They arrive as notification cards in real time, including in the middle of an active firefight, rather than waiting for a calm moment or a menu screen.
The through line across all of it is restraint. Bars, stars, prompts and warnings each fade in when they become relevant and clear out when they do not, which means anything on screen is worth reading. If you see the map turn red or a hanger icon appear next to your stars, that is the game telling you exactly what to fix next.
More GTA 6 guides
- GTA 6 guides hub: every system and trick we know
- GTA 6 Controls on PS5: Every Confirmed Button Prompt From the Extended Look
- GTA 6 Wanted System Explained: How Heat Builds and How You Lose It
- GTA 6: How the Weapon Wheel and Inventory Work
- Every GTA 6 Mechanic That Works Differently From GTA 5
- GTA 6 Livestreams Explained: How the In-World Streamer Overlay Works





