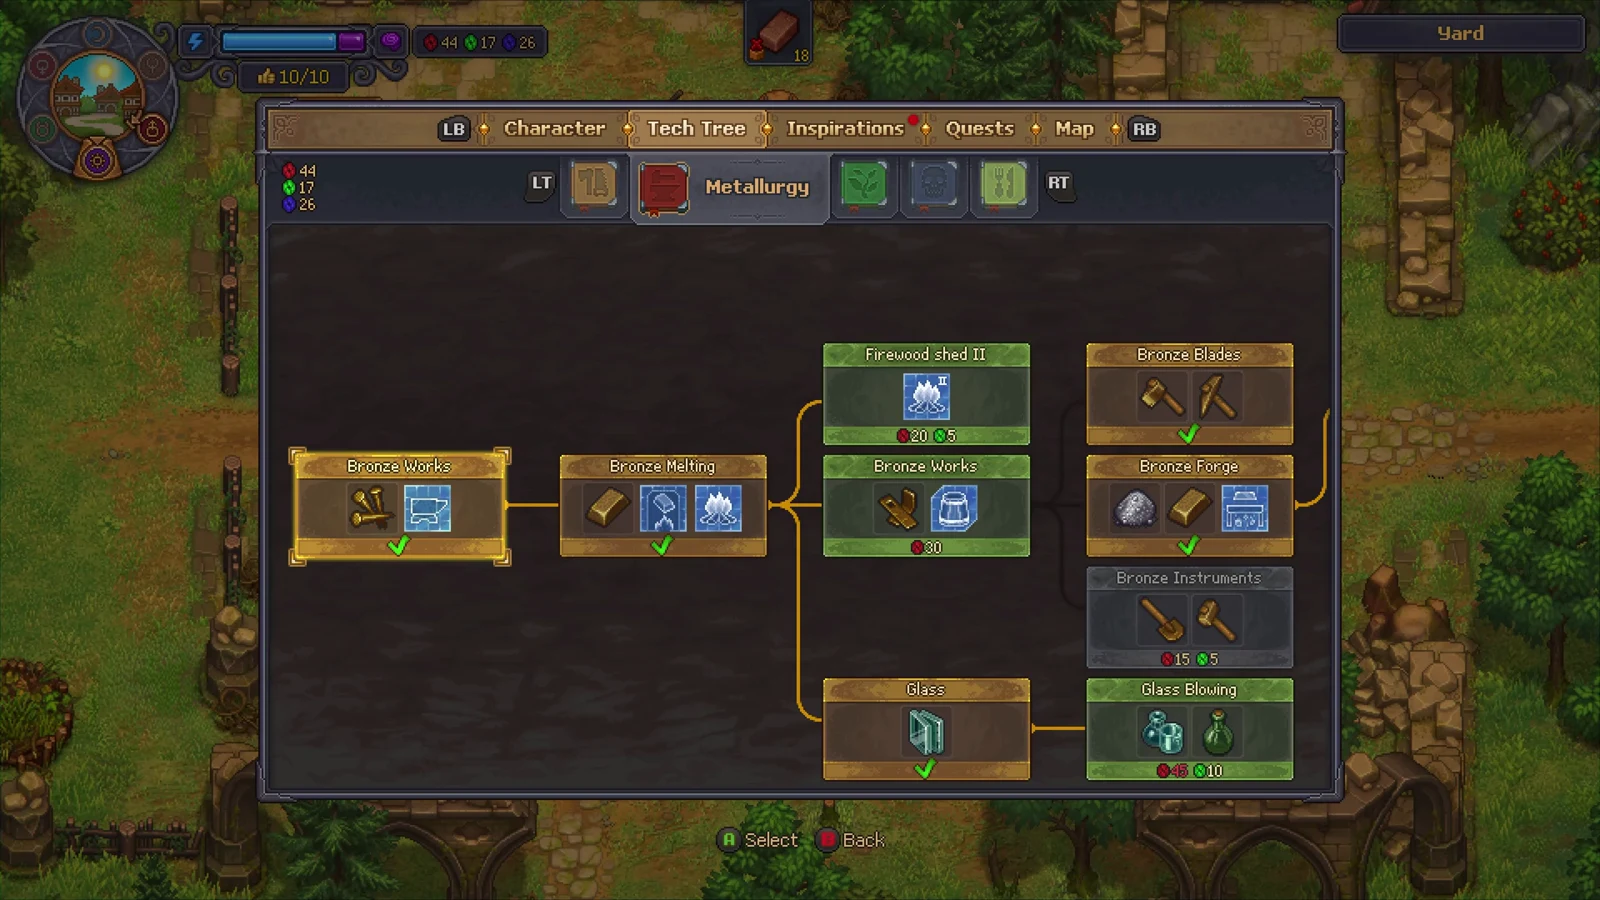
The Metallurgy branch carries you from a wooden anvil to full steel armor, and it feeds almost everything else you build in Graveyard Keeper 2. It also holds every barricade and archer tower you need before the zombies start pushing back. The whole branch is 45 technologies spread across 15 columns, and each one is bought with tech points.
Quick answer: Each node uses red and green tech points, with some also requiring blue, and you unlock them from left to right within the branch. Completing Metallurgy requires 3,680 red points, 330 green points, and 340 blue points, plus passing a Herbert reputation gate.
How the Metallurgy branch unlocks
The Metallurgy tab opens the moment you wake up at home during the intro, so you have access to it from the start. Progress through it is gated by three things: the tech points you spend, the nodes you have already bought, and a reputation check partway through.
- Nodes are connected in a chain. You must buy the earlier node in a line before the one to its right becomes available.
- Costs are paid in red, green, and blue tech points. Most Metallurgy nodes lean heavily on red, with green and blue appearing on the higher tiers.
- Two reputation gates sit inside this branch. The Herbert (Head of the Guards) reputation gate blocks progress past the early bronze and glass nodes until you have earned enough standing with him.
Once you buy a node, its recipes and blueprints appear in your crafting and building menus. That change is your confirmation the research went through.
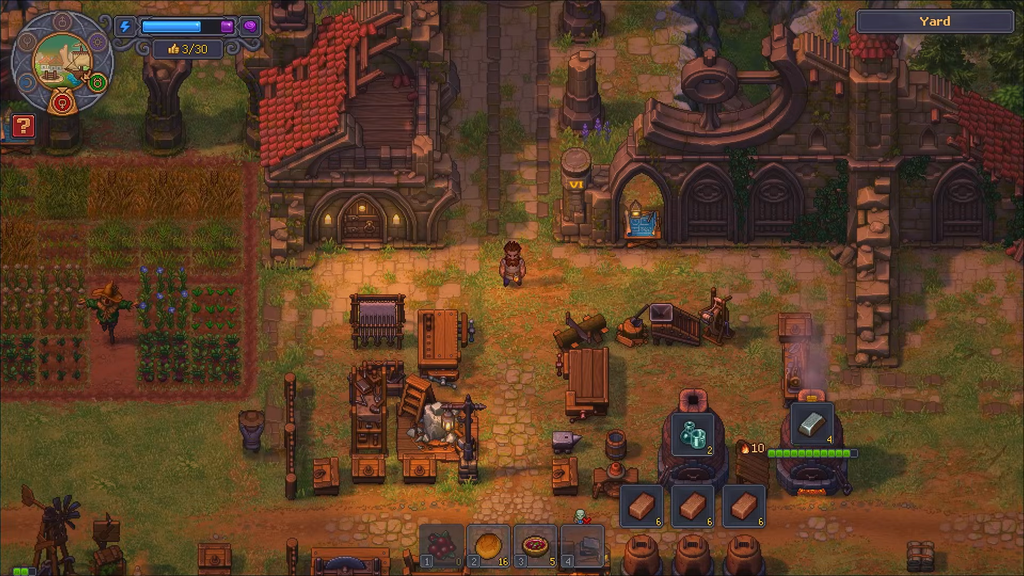
Bronze foundation upgrades
These are the cheapest nodes and the ones you should grab first. Bronze Melting is the key early pick because it unlocks Furnace I and the Bronze Ingot recipe that everything downstream depends on.
| Upgrade | Unlocks | Cost |
|---|---|---|
| Bronze Works | Bronze Nails, Wooden Anvil blueprint | 10 Red |
| Bronze Melting | Bronze Ingot, Furnace I, Firewood Shed I | 10 Red |
| Bronze Craft | Bronze Detail, Hardening Bucket | 30 Red |
| Bronze Blades | Bronze Axe, Bronze Pickaxe | 15 Red, 5 Green |
| Bronze Forge | Tin, Bronze Ingot, Sluice Box | 20 Red |
| Bronze Instruments | Bronze Shovel, Bronze Hammer | 15 Red, 5 Green |
| Bronze Polishing | Polished Bronze, Bronze Tools, Copper Trinkets | 30 Red |
| Bronze Equipment | Bronze Armor, Bronze Sword | 30 Red |
| Bronze Weapons | Light Pike, Reinforced Bow | 35 Red, 10 Green |
| Firewood Shed II | Firewood Shed II | 20 Red, 5 Green |
| Reinforced Plank | Reinforced Plank | 45 Red |
| Reinforced Beam | Reinforced Beam | 75 Red |
Glass, bellows, and lenses
This side line ties Metallurgy into your alchemy setup. Glass and Glass Blowing produce the flasks and bottles you need for potions, while Bellows and Lenses feed later smithy tools.
| Upgrade | Unlocks | Cost |
|---|---|---|
| Glass | Glass | 30 Red, 10 Green |
| Glass Blowing | Alchemy Flasks I, Empty Bottle | 45 Red, 10 Green |
| Bellows | Lens, Alchemy Flasks II, Bellows | 30 Red |
| Lenses | Lens, Press blueprint | 175 Red, 20 Blue |
Iron upgrades
The iron tier starts with Iron Forge, which unlocks Furnace II and the Iron Ingot recipe. From there you branch into iron tools, weapons, and armor. Iron Instruments I and II both cost blue points, so hold some in reserve before committing.
| Upgrade | Unlocks | Cost |
|---|---|---|
| Iron Forge | Iron Ingot, Iron, Furnace II | 35 Red |
| Iron Smithing | Bronze Gear, Iron Nails, Iron Anvil | 50 Red |
| Iron Works | Iron Detail, Iron Kit I | 75 Red |
| Iron Equipment | Iron Armor, Iron Sword | 80 Red |
| Iron Instruments I | Iron Axe, Iron Shovel | 80 Red, 15 Blue |
| Iron Instruments II | Iron Hammer, Iron Pickaxe | 80 Red, 15 Blue |
| Iron Weapons | Battle Pike, Battle Bow | 90 Red, 10 Blue |
| Iron Products | Advanced Detail, Iron Tools | 90 Red, 10 Blue |
Steel and masterwork upgrades
Steel is the endgame material for Metallurgy and the most expensive to research. Steel Smithing opens the path with the Steel Anvil blueprint, and Masterwork Equipment is the single priciest node in the branch at 200 red and 25 blue.
| Upgrade | Unlocks | Cost |
|---|---|---|
| Steel Smithing | Steel Detail, Steel Screws, Steel Anvil | 120 Red, 15 Blue |
| Steel Instruments I | Steel Hammer, Steel Axe | 150 Red, 20 Blue |
| Steel Instruments II | Steel Pickaxe, Steel Shovel | 150 Red, 20 Blue |
| Steel Casting | Engineering Details, Steel Tools, Casting Table | 150 Red, 20 Blue |
| Steel Weapons | Knight’s Spear, Heavy Bow | 160 Red, 10 Blue |
| Steel Equipment | Steel Armor, Steel Sword | 160 Red, 10 Blue |
| Steel Works | Engineering Kit, Steel Tools, Grindstone | 175 Red, 20 Blue |
| Masterwork Equipment | Master Sword, Master Armor | 200 Red, 25 Blue |
Smithy automation and zombie gear
These nodes turn manual crafting into a production line. Smithy I through II add the workstations, the Hammer and Bellows attachments speed up output, and Zombie Gears hands automation over to a Zombie Carousel.
| Upgrade | Unlocks | Cost |
|---|---|---|
| Smithy I | Brick, Glass, Smithy I | 75 Red, 20 Blue |
| Smithy: Hammer | Iron Ingot, Iron Kit I, Hammer | 80 Red, 30 Blue |
| Smithy: Bellows | Tableware, Glass Containers, Smithy: Bellows | 90 Red, 20 Blue |
| Smithy II | Clay Molds, Iron Kit II, Smithy II | 160 Red, 20 Blue |
| Zombie Gears | Zombie Carousel | 90 Red |
Defensive structures: barricades and archer towers
When you are ready to fight zombies rather than just craft, these nodes matter most. Barricades come in three tiers, each unlocking a standard, spiked, and fortified version. The archer towers scale the same way, and the first one also unlocks the Expand Military Building Area upgrade for placing them.
| Upgrade | Unlocks | Cost |
|---|---|---|
| Simple Barricades | Barricade I, Spiked Barricade I, Fortified Barricade I | 60 Red, 25 Green |
| Robust Barricades | Barricade II, Spiked Barricade II, Fortified Barricade II | 90 Red, 30 Green |
| Reinforced Barricades | Barricade III, Spiked Barricade III, Fortified Barricade III | 150 Red, 75 Green |
| Archers Tower | Archer Tower I, Expand Military Building Area | 60 Red, 25 Green |
| Archers Tower II | Archer Tower II | 100 Red, 50 Green |
| Archer Tower III | Archer Tower III | 160 Red, 80 Green |
Work down the branch in the order that matches what you need next, and the recipes and blueprints will pop into your menus as each node clears. Bronze first for basic tools and your furnace, then iron for a real weapon set, then steel once you have the blue points to spare and are staring down heavier zombie waves.