
Prismana are the rare alternate forms of Aniimo, and each region has exactly one Prismana target you can draw out by filling that area’s Prismatic Energy. When the energy reaches its highest state, the region enters a Prismana Flow, a rainbow weather event that spawns the region’s Prismana form in the wild for you to catch. The whole loop runs on three moving parts: the Bloom and Branch that let you nurture, the regional energy meter, and the luck events that push it along.
Quick answer: In the region where your target Prismana lives, nurture its Bloom and catch the Wild Surge Aniimo to release Prismatic Energy, repeating until the region’s state reaches Full. A Full state guarantees a Prismana Flow.
Prismana, Prismatic Energy and Prismana Flow
The three terms are easy to mix up, so it helps to separate them before you start farming.
- Prismana is the special form of an Aniimo. It can change a creature’s element and some skills, but its base attack progression is the same as the standard form.
- Prismatic Energy is a meter that each region fills on its own. Progress in Breezy Plains never carries over to Beast Fang Ridge, so you build energy in the exact area you want.
- Prismana Flow is the regional weather event that appears once the energy hits Full, or earlier through luck and items. While it is active, that region’s Prismana form spawns in the wild.
Prismana forms are not stronger than their base versions. The catchable copy can still have its own potential and can also be Sparkling, but the form itself is a cosmetic and typing change, not a stat upgrade.
Prismatic Energy states and spawn chances
The region’s meter moves through six named states. As it climbs, the odds of a Prismana appearing rise with it, ending in a guaranteed spawn at Full.
| Energy state | Prismana spawn chance |
|---|---|
| Empty | Trace |
| Very Low | Low |
| Slight | Moderate |
| Abundant | High |
| Very High | Extremely High |
| Full | Guaranteed |
You do not always have to climb the whole ladder. Every Nurture carries a flat 3% chance to trigger a Prismana Flow directly, regardless of the current state, and the misses still add energy toward a pity threshold of 10,500 Prismatic Energy that forces the Flow. Because the 3% is flat, a long dry run does not improve your next roll; it only pushes you closer to that ceiling.
Ways to build Prismatic Energy
Several activities feed the same regional meter, so you can stack them in the area you are targeting.
- Free daily Nurtures: the Branch grants up to three free regional Nurtures each day with no resource cost.
- Bloom offerings: placing shards at a Bloom starts a timed Wild Surge, and catching the Aniimo it spawns channels energy into the flower.
- Lucky Strikes: normal wild catches can proc a Lucky or Super Lucky Strike that adds energy and can trigger the Flow.
- Friend Blooms: joining a friend’s Wild Surge grows your own world’s energy through the Wild Surge affinity perk.
- Prismana Crystals: a consumable that forces an immediate Prismana Flow in a chosen region through the Branch.
The Branch interface, opened from the map or by delivering Lumin Amber, is where you spend those free daily infusions. It stores a charge at 04:00 each day and banks up to three, so a Branch left alone for a couple of days still has runs waiting when you return.

Nurture a Bloom to fill the meter
The Bloom route is the repeatable core of the whole system. Each distinct map region has a single Bloom, a physical flower you interact with in the world.
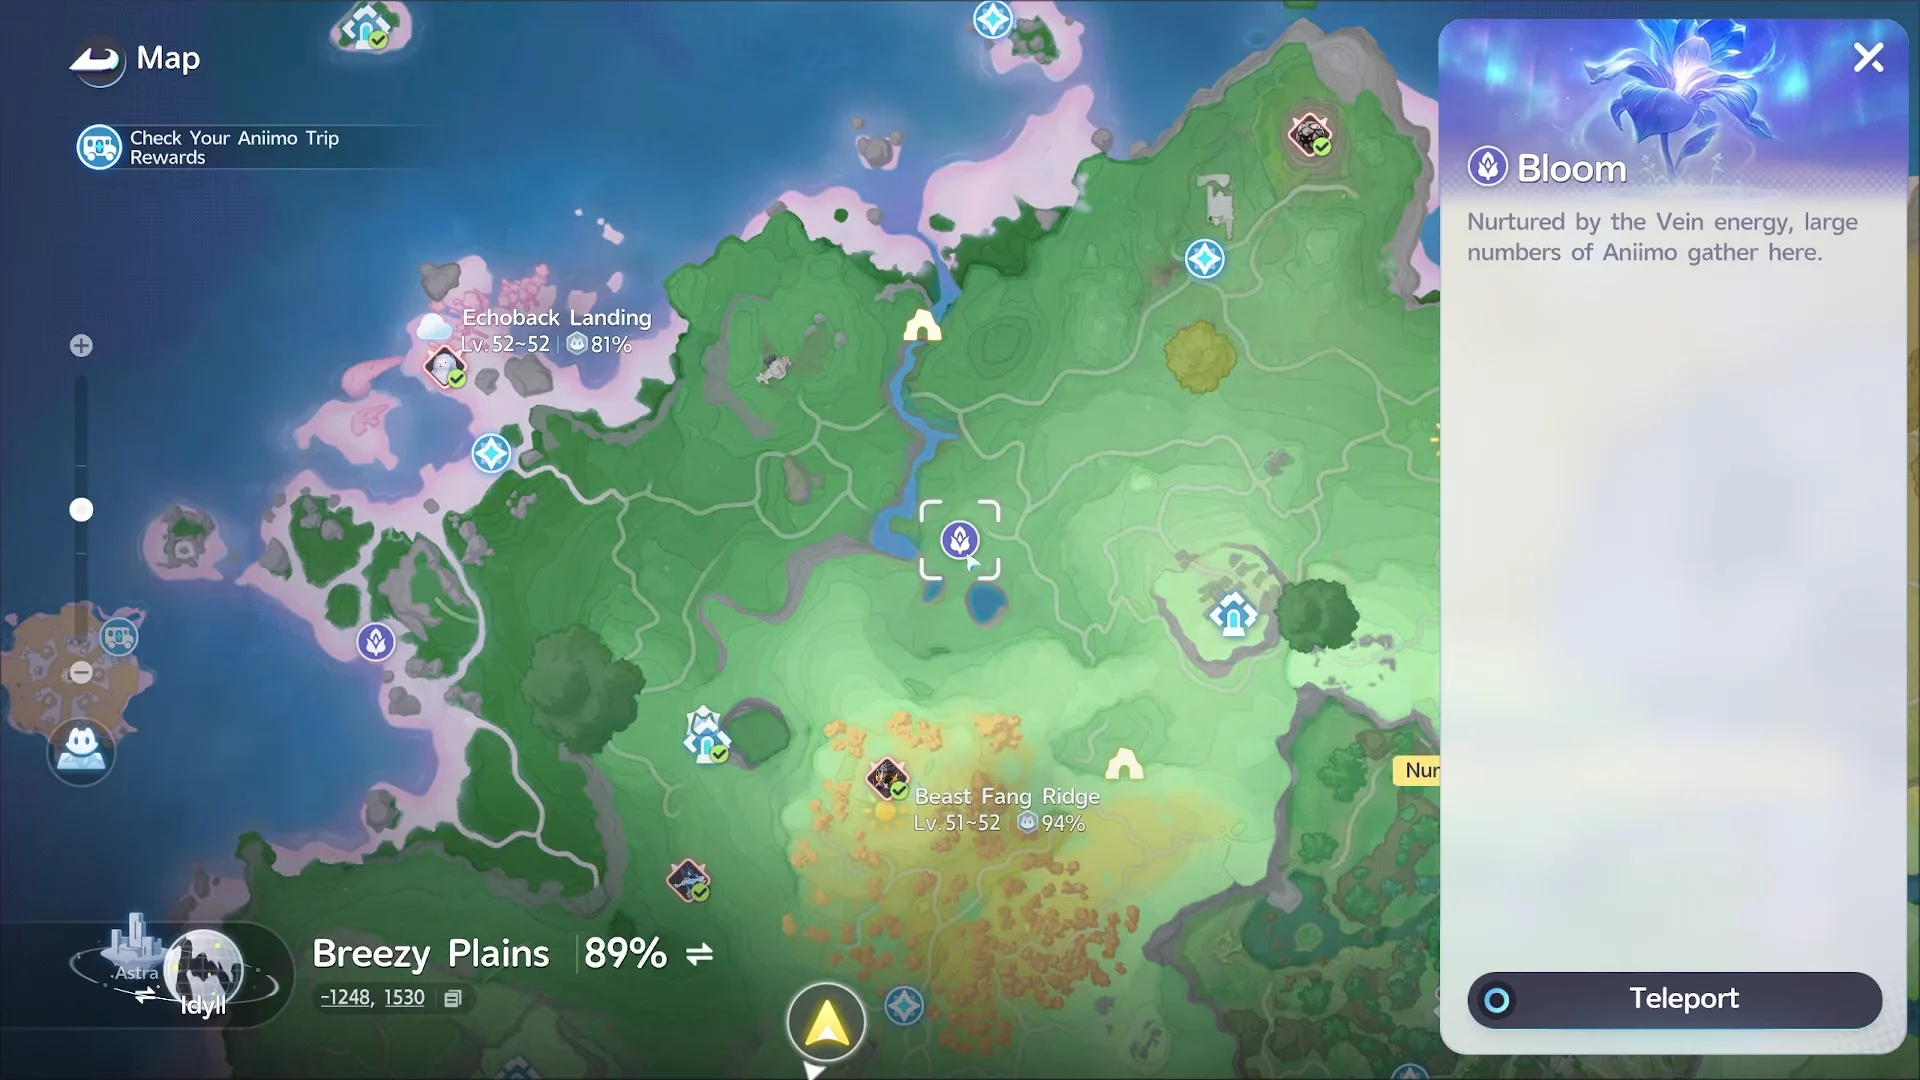

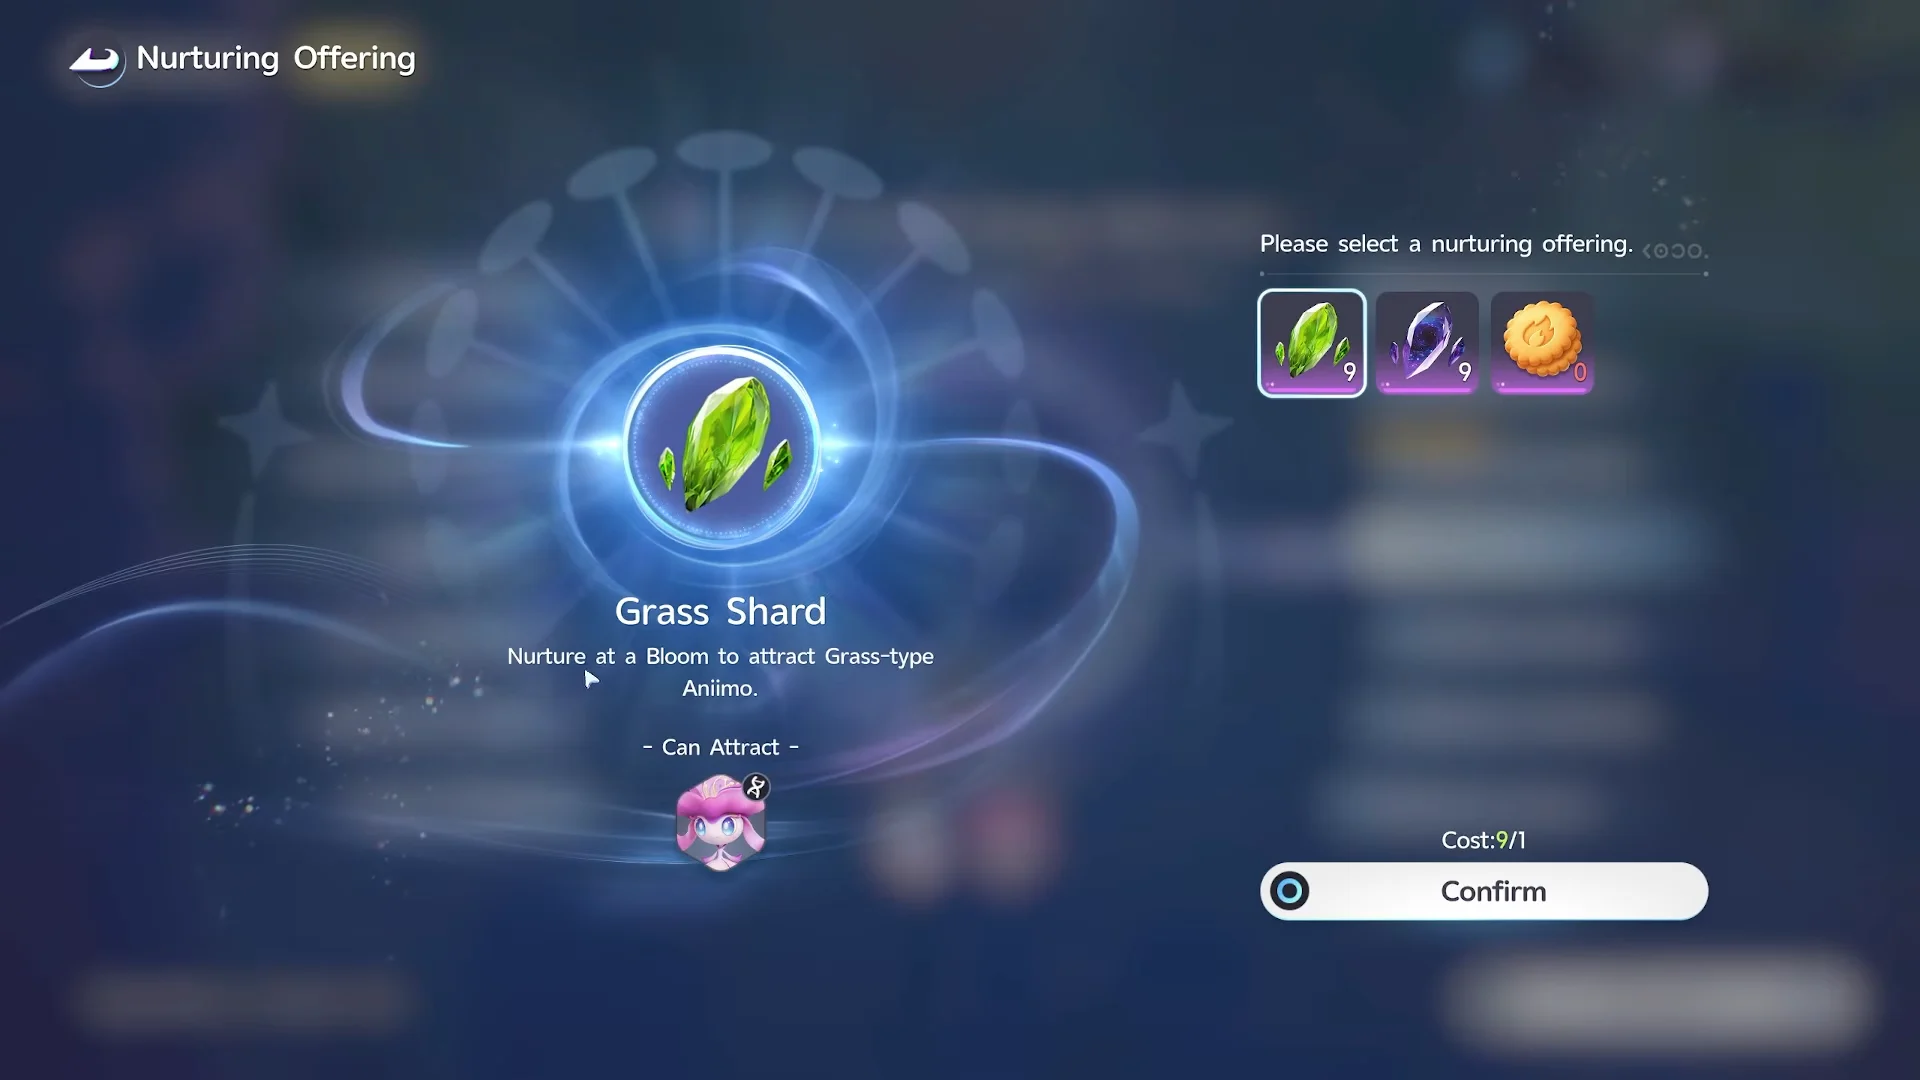

Put your companion in a non-aggressive stance before a wave to keep it from attacking the creatures you’re trying to catch. Use a Tumbler to scoop up several Aniimo at once.
How Lucky Strikes feed the system
A Lucky Strike is a bonus that can fire during any successful catch. You cannot force one, and there is no button timing or Aniipod that guarantees it, so treat it as upside on catches you were already making.
When a Lucky or Super Lucky Strike lands, it can do three things: award bonus items, raise the Prismatic Energy of the area you are standing in, and carry the same 3% chance to trigger a Prismana Flow directly. Super Lucky returns the larger energy gain. Because the energy result adds progress toward the 10,500 pity, a strike that does not trigger the Flow is still useful. There is a weekly limit on how many of these bonus reward claims you can collect.
This is why plain catching in your target region matters when your Nurture charges are spent. Keep catching wild Aniimo there and you keep rolling for both the energy gains and the direct trigger.
Co-op Blooms and friend affinity
During a Wild Surge, visiting a friend’s Bloom increases Prismatic Energy in your own world via the Wild Surge affinity perk. Higher friendship tiers provide a bigger boost.
- Close Friend: your world’s energy grows a little.
- Best Friend: a moderate boost.
- Soulmate: energy grows significantly.
This co-op gain is capped weekly, so it supplements your solo farming rather than replacing it.

Prismana Crystals and forced weather
A Prismana Crystal is a crystal infused with Prismana that immediately triggers a Prismana Flow when absorbed by the Branch. Open the Branch, choose Change Weather, select the region and spend one crystal to start the event there.
Weather can be activated three times per day, with a one-minute wait between uses, making crystals useful for focused bursts rather than farming. The route unlocks once you have the region’s Silver Badge and have completed 70% of that area.
Regional badges that unlock and speed up the loop
Access to nurturing and weather control is gated behind each region’s collection badges. You raise them by catching different species and gathering Lumin Amber in that area.

| Badge | What it unlocks |
|---|---|
| Bronze | Ecosystem nurturing at the region’s Blooms |
| Silver | Ecosystem Intervention, letting you change the area’s weather |
| Gold | Prismatic Resonance, permanently faster energy buildup in that zone |
Along the way, milestones also grant privileges such as the Untamed prefix title and Eye of Potential, which raises your chance of catching high-potential Aniimo in the area. Note that you can obtain a region’s Prismana through nurturing before reaching Silver, so you do not need manual weather control to start hunting.
Which Prismana lives in each Breezy Plains region
Every region has one mapped Prismana target. Pick the area that matches the form you want before you commit resources.
| Prismana form | Region |
|---|---|
| Stellarys | Forest of Falling Stars |
| Scorchhowl | Beast Fang Ridge |
| Turbo | Nimbus Fields |
| Hexxin | The Mistwoods |
| Ignitis | Berylline Vale |
| Panpanta | Echoback Landing |
| Cornet | The Argent Strait |
| Blazen | Blitzwood |
| Thornblade | Sea of Flowers |
| Luminelle | Tideblossom Coast |
| Pawney | Russet Highlands |
| Grizbo | Rosetower Woods |
| Glacy | Driftwise Meadow |
| Magmarex | Zephyrus Landbridge |
Some forms are event-only. Glynsera, Inferlupa, Melloblum and Waleetle appear through rotating Vein Abundance events and return during the Prismana Carnival, while Prismana Iris comes from an egg found in an oasis in Tideblossom Coast.
How to know the Prismana Flow triggered
When the Flow starts, the sky over the region fills with a rainbow aura and a tall vertical purple light beam shoots up from the spawn point. You will also see the on-screen message that Prismatic Energy has grown and is drawing out the region’s Prismana Aniimo.
Fly to the beacon, find the Prismana form, and catch it with a high-tier device such as an Aniipod Ultra. If you want a Sparkling copy of that form, use a Sparkling Cube on the catch, since it guarantees success and Perfect Potential. Have your catch supplies ready before you trigger the Flow, because the event is the moment you have been building toward.