Lucilla is a 5-star Glacio Rectifier who swaps between two Resonance Modes, and her Resonance Chain pushes both directions of that kit harder. Each node from S1 to S6 layers on either survivability, team amplification, or raw damage to her two key skills, Letting It Go and Oblivion. Knowing exactly what each Sequence unlocks makes it easier to decide where to stop pulling.
Quick answer: S2 (Slumbering Moonlight) is the strongest support breakpoint because it boosts her Outro buffs for the whole team. Push to S3 to power up her Letting It Go nuke, and only chase S6 if you want her highest personal damage and the best overworld convenience.
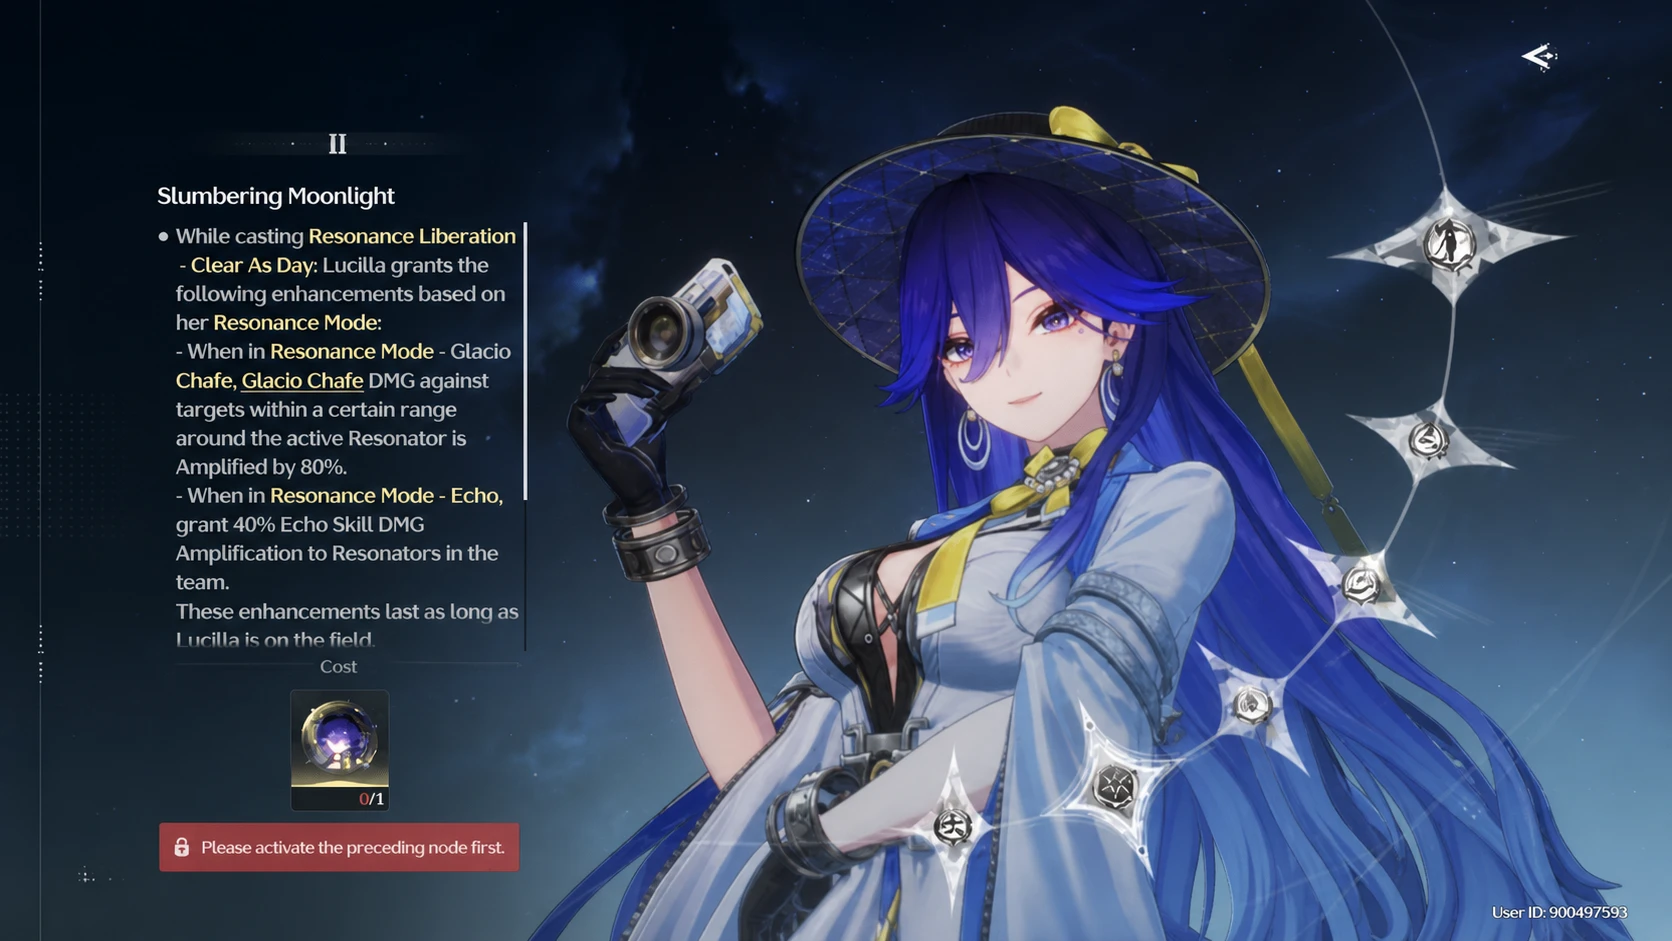
Lucilla Resonance Chain nodes (S1-S6)
Every node carries over to both Resonance Mode – Glacio Chafe and Resonance Mode – Echo, but the value of each one shifts depending on which mode you run. The table below lists the exact effect of each Sequence.

| Sequence | Name | Effect |
|---|---|---|
| S1 | Distant Noon | The first time you deploy Focus Ring during Resonance Skill – Phantom Frame and land the cursor in Perfect Focus, Perfect Focus instantly fills the ring. Releasing the skill inside Perfect Focus grants 20% Crit. Rate for 10s. Lucilla is immune to interruption while casting Phantom Frame and deploying Focus Ring, and Spotlight and Basic Attack – Tracing Forms Stage 3 also become interrupt-immune. |
| S2 | Slumbering Moonlight | Upgrades Outro Skill – Montage. In Glacio Chafe mode, nearby targets take 120% Amplified damage from Glacio Chafe for 30s. In Echo mode, the incoming Resonator gains 80% Echo Skill DMG Amplification for 14s or until switched out. |
| S3 | Days Fade Unheard | Increases the DMG multiplier of Letting It Go by 100%. |
| S4 | The Past Fades Into Silence | Oblivion pulls in nearby targets on hit. Casting Oblivion raises Lucilla’s ATK by 10% for 6s, stacking up to 3 times. While casting Basic Attack – Tracing Forms Stage 3, she takes 30% less damage. |
| S5 | Time Equally a Stream | Increases the DMG multiplier of Oblivion by 50%. |
| S6 | Gazing In the Mist of Time | While in Reminiscence, each Photo consumed grants 1 Remembrance, stacking up to 3 times. Each stack raises Letting It Go’s damage to the target by 30%, and casting Letting It Go removes all stacks. Defeating a target with Letting It Go grants Longing, which restores 100% Resonance Energy and 150 Traces when consumed out of combat. |
How the Resonance Chain changes Lucilla’s role
S1 is mostly a comfort node. The auto-fill on Perfect Focus removes the timing pressure on her Focus Ring inputs, and the added interrupt immunity smooths out her on-field rotation when enemies are pushing back. It is useful, but it does not change her ceiling.
S2 is the biggest jump for a support-focused Lucilla. Pumping her Outro to 120% Amplified Glacio Chafe damage or 80% Echo Skill DMG Amplification feeds directly into your main DPS, which is why it is the standard stopping point for players who run her purely as a buffer.
S3 through S6 lean into her personal damage. S3 doubles the multiplier on Letting It Go, her main burst source, while S4 adds ATK stacking, a pull effect, and damage reduction during her enhanced Basic Attack chain. S5 raises Oblivion’s multiplier, and S6 stacks Remembrance on top of Letting It Go for her highest single-target output, plus an out-of-combat energy and Traces refund that makes overworld play more convenient.
Lucilla pull priority and Sequence breakpoints
For most players, the value sits at the low and mid Sequences. Start at S0R0 without her weapon, or S0R1 if you grab her signature weapon Freeze Frame. From there, the recommended path runs to S2R1 to maximize her team support, then S3R1 to unlock her main-DPS damage, and finally S6R1 or S6R5 for the highest personal buffs and the smoothest exploration experience.
| Target | Why stop here |
|---|---|
| S0R0 / S0R1 | Full kit access; S0R1 adds her signature weapon for extra ATK and Glacio DMG. |
| S2R1 | Best support breakpoint thanks to the enhanced Outro amplification. |
| S3R1 | Unlocks her stronger main-DPS playstyle by doubling Letting It Go. |
| S6R1 / S6R5 | Highest personal damage and the best overworld utility. |
If you only want Lucilla as a buffer for a Hiyuki Glacio team or an Echo Skill team, S0 already covers her core support, with S2 as the natural upgrade. If you intend to field her as an on-field damage dealer, S3 is where her kit starts paying off, and S6 is the finish line for anyone going all-in.