Spirit Charms shape a large part of any build in VV Ultimatum, and picking the right ones changes how reliably you can deal damage, defend, and start combos. The strongest Charms are the ones that stay useful in most fights, proc consistently, and carry little or no downside. Below is a full ranking focused on player-versus-player value, with notes where a Charm leans more toward boss raiding and team play.
Quick answer: Run Haze of Death as your top pick. It applies Cursed on your critical attacks with a 50s cooldown, has no downside, and can be reapplied to the same target unlike other debuff Charms.

How Spirit Charm tiers work in VV Ultimatum
Every Charm already has a built-in game tier from Tier 1 to Tier 4, which mostly reflects how strong the effect is and how much weight it costs to slot. There are over 50 unique Charms. Two are Tier 4, around 15 are Tier 3, 19 are Tier 2, and roughly a dozen are Tier 1. A higher in-game tier usually means a stronger effect, but that power often comes with a trade-off, so a Tier 4 Charm is not automatically better in practice than a clean Tier 1.
The ranking below grades Charms by real fight value rather than their in-game tier:
- S-Tier: the most reliable picks with no meaningful downside.
- A-Tier: excellent options that are only slightly weaker or need more skill.
- B-Tier: strong but situational, often build-specific.
- C-Tier: weaker and situational, useful only in narrow cases.
- D-Tier: avoid for PvP. Either negligible or carrying a punishing downside.
Note: PvP and PvE value can diverge sharply. Charms like Heavenly Restriction and Kill Confirmed are far stronger in raw melee or boss-raid setups than in duels, so weigh placements against your own playstyle.
S-Tier Spirit Charms
| Charm | Effect | Why it ranks here |
|---|---|---|
| Haze of Death (Tier 3) | Critical attacks apply Cursed, 50s cooldown | A strong debuff with no downside that can be reapplied to the same target, making it the most dependable pick. |
| Blazing Spirit (Tier 3) | Parrying a basic melee attack ignites your blade (5s CD, +10% damage); non-ignited basics deal -2% | Since most PvP is parrying and striking rather than long M1 chains, this acts as a near-constant damage boost. |
| Struggler’s Spirit (Tier 3) | Three basic attacks below 25% HP boost damage; take 20% less damage below 25% HP | A large offense and defense swing that turns low health into a real comeback window. |
| You’re In My Range (Tier 3) | 35% defense vs gap-close abilities; empowers your next basic or crit after being hit by one (45s CD) | Free defense against common dive abilities plus a follow-up hit, though it adds vulnerability to far-range attacks. |
| Resourceful Spirit (Tier 1) | Your aerial launcher counts as a critical attack, applying all crit effects | The only S-Tier with build synergy, pairing perfectly with Haze of Death and other crit effects. |
A-Tier Spirit Charms
| Charm | Effect | Why it ranks here |
|---|---|---|
| Flawless Swordsman (Tier 3) | Build “Perfection” by dealing damage without being hit, up to 15% damage; half stacks convert all damage to fire. Getting hit loses all stacks | High skill cap, but a strong free boost if you parry and dodge cleanly. |
| Ranged Warrior (Tier 2) | +6% Kido/ranged damage, +3% damage taken | A clean damage boost for ranged and Kido skill-tree builds. |
| Close and Personal (Tier 2) | +5% weapon/Hakuda damage, +2% damage taken | A simple, low-risk pressure boost for melee builds. |
| Ruler’s Gaze (Tier 3) | Manual rushdown activates “Geass” to halt the opponent for a free follow-up; reduces their damage taken by 35%; cannot be used twice on the same target | The halt is an excellent combo starter and extender. Only the once-per-target limit keeps it out of S-Tier. |
| Blademaster (Tier 3) | Bladed basics inflict Deep Gash but deal 90% less damage; at 3 stacks, deal 110% of normal damage | Delivers a burst payoff and catches opponents off guard since early hits look weak. |
| Domination (Tier 1) | Max AP increased by 0.15x | The best Tier 1 Charm, since extra AP helps in every situation. |
B-Tier Spirit Charms
| Charm | Effect | Why it ranks here |
|---|---|---|
| A Song of Fire and Thunder (Tier 4) | Above 1.25x AP, melee gains flame damage; above 1.2x AP, Kido gains thunder stun. Below 25% HP, high-damage attacks can inflict Scorch or Electroshock (10s CD) | Powerful but situational, since the low-HP procs are chance-based and the AP thresholds are not always met. |
| Frostwalker (Tier 2) | A high-damage Kido attack imbues frost for 12.5s; next basic freezes (25s CD) | Very Kido-specific, but a frozen target sets up a strong combo. |
| Soul Snatcher (Tier 3) | Any Kido move on an enemy below 11% HP knocks them after a short delay | An execute tool that shines in team fights but stays build-specific. |
| Shonen Syndrome (Tier 3/4) | Displays your move in chat but upgrades it by 2 levels (not past level 6), 20-25s CD | A free tempo benefit that can swing a fight, though the cooldown limits spamming. |
| Last Man Standing (Tier 3) | An ally knocked within 90m heals you for part of the enemy’s HP pack; regeneration halved | Only valuable in team fights and boss raids for quick heals. |
| Quick Grit (Tier 3) | Three different non-barrage attacks on one target within 5s grant a 40% damage buff on the latest hit (40s CD) | Similar payoff to Blademaster, but harder to land in PvP than PvE. |
| Golem (Tier 2) | Taking 25% base damage within 2.5s activates rock armor for 15s (45s CD), 7.5% resistance | A situational defensive buffer that can occasionally absorb a big hit. |
| Heat Burst (Tier 2) | Replaces Aura buffs with Heat; on activation heal 37% max HP and gain max AP | Good for baiting enemies to overcommit at low HP, then healing for a counter. |
| Mysterious Stranger (Tier 2) | Him: 8% chance to aid on physical melee; Her: 8% chance on ranged Kido (30s CD) | Decent when merged for the higher proc chance, weaker on their own. |
| Await the Opening (Tier 3) | Parries posture break but deal 50% as much posture damage | Strong for defensive duelists, but heavily dependent on parry skill and latency. |
C-Tier Spirit Charms
| Charm | Effect | Why it ranks here |
|---|---|---|
| Raid Boss (Tier 3) | Gain Battle Fever per nearby enemy, lose it per ally (up to 10 stacks); each stack adds 5% defense and 3% damage, with bonuses at higher stacks; empty stacks near allies add 10% damage taken | Only good when outnumbered, and same-faction players counting as allies can cancel its value. |
| Kill Confirmed (Tier 3) | Knocking an opponent blows their head off, reducing your output by 5% temporarily (5s CD) | Useful for boss raiding, but maiming and gripping usually does the job. |
| The Incapable (Tier 3) | Base output up to 105-120% scaling with missing HP; lose transformations, racial abilities, Hollow traits, and racial boss fights | Slightly better than Heavenly Restriction, but the lost access is rarely worth it. |
| Indomitable Spirit (Tier 2) | Gain 5% HP on winning clashes, lose 5% on losing | Modest payoff with a real downside, though it can out-heal Lizard’s Spirit if you win clashes. |
| Superiority Complex (Tier 2) | Blade-catching mocks the opponent for more Aura gain; mocked enemies lose 0.2x AP and take 15% more posture damage (30s CD) | All upside, but the numbers are too small to matter much. |
| Fortified Fighter (Tier 1) | Gain 15% defense when posture broken | A niche defensive boost that only helps in a narrow moment. |
D-Tier Spirit Charms to avoid in PvP
| Charm | Effect | Why it ranks here |
|---|---|---|
| Swarm (Tier 2) | Landing a crit spawns one friendly Dragonfly Hollow | Too weak to influence a fight. |
| Lizard’s Spirit (Tier 2) | Heal 7.5% HP when dropping below half health (9-minute CD) | The cooldown is so long that other healing Charms are simply better. |
| Heavenly Restriction (Tier 3) | Up to +35% physical damage, +15% movement speed, +25% Kido defense; crits proc Kill Confirmed; cannot use abilities at all | Losing abilities cripples combos and mix-ups in VV, where M1s are mostly filler. Stronger only in pure-melee PvE builds. |
| Curtain Call (Tier 3) | Basic attacks gain lifesteal at 100% Reiatsu; you no longer passively regenerate Reiatsu | A trap pick, since you rarely sit at full Reiatsu and losing regen hurts badly. |
| Warrior’s Spirit (Tier 3) | +17.5% melee basic damage; cannot flash step or manual rushdown | The damage looks tempting, but losing flash step and rushdown is not worth it. |
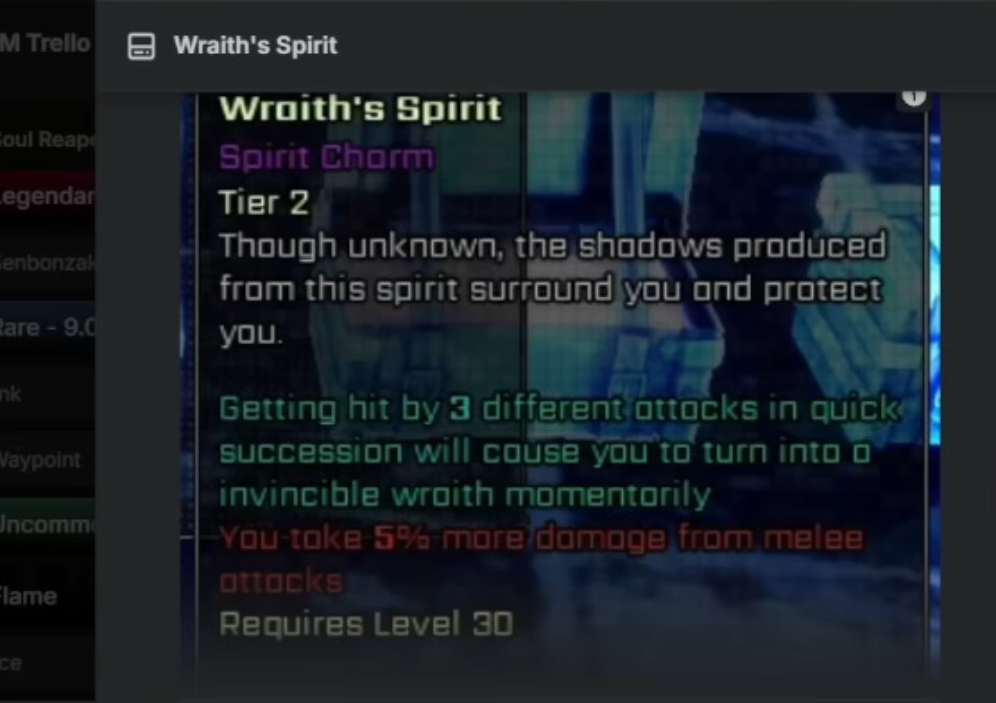
| Wraith’s Spirit (Tier 2) | Three different attacks in quick succession turn you into a brief invincible wraith; take 5% more melee damage | The trigger condition and the extra melee vulnerability make it unreliable. |
If you are building for duels, anchor your loadout with Haze of Death and Resourceful Spirit, then fill remaining slots with damage Charms that match your tree, such as Close and Personal for weapon and Hakuda builds or Ranged Warrior for Kido. For boss raids and outnumbered fights, Charms like Kill Confirmed, Raid Boss, and Heavenly Restriction climb in value, so adjust the ranking to the mode you actually play.